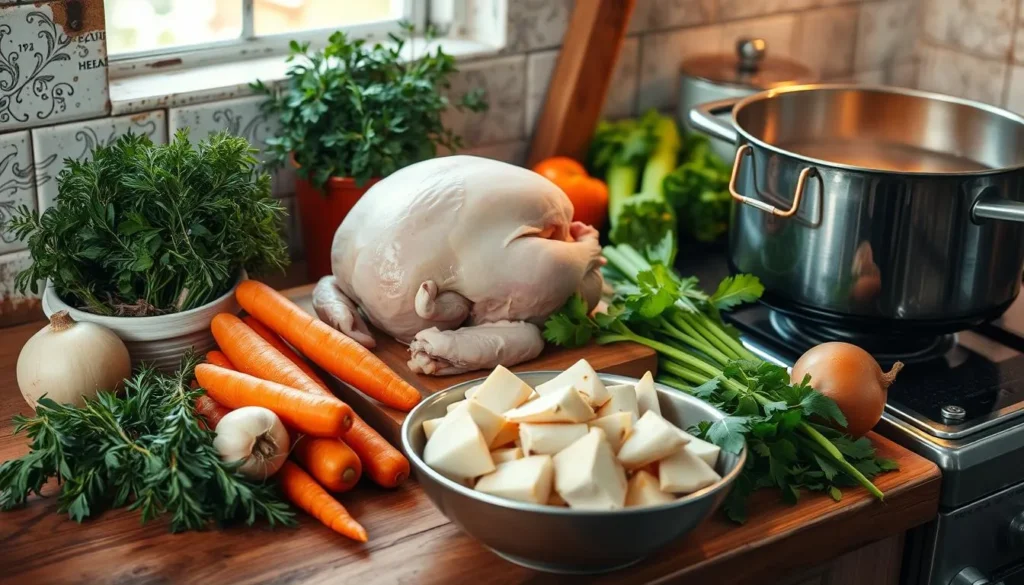
Home Recipes
Category:

Recipes

Chicken Soup with Bones

Easy and perfect Chicken Soup with Bones

by IDYA
Chicken Soup with Bones

Easy and perfect Chicken Soup with Bones

Serves: 6 Prep Time: Cooking Time:
Nutrition facts: 250 calories 10 grams fat
Rating: 5.0/5
( 1 voted )

Ingredients

  • 1 whole chicken (about 3-4 lbs), cut into pieces
  • 10 cups water
  • 2 medium carrots, peeled and chopped
  • 3 celery stalks, chopped
  • 1 onion, quartered
  • 3 cloves garlic, smashed
  • 2 bay leaves
  • 1 tsp dried thyme Salt and pepper to taste Fresh parsley for garnish

Instructions

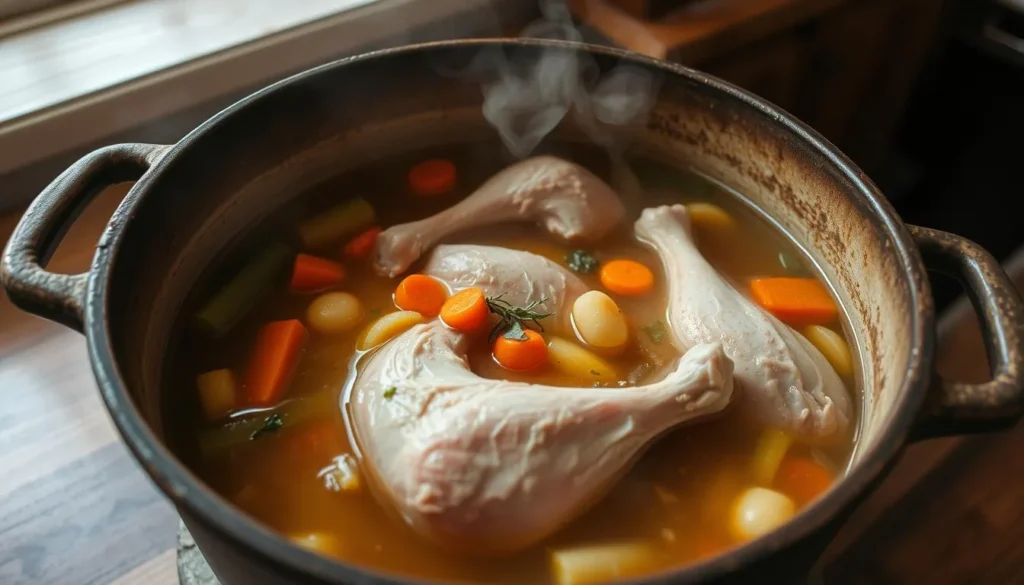
1. Place the chicken pieces in a large stockpot and cover with 10 cups of water.

2. Bring to a boil over medium-high heat, then reduce to low heat and simmer.

3. Skim off any foam or impurities that rise to the top of the pot.

4. Add the carrots, celery, onion, garlic, bay leaves, thyme, salt, and pepper.

5. Cover the pot and simmer for 2.5 to 3 hours, stirring occasionally.

6. Once the chicken is tender and the broth is flavorful, remove the chicken pieces and set aside to cool.

7. Remove the skin and bones from the chicken, then shred the meat and return it to the soup.

8. Taste the soup and adjust seasoning if needed. Garnish with fresh parsley before serving."

Notes

For a richer broth, you can roast the chicken pieces in the oven at 400°F for 30 minutes before adding to the pot. If you prefer a clearer broth, strain the soup after simmering to remove vegetable chunks and herbs. This soup can be stored in the fridge for up to 3 days or frozen for up to 3 months.

Chicken soup with Bones is a favorite comfort food, loved for its warmth and healing qualities. But its true magic comes from the broth made from chicken bones. This broth adds a depth of flavor that store-bought soups can’t match.

In this guide, we’ll show you how to make chicken soup from bones. You’ll learn the secrets to a flavorful broth that will wow your taste buds. Whether you’re an experienced cook or just starting out, you’ll find the techniques and ingredients you need to make the perfect bone-based chicken soup.

Key Takeaways

  • Discover the health benefits and nutritional profile of bone-rich chicken broth
  • Learn how to select the best chicken bones for maximum flavor
  • Understand the essential equipment and step-by-step process for making homemade bone broth
  • Explore creative ways to incorporate bone broth into your cooking and recipes
  • Avoid common mistakes when making bone broth for a consistently delicious result

Understanding the Magic of Bone-Based Chicken Soup with Broth

Chicken soup made with bones is a true culinary wonder. It has a rich flavor and lots of nutrients. The secret is the collagen and minerals from the bones, which are released when simmered. This homemade how do you make bone broth method brings many health benefits, making it great for nourishing your body.

Health Benefits of Bone-Rich Broth

Drinking chicken bone broth benefits can help your health in many ways. The collagen in it is good for your joints and skin. It also has minerals like calcium and magnesium that are great for your bones. Plus, the amino acids in it can help with digestion and keep your immune system strong.

Nutritional Profile of Homemade Stock

Homemade chicken stock made from bones is much better than store-bought. It’s full of nutrients because it’s simmered slowly. This process pulls out good stuff like gelatin and glucosamine, which aren’t in commercial soups. So, homemade how do you make bone broth is packed with vitamins, minerals, and compounds that are good for your health.

Why Commercial Soups Don’t Compare

Store-bought chicken soups are easy but not as good as homemade. They often don’t have as much flavor or nutrients. They use water, salt, and fake flavorings instead of real bones. But, making bone-based chicken bone broth benefits broth is a lot of work. It’s simmered for hours to get all the good stuff from the bones and cartilage.

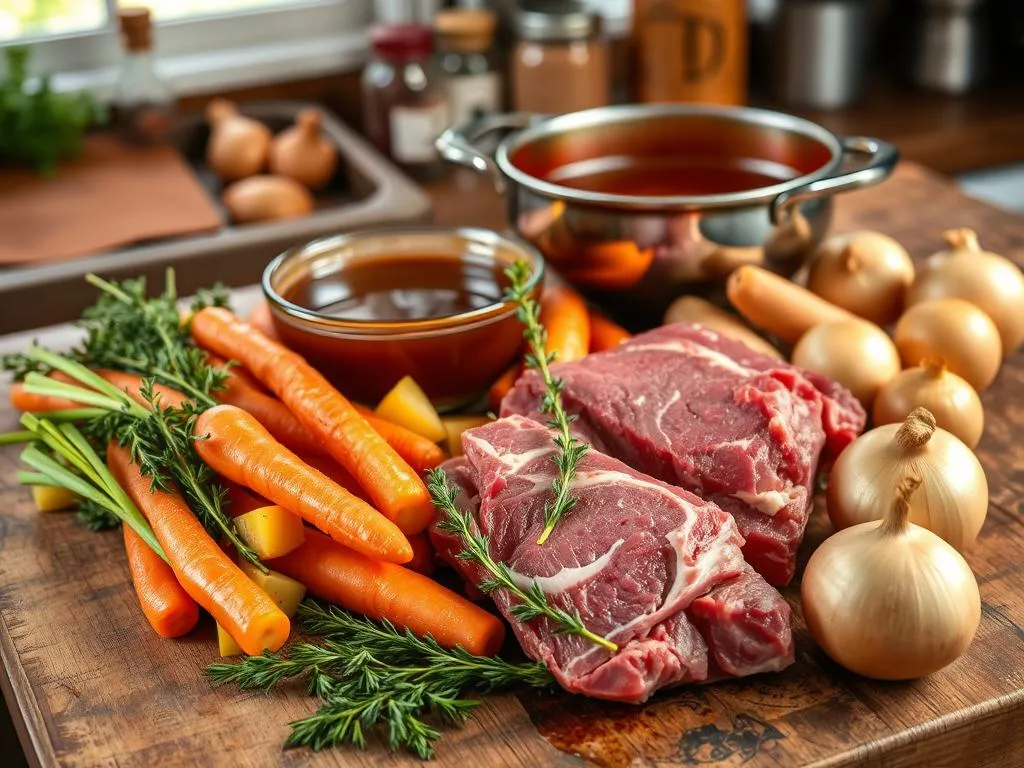
Essential Ingredients for Perfect Chicken Soup from Bones

To make a delicious and healthy chicken soup from bones, you need the right ingredients. The main chicken soup ingredients and bone broth essentials are:

  • A variety of chicken bones, such as backs, necks, feet, and wings, which provide collagen, gelatin, and vital minerals.
  • Aromatic vegetables like onions, carrots, celery, and garlic, which add depth and complexity to the broth.
  • Fresh herbs like thyme, parsley, and bay leaves, which infuse the soup with fragrant flavors.
  • Spices like black peppercorns, allspice, and cloves, which enhance the overall taste profile.
  • Sea salt or Himalayan pink salt, which helps balance the flavors and brings out the natural sweetness of the ingredients.

Using these key elements makes your homemade chicken soup from bones both tasty and nutritious.

“The secret to the perfect chicken soup lies in the bones. By simmering a variety of chicken bones, you unlock a world of flavor and nourishment.”

The quality and freshness of your ingredients matter a lot. Choose high-quality, organic, and ethically raised chicken bones and vegetables for the best taste and nutrition.

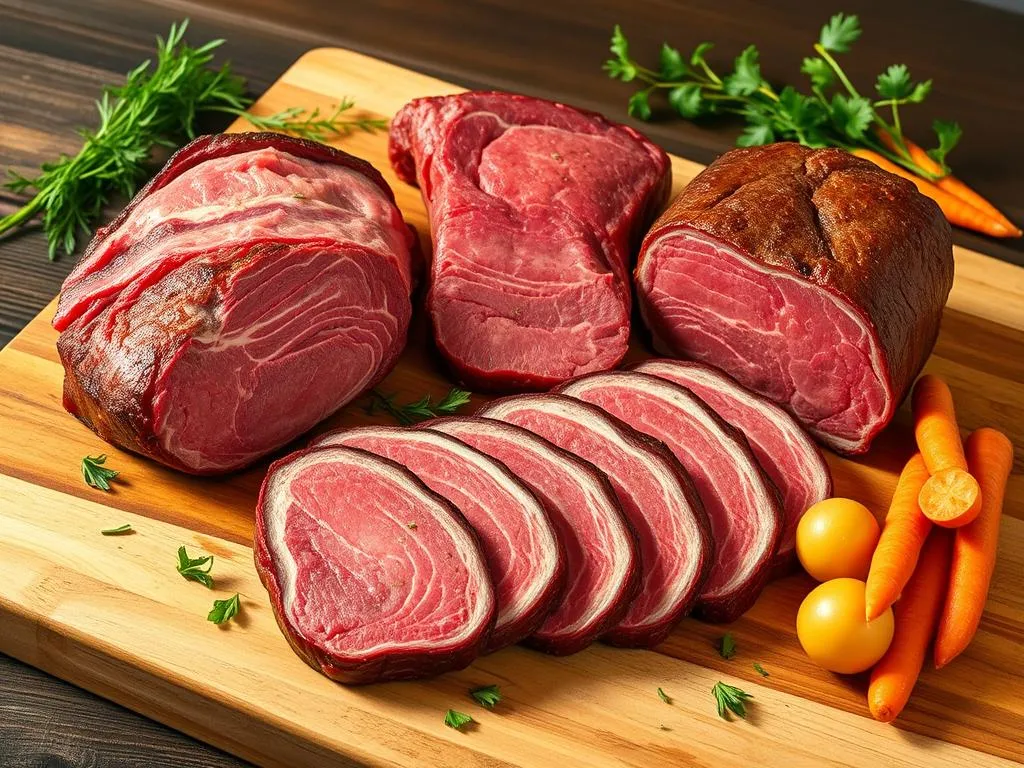
Selecting the Right Chicken Bones for Your Soup

Choosing the right chicken bones is key to a delicious homemade chicken soup. Whether you pick fresh or roasted bones, knowing their differences is crucial. This knowledge helps you make the best broth possible.

Fresh vs. Roasted Bones

Fresh chicken bones, like those from a whole roasted chicken, make a lighter broth. They add a silky texture and a hint of sweetness. Roasted bones, however, give a deeper flavor. The roasting caramelizes sugars, making the broth richer and more savory.

Best Cuts for Rich Flavor

  1. Chicken backs and necks: These cuts are full of connective tissue, adding depth to the broth.
  2. Chicken feet: Though they might seem unusual, they’re packed with gelatin for a velvety soup.
  3. Chicken wings: With bones, skin, and cartilage, they create a broth full of umami.

Storage and Preparation Tips

  • Freeze fresh chicken bones until you’re ready to use them. This keeps their flavor and nutrients.
  • Roast bones at 400°F (200°C) for 30-45 minutes before simmering. It boosts their sweetness and aroma.
  • Always rinse and clean the bones well before simmering. This removes excess fat and impurities.

By choosing the right chicken bones for soup and preparing them well, you can make an amazing homemade broth. This will give you a truly exceptional chicken soup experience.

Basic Equipment Needed for Making Bone Broth

Making delicious bone broth at home needs a few key tools and equipment. Whether you’re aiming for tasty chicken soup or healthy bone broth, the right tools matter. Let’s look at the essential items for your bone broth-making journey.

A large stockpot is at the core of your bone broth setup. Choose a heavy-duty, stainless steel or enameled cast-iron pot. It should hold all your bones and liquid. A pot with 8 to 12 quarts is usually enough for most cooks.

  • Large stockpot (8-12 quarts)
  • Fine-mesh strainer or cheesecloth
  • Storage containers (glass jars or BPA-free plastic)
  • Slow cooker or pressure cooker (optional)

To get the most flavor and nutrients from your bones, a good strainer or cheesecloth is key. It helps you get a clear, sediment-free broth. This broth is perfect for drinking or adding to recipes.

Remember storage containers too. Reliable, airtight vessels like glass jars or BPA-free plastic keep your bone broth fresh. This way, it’s always ready to use.

If you like easy cooking, a slow cooker or pressure cooker can be a big help. These appliances let you cook your bone broth without much effort. Just set it and forget it.

ItemPurpose
Large stockpotHolds bones and simmering liquid
Fine-mesh strainerFilters out solids for a clear broth
Storage containersPreserves and stores bone broth
Slow cooker/Pressure cookerConvenient cooking methods for bone broth

With these bone broth equipment and tools for making chicken soup, you’re set to make the best broths and soups at home. Enjoy your cooking journey!

Step-by-Step Guide to Making Chicken Soup from Bones

Making chicken soup from bones is easy and rewarding. It’s great for how to make chicken bone broth or a classic chicken soup from bones recipe. The secret is in the preparation and cooking.

Preparation Process

Start by collecting your chicken bones. Use a mix of bones like feet, necks, and backs for a full broth. Rinse them under cold water to clean them.

Put the bones in a big stockpot and cover with cold water. Boil, then lower the heat and simmer for 30 minutes. This step cleans the bones for the next step.

Cooking Techniques

Drain the water and add fresh, cold water. Simmer the bones for 6-8 hours for a rich broth. Skim off any foam that forms.

Add veggies like onions, carrots, and celery for flavor. Herbs and spices like bay leaves and thyme also add depth.

Straining and Finishing

Strain the broth through a fine-mesh sieve after simmering. Throw away the solids. Let the broth cool a bit before storing it in airtight containers.

Season the broth with salt and herbs for taste. Your homemade chicken soup from bones recipe is now ready to enjoy or use in other dishes.

Creating great how to make chicken bone broth takes patience and care. With time and attention, you’ll have a nourishing broth that boosts your cooking.

Adding Vegetables and Aromatics for Enhanced Flavor

Boosting the flavor of your homemade chicken soup is easy. Just add the right mix of vegetables and aromatic ingredients. These additions turn a simple bone broth into a flavorful masterpiece that will delight your taste buds.

For bone broth vegetables, you have many choices. Carrots, celery, and onions are great for a rich, earthy taste. But don’t just stop there. Try herbs like thyme, rosemary, and bay leaves, or spices like black peppercorns and whole allspice berries for more flavor.

For sweetness and depth, add fresh ginger or a bit of honey. Leafy greens like kale or spinach add unique flavors and nutrients. Mushrooms and garlic bring a rich, savory taste.

VegetableAromatic
CarrotsThyme
CeleryRosemary
OnionsBay Leaves
MushroomsPeppercorns
SpinachGinger

Experiment to find the perfect mix of bone broth vegetables and aromatics for chicken soup for you. With a bit of creativity, your homemade chicken soup can become incredibly flavorful and satisfying.

“The secret to a great soup lies in the harmonious blend of its ingredients.”

Common Mistakes to Avoid When Making Bone Broth

Making the perfect bone broth can be tricky. A few common mistakes can affect the taste and quality. Keep these bone broth mistakes and tips for perfect chicken soup in mind for a smooth process.

Temperature Control Issues

Getting the temperature right is key when simmering bone broth. Boiling too hard can make it cloudy and thick. On the other hand, a low temperature might not get all the nutrients out. Aim for a gentle simmer between 195°F and 205°F for the best flavor and health benefits.

Seasoning Errors

Seasoning is crucial for a great bone broth. Too little salt makes it taste flat, while too much can overpower the flavors. Start with a small amount of salt and adjust to taste. Try different herbs, spices, and aromatics to find the perfect balance.

Cooking Time Mistakes

The cooking time affects the broth’s consistency and taste. Cooking it too short makes it watery, while too long can make it bitter. Aim for 6-8 hours of simmering for a rich, gelatinous broth.

By avoiding these bone broth mistakes and following these tips for perfect chicken soup, you’ll make an amazing homemade bone broth. It will take your cooking to the next level.

Storage Tips and Shelf Life of Homemade Bone Broth

Keeping your homemade chicken bone broth fresh is key to enjoying its health benefits. The right storage methods can help your broth stay good for longer. This way, you can always have its tasty goodness ready when you want it. Let’s look at the best ways to store your homemade bone broth and how long it stays fresh.

Refrigeration and Freezing Methods

After your bone broth cools down, you can keep it in the fridge for up to 5 days. To keep it longer, put it in airtight containers or freezer bags. Make sure to leave some space for it to expand when it freezes.

Freezing your broth can make it last up to 6 months. Just thaw it in the fridge or in warm water when you’re ready to use it.

Portioning and Thawing Frozen Broth

  • Split the broth into smaller portions before freezing for easier use.
  • Freeze it in ice cube trays or muffin tins for quick access to small amounts.
  • To thaw, put the portion in the fridge or in warm water on the stovetop.
Storage MethodShelf Life
RefrigeratorUp to 5 days
FreezerUp to 6 months

By using these how to store bone broth tips, your homemade broth will stay tasty and healthy. This lets you enjoy its benefits whenever you like.

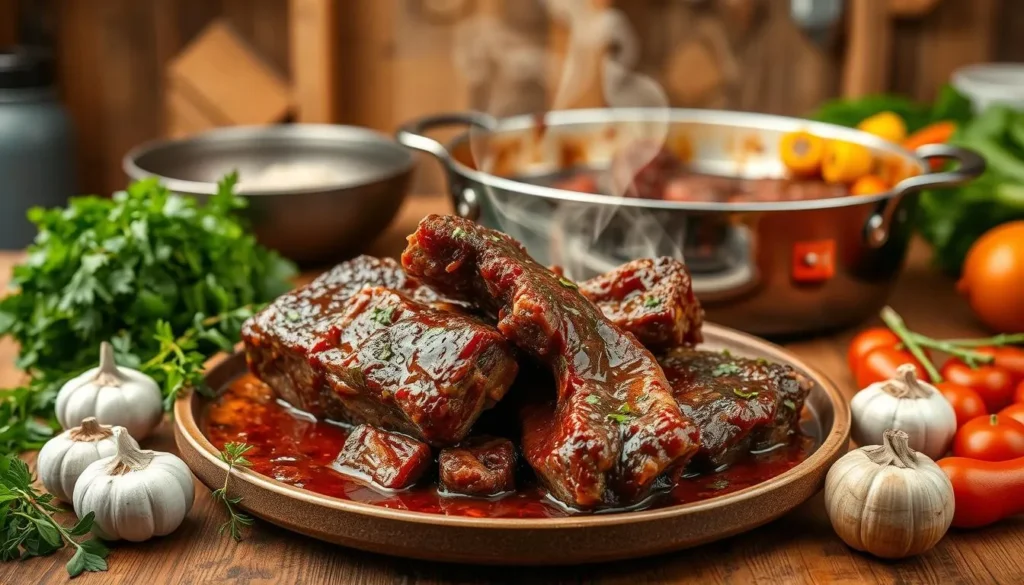
Creative Ways to Use Leftover Bone Broth

Homemade chicken bone broth is more than just for soups. If you have a lot of it, try these creative ways to use it. They’ll help you make the most of your bone broth.

Alternative Bone Broth Recipes

Bone broth is great for many dishes. Use it to cook grains like rice or quinoa. It’s also a good substitute for water or stock in sauces, gravies, and stews. This adds a rich, savory flavor to your meals.

  • Bone Broth Risotto: Substitute bone broth for traditional stock when making creamy risotto.
  • Bone Broth Braised Greens: Simmer leafy greens like kale or spinach in bone broth for a nutrient-dense side dish.
  • Bone Broth Gravy: Use bone broth as the foundation for a deeply flavorful gravy to serve over mashed potatoes or roasted meats.

Cooking Applications for Bone Broth

Beyond recipes, bone broth is versatile in cooking. Use it instead of water when boiling pasta or cooking grains. It adds extra flavor. You can also freeze it in ice cube trays for easy use later.

Cooking ApplicationHow to Use Bone Broth
Pasta Cooking WaterSubstitute bone broth for the cooking water when boiling pasta
Grain Cooking LiquidUse bone broth instead of water when cooking rice, quinoa, or other grains
Freezer CubesPour bone broth into ice cube trays and freeze for easy, portioned access

With these ideas, you can use your homemade bone broth recipes in new ways. You’ll find many uses for chicken stock in your daily cooking.

Conclusion

Homemade chicken soup from bones offers many benefits. It creates a rich, flavorful broth that’s packed with nutrients. This summary shows why this cooking method is so valuable:

First, homemade chicken soup is great for your health. It’s full of collagen, amino acids, and minerals. These help strengthen your immune system, improve gut health, and support healthy skin and joints. Unlike store-bought soups, your homemade version has no preservatives or artificial ingredients. This means you get pure, wholesome nourishment with every spoonful.

Making chicken soup from bones is also very rewarding. The soothing aromas and the hands-on preparation are enjoyable. Plus, the sense of accomplishment you feel when serving your own homemade soup is unbeatable. We encourage you to try this method and experience the superior flavor and nutrition of homemade bone broth.

FAQ

What are the health benefits of bone-rich broth?

Bone broth is packed with collagen, minerals, and nutrients. It supports gut health, joint function, and overall well-being. Homemade broth is much more nutritious than store-bought soups.

What type of chicken bones are best for making broth?

Use a mix of fresh and roasted chicken bones. Include wings, backs, and necks for the best flavor and nutrients. Don’t just use boneless chicken breasts.

What equipment is needed to make bone broth?

You’ll need a large stockpot, a strainer, and containers for storing. A slow cooker or pressure cooker can also make the process easier.

How do I avoid common mistakes when making bone broth?

Avoid temperature issues, over-seasoning, and not cooking it long enough. Keep the temperature right, season slowly, and be patient for the best broth.

How long can homemade bone broth be stored?

Bone broth can last 5 days in the fridge or 6 months in the freezer. Divide it into smaller containers for easy thawing and use.

What are some creative ways to use leftover bone broth?

Use it as a base for sauces, gravies, and risottos. It’s also great in soups, stews, and baked goods. It makes your cooking better.

1 comment
0 FacebookTwitterPinterestEmail
Beef Stew Recipe for the Crock Pot

Easy Beef Stew Recipe 4 the Crock Pot

by IDYA
Beef Stew Recipe for the Crock Pot

Easy Beef Stew Recipe for the Crock Pot

Serves: 6 Prep Time: Cooking Time:
Nutrition facts: 350 calories 18 grams fat
Rating: 5.0/5
( 1 voted )

Ingredients

  • 2 lbs beef stew meat, cut into cubes
  • 4 cups beef broth
  • 3 medium carrots, peeled and sliced
  • 3 medium potatoes, peeled and cubed
  • 1 onion, chopped
  • 3 cloves garlic, minced
  • 1 tsp dried thyme
  • 1 tsp dried rosemary
  • 1 bay leaf Salt and pepper to taste
  • 2 tbsp olive oil
  • 2 tbsp flour (optional, for thickening)

Instructions

1. Heat olive oil in a skillet over medium-high heat. Brown the beef stew meat on all sides, about 5-7 minutes. Transfer the meat to the crock pot. 2. Add the beef broth, carrots, potatoes, onion, garlic, thyme, rosemary, bay leaf, salt, and pepper to the crock pot. 3. Stir to combine. Cover and cook on low for 7-8 hours or until the beef is tender and vegetables are cooked through. 4. Optional: For a thicker stew, mix 2 tbsp of flour with 2 tbsp of water to form a slurry. Stir it into the stew 30 minutes before serving, then cook on high for the final 30 minutes. 5. Taste and adjust seasoning if needed before serving.

Notes

This stew can be made ahead and stored in the fridge for up to 3 days or frozen for up to 3 months. For extra flavor, you can add a splash of red wine to the crock pot along with the beef broth. You can swap out the potatoes for parsnips or sweet potatoes for a different flavor.

Enjoy the warmth of homemade beef stew with this simple recipe for your crock pot. It’s slow-cooked to perfection, making it a favorite among many. The rich flavors will make you feel like you’re in for a cozy winter night.

Looking for a satisfying meal for the weekend or a quick option for busy weeknights? This beef stew recipe is perfect. It will soon become a favorite in your kitchen.

Key Takeaways

  • Crock pot cooking enhances the flavor and tenderness of beef stew
  • Slow cooking breaks down tough cuts of beef for a melt-in-your-mouth texture
  • Easy to prepare with minimal hands-on time, making it a convenient weeknight meal
  • Versatile recipe that can be customized with your favorite vegetables and seasonings
  • Leftovers reheat beautifully, making it a great meal-prep option

Understanding the Magic of Slow-Cooked Beef Stew

Slow-cooked beef stew is a true culinary delight. It shows how beef changes when simmered for hours in a flavorful broth. The magic happens thanks to crock pot cooking, which is different from stovetop methods.

Why Crock Pot Cooking Enhances Flavor

The crock pot’s slow heat mixes the flavors of beef, veggies, and seasonings perfectly. As they simmer, their juices and oils blend, making a rich broth. This broth makes every bite taste amazing.

This slow cooking also makes even the toughest beef tender. It turns into something that just melts in your mouth.

Benefits of Slow Cooking Tough Cuts

Slow-cooked beef stew is special because it makes tough, cheap cuts of beef delicious. The long cooking time breaks down the meat’s tough parts. This makes it tender and falls apart easily, unlike quick-cooking methods.

Temperature Control and Timing

Crock pot cooking offers precise temperature control. This is different from stovetop cooking, where heat can change. The crock pot keeps a steady, gentle heat. This ensures the beef and veggies cook slowly and evenly.

This even cooking brings out the best flavors. The long cooking time also lets the flavors deepen. This creates a taste that’s unmatched.

Essential Ingredients for Perfect Beef Stew Recipe Crock Pot

Making a delicious beef stew in your crock pot needs careful picking of ingredients. From the tender beef to the tasty seasonings, each part is crucial. It makes a dish that warms your heart and excites your taste buds. Let’s look at the key ingredients for a crock pot beef stew that will impress everyone.

The Beef

The heart of a great beef stew is the beef. Pick a cut like chuck roast or beef short ribs. These cuts get tender and add rich flavor as they cook slowly.

Vegetables

  • Onions: Add depth and sweetness to the stew.
  • Carrots: Provide a natural source of sweetness and vibrant color.
  • Potatoes: Lend heartiness and serve as a satisfying base.
  • Celery: Imparts a savory, aromatic note.
  • Garlic: Enhances the overall flavor profile.

Broth and Liquids

The liquid part is key for a flavorful stew. Mix beef broth, red wine, and tomato paste for a rich base.

Seasonings and Herbs

Make your crock pot beef stew special with the right seasonings and herbs. Use bay leaves, thyme, rosemary, and Worcestershire sauce. Try new spice blends or flavors to make it your own.

IngredientPurpose
Beef (chuck roast or short ribs)Provides the main source of protein and texture
Onions, carrots, potatoes, celery, garlicAdds flavor, sweetness, and nutrients
Beef broth, red wine, tomato pasteCreates a rich, flavorful liquid base
Bay leaves, thyme, rosemary, Worcestershire sauceEnhances the overall seasoning and aroma

By picking and mixing these key ingredients, you’re on your way to a fantastic crock pot beef stew. The secret is to let the flavors blend and grow as it cooks slowly.

Selecting and Preparing the Right Cut of Beef

Choosing the right cut of beef is key to a perfect beef stew. The right cuts and preparation make the stew tender and flavorful. It’s all about picking the right beef and getting it ready for slow cooking.

Best Beef Cuts for Stewing

For the best beef stew, go for tougher, well-marbled cuts. Chuck roast, bottom round, and beef shoulder are top choices. These cuts have more connective tissue, which breaks down during slow cooking. This makes the stew rich and tender.

Proper Meat Preparation Techniques

Before cooking, prepare your beef well. Trim off excess fat and cut it into 1-inch cubes. This ensures even cooking and better flavor absorption. You can also lightly flour the cubes for a velvety texture.

Seasoning Your Meat

Seasoning the meat is crucial for a great beef stew. Use salt, pepper, and your favorite herbs and spices. Try classic stew seasonings like thyme and rosemary, or bold flavors like smoked paprika. This will make your stew stand out.

Beef CutCharacteristicsBest for Stewing
Chuck RoastWell-marbled, tough, with a robust flavor
Bottom RoundLean, with a firm texture
Beef ShoulderFlavorful, with a lot of connective tissue
Sirloin TipLean, with a moderate amount of connective tissue
BrisketTough, with a rich, beefy flavor

Vegetable Selection and Preparation Tips

Choosing the right vegetables and preparing them well are key to a great beef stew in your crock pot. By picking and prepping your vegetables for beef stew with care, you make sure every bite is full of flavor and texture.

For vegetable preparation in slow cooking, size is important. Cut your veggies into 1-inch cubes so they cook evenly. This way, no veggies get mushy while others stay hard.

Layering for Optimal Cooking

In your crock pot, arrange the crock pot vegetable cooking ingredients wisely. Place hardy veggies like potatoes, carrots, and onions at the bottom. They cook the longest. Then, put softer veggies like peas, corn, and green beans on top. This lets them steam and soften without getting too mushy.

VegetablePreparationCooking Time
PotatoesPeeled and cubed45-60 minutes
CarrotsPeeled and sliced45-60 minutes
OnionsDiced30-45 minutes
PeasFrozen15-20 minutes
Green BeansTrimmed and cut into 1-inch pieces30-45 minutes

By using these vegetable preparation tips and layering methods, you’re on your way to a delicious beef stew in your crock pot.

Traditional vs. Modern Beef Stew Seasoning Techniques

Seasoning your beef stew offers many options. From classic herbs to modern spices, the choices are vast and delicious. Let’s explore both traditional and modern ways to enhance your crock pot beef stew.

Classic Herb Combinations

Home cooks have used trusted herb mixes for beef stew for years. Some top beef stew seasoning recipe include:

  • Thyme, rosemary, and bay leaves
  • Parsley, oregano, and garlic
  • Sage, marjoram, and black pepper

These traditional beef stew herbs add a rich, comforting flavor. They make the stew taste like it was made by grandma.

Contemporary Spice Blends

Today, chefs and home cooks are trying new modern beef stew spices. These blends can bring exciting flavors to your stew. Try adding:

  1. Smoked paprika, cumin, and chili powder for a Southwest twist
  2. Cinnamon, allspice, and cloves for a warm, sweet taste
  3. Curry powder, ginger, and turmeric for a global flavor

These modern beef stew spices can make your stew stand out. They introduce new and exciting tastes.

Regional Seasoning Variations

Seasoning can also reflect regional flavors. For example, Hawaiian beef stew might use ginger, soy sauce, and brown sugar. Irish stew, on the other hand, might include Guinness, thyme, and potatoes.

Trying these regional flavors can give your stew a unique twist. It lets you add a personal touch and global inspiration.

Step-by-Step Cooking Instructions

Making a delicious beef stew in your crock pot is easy and rewarding. Follow these simple steps to make the perfect beef stew recipe crock pot:

  1. Start by browning the beef. Heat a skillet over medium-high heat and add a tablespoon of oil. Sear the beef cubes on all sides until they have a nice caramelized crust. This step makes the step-by-step beef stew taste better and feel more tender.
  2. Put the seared beef in your crock pot cooking instructions. Add diced onions, carrots, potatoes, and any other veggies you like.
  3. In another bowl, mix the broth, tomato paste, Worcestershire sauce, herbs, and spices. Pour this tasty mix over the beef and veggies in the crock pot.
  4. Cover the crock pot and set it to cook on low for 8-10 hours or on high for 4-6 hours. The slow cooking makes the beef tender and the flavors blend well.
  5. About 30 minutes before serving, add any delicate ingredients like frozen peas or fresh herbs. This keeps their texture and flavor good.

With these easy beef stew recipe crock pot steps, you’ll have a cozy and tasty meal ready. The slow-cooked beef stew will be tender and full of rich, complex flavors.

“The secret to a truly exceptional beef stew is in the slow, gentle cooking process that allows the flavors to develop and the meat to become perfectly tender.”

Alternative Cooking Methods: Dutch Oven and Stovetop Options

While the crock pot is great for beef stew, other methods can also work well. You might like the deep flavors of a dutch oven or the ease of stovetop cooking. This beef stew recipe can be adapted for either method.

Dutch Oven Adaptation

To cook this stew in a dutch oven, start by searing the beef cubes. Do this over medium-high heat to get a nice crust. Next, add the rest of the ingredients, cover the pot, and bake at 325°F for 2-3 hours. This will make the beef tender.

Stovetop Conversion Guide

For stovetop cooking, start by browning the beef in a big pot or dutch oven. Then, add the rest of the ingredients and bring to a boil. Lower the heat to low, cover, and simmer for 1.5-2 hours. Stir now and then until the beef is tender.

Using a dutch oven or stovetop lets you control the cooking better. Try these methods to see which one you like best.

Troubleshooting Common Beef Stew Problems

Making the perfect beef stew in your crock pot is a fun journey. But, sometimes, you might hit a few bumps. Don’t worry, we’ve got you covered! We’ll share the top tips to fix common beef stew problems. This way, your next batch will be a huge success.

Tough and Chewy Meat

If your beef cubes are tough, it might be because of the wrong meat or not cooking it enough. Choose tougher cuts like chuck roast or brisket. Then, let them cook in the crock pot for 6-8 hours on low heat.

Watery Stew Consistency

A watery stew can be a bummer. But, there’s an easy fix. Just add a tablespoon or two of flour or cornstarch near the end. You can also mash some cooked potatoes or veggies against the crock pot’s sides to thicken it.

Overcooked Vegetables

Crock pot cooking is convenient but can make veggies mushy if not careful. To avoid this, put potatoes, carrots, and onions in first. Then, add softer veggies like peas or green beans in the last hour.

By using these beef stew troubleshooting tips and crock pot beef stew tricks, you’ll easily fix beef stew issues. Your family and friends will love the hearty, tasty dish you make. Happy cooking!

Serving Suggestions and Storage Tips

Make your beef stew even better by adding tasty sides. Try crusty bread, creamy mashed potatoes, or fluffy rice. These options soak up the stew’s rich broth. For a fuller meal, serve it over buttered noodles or creamy polenta.

Complementary Side Dishes

  • Crusty bread or rolls
  • Mashed potatoes
  • Steamed rice
  • Buttered egg noodles
  • Creamy polenta

Proper Storage Methods

Keep your leftover beef stew tasty by storing it right. Cool it down first, then put it in an airtight container. Store it in the fridge for 3-4 days or freeze for up to 3-4 months. Make sure to leave some space in the container for expansion when freezing.

Reheating Guidelines

Ready to enjoy your beef stew again? Here’s how to keep it delicious. Reheat it gently on the stovetop or in the microwave. Stir occasionally to avoid scorching. If it’s too thick, add a bit of broth or water.

Serving SuggestionsStorage MethodsReheating Tips
Crusty bread, mashed potatoes, rice, noodles, polentaRefrigerate 3-4 days, freeze 3-4 monthsGently reheat on stovetop or in microwave, add broth if needed

Conclusion

Making a tasty beef stew recipe crock pot is easy and rewarding. It’s all about slow-cooked flavors, picking the right ingredients, and following simple steps. The crock pot makes it convenient, creating a easy comfort meal that warms your heart.

This hearty beef stew is versatile, whether you like classic herbs or new spices. Try different beef cuts, veggies, and seasonings to make it yours. With a bit of time and patience, you’ll get a rich, flavorful stew loved by all.

So, why not try this beef stew recipe crock pot today? Enjoy the simple joy of a homemade, easy comfort meal that warms both body and soul. Share it with loved ones and savor the comfort of this classic hearty beef stew.

FAQ

What are the key ingredients for a classic beef stew recipe in the crock pot?

For a tasty crock pot beef stew, you’ll need beef like chuck roast or bottom round. Also, add potatoes, carrots, onions, and beef broth. Don’t forget tomato paste, Worcestershire sauce, and herbs and spices.

How does slow cooking in a crock pot enhance the flavor of beef stew?

Slow cooking makes tough beef tender and rich in flavor. It breaks down the meat’s connective tissues. This results in a tender, fall-apart texture.

What is the best way to prepare the beef for crock pot beef stew?

Choose a tough, well-marbled cut of beef like chuck roast or bottom round. Trim excess fat and cut it into 1-inch cubes. Season it with salt, pepper, and spices before browning in a skillet. This enhances flavor and creates a nice sear.

How should I prepare the vegetables for crock pot beef stew?

Cut vegetables like potatoes, carrots, onions, and celery into 1-inch pieces for even cooking. Layer them in the crock pot, with potatoes and carrots at the bottom. This ensures they cook evenly.

What are some traditional and modern seasoning options for beef stew?

Traditional seasonings include thyme, rosemary, bay leaves, and parsley. Modern options might include smoked paprika, cumin, chili powder, or red wine. You can also try regional flavors like Hawaiian beef stew with soy sauce and brown sugar.

Can I adapt this crock pot beef stew recipe to be cooked in a Dutch oven or on the stovetop?

Yes! You can cook the stew in a Dutch oven or on the stovetop. For a Dutch oven, brown the meat, add vegetables and liquid, and bake at 325°F for 2-3 hours. On the stovetop, simmer on low heat for 2-3 hours, stirring occasionally.

What are some common issues that can arise with crock pot beef stew, and how can I fix them?

Issues like tough meat, watery sauce, and overcooked vegetables can happen. Brown the meat before adding it to the crock pot. Use a cornstarch slurry to thicken the sauce. Add delicate vegetables like peas or green beans towards the end.

What are some tasty side dishes that pair well with crock pot beef stew?

Serve the stew with crusty bread, mashed potatoes, rice, or a green salad. Roasted or steamed vegetables like Brussels sprouts or green beans also pair well.

1 comment
0 FacebookTwitterPinterestEmail
Beef Short Ribs

Beef Short Ribs in the Oven Easy Recipe

by IDYA
Beef Short Ribs

Beef Short Ribs in the Oven Easy Recipe

Serves: 4 Prep Time: Cooking Time:
Nutrition facts: 350 calories 25 grams fat
Rating: 5.0/5
( 1 voted )

Ingredients

  • 4 beef short ribs (about 2 lbs)
  • 2 tbsp olive oil
  • 1 onion, chopped
  • 4 cloves garlic, minced
  • 2 cups beef broth
  • 1 tbsp tomato paste
  • 1 tbsp brown sugar
  • 1 tsp smoked paprika
  • 1 tsp thyme Salt and pepper to taste"

Instructions

1. Preheat the oven to 300°F (150°C). 2. Heat olive oil in a large oven-safe pot or Dutch oven over medium-high heat. 3. Season the short ribs with salt and pepper, then sear them on all sides until browned, about 2-3 minutes per side. Remove the ribs and set aside. 4. In the same pot, add the chopped onion and garlic. Cook for 2-3 minutes until softened. 5. Stir in the tomato paste, brown sugar, smoked paprika, and thyme. Cook for 1 minute. 6. Pour in the beef broth, scraping up any browned bits from the bottom of the pot. 7. Return the short ribs to the pot and cover with a lid. 8. Place the pot in the oven and cook for 2.5 to 3 hours, or until the ribs are tender and the meat is falling off the bone. 9. Remove the ribs from the oven and let them rest for 10 minutes before serving."

Notes

For extra flavor, marinate the short ribs overnight in the refrigerator with some of the broth, garlic, and seasonings. If you don't have an oven-safe pot, you can transfer everything to a baking dish and cover with aluminum foil before baking. Serve the short ribs with mashed potatoes or roasted vegetables for a complete meal.

Beef short ribs are a delicious and versatile cut of meat. They can be turned into a mouthwatering meal with the right cooking method. This guide will help you learn how to cook short ribs in the oven, whether you’re a seasoned cook or just starting.

We’ll cover everything from choosing the right cut to making them tender and fall-off-the-bone. You’ll get all the steps to make sure your meal is delicious and satisfying.

Key Takeaways

  • Understand the different types and cuts of beef short ribs to make the best selection
  • Discover the essential ingredients and preparation steps for perfectly cooked short ribs in the oven
  • Learn the optimal cooking temperatures and timing guidelines to achieve the desired doneness
  • Explore the best side dishes and sauces to complement your oven-baked short ribs
  • Discover tips for storing and reheating leftover short ribs to enjoy them again

Understanding Beef Short Ribs: Types and Cuts

Beef short ribs are a versatile and flavorful cut. They can be prepared in many ways. But, it’s key to know the different types and cuts before cooking.

English-Style vs. Flanken-Style Short Ribs

There are two main styles of beef short ribs: English-style and Flanken-style. English-style ribs are cut across the bone, making them thick and meaty. Flanken-style ribs, cut parallel to the bone, are thinner and more uniform.

The choice between these styles depends on your preference and cooking method.

USDA Grades and Quality Selection

When picking the best beef short ribs, USDA grading matters. The USDA grades beef based on marbling, maturity, and tenderness. Choose ribs graded as “Choice” or “Prime” for the tastiest and tenderest results.

Fresh vs. Frozen Short Ribs

Beef short ribs come in fresh and frozen forms. Fresh ribs usually have a stronger flavor and softer texture. But, frozen ribs are cheaper and work well for slow-cooking. Just thaw them properly before cooking.

“Understanding the different types and cuts of beef short ribs is the first step to ensuring a successful oven-baked dish.”

Essential Ingredients for Perfect Oven-Baked Short Ribs

Making delicious oven-baked short ribs starts with the right ingredients. You need strong seasonings and tasty braising liquids. Each part is key to making this dish amazing. Let’s explore the must-haves for oven-baked short ribs perfection.

Seasoning Essentials

Start by picking out some aromatic spices and herbs. Mix kosher salt, black pepper, garlic powder, onion powder, and thyme or rosemary. Adding smoked paprika or cayenne pepper can give it an extra kick.

Braising Liquids

Short ribs love to simmer in a tasty braising liquid. Use a mix of red wine, like Cabernet Sauvignon or Merlot, and beef broth or stock. The wine adds depth, while the broth makes the meat taste beefy.

Vegetable Aromatics

  • Onions
  • Carrots
  • Celery
  • Garlic

Diced onions, carrots, celery, and garlic add flavor to your short ribs. These veggies mix with the braising liquid, making a great sauce for the meat.

Remember, the right ingredients make a dish delicious. By choosing and mixing these key parts, you’ll make short ribs that wow everyone.

Preparing Short Ribs Before Cooking

To get the best oven-baked short ribs, you need to prepare the meat right. This means trimming fat, cleaning the ribs, and using a tasty dry rub.

Trimming and Cleaning

First, cut off any big fat pieces from the short ribs. This makes the meat cook better and avoids bitter taste from fat. Use a sharp knife to remove fat, but don’t take off too much marbling. Marbling is what makes short ribs taste so good.

After trimming, rinse the ribs under cool water. Then, dry them with paper towels. This removes dirt or bone bits from the meat’s surface.

Dry Rub Techniques

  • Make a tasty dry rub with your favorite spices and herbs. Brown sugar, garlic powder, onion powder, smoked paprika, and black pepper are great choices.
  • Spread the dry rub all over the ribs, pressing it into the meat. This helps it stick better.
  • Let the seasoned ribs sit at room temperature for 30 minutes before cooking. This boosts the flavor.

Room Temperature Tips

Make sure the short ribs are at room temperature before cooking. This ensures they cook evenly and stay tender. Take the ribs out of the fridge 30 minutes to an hour before cooking.

Short Ribs Recipe Oven: Step-by-Step Process

Making delicious oven-baked short ribs is easier than you think. Just follow these simple steps to make a tasty short ribs dish at home.

  1. First, heat your oven to 350°F (175°C). This temperature helps the short ribs cook evenly and get a nice caramelized crust.
  2. Wipe the short ribs dry with paper towels and sprinkle them with salt and black pepper. This lets the meat’s natural flavors come through.
  3. Heat a big, oven-safe Dutch oven or heavy pot over medium-high heat. Add a tablespoon of oil and sear the short ribs on all sides until they’re golden, about 2-3 minutes each side. This step keeps the juices in and adds flavor.
  4. After searing the short ribs, take them out and set them aside. Then, sauté chopped onions, carrots, and celery in the pot until they’re soft, about 5 minutes.
  5. Next, pour in a cup of beef broth or red wine to deglaze the pot. This loosens all the tasty browned bits from the bottom, making a rich braising liquid.
  6. Put the seared short ribs back in the pot, cover it, and put it in the oven. Let it braise for 2-3 hours, or until the meat is tender and falls off the bone.

Follow these easy steps to get tender, oven-baked short ribs. They’re sure to impress your family and guests. Enjoy this tasty short ribs recipe oven and the oven-baked short ribs recipe results.

Temperature and Timing Guidelines

To get your oven-baked short ribs just right, pay close attention to temperature and timing. Learning these key points will help you make short ribs that are juicy and tender every time.

Optimal Cooking Temperatures

The best temperature for cooking short ribs is between 300°F and 325°F. This temperature helps the meat get tender while creating a delicious, caramelized outside. Cooking at higher temperatures can make the short ribs dry and tough.

How to Test for Doneness

  • Check the short ribs’ internal temperature with a meat thermometer. Aim for 205°F to 210°F for the best doneness.
  • Or, try the “fork test”. If a fork slides in and out easily, the ribs are done.
  • Remember, the ribs will get even more tender after they’re out of the oven.

Resting Period Importance

After the short ribs are cooked, let them rest for 10-15 minutes before serving. This resting time helps the juices spread evenly, making the meat more tender and flavorful.

Cooking TemperatureOptimal Internal TemperatureResting Period
300°F to 325°F205°F to 210°F10-15 minutes

By sticking to these temperature and timing tips, you’ll make oven-baked short ribs that are tender, juicy, and full of flavor. Your taste buds will thank you.

Best Side Dishes for Oven-Baked Short Ribs

When you serve oven-baked short ribs, the right side dishes can make the meal even better. You can choose from classic comfort foods or fresh, vibrant options. Each choice pairs perfectly with the flavorful beef.

Creamy Mashed Potatoes

Every short ribs feast needs creamy, buttery mashed potatoes. The soft, starchy texture of mashed potatoes goes well with the tender, rich short ribs.

Roasted Vegetables

Oven-roasted veggies like carrots, Brussels sprouts, or asparagus add a healthy touch. They contrast nicely with the savory short ribs. The veggies’ caramelized edges and sweetness balance the flavors.

Side DishWhy it Works
Garlic Mashed PotatoesThe bold garlic flavor complements the richness of the short ribs.
Roasted Root VegetablesThe earthy, caramelized vegetables balance the hearty nature of the short ribs.
Creamy PolentaThe creamy, comforting texture of polenta provides a soothing base for the short ribs.
Sautéed GreensThe bitterness of sautéed greens, such as kale or Swiss chard, cuts through the richness of the short ribs.

To make a satisfying short ribs meal, pick side dishes that match the meat’s bold flavors. Whether you choose classic comfort foods or fresh veggies, there are endless delicious options.

Sauce and Gravy Preparation

Boosting the taste of your oven-baked short ribs is easy with the right sauce and gravy. Use the rich pan drippings and a simple wine reduction. This way, you’ll make a delicious sauce that highlights the short ribs‘ natural flavors.

Pan Dripping Utilization

Don’t waste those flavorful pan drippings! They’re essential for making a tasty short ribs sauce or gravy for short ribs. After roasting, move the pan to the stovetop. Add a bit of red wine or beef broth to deglaze, scraping up all the browned bits.

This liquid gold can then be simmered down. It turns into a rich, glossy sauce that’s perfect with your tender short ribs.

Wine Reduction Techniques

Adding a wine reduction can make your short ribs sauce or gravy even better. Pick a bold, full-bodied red wine that goes well with the meat’s flavors. Simmer the wine until it reduces and becomes syrupy.

Then, mix it with your pan drippings for a top-notch short ribs sauce or gravy for short ribs.

IngredientAmount
Red wine1/2 cup
Beef broth1 cup
Butter2 tablespoons
All-purpose flour2 tablespoons
Salt and pepperTo taste

“The secret to a truly exceptional short ribs dish lies in the sauce or gravy. By harnessing the flavors of the pan drippings and incorporating a wine reduction, you can elevate your oven-baked short ribs to new heights.”

Storing and Reheating Leftover Short Ribs

Cooking oven-baked short ribs is a joy. But what about leftovers? Don’t worry, you can still enjoy the flavors with the right storage and reheating.

Proper Storage for Leftover Short Ribs

To keep your short ribs juicy and flavorful, follow these tips:

  • Let the short ribs cool down before putting them in an airtight container or plastic bag.
  • Put the leftovers in the fridge within 2 hours of cooking. They’ll last 3-4 days.
  • For longer storage, freeze them in a freezer-safe container for up to 3 months.

Reheating Methods for Mouthwatering Short Ribs

Ready to enjoy your short ribs again? Try these reheating methods:

  1. Oven Reheating: Heat your oven to 325°F (165°C). Put the short ribs in a dish, cover with foil, and warm for 15-20 minutes.
  2. Stovetop Reheating: Put the short ribs in a skillet with some broth or sauce. Heat on low, stirring now and then, until warm.
  3. Slow Cooker Reheating: Add the short ribs to your slow cooker. Set it to low and warm for 2-3 hours.

With these easy storage and reheating tips, you can enjoy your oven-baked short ribs again. Make the most of your leftovers!

Conclusion

Cooking beef short ribs in the oven is a rewarding skill. It can impress your family and friends. By learning about the different types of short ribs and choosing the right quality, you can make a tender, flavorful dish.

The secret to beef short ribs oven baked recipe success is in the preparation and cooking techniques. Each step, from trimming and seasoning to monitoring the temperature, is important. Don’t forget to use the pan drippings to make a rich, savory sauce or gravy.

This guide is for both seasoned cooks and beginners. It gives you the knowledge and tools to cook this impressive dish with confidence. So, get your ingredients ready, fire up the oven, and enjoy the delicious flavors of perfectly cooked beef short ribs. Bon appétit!

FAQ

What is the difference between English-style and Flanken-style short ribs?

English-style short ribs are cut across the bone, making them thick and meaty. Flanken-style short ribs are cut parallel to the bone, making them thin and strip-like.

How do I select the best quality beef short ribs?

Choose USDA Choice or Prime grade short ribs for the highest marbling and tenderness. Fresh short ribs are best, but high-quality frozen ones work too.

What are the essential ingredients for oven-baked short ribs?

You’ll need beef short ribs, onions, garlic, and herbs. Also, a flavorful braising liquid like beef broth, wine, or tomatoes is key.

How do I prepare short ribs before cooking?

Trim excess fat and clean the ribs. Apply a dry rub or seasoning blend. Let the ribs come to room temperature before cooking.

What is the ideal cooking temperature and timing for oven-baked short ribs?

Cook at 325°F (165°C) for 2-3 hours. The meat should be tender and falling off the bone. Use a meat thermometer for an internal temperature of 200-205°F (93-96°C).

What are some good side dish options to serve with oven-baked short ribs?

Creamy mashed potatoes, roasted root vegetables, and buttered egg noodles are great. A fresh green salad also pairs well with the short ribs.

How can I make a delicious sauce or gravy to accompany the short ribs?

Use the pan drippings to make a flavorful sauce or gravy. Add wine, stock, or tomatoes to enhance the flavors of the short ribs.

How do I properly store and reheat leftover oven-baked short ribs?

Store leftovers in an airtight container in the fridge for 3-4 days. To reheat, place in a baking dish or saucepan with a little broth or sauce. Cover and warm in a 325°F (165°C) oven until hot.

1 comment
0 FacebookTwitterPinterestEmail
Brown Butter Chocolate Chip Cookies

Easy Chocolate Chip Cookies Brown Butter

by IDYA
Brown Butter Chocolate Chip Cookies

Easy Chocolate Chip Cookies Brown Butter

Serves: 24 Prep Time: Cooking Time:
Nutrition facts: 200 calories 12 grams fat
Rating: 5.0/5
( 1 voted )

Ingredients

  • 1 cup unsalted butter
  • 1 cup packed brown sugar
  • 1/2 cup granulated sugar
  • 2 large eggs
  • 1 tsp vanilla extract 2
  • 1/4 cups all-purpose flour
  • 1 tsp baking soda
  • 1/2 tsp salt
  • 2 cups semisweet chocolate chips

Instructions

1. Preheat the oven to 350°F (175°C) and line two baking sheets with parchment paper. 2. In a medium saucepan, melt butter over medium heat. Cook, swirling occasionally, until the butter becomes golden brown and has a nutty aroma. Remove from heat and let it cool slightly. 3. In a large bowl, whisk together the brown sugar, granulated sugar, eggs, and vanilla extract until smooth. 4. Add the brown butter to the sugar mixture and stir to combine. 5. In a separate bowl, whisk together the flour, baking soda, and salt. 6. Gradually add the dry ingredients to the wet ingredients, mixing until just combined. 7. Fold in the chocolate chips. 8. Scoop tablespoon-sized portions of dough onto the prepared baking sheets, spacing them about 2 inches apart. 9. Bake for 10-12 minutes, or until the edges are golden brown and the centers are soft. 10. Let the cookies cool on the baking sheets for 5 minutes before transferring them to wire racks to cool completely.

Notes

For chewier cookies, refrigerate the dough for 30 minutes before baking. Make sure to brown the butter slowly for the best flavor. These cookies can be stored in an airtight container for up to a week.

Experience the enchanting smell and delicious taste of homemade brown butter chocolate chip cookies. This classic Nestlé recipe gets a special twist with browned butter. It makes the cookies sweeter and more textured. Get ready for a fun baking adventure that will make your taste buds happy.

Key Takeaways

  • Brown butter adds a unique nutty, caramelized flavor to classic chocolate chip cookies.
  • Proper browning of the butter is crucial to achieve the perfect texture and taste.
  • Carefully selecting high-quality chocolate chips enhances the overall cookie experience.
  • Temperature control is key for achieving the desired cookie consistency.
  • Freezing dough or baked cookies allows for convenient, freshly-baked treats anytime.

Creating the perfect small batch chocolate chip cookies or celebrating chocolate chip cookie day starts with brown butter. The Maillard reaction, a series of chemical changes, adds nutty, caramel-like flavors. These changes turn your cookies from ordinary to extraordinary.

The Science Behind Browning Butter

When butter cooks, the milk solids brown and caramelize. This creates a rich, complex flavor. The Maillard reaction, named after a French chemist, is behind this magic. Heat, time, and butter’s natural sugars and amino acids make hundreds of new flavors.

Brown butter adds unmatched depth to small batch chocolate chip cookies. Its nutty, toasted notes balance the chocolate’s sweetness. This technique is a favorite for adding complexity to a classic treat on chocolate chip cookie day.

“The Maillard reaction is the secret to unlocking the true potential of your small batch chocolate chip cookies.”

Essential Ingredients for Perfect Brown Butter Chocolate Chip Cookies

Baking the ultimate chocolate chip cookie recipe without brown sugar starts with the right ingredients. The rich, nutty brown butter and decadent chocolate chips are key. Each part adds to the perfect mix of flavors and textures.

The brown butter is at the heart of these cookies. It gives a flavor that regular melted butter can’t. To get this, you must brown the butter. This process brings out nutty and caramelized notes.

You’ll also need all-purpose flour, granulated sugar, eggs, vanilla extract, and top-quality chocolate chips. For a chocolate chip cookie recipe without brown sugar, use light or dark brown sugar instead of granulated sugar. This keeps the cookie sweet and chewy.

Choose premium chocolate chips for the best taste. The quality of the chocolate makes a big difference in the cookie’s flavor.

IngredientQuantity
Unsalted butter1 cup (226g)
All-purpose flour2 1/4 cups (281g)
Granulated sugar1 cup (200g)
Eggs2 large
Vanilla extract2 teaspoons
Premium chocolate chips2 cups (340g)

With these ingredients, you’re ready to make the perfect chocolate chip cookie recipe without brown sugar. Your friends and family will love the amazing taste and texture.

Step-by-Step Guide to Browning Butter

Browning butter is key to making perfect brown butter chocolate chip cookies. It adds a rich, nutty flavor that makes your cookies stand out. Here’s how to brown butter perfectly every time.

Signs Your Butter is Perfectly Browned

Watch the color and smell of the butter closely. It should turn from pale yellow to deep golden brown. You’ll know it’s ready when you smell a nutty, caramelized scent. Be quick, as it can burn if you’re not careful.

Common Mistakes to Avoid When Browning Butter

  • Overcrowding the pan: Make sure the pan is big enough for the butter to spread and brown evenly.
  • Not stirring frequently: Stir constantly to avoid burning the butter.
  • Rushing the process: Brown butter slowly for the best flavor.
  • Letting the butter get too dark: Remove the pan from heat just before it reaches your desired brown color.

Cooling and Storing Brown Butter

After browning the butter, cool it down before adding it to your cookie dough. Put the browned butter in a heatproof container and let it cool at room temperature. Once cooled, you can store it in the fridge for up to 2 weeks or in the freezer for months. Just remember to let it come to room temperature before using it in your Disney chocolate chip cookie recipe.

By following these tips, you’ll master browning butter and make the most delicious brown butter chocolate chip cookies.

Making the perfect brown butter chocolate chip cookies begins with the dough. The right mix and handling are key for flavor and texture. Let’s explore the secrets to a dough that yields soft, chewy, and delicious cookies.

Start by cooling the browned butter completely before mixing it into the dough. This step ensures the butter is solid enough for the right dough consistency. Once cooled, mix the butter with sugars until it’s light and fluffy.

Then, add eggs one at a time, mixing each fully before adding the next. This step makes the dough smooth and well combined. For extra flavor, try using some sourdough discard flour instead of regular flour. It adds a tangy taste that goes well with the brown butter and chocolate chips.

  1. Cream the browned butter and sugars until light and fluffy.
  2. Add the eggs one at a time, mixing well after each addition.
  3. Slowly incorporate the dry ingredients, including the all-purpose flour and a touch of sourdough discard (if desired).
  4. Gently fold in the chocolate chips by hand to avoid overmixing the dough.

By following these steps, you’ll get a dough that’s just right. The browned butter adds a rich, nutty taste. The sourdough discard brings a tangy flavor that pairs well with the chocolate chip cookies.

“The secret to the best brown butter chocolate chip cookies is in the dough – treat it with care and let the flavors shine.”

Baking the perfect chocolate chip cookie is an art. The secret to the perfect texture is in a few simple techniques. Let’s explore how to make cookies with crisp edges and soft centers, just like the classic Nestlé recipe.

Temperature is key to your cookies’ texture. Make sure your butter and eggs are at the right temperature. Chilled butter and room-temperature eggs make cookies chewier. Softened butter and cold eggs make them more cakey.

Try different temperatures to find your ideal cookie.

Choosing the Right Chocolate Chips

The type of chocolate chips affects your cookie’s texture. Large, premium chips like those in Nestlé’s cheesecake cookies add fudgy pockets. Smaller chips give a more even texture.

Choose based on your taste and the recipe‘s style.

Mastering ingredient temperatures and picking the right chocolate chips will help you bake amazing brown butter chocolate chip cookies. They’re sure to impress.

Baking Techniques for Brown Butter Chocolate Chip Cookies

Baking small batch chocolate chip cookies or larger batches of brown butter chocolate chip cookies needs careful techniques. This ensures the perfect texture and flavor. Whether you’re using a classic Disney chocolate chip cookie recipe or trying your own, focus on oven temperature, baking time, and pan prep.

Preheat your oven to 375°F (190°C) for the best results. Use parchment paper or silicone mats on baking sheets to prevent sticking and ensure even browning. For small batch chocolate chip cookies, use a smaller baking sheet or space dough balls apart to keep their shape.

  1. Scoop the chilled brown butter chocolate chip cookie dough onto the prepared baking sheets, leaving about 2 inches between each cookie.
  2. Bake the cookies for 10-12 minutes, or until the edges are golden brown and the centers are still slightly soft. Remember, the cookies will continue to firm up as they cool.
  3. For larger batches, you may need to bake the cookies in multiple rounds, rotating the baking sheets halfway through the baking time to ensure even cooking.

Getting the perfect Disney chocolate chip cookie recipe metric measurements is key for consistent results. Follow the recipe instructions closely, and adjust as needed based on your oven and taste preferences. With practice, you’ll master baking small batch chocolate chip cookies and larger batches of brown butter chocolate chip cookies.

“The secret to delicious small batch chocolate chip cookies lies in the perfect balance of flavors and textures, and that’s where the magic of brown butter comes into play.”

Storage Tips and Shelf Life

Keeping your homemade brown butter chocolate chip cookies fresh is key. Whether it’s for chocolate chip cookie day or sourdough discard cookies, these tips will help. You’ll enjoy your cookies at their best.

Freezing Instructions for Dough and Baked Cookies

Freezing your cookie dough or baked cookies is a great idea. Unbaked dough can stay in the freezer for up to 3 months. Just portion it out and freeze on a baking sheet, then move it to an airtight container.

When you’re ready to bake, just put the frozen dough on a baking sheet. Add a few extra minutes to the cooking time.

Baked cookies can also be frozen for up to 3 months. Let them cool completely first. Then, place them in a single layer on a baking sheet and freeze. Move them to an airtight container or freezer bag once frozen. Thaw at room temperature before eating.

Maintaining Freshness

  • Store baked cookies in an airtight container at room temperature for up to 1 week.
  • For longer storage, keep cookies in the refrigerator for up to 2 weeks or in the freezer for up to 3 months.
  • To prevent cookies from drying out, place a slice of bread or a paper towel in the container to absorb excess moisture.
  • Enjoy your brown butter chocolate chip cookies within their peak freshness for the best taste and texture.

By following these storage tips, your homemade brown butter chocolate chip cookies will stay fresh. Enjoy them long after baking. Whether it’s for chocolate chip cookie day or sourdough discard cookies, they’ll be delicious.

Variations and Recipe Adaptations

Get creative and explore many delicious chocolate chip cookie variations! You can make a classic chocolate chip cookie recipe without brown sugar or try the indulgent chocolate chip cheesecake cookies. There are endless options to customize the recipe to your liking or dietary needs.

Want to cut down on sugar or prefer a less sweet cookie? Our chocolate chip cookie recipe without brown sugar is perfect. By using granulated sugar instead of brown sugar, you get a lighter cookie. It still has that rich chocolate flavor. Adjust the sugar to your taste for the perfect sweetness.

Chocolate Chip Cheesecake Cookies

For a special treat, try our chocolate chip cheesecake cookies. They mix the creamy cheesecake with the classic chocolate chip cookie. Add a creamy cheesecake filling and chocolate chips for a dessert that will wow anyone.

Dietary Adaptations

  • Gluten-free: Use a gluten-free flour blend to make these cookies safe for those with gluten sensitivities.
  • Dairy-free: Swap the butter for coconut oil or vegan butter and use dairy-free chocolate chips for a dairy-free option.
  • Nut-free: Remove the nuts and use nut-free chocolate chips for those with nut allergies.

These versatile variations cater to many tastes and dietary needs. So, everyone can enjoy the chocolatey goodness of these irresistible cookies.

Recipe VariationKey Ingredient SubstitutionsFlavor Profile
Chocolate Chip Cookie Recipe Without Brown SugarGranulated sugar instead of brown sugarLighter, less sweet, more subtle chocolate flavor
Chocolate Chip Cheesecake CookiesCheesecake filling swirled into the doughCreamy, decadent, rich chocolate-cheesecake experience

Conclusion

Discovering the secret to making amazing brown butter chocolate chip cookies is easy. It all starts with browning the butter. This simple step adds a rich, nutty flavor to the classic Nestlé chocolate chip cookie recipe.

In this guide, you’ve learned why brown butter is so special. You’ve also found out what ingredients you need and how to make the dough. Now, you can make cookies that will wow everyone you share them with.

Don’t be afraid to try new things with your brown butter cookies. Add different chocolate chips, nuts, or your favorite mix-ins. The possibilities are endless. So, get your oven ready, gather your ingredients, and start baking. You’re about to make the most delicious cookies you’ve ever had.

FAQ

What is the secret to making brown butter chocolate chip cookies?

The secret to delicious brown butter chocolate chip cookies is browning the butter. This process adds a rich, nutty flavor. It makes the classic cookie recipe even better.

How does brown butter improve the flavor of chocolate chip cookies?

Browning the butter brings out toffee, caramel, and nutty notes. These flavors mix well with the chocolate chips’ sweetness. It makes the cookie taste more complex and delicious.

Can I make a small batch of brown butter chocolate chip cookies?

Yes, you can make a small batch of these cookies. The method works for any number of cookies. Just adjust the ingredients to fit your batch size.

Can I use sourdough discard in brown butter chocolate chip cookies?

Yes, you can add sourdough discard to your cookies. It adds a tangy flavor that goes well with the brown butter’s richness.

You don’t have to follow the Disney recipe exactly for brown butter cookies. Focus on the right ingredient ratios and browning technique for the best taste.

Can I make brown butter chocolate chip cookies without using brown sugar?

Yes, you can make these cookies without brown sugar. Use granulated sugar and molasses, or try maple syrup or honey for a similar flavor.

Can I make chocolate chip cheesecake cookies with brown butter?

Absolutely! Brown butter’s rich flavor goes great with cheesecake cookies. Add it to your cheesecake cookie dough for a unique twist.

0 comments
0 FacebookTwitterPinterestEmail
Sourdough Discard Recipes

Easy Creative Sourdough Discard Recipes

by IDYA
Sourdough Discard Recipes

Creative Sourdough Discard Recipes for Your Kitchen

Serves: 4 Prep Time: Cooking Time:
Nutrition facts: 120 calories 6 grams fat
Rating: 5.0/5
( 1 voted )

Ingredients

  • 1 cup sourdough discard
  • 1 cup all-purpose flour
  • 1/4 cup olive oil
  • 1/2 tsp salt
  • 1 tsp dried herbs (optional)
  • 1 tbsp sesame seeds (optional)
  • 1/2 cup water

Instructions

1. Preheat the oven to 350°F (175°C). Line a baking sheet with parchment paper. 2. In a mixing bowl, combine the sourdough discard, flour, olive oil, salt, and dried herbs (if using). 3. Gradually add water until the dough forms a thick, workable consistency. 4. Roll out the dough on a floured surface to about 1/8-inch thickness. 5. Use a knife or pizza cutter to cut the dough into cracker-sized squares or shapes." 6. Sprinkle with sesame seeds, if desired, and place them on the prepared baking sheet. 7. Bake for 20-25 minutes, or until the crackers are golden and crisp. 8. Let the crackers cool before serving.

Notes

For added flavor, experiment with different herbs like rosemary or thyme. You can use the sourdough discard straight from your starter without feeding it. Store in an airtight container for up to one week.

Discover the magic of sourdough discard and boost your cooking skills with tasty recipes. This article is for both new and experienced sourdough bakers. It shows you how to use leftover starter and cut down on kitchen waste.

Sourdough discard is full of flavor and nutrients. Instead of throwing it away, turn it into delicious dishes. Try making savory crackers, pizza dough, sweet pastries, or cinnamon rolls. Let your sourdough discard take you on a tasty journey.

Key Takeaways

  • Sourdough discard is a versatile ingredient that can be used in a variety of recipes to reduce waste.
  • Explore the nutritional benefits of sourdough discard and learn how to store it properly.
  • Master the essential tools and ingredients needed for sourdough discard recipes.
  • Dive into classic sourdough discard dishes like pancakes, waffles, and crackers.
  • Discover innovative ways to use sourdough discard in pizza dough, bagels, and sweet treats.

Understanding Sourdough Discard and Its Benefits

Keeping a sourdough starter means you’ll have leftover discard. This is the part you remove before feeding it. Instead of throwing it away, you can use it in many sourdough discard recipes. Using discard reduces waste and opens up new cooking possibilities.

Nutritional Value of Sourdough Discard

Sourdough discard is not just waste; it’s full of good stuff. The fermentation process makes probiotics, which are great for your gut. It also has B vitamins, minerals, and fiber, making it healthy for baking. Adding king arthur sourdough starter discard to your recipes can make your food more nutritious.

Storage and Shelf Life Tips

  • Keep discard in an airtight container in the fridge for up to 1 week.
  • Freeze it in an airtight container or bag for up to 3 months.
  • Thaw frozen discard in the fridge overnight before using it in your recipe.

Why You Shouldn’t Throw Away Your Discard

Don’t throw away your sourdough starter discard. It’s a chance to make tasty baked goods like pancakes, waffles, crackers, and pizza dough. Using discard in your recipes not only saves food but also adds flavor and moisture to your dishes.

“Sourdough discard is a treasure trove of flavor and nutrition – don’t let it go to waste!”

Essential Tools and Ingredients for Sourdough Discard Recipes

Starting your sourdough discard recipe journey needs a few key tools and ingredients. Having the right equipment and quality materials is crucial. It helps achieve the perfect texture and flavor in your sourdough creations.

You’ll first need a reliable sourdough starter, like the King Arthur Sourdough Starter. This starter is the base for your recipes. It provides the yeast and bacteria needed for sourdough’s unique taste.

You’ll also need various flours. All-purpose flour is a good start, but try whole wheat, rye, or spelt for different flavors. Mix different flours to find your favorite mix.

Essential ToolsKey Ingredients
Mixing bowl Dough scraper Bench scraper Baking sheet Parchment paper Oven-safe baking dishKing Arthur Sourdough Starter All-purpose flour Whole wheat flour Rye flour Spelt flour Water Salt

With the right tools and ingredients, you’re set to make tasty sourdough discard recipes. You’ll impress your family and friends. Now, get creative and explore the world of sourdough discard baking.

Classic Sourdough Discard Pancakes and Waffles

Take your breakfast to the next level with sourdough discard pancakes and waffles. This recipe uses leftover sourdough starter. It also gives a unique texture that will make your taste buds happy.

Perfect Texture and Flavor Tips

To get the best sourdough discard pancakes and waffles, follow these tips:

  • Let the batter rest for at least 30 minutes. This helps the gluten develop and flavors blend.
  • Adjust the batter’s thickness by adding more milk or sourdough discard.
  • Add a bit of sugar or honey to balance the sourdough’s tanginess.
  • Use a hot, well-greased griddle or waffle iron for the best results.

Sweet and Savory Topping Ideas

Try different toppings on your sourdough discard pancakes and waffles:

  1. Top with fresh berries, sliced bananas, or maple syrup for a sweet treat.
  2. Go savory with crispy bacon, shredded cheese, and a fried egg.
  3. Choose sautéed mushrooms, spinach, and yogurt for a healthy option.
  4. For a special treat, add chopped nuts, cinnamon, and powdered sugar.

Make-Ahead Storage Solutions

Make your sourdough discard pancakes and waffles ahead of time. Here’s how:

  • Make the batter and refrigerate it for up to 5 days.
  • Cook the pancakes or waffles, cool them, and freeze in an airtight container for up to 3 months.
  • Reheat frozen pancakes or waffles in a toaster or oven for a quick breakfast.

Explore sourdough discard pancakes and waffles for a homemade breakfast. It’s a delicious way to use your sourdough starter.

Crispy Sourdough Discard Crackers with Herbs

Discover the hidden treasure in your sourdough discard with these tasty sourdough discard crackers. They’re flavored with herbs and are perfect for snacking. Enjoy them with dips, cheeses, or on their own.

To make these crunchy crackers, you’ll need:

  • 1 cup (240 ml) sourdough discard
  • 1/2 cup (60 g) all-purpose flour
  • 1/4 teaspoon (1.25 ml) salt
  • 2 tablespoons (30 ml) olive oil
  • 1 tablespoon (15 ml) of your favorite dried herbs (such as rosemary, thyme, or oregano)

First, heat your oven to 375°F (190°C). Mix the sourdough discard, flour, salt, and olive oil in a bowl. Knead the dough a bit, then roll it out to 1/8 inch (3 mm) thick.

Spread the dried herbs over the dough. Use a rolling pin to press them in. Cut the dough into shapes with a knife or pizza cutter.

Place the crackers on a parchment-lined baking sheet. Bake for 12-15 minutes, until they’re golden and crispy. Watch them closely to avoid overbaking.

Let the crackers cool on the sheet before serving. They’re great as a snack, with dips, or on cheese and charcuterie boards.

For the best crunch, focus on rolling and baking. Try different methods to find your favorite texture. Soon, you’ll make sourdough discard crackers that everyone will love.

Quick and Easy Sourdough Discard Pizza Dough

Make the most of your sourdough discard to create a tasty pizza dough. It’s quick to make and gives your pizza a unique flavor and texture. This makes it perfect for a homemade pizza crust.

Best Toppings for Sourdough Pizza

Sourdough discard goes well with many toppings. Here are some great options for your sourdough pizza:

  • Fresh basil and tomato for a classic Margherita-style pizza
  • Sautéed mushrooms, caramelized onions, and crumbled feta for a flavorful vegetarian option
  • Crispy prosciutto, arugula, and shaved Parmesan for a sophisticated and savory experience
  • Spicy Italian sausage, bell peppers, and olives for a robust and satisfying combination

Temperature and Baking Techniques

To get a perfect crust, follow these baking tips. Heat your oven to 450°F (232°C). Use a pizza stone or baking steel if you have one.

Place the dough on the hot surface. Bake for 12-15 minutes. The crust should be golden, and the cheese should melt and bubble. Turn the pizza halfway for even cooking.

Freezing and Storing Options

This recipe is great because you can freeze the dough. Make a double or triple batch and freeze the rest. Divide the dough into portions, wrap them, and store in the freezer for up to 3 months.

Thaw the dough in the fridge overnight. Then, let it come to room temperature before topping and baking. This way, you can enjoy homemade sourdough pizza anytime without starting from scratch.

Homemade Sourdough Bagels Using Discard

Turn your sourdough discard into delicious sourdough bagels for breakfast. This recipe lets you make chewy, tasty bagels from leftover starter. They will wow your taste buds and fill your cravings.

The secret to great sourdough bagels is fermentation. Your discard’s natural yeasts and bacteria give them a unique taste and texture. This process also makes them easier to digest.

Achieving the Ideal Texture and Crust

To get chewy inside and shiny crust, follow these tips:

  • Knead the dough well to build the gluten structure for chewiness.
  • Let the dough ferment for at least 8 hours, or up to 24 hours, for deep flavor.
  • Boil the bagels in baking soda water before baking for a shiny crust.
  • Bake at 450°F for a crisp outside and soft inside.

Flavor Variations and Toppings

Get creative with flavors. Try sesame, poppy seed, garlic, onion, or add herbs and cheese. The choices are endless.

Once you know the basic recipe, try new toppings. Add sea salt, cream cheese, or more. Make your sourdough bagels your own with your favorite flavors.

Make your breakfast better with homemade sourdough bagels from discard. Use fermentation and try different flavors for a special kitchen experience.

Sweet Treats: Sourdough Cinnamon Rolls and Pastries

Discover a world of sweet treats with our sourdough cinnamon rolls and pastries. Sourdough discard adds a unique flavor to your baking. It turns simple treats into something special.

Frosting and Glazing Options

Take your sourdough cinnamon rolls to the next level with different frostings and glazes. Try cream cheese frosting or a caramel drizzle. You can also add flavors like cinnamon or vanilla to make it your own.

Making Ahead and Freezing Tips

Make your sourdough cinnamon rolls and pastries ahead of time for convenience. Learn how to proof and freeze them properly. This way, you can enjoy them whenever you want.

Sourdough Cinnamon Roll VariationsProsCons
Classic Sourdough Cinnamon RollsAuthentic sourdough flavor, traditional tasteRequires more time for proofing and rising
Sourdough Cinnamon Roll BitesBite-sized, perfect for snacking, faster to prepareMay not have the same level of sourdough intensity
Sourdough Cinnamon Roll Braided LoafImpressive presentation, can feed a crowdRequires more shaping and handling skills

Explore the versatility of sourdough discard with our sweet treats. Try different frostings, glazes, and make-ahead methods. Enjoy the flavors of sourdough whenever you want.

Troubleshooting Common Sourdough Discard Recipes

Exploring sourdough discard recipes can be fun but comes with challenges. You might face a few common issues when using leftover sourdough starter. But don’t worry, with some troubleshooting, you can solve these problems and enjoy your sourdough discard fully.

Adjusting Consistency and Texture

Getting the right consistency in sourdough discard recipes can be tricky. If your dough or batter is too thick, add a bit more milk or water. If it’s too thin, add a little more flour. Always follow the recipe’s instructions to get the texture you want.

Addressing Flavor Challenges

Flavor issues in sourdough discard recipes can be a problem. If it tastes too sour, use less discard or add honey or maple syrup. If it’s too mild, add spices, herbs, or citrus zest to boost the flavor.

Troubleshooting Baking Issues

  • Uneven baking: Make sure your oven is at the right temperature. Rotate the baking sheet or pan to avoid hot spots.
  • Soggy texture: Cook for longer or at a higher temperature. Use the right pan or bakeware.
  • Dry or crumbly results: Add more liquid or bake for less time to avoid drying out.

Every sourdough discard is different, so you might need to make adjustments. Be patient, experiment, and tweak the recipe until it’s just right. With practice, you’ll soon be making tasty sourdough discard dishes.

Advanced Techniques for Sourdough Discard Baking

As an experienced baker, you can take your sourdough discard recipes to new heights by mastering advanced techniques. Precise temperature control is crucial during the fermentation and baking stages. This allows you to achieve the perfect rise, texture, and flavor in your sourdough discard creations.

Temperature Control Methods

Carefully monitoring and adjusting the temperature throughout the baking process is key. Use insulated proofing containers or a temperature-regulated environment to maintain the optimal fermentation temperature. This ensures your dough rises evenly and develops a robust flavor profile.

Similarly, pay close attention to your oven’s temperature and adjust it as needed. This helps achieve the desired crust and crumb structure.

Hydration Level Adjustments

Experimenting with the hydration levels in your sourdough discard recipes can lead to remarkable results. By adding or reducing the amount of water, you can create a wide range of textures. This includes tender and moist to crisp and chewy.

Carefully observe the dough’s behavior and make subtle adjustments to the hydration. This helps achieve your desired outcomes, such as lighter, airier pancakes or heartier, more substantial crackers.

Flavor Development Strategies

Unlock the complex flavors inherent in your sourdough discard by employing various techniques. Try fermenting your discard for an extended period. This allows the natural yeasts and bacteria to work their magic, resulting in a deeper, more nuanced taste.

Experiment with adding complementary ingredients, such as herbs, spices, or citrus zest. This enhances the overall flavor profile of your baked goods.

FAQ

What is sourdough discard and how can I use it?

Sourdough discard is what you remove from your starter when you feed it. Instead of throwing it away, you can use it to make tasty recipes. Try making pancakes, waffles, crackers, or pizza dough.

What are the nutritional benefits of using sourdough discard?

Sourdough discard is full of probiotics, vitamins, and minerals. It’s also easier to digest than regular flour. This makes it great for those with sensitive stomachs.

How should I store my sourdough discard?

Store your sourdough discard in an airtight container in the fridge for up to a week. You can also freeze it for months. This way, you always have it ready to use.

What kind of tools and ingredients do I need for sourdough discard recipes?

You’ll need basic baking tools like a bowl, spatula, and baking sheet. Use high-quality bread flour or all-purpose flour for the best results.

How do I make the perfect sourdough discard pancakes and waffles?

For perfect pancakes and waffles, let the batter rest for 30 minutes. This develops the gluten and enhances the sourdough flavor. Add sweet or savory toppings for a great breakfast or brunch.

Can I make crispy sourdough discard crackers at home?

Yes, you can! Mix the discard with simple ingredients, roll out the dough, and bake until crispy. Try different herbs and seasonings for a tasty snack.

How do I use sourdough discard to make pizza dough?

Sourdough discard is great for pizza dough, adding flavor and texture. Let the dough ferment for several hours. Then, bake it at high heat for a crispy crust.

Can I make homemade sourdough bagels using discard?

Yes, you can! Sourdough discard makes bagels chewy and flavorful. Boil the shaped bagels before baking for that classic look and taste. Get creative with toppings for a unique bagel.

How do I make sweet sourdough discard treats like cinnamon rolls?

Use sourdough discard to make sweet treats like cinnamon rolls and pastries. It adds moisture and flavor to the dough. Top with frostings and glazes for a decadent treat.

What are some common issues I might encounter with sourdough discard recipes?

You might face challenges like adjusting consistency and managing fermentation times. Follow your recipe closely and experiment to find what works best for you.

What advanced techniques can I use for sourdough discard baking?

Experienced bakers can try advanced techniques like precise temperature control and adjusting hydration levels. These can help develop complex flavors and textures in your baking.

1 comment
0 FacebookTwitterPinterestEmail
Vegan Desserts
Vegan Desserts

Best Vegan Desserts to Satisfy Your Sweet Tooth

Serves: 8 Prep Time: Cooking Time:
Nutrition facts: 180 calories 9 grams fat
Rating: 5.0/5
( 1 voted )

Ingredients

  • 1 cup almond flour
  • 1/4 cup cocoa powder
  • 1/2 cup maple syrup
  • 1/4 cup coconut oil, melted
  • 1 tsp vanilla extract
  • 1/4 tsp sea salt
  • 1/2 cup dairy-free chocolate chips (optional)
  • 1/4 cup shredded coconut (optional)

Instructions

1. Preheat the oven to 350°F (175°C). Line a baking dish with parchment paper. 2. In a large bowl, combine almond flour, cocoa powder, and sea salt. 3. Add the maple syrup, melted coconut oil, and vanilla extract to the dry ingredients. Mix until smooth. 4. Stir in the dairy-free chocolate chips and shredded coconut if using. 5. Pour the batter into the prepared baking dish and spread it evenly. 6. Bake for 15-20 minutes, or until the edges are firm and the center is slightly soft. 7. Let the dessert cool before cutting into squares.

Notes

These vegan bars can be stored in an airtight container for up to a week. For a nut-free version, use oat flour instead of almond flour. Feel free to swap in other add-ins like chopped nuts or dried fruit for added texture and flavor.

Vegan desserts are a tasty choice for those who love sweets but want to stay true to their values. Whether you’re already vegan or just trying new things, this article will show you the best vegan desserts. They’re sure to make your sweet tooth happy.

Key Takeaways

  • Discover a variety of delicious vegan dessert recipes that cater to diverse tastes and dietary needs.
  • Learn about the key ingredients and substitutes used in vegan baking to create rich, creamy, and indulgent treats.
  • Explore easy-to-make vegan chocolate brownies, creamy vegan cheesecake variations, and other beginner-friendly desserts.
  • Discover gluten-free vegan cookie options and healthy vegan dessert alternatives that don’t compromise on flavor.
  • Enjoy traditional desserts made vegan, allowing you to savor the classics without sacrificing your plant-based lifestyle.

Understanding Vegan Dessert Ingredients and Substitutes

Making tasty vegan desserts means knowing the key ingredients and their plant-based options. These alternatives open up a world of possibilities. You can make vegan gluten free desserts that are both delicious and satisfying.

Plant-Based Egg Alternatives

Eggs are important in baking, but vegans have many substitutes. Flax or chia seeds, mashed bananas, applesauce, and commercial egg replacers work well. They help your vegan desserts turn out right.

Natural Sweeteners for Vegan Baking

Many desserts use refined sugar, but vegan baking lets you try natural sweeteners. Maple syrup, agave nectar, coconut sugar, and date paste add great flavors. They’re also healthier than processed sugar.

Dairy-Free Options That Work Best

Switching to dairy-free products is key in vegan desserts. Use plant-based milk like almond, oat, or coconut milk. Try dairy-free butter and cream made from coconut oil or cashews. These options work well in your favorite vegan dessert recipes.

IngredientVegan Substitute
EggsFlax seeds, chia seeds, mashed bananas, applesauce, commercial egg replacers
Refined SugarMaple syrup, agave nectar, coconut sugar, date paste
Dairy MilkAlmond milk, oat milk, coconut milk
ButterCoconut oil, dairy-free butter substitutes
CreamCashew cream, coconut cream

Knowing these vegan dessert ingredients and their substitutes is crucial. It helps you make delicious, dairy-free and egg-free treats. These are perfect for different diets and tastes.

Quick and Easy Vegan Chocolate Brownies

Indulge in the rich, fudgy goodness of vegan chocolate brownies that are a breeze to make. These easy vegan desserts satisfy your sweet tooth without any dairy or eggs. They’re perfect for best vegan desserts lovers. Follow this simple recipe to whip up a batch of these decadent treats.

Ingredients:

  • 1 cup all-purpose flour
  • 1/2 cup unsweetened cocoa powder
  • 1/2 teaspoon baking soda
  • 1/4 teaspoon salt
  • 1/2 cup non-dairy milk (such as almond or soy)
  • 1/2 cup maple syrup or agave nectar
  • 1/3 cup melted coconut oil or vegan butter
  • 1 teaspoon vanilla extract
  • 1/2 cup vegan chocolate chips (optional)

Instructions:

  1. Preheat your oven to 350°F (175°C). Grease an 8×8-inch baking pan or line it with parchment paper.
  2. In a medium bowl, whisk together the flour, cocoa powder, baking soda, and salt.
  3. In a separate bowl, combine the non-dairy milk, maple syrup or agave, melted coconut oil or vegan butter, and vanilla extract.
  4. Pour the wet ingredients into the dry ingredients and mix until just combined. Fold in the vegan chocolate chips, if using.
  5. Spread the batter evenly into the prepared baking pan.
  6. Bake for 20-25 minutes, or until a toothpick inserted in the center comes out clean.
  7. Allow the brownies to cool completely before cutting into squares and serving.

For the perfect easy vegan desserts and best vegan desserts, try this foolproof recipe for vegan chocolate brownies. Enjoy the indulgent flavor and fudgy texture that will have your guests coming back for more.

“These vegan brownies are so rich and decadent, you won’t believe they’re dairy-free and egg-free!”

IngredientVegan Alternative
EggsFlax eggs (1 Tbsp ground flax + 3 Tbsp water)
ButterCoconut oil or vegan butter
MilkAlmond, soy, or oat milk
Chocolate chipsDairy-free chocolate chips or chopped dark chocolate

Creamy Vegan Cheesecake Variations

Enjoy the rich flavors of vegan cheesecake without dairy. Cashews make a creamy base that’s as good as traditional cheesecake. Try these tempting vegan cheesecake variations.

Raw Cashew Cheesecake Base

Soaked raw cashews are key to a smooth vegan cheesecake. Soak them in water for at least 4 hours, or overnight. Then, drain and blend with plant-based milk, sweetener, and lemon juice until smooth.

Pour the creamy base into a springform pan. Chill it until it’s set.

Seasonal Fruit Toppings

  • Make your vegan dessert pop with seasonal fruits. Try fresh berries, sliced peaches, or mango-passion fruit compote for a tropical flavor.
  • For a rich touch, add homemade fruit preserves or a warm berry coulis.

No-Bake Options

Vegan dessert recipes can be no-bake. Chill the cashew filling in the fridge until firm. This keeps the cheesecake creamy without baking.

Try different flavors and toppings to make your vegan cheesecake unique. Choose from vanilla bean to bold chocolate swirl. This dairy-free dessert is sure to please.

Vegan Dessert Recipes for Beginners

Starting with vegan baking? No worries! We’ve got you covered. Exploring vegan desserts is fun and tasty. These vegan dessert recipes are great for beginners.

These recipes include no-bake treats, simple cakes, and cookies. They use easy ingredients and methods. You’ll make delicious vegan treats quickly.

Vegan Chocolate Truffles

Try vegan chocolate truffles for a rich treat. You need dairy-free chocolate, coconut milk, and vanilla. Roll them in cocoa or nuts for a nice touch.

Easy Vegan Fruit Tarts

  • Make a vegan tart crust with nuts, dates, and salt.
  • Fill it with fresh fruit like berries, apples, or mango.
  • Add maple syrup or powdered sugar for a sweet finish.

Remember, vegan baking is all about trying new things. Start with these recipes. Soon, you’ll make amazing vegan desserts that everyone will love.

If you’re a vegan with a gluten sensitivity, you don’t have to miss out on cookies. Gluten-free vegan desserts offer many tasty options. You can use nutty almond flour or hearty oat flour for delicious treats.

Almond Flour Alternatives

Almond flour is great for gluten-free vegan baking, but there are other choices too. Try these nut and seed-based flours for your vegan cookies:

  • Coconut flour: Adds a delicate sweetness and tender crumb.
  • Cashew flour: Provides a creamy, buttery texture.
  • Sunflower seed flour: A nut-free alternative with a nutty flavor.
  • Buckwheat flour: Imparts an earthy, slightly nutty taste.

Perfect Texture Tips

Getting the right texture in gluten-free vegan cookies takes some trial and error. Here are some tips to help:

  1. Use a mix of flours for a balanced consistency.
  2. Add ground flaxseed or chia seeds as natural binders.
  3. Chill the dough before baking to prevent spreading.
  4. Adjust baking time and temperature to avoid over-browning.

With a bit of creativity and focus, you can make amazing vegan gluten free desserts. They’ll be the best vegan desserts you’ve ever had.

Decadent Vegan Ice Cream Creations

Learn how to make delicious vegan ice cream at home! You can enjoy creamy, smooth, and tasty frozen treats just like the dairy kind. Discover the best vegan desserts and vegan dessert recipes to satisfy your sweet tooth.

Achieving Creamy Texture

To get a creamy texture in vegan ice cream, use plant-based fats and thickeners. Choose coconut milk, cashews, or avocado as your base. Blend them until they’re silky smooth. Add arrowroot powder or tapioca starch for a scoopable consistency.

Flavor Variations

Make your vegan ice cream special with mix-ins and toppings. Add melted dark chocolate for a chocolate chip treat. Mix in nuts, granola, or berries for texture. Try spices like cinnamon, cardamom, or ginger for a unique flavor.

Vegan Ice Cream FlavorKey Ingredients
Salted CaramelCashews, coconut milk, maple syrup, sea salt
Strawberry SwirlCoconut cream, fresh strawberries, vanilla extract
Mint ChipAlmond milk, cacao nibs, fresh mint leaves

With a bit of creativity and the right vegan dessert recipes, you can make a variety of best vegan desserts. They’ll satisfy your cravings and impress your friends.

“Vegan ice cream has come a long way, and the options for creating rich, creamy, and flavorful frozen treats are endless.”

Healthy Vegan Dessert Alternatives

Vegan desserts are getting more popular because they’re healthier and plant-based. They offer tasty and nutritious treats. You can enjoy them without feeling guilty, as they help you eat better.

Natural Sugar-Free Options

Vegan desserts use natural sweeteners instead of refined sugars. You can find sweetness in dates, maple syrup, coconut sugar, and applesauce. These options are better for your health than regular sugar.

Try recipes that use these natural sweeteners. They let you enjoy sweet treats without the guilt.

Protein-Rich Sweet Treats

Vegan desserts can also be packed with protein. Add nut butters, chia seeds, or plant-based protein powders to your recipes. This makes your desserts both delicious and nutritious.

These protein-rich desserts help with muscle recovery and weight management. They’re great for your overall health.

Vegan DessertProtein Content (per serving)Ingredient Highlights
No-Bake Peanut Butter Cups8gPeanut butter, chia seeds, dark chocolate
Chocolate Avocado Mousse5gAvocado, cocoa powder, maple syrup
Almond Flour Blondies7gAlmond flour, tahini, coconut sugar

Healthy vegan desserts let you enjoy sweet treats while eating well. Try natural sweeteners and protein-rich options. You’ll find new ways to indulge that are good for you.

Traditional Desserts Made Vegan

Craving the rich, indulgent flavors of classic desserts but seeking a plant-based alternative? The world of vegan baking has evolved. Now, you can enjoy delectable recreations of your favorite treats. From vegan chocolate cake to vegan apple pie, the options are endless.

Using innovative ingredients like cashews, coconut milk, and ground flax, you can get the creamy textures and tastes of classic desserts. Whether baking vegan tiramisu or vegan brownies, finding the right flavors and textures is key. With a bit of experimentation and creativity, you can satisfy your sweet tooth while staying vegan.

Explore the world of vegan dessert recipes and discover how to recreate the flavors you love in a plant-based form. From vegan pie crust to vegan cheesecake, the possibilities are vast. Indulge in the comfort and nostalgia of traditional desserts, made vegan and delicious.

FAQ

What are the best vegan desserts to satisfy my sweet tooth?

Vegan desserts are a tasty and varied way to satisfy your sweet tooth. You can enjoy everything from classic chocolate brownies to creamy cheesecakes. There are also healthier options and vegan versions of traditional desserts.

How can I substitute common baking ingredients to make vegan desserts?

To bake vegan desserts, you can use plant-based egg substitutes and natural sweeteners. Dairy-free options help replicate the taste and texture of traditional recipes. This is crucial for making great vegan baked goods.

What are some easy vegan dessert recipes for beginners?

Beginners can start with simple vegan dessert recipes. These often need just a few ingredients and are easy to follow. Try making quick vegan chocolate brownies or other no-bake desserts.

Can I make vegan desserts that are also gluten-free?

Yes, you can make delicious gluten-free vegan cookies. Use flours like almond flour for the best results. With the right techniques, your gluten-free vegan baking will turn out perfectly.

How can I make creamy vegan ice cream at home?

Homemade vegan ice cream can be creamy and delicious. Blend cashews or use plant-based milk alternatives to achieve this. You can make a variety of rich and tasty vegan ice cream flavors.

Are there any healthy vegan dessert alternatives?

Yes, there are many healthy vegan dessert options. They use natural sweeteners and nutrient-rich ingredients. Enjoy sugar-free and protein-rich vegan treats that are good for you and taste great.

0 comments
0 FacebookTwitterPinterestEmail
Pie Crust

Perfect Homemade Pie Crust: 1 Easy Recipe

by IDYA
Pie Crust

Perfect Homemade Pie Crust: 1 Easy Recipe

Serves: 1 Prep Time: Cooking Time:
Nutrition facts: 150 calories 10 grams fat
Rating: 5.0/5
( 1 voted )

Ingredients

  • 1 1/4 cups all-purpose flour
  • 1/4 teaspoon salt
  • 1/2 cup unsalted butter, cold and cubed
  • 3-4 tablespoons ice water

Instructions

1. In a large bowl, whisk together flour and salt. 2. Add cold, cubed butter to the flour mixture. Use a pastry cutter or your fingers to work the butter into the flour until it resembles coarse crumbs. 3. Gradually add ice water, 1 tablespoon at a time, until the dough begins to come together. 4. Turn the dough out onto a lightly floured surface and knead it a few times until it forms a smooth ball. 5. Flatten the dough into a disk, wrap it in plastic wrap, and refrigerate for at least 30 minutes. 6. Once chilled, roll out the dough on a floured surface to your desired thickness for your pie. 7. Transfer the dough to a pie dish, trim any excess, and crimp the edges as desired. Follow your pie recipe's instructions for baking.

Notes

For a flakier crust, make sure your butter is very cold and handle the dough as little as possible. If you're making a double-crust pie, simply double the ingredients for the dough. This crust can be pre-baked if your pie recipe calls for it; simply bake at 375°F (190°C) for 15-20 minutes until golden.

Making the perfect homemade pie crust might seem hard, but it’s easier than you think. With the right techniques and a bit of practice, you’ll soon be making flaky, buttery crusts like a pro. Whether it’s a classic apple pie or a creamy tart, the crust is key. This guide will teach you everything you need to know to become a pie crust master. You’ll learn about the best ingredients and how to decorate your crust like a pro. Get ready to wow your friends and family with your pie-making skills!

Key Takeaways

  • Understand the essential ingredients for a flaky, tender pie crust
  • Discover the science behind perfect pastry dough
  • Learn step-by-step techniques for mixing, rolling, and shaping your crust
  • Avoid common mistakes that can ruin your pie crust
  • Achieve the perfect flaky texture through temperature control and handling
  • Try easy and advanced recipes for professional-looking pie crust results
  • Troubleshoot any pie crust problems with our helpful guide

Understanding the Basics of Pie Crust Making

Making the perfect pie crust recipe butter is a mix of art and science. To get that flaky crust, you need to know the main ingredients and the science behind it.

Essential Ingredients for a Flaky Crust

The base of a great pie crust is a few key things:

  • High-quality flour, like all-purpose or pastry flour, for structure
  • Chilled butter or shortening for fat pockets that melt in the oven
  • Ice-cold water to hydrate the dough and help gluten develop
  • A pinch of salt to boost the flavor

The Science Behind Perfect Pastry

The secret to a flaky crust is balancing fat and gluten. When mixing, flour proteins form gluten strands for structure. Cold fat is then added, creating pockets that expand in the oven, making the crust flaky.

Tools You’ll Need

To succeed with your pie crust recipe butter, you’ll need the right tools:

  1. A pastry cutter or two forks to mix the fat into the flour
  2. A rolling pin to flatten the dough evenly
  3. A pie plate or baking dish to hold your pie
  4. Parchment paper or a lightly floured surface for rolling out the dough

With a good grasp of the ingredients and the science, you’ll make perfect flaky crust every time.

The Best Ingredients for Your Butter Pie Shell

Creating the perfect butter pie shell starts with the right ingredients. Each part, from flour to salt, affects the taste, texture, and look of your pastry. Let’s look at the top ingredients for a standout butter pie crust.

Choosing the right flour is crucial. All-purpose flour is a good choice because it’s not too soft or too hard. For an even flakier crust, mix all-purpose flour with pastry flour. Pastry flour is made from softer wheat, making it more tender.

Don’t forget the salt. A bit of high-quality salt can really boost your pie shell’s flavor. It balances the butter’s richness and adds depth. Try different salts like kosher or sea salt to see what you like best.

  • All-purpose flour for a balanced texture
  • Pastry flour for an extra-flaky crust
  • High-quality salt to enhance flavor

The butter is the main attraction in a butter pie shell. The debate is whether to use all butter, a mix of butter and shortening, or all shortening. Butter gives a rich flavor and flaky texture. Shortening makes the crust tender and crisp. Play with different mixes to find your favorite.

For a great butter pie shell, focus on every detail. Choose the best ingredients and learn the pie crust making techniques. With these steps, you’ll make a pastry that will wow your loved ones.

How to Make Pie Crust: Step-by-Step Guide

Making a homemade pie crust is an art. Our guide will help you make a flaky and delicious crust every time. It’s perfect for classic apple pies or savory quiches. You’ll learn how to mix the dough, rest and chill it, and roll it out just right.

Mixing the Dough

Begin by mixing flour, cold butter or shortening, and ice water. Use a food processor or your hands to mix until it looks like coarse crumbs. Don’t overwork it, or your crust might turn out tough.

Resting and Chilling Tips

After mixing, shape the dough into a disc and wrap it in plastic wrap. Let it rest in the fridge for at least 30 minutes. This helps the dough relax and the fat firm up, making it easier to roll out. For the best results, chill it for 1-2 hours before rolling.

Rolling Techniques

When you’re ready to roll, lightly flour your surface and rolling pin. Roll the dough from the center outwards, turning it often to keep it even. If it sticks, add more flour. Aim for a circle 2 inches wider than your pie plate.

By following these steps, you’ll make a perfect homemade pie crust. It’s sure to impress your family and friends. The secret to a flaky crust is gentle handling and proper chilling before rolling.

Common Mistakes to Avoid When Making Pie Crust

Making the perfect pie crust is an art. By avoiding common mistakes, you can make a flaky, golden crust. Knowing what can go wrong helps you avoid these issues and make a flawless pie crust every time.

One big mistake is overworking the dough. This can make the crust tough and chewy. To avoid this, mix the ingredients gently and don’t knead the dough too much. Just fold and press it together until it comes together.

Using warm ingredients is another common mistake. Pie crust dough needs to be cold for the butter or fat to stay solid. This makes the crust flaky. So, chill your flour, fat, and even the water or milk before mixing the dough.

Not chilling the dough enough can also cause problems. Make sure to refrigerate the dough for at least 30 minutes, or up to 2 hours, before rolling it out. This lets the gluten relax, so the crust doesn’t shrink as it bakes.

By knowing these pie crust troubleshooting tips and pie crust tips, you can avoid common mistakes. With practice and attention to detail, you’ll make pies that impress everyone.

Tips for Achieving the Perfect Flaky Texture

Creating a flaky, buttery pie crust is a goal for many bakers. With a few tips, you can make your pie crust stand out. Let’s uncover the secrets to a flaky pie crust texture.

Temperature Control

Temperature is key for a pie crust texture. Keep your ingredients and tools cold. This helps keep the fat and flour balance right for a flaky crust. Chill your butter, water, and mixing bowl before starting.

This prevents the fat from melting too fast. A melted fat can make the crust tough and dense.

Handling Techniques

Handling the dough gently is crucial for a flaky crust. Overworking can make the dough tough. Mix ingredients lightly and handle the dough carefully during rolling and shaping.

Avoid stretching or pulling the dough. This can ruin the flaky pie crust texture.

Moisture Balance

Finding the right moisture balance is essential for a flaky pie crust. Too little moisture makes the crust dry and crumbly. Too much makes it tough and heavy.

Watch the water amount and adjust based on your kitchen’s humidity and temperature. Aim for a dough that’s easy to work with but not too wet.

“The key to a perfect pie crust lies in understanding the science behind the ingredients and how they interact. With a little practice and patience, you can master the techniques to create a flaky, buttery pastry every time.”

Easy Pie Crust Recipe for Beginners

Starting your pie-making journey is exciting, but making the perfect easy pie crust recipe can seem tough. Don’t worry! We have a foolproof recipe that will help you make delicious homemade pie crusts with ease.

This beginner pie crust recipe uses simple ingredients and easy steps. It’s perfect for new pie makers. Just follow our guide, and you’ll soon be making flaky, tender pie dough like a pro.

  1. Gather your ingredients: all-purpose flour, unsalted butter, ice water, and a pinch of salt.
  2. In a food processor, pulse the flour and salt together until combined.
  3. Add the cubed, chilled butter and pulse until the mixture resembles coarse crumbs.
  4. Gradually add ice water, one tablespoon at a time, pulsing the dough until it just begins to come together.
  5. Turn the dough out onto a lightly floured surface and gently shape it into a disk. Wrap in plastic and chill for at least 1 hour.
  6. When ready to use, roll out the dough on a lightly floured surface to your desired size and shape.

With this simple easy pie crust recipe, you’ll make homemade pie crusts that are as good as store-bought ones. You’ll impress your friends and family with your baking skills. Plus, you’ll enjoy making a delicious pie from scratch.

“Making pie crust from scratch is easier than you think. This recipe takes the guesswork out of it for beginners.”

Advanced Techniques for Professional-Looking Results

Ready to improve your pie crust skills? Try these advanced techniques for stunning pies. Decorative edges and intricate lattice tops will make your desserts stand out. They add beauty and quality to your homemade treats.

Decorative Edges

Make your pie crust look amazing with decorative edges. Try fluted, scalloped, or crimped edges. Use your fingers or special tools for these designs. They not only look great but also strengthen your crust.

Don’t worry if it takes practice to get it right. Keep trying different designs until you find your favorite.

Lattice Top Designs

Lattice top pies are a classic and beautiful choice. Cut your dough into thin strips and weave them over your filling. For a fancy touch, try braiding or making a detailed lattice design.

With patience and care, you can create a pie that will wow your guests.

Blind Baking Methods

Blind baking is key for a perfect professional pie crust. It means baking the crust alone to avoid a soggy bottom. To blind bake, line your pie dish with dough, prick the bottom, and fill with pie weights or beans.

Bake until the crust is golden, then remove the weights. Keep baking until it’s fully cooked.

By using these advanced techniques, you’ll make pies that look like they came from a pro. Your friends and family will love your baking.

Troubleshooting Your Pie Crust Problems

Baking the perfect pie is an art. The pie crust can be the trickiest part. But, with some troubleshooting, you can fix pie crust problems and get a flaky, golden crust. Let’s look at common issues and how to solve them.

Tough and Chewy Crust

A tough and chewy crust usually comes from overworking the dough. Too much kneading or rolling makes the gluten develop too much. This makes the crust tough. To fix this, mix and roll the dough gently. Try not to handle it too much.

Soggy Bottom Crust

A soggy bottom crust can spoil a great pie. It’s often due to underbaking or too much filling. To prevent soggy crusts, bake the bottom crust well before adding filling. Par-baking the crust can also help it stay crisp.

Shrinking Crust

A shrinking crust is a big disappointment. It can happen if the dough isn’t chilled enough or is overworked. To fix a shrinking crust, chill the dough for at least 30 minutes before baking. Handle it gently when rolling.

Uneven Baking

If your pie crust bakes unevenly, it might be the oven’s fault. Uneven baking can be due to oven temperature or placement. To ensure even baking, check your oven’s temperature. Try rotating the pie halfway through baking.

By fixing these common pie crust problems and using the right fixes, you’ll get better at making homemade pie crust. With practice and attention to detail, you’ll get perfect results every time.

ProblemCauseSolution
Tough and Chewy CrustOverworking the doughBe gentle when mixing and rolling the dough
Soggy Bottom CrustUnderbaking or using too much fillingFully bake the bottom crust before adding filling, consider par-baking
Shrinking CrustInsufficient chilling or overworking the doughChill the dough for at least 30 minutes before rolling and baking, handle gently
Uneven BakingOven temperature or placement issuesEnsure oven is properly calibrated, rotate the pie halfway through baking

Make-Ahead and Storage Guidelines

Learning to make homemade pie crust is more than just mixing and rolling. It’s about knowing how to store pie crust and freeze pie crust right. These tips will help you save time and have a homemade pie shell ready whenever you want.

Freezing Instructions

Freezing is a great way to store pie crust for later. Roll out the dough, put it in a pie plate, and freeze it. Once it’s frozen, take it out of the plate and store it in a bag or container. Just thaw it in the fridge overnight before baking.

For crusts that are partially baked, cool them down, then wrap them in plastic or foil. Freeze them for later use. This is perfect for preparing the crust ahead of time.

Proper Storage Methods

Keep pie crust in an airtight container or wrapped in plastic at room temperature. This keeps the dough fresh and prevents it from drying out. Unbaked crusts can stay in the fridge for 3 days. Baked ones can last up to a week.

Using the right storage and freezing pie crust methods keeps your pastry fresh. Preparing your crust ahead of time saves you time and effort later.

Variations on Classic Pie Crust Recipe

Take your pie-making to the next level with creative pie crust variations. You can mix up the traditional recipe with different ingredients. Try adding herbs, citrus, or whole grain flours to your dough.

For gluten-free diets, swap all-purpose flour for gluten-free blends or almond meal. Vegans can use coconut oil or plant-based butter for a flaky crust. Whole grain fans can add flour like whole wheat or oat to make their pies healthier.

Looking to add flavor or meet dietary needs? The options for pie crust variations are endless. Let your creativity shine and make pies that are uniquely yours.

FAQ

What are the essential ingredients for a flaky pie crust?

For a flaky pie crust, you need flour, fat (like butter or shortening), and a bit of cold water. How much and how you mix these ingredients is key to getting it right.

How do I ensure my pie crust doesn’t shrink during baking?

To stop your pie crust from shrinking, chill the dough well before baking. Use crimping or docking to keep it in place. Also, avoid overworking the dough to prevent gluten buildup and shrinkage.

Can I use a food processor to make pie crust?

Yes, a food processor is great for pie crust. Just pulse the ingredients gently to avoid a tough crust. Chill the dough afterward for the best results.

How do I achieve a flakier texture in my pie crust?

For flakiness, keep your butter or fat cold before mixing it with flour. Don’t overwork the dough to avoid too much gluten. Proper temperature and resting the dough are also important.

Can I substitute other types of fat for butter in a pie crust recipe?

Yes, you can use shortening, lard, or a mix of fats instead of butter. Each fat adds different flavors and textures, so try different ones to find your favorite.

How do I blind bake a pie crust?

Blind baking involves lining the crust with parchment or foil and filling it with weights or beans. Bake at 400°F for 15-20 minutes. Then, remove the weights and bake until golden.

Can I freeze homemade pie crust for later use?

Yes, you can freeze homemade pie crust. Wrap it tightly in plastic or foil and freeze. Thaw in the fridge overnight before baking.

What’s the difference between a single-crust and a double-crust pie?

A single-crust pie has a bottom crust only. A double-crust pie has a bottom and top crust. Double-crust pies, like fruit pies, use the top crust to hold the filling and look nice.

How do I prevent a soggy bottom crust?

To avoid a soggy bottom, blind bake the crust first. You can also sprinkle breadcrumbs or crushed crackers on the bottom before adding the filling to soak up moisture.

1 comment
1 FacebookTwitterPinterestEmail
Gluten-Free Desserts

Gluten-Free Desserts: Easy Recipes for Everyone

Serves: 6 Prep Time: Cooking Time:
Nutrition facts: 200 calories 10 grams fat
Rating: 5.0/5
( 1 voted )

Ingredients

  • 1 cup almond flour
  • 1/4 cup coconut flour
  • 1/2 cup coconut sugar
  • 1/4 cup butter, softened
  • 2 large eggs
  • 1 tsp vanilla extract
  • 1/2 tsp baking powder
  • 1/4 tsp salt
  • 1/4 cup dark chocolate chips (optional)

Instructions

1. Preheat the oven to 350°F (175°C). Line a baking sheet with parchment paper.

2. In a medium bowl, combine almond flour, coconut flour, baking powder, and salt.

3. In another bowl, beat together butter, coconut sugar, eggs, and vanilla extract until smooth.

4. Gradually add the dry ingredients to the wet ingredients and mix until well combined.

5. Fold in the chocolate chips if using.

6. Scoop the dough onto the prepared baking sheet, shaping them into cookie rounds.

7. Bake for 20-25 minutes, or until the edges are golden brown.

8. Let the cookies cool for a few minutes before transferring to a wire rack to cool completely.

Notes

You can substitute the chocolate chips with dried fruit, nuts, or other add-ins of your choice.

For a lower-fat option, use coconut oil or a dairy-free butter alternative.

These cookies can be stored in an airtight container for up to one week.

In recent years, more people are looking for gluten-free desserts. This is because of celiac disease, gluten sensitivity, and the need for healthier food. If you or someone you love has a gluten intolerance, or if you just want to try new desserts, this article is for you. It will show you how to make delicious gluten-free desserts that everyone can enjoy.

Starting with gluten-free baking might seem hard at first. But with the right tips and simple recipes, you’ll soon be making amazing treats. This guide will teach you how to make everything from rich cakes and cookies to creamy puddings and no-bake treats. You’ll learn how to make desserts that are both tasty and gluten-free.

Key Takeaways

  • Explore the essentials of gluten-free baking, including flour alternatives and binding agents.
  • Discover quick and easy no-bake dessert options for busy cooks.
  • Dive into popular gluten-free desserts, from simple cookies to basic cake variations.
  • Learn how to convert traditional recipes to gluten-free versions.
  • Indulge in seasonal and holiday-specific gluten-free dessert ideas.

Understanding Gluten-Free Baking Essentials

Gluten-free baking opens up a world of tasty desserts. It’s great for those with dietary needs or just for fun. Knowing the basic ingredients and tools is crucial. Let’s explore how to make delicious simple gluten free desserts and gluten free dessert ideas.

Common Gluten-Free Flour Alternatives

Flours are key in gluten-free baking. They help get the right texture and structure. Here are some options:

  • Almond flour: It has a nutty taste and a soft crumb.
  • Coconut flour: It adds a sweet flavor and keeps things moist.
  • Rice flour: It’s neutral and works well in many recipes.
  • Buckwheat flour: It gives a unique earthy taste and a hearty feel.

Essential Binding Agents and Stabilizers

Gluten-free baking needs substitutes for gluten. These help with texture and rise. Look for:

  1. Xanthan gum: It’s a thickener that helps bind and stabilize.
  2. Psyllium husk: It’s a natural fiber that adds structure and chewiness.
  3. Egg whites: They help with structure and lift, especially in meringues.

Must-Have Tools for Gluten-Free Baking

The right tools make gluten-free baking easier. Here are some essentials:

  • A good food processor or blender for mixing and grinding.
  • Sturdy baking sheets and pans for even heat.
  • A digital scale for accurate measurements.
  • Parchment paper or silicone mats for easy cleanup.

With these basics, you can make tasty simple gluten free desserts and gluten free dessert ideas. Everyone will love them.

Quick and Easy No-Bake Dessert Options

In the world of easy gluten free desserts, no-bake treats are the best. They need little prep, perfect for busy lives or new gluten-free bakers. You can find everything from refreshing fruit desserts to rich no-bake cheesecakes and simple fridge cakes here.

The Lemon Coconut Chia Pudding is a standout. Mix chia seeds, coconut milk, and lemon juice for a creamy, protein-rich treat. Add toasted coconut flakes for extra crunch.

For a rich dessert, try the Chocolate Avocado Mousse. Blend avocado, cocoa, and sweetener for a smooth, chocolatey delight. Serve in ramekins or parfait glasses for a stunning look.

The Strawberry Swirl Cheesecake Bars are a hit. They have a gluten-free crust and a creamy cheesecake with strawberry swirl. Chill in the fridge for a sweet and tangy treat.

The Chocolate Refrigerator Cake is a classic. Layer gluten-free cookies or wafers with chocolate ganache. Chill until set for a fudgy, no-bake dessert.

Discover the joy of easy gluten free desserts with these quick and 5 star gluten-free dessert recipes. They’re easy to make and will impress your taste buds.

Starting a gluten-free diet doesn’t mean giving up on desserts. There are many easy and tasty gluten-free recipes for beginners. You can make everything from classic cookies to creamy puddings. These treats let you enjoy sweet flavors while following your dietary rules.

Making gluten-free cookies is easy. Try gluten-free chocolate chip cookies for a classic taste. They need gluten-free flour, butter, and chocolate chips. For something different, make gluten-free peanut butter cookies. They need just peanut butter, sugar, and an egg.

Basic Cake Variations

Gluten-free cakes might seem hard, but they’re not. Start with a simple gluten-free vanilla cake. It’s great for many toppings and fillings. Or, go for a gluten-free chocolate cake for a decadent treat.

Easy Pudding Alternatives

For a quick gluten-free dessert, try a pudding. Gluten-free rice pudding is comforting, made with rice, milk, and sugar. Or, make gluten-free chia pudding with chia seeds, milk, and flavorings. It’s healthy and tasty.

Exploring these gluten-free desserts shows you don’t have to miss out on sweets. With some creativity and the right ingredients, you can make many delicious desserts. They’re both tasty and fit your dietary needs.

Converting Traditional Recipes to Gluten-Free

Starting a gluten-free diet doesn’t mean you must miss out on desserts. With a few tweaks, you can turn your favorite treats into gluten free dessert ideas and 5 star gluten-free dessert recipes. Follow these tips to make your beloved desserts gluten-free.

Finding the right gluten-free flour is key. Use a mix of flours like almond flour, coconut flour, or rice flour to get the right texture. Also, remember to adjust the liquid content, as gluten-free flours soak up more.

  1. Try using xanthan gum or psyllium husk to keep your gluten-free baked goods together.
  2. Adjust baking times and temperatures. Gluten-free desserts might need longer baking or a lower oven temperature to avoid burning.

With practice, you’ll make gluten free dessert ideas that taste just as good as the originals. Start by converting recipes like fudgy brownies or fluffy muffins to begin your gluten-free baking adventure.

“Embracing a gluten-free lifestyle doesn’t mean you have to sacrifice the flavors and textures you love. With the right techniques, you can enjoy all your favorite desserts without the worry of gluten.”

Seasonal Gluten-Free Dessert Ideas

Following a gluten-free diet doesn’t mean missing out on desserts. You can enjoy everything from zesty summer fruit tarts to cozy autumn pies. And don’t forget the festive holiday treats. There’s a gluten-free option for every season.

Summer Fruit-Based Treats

Warm weather calls for refreshing gluten-free desserts. Try a vibrant berry trifle with whipped cream and gluten-free cookie pieces. Or, enjoy a creamy lemon mousse with juicy berries or stone fruit.

Cozy Fall and Winter Options

As it gets cooler, cozy up with gluten-free desserts. Make pumpkin or sweet potato pies for a comforting treat. Or, create a rich chocolate truffle with your favorite nut butter.

Holiday-Specific Desserts

Gluten-free desserts can be the stars of any celebration. Make festive Christmas cookies with rice flour or almond meal. Or, impress everyone with a gluten-free Thanksgiving pie, complete with a flaky crust and rich filling.

Every season offers a chance to enjoy delicious gluten-free desserts. With a bit of creativity and the right ingredients, you can have all your favorite treats without compromising your diet.

Chocolate Lovers’ Gluten-Free Delights

Indulge your sweet tooth with our selection of easy gluten free desserts. They’re perfect for chocolate lovers. Enjoy rich flourless chocolate cakes, decadent chocolate mousse, and classic chocolate chip cookies. Our 5 star gluten-free dessert recipes offer a unique taste experience.

Choosing the right chocolate and cocoa powder is key for gluten-free baking. Opt for high-quality, gluten-free certified chocolate and unsweetened cocoa powder. This ensures your desserts are not only tasty but also gluten-free.

Flourless Chocolate Cake

This intensely chocolaty, fudgy cake is a game-changer for gluten-free chocolate lovers. It’s made with just a few simple ingredients. It’s the perfect showstopper dessert for any occasion. Serve it with a dollop of freshly whipped cream or a scoop of your favorite ice cream for an indulgent treat.

Decadent Chocolate Mousse

Our gluten-free chocolate mousse is light, airy, and bursting with rich chocolate flavor. It’s infused with a touch of vanilla and sweetened with natural sweeteners. This silky smooth dessert is sure to impress.

Chewy Chocolate Chip Cookies

Satisfy your cookie cravings with our easy gluten free desserts. They offer the perfect balance of crisp edges and soft, chewy centers. Featuring chunks of melted chocolate in every bite, these classic chocolate chip cookies are a true crowd-pleaser.

Healthy Alternatives in Gluten-Free Baking

Following a gluten-free diet doesn’t mean you can’t enjoy sweet treats. You can make tasty simple gluten free desserts that are good for you. Just try natural sweeteners and make a few calorie-smart changes.

Natural Sweetener Options

Don’t use refined sugars. Instead, try honey, maple syrup, or dates in your desserts for gluten free diet. These sweeteners are not only tasty but also packed with vitamins, minerals, and antioxidants. They make your baked goods healthier.

  • Honey: A versatile sweetener that can be used in a variety of gluten-free recipes, from cakes and cookies to custards and sauces.
  • Maple Syrup: With its rich, caramelized flavor, maple syrup can add depth and complexity to your gluten-free desserts.
  • Dates: Blended into a smooth paste, dates can serve as a natural sweetener and binding agent in gluten-free baking.

Lower-Calorie Modifications

Want to cut calories in your simple gluten free desserts? Here are some tips:

  1. Substitute applesauce or mashed bananas for oil or butter in recipes.
  2. Experiment with lower-calorie flours like almond, coconut, or oat flour.
  3. Use Greek yogurt or plant-based milk alternatives to create creamy, indulgent textures.

By using these healthy alternatives, you can enjoy sweet treats without compromising your gluten-free diet. You’ll stay on track with a balanced, nutritious diet.

Troubleshooting Common Gluten-Free Baking Issues

Exploring gluten-free desserts can be fun but tricky. You might face issues like dry textures or cakes that spread too much. But don’t worry, with a few tips, you can make tasty simple gluten-free desserts that everyone will love.

Proper Measuring Techniques

Getting the right measurements is crucial in gluten-free baking. Unlike regular baking, gluten-free recipes need exact amounts. Always use measuring cups and spoons and level off the top for accurate measurements.

Mixing and Kneading

Don’t overwork the dough or batter. This can make your gluten-free treats dense and tough. Mix ingredients gently and knead lightly. Be careful when adding delicate ingredients like egg whites or fresh fruit.

Adjusting Recipes

Every gluten-free flour blend is unique, so you might need to adjust recipes. Start by adding a bit more liquid to prevent dryness. Try different binding agents like xanthan gum or psyllium husk to improve texture.

Common Gluten-Free Baking IssuesPotential Solutions
Dry, crumbly textureIncrease liquid, use more binding agents
Dense cakes or breadsAvoid over-mixing, use lighter flours
Cookies that spread too muchChill dough before baking, use less fat

With a bit of trial and error, you’ll master gluten-free dessert ideas. The fun is in the journey, so enjoy making your own simple gluten-free desserts.

Kid-Friendly Gluten-Free Treats

Making gluten-free desserts for kids is easy and fun. You can find many recipes that kids love. These easy gluten-free desserts include colorful cupcakes and fruit roll-ups. They’re perfect for satisfying kids’ sweet tooth while being healthy.

Fun Decorating Ideas

Let kids decorate their own desserts. They can use sprinkles, glitter, or fruit slices. This makes cupcakes and cookie pops a fun activity and a tasty treat.

School-Safe Options

Choose snacks that are safe for school. Look for nut-free, dairy-free, and easy-to-share options. Fruit leathers, mini muffins, and bite-sized brownies are great choices. These treats make kids happy and feel included.

FAQ

What are the most common gluten-free flour alternatives?

Popular gluten-free flours include almond flour, coconut flour, rice flour, and tapioca flour. You can use them alone or mix them to make gluten-free baking mixes.

What are the essential binding agents and stabilizers for gluten-free baking?

Ingredients like xanthan gum, psyllium husk, and ground flaxseeds are key. They help gluten-free baked goods have the right texture and prevent crumbling.

What are some quick and easy no-bake gluten-free dessert options?

Quick no-bake desserts include fruit parfaits, no-bake cheesecakes, and fridge cakes. They’re easy to make and perfect for beginners.

Beginners can try classic chocolate chip cookies, easy vanilla cakes, and pudding recipes. These are great for starting out with gluten-free baking.

How can I convert traditional dessert recipes to be gluten-free?

To make traditional recipes gluten-free, replace all-purpose flour with a gluten-free blend. Adjust liquid amounts and baking times. It might take some trial and error, but many recipes can be adapted.

What are some seasonal gluten-free dessert ideas?

Seasonal desserts include summer fruit trifles, autumn pumpkin pies, and holiday cookies and truffles. Using fresh ingredients enhances the flavors of your gluten-free treats.

What are some delicious gluten-free chocolate dessert recipes?

Delicious gluten-free chocolate desserts include flourless chocolate cake, chocolate mousse, and chocolate chip cookies. Choosing the right gluten-free chocolate is crucial.

How can I make my gluten-free desserts healthier?

To make healthier gluten-free desserts, use natural sweeteners like honey or maple syrup. Also, add more nuts, seeds, and fruits to increase nutritional value.

How can I troubleshoot common gluten-free baking issues?

Issues like dry textures, dense cakes, and spreading cookies can be fixed. Properly measure ingredients, use the right mixing techniques, and adjust recipes as needed.

What are some kid-friendly gluten-free dessert ideas?

Fun gluten-free desserts for kids include colorful cupcakes, fruit roll-ups, and cookie pops. Decorating these treats makes them appealing for school events.

5 comments
0 FacebookTwitterPinterestEmail
Dressing with Chicken Recipe

Easy Cornbread Dressing with Chicken Recipe

by IDYA
Dressing with Chicken Recipe
Serves: 8 Prep Time: Cooking Time:
Nutrition facts: 250 calories 14 grams fat
Rating: 5.0/5
( 1 voted )

Ingredients

  • 1 pan of cornbread, crumbled
  • 2 cups cooked chicken, shredded
  • 1 cup celery, chopped
  • 1 medium onion, chopped
  • 1/2 cup butter
  • 2 cups chicken broth
  • 2 large eggs, beaten
  • 1 teaspoon sage
  • 1 teaspoon thyme
  • Salt and pepper to taste

Instructions

1. Preheat the oven to 350°F (175°C). Grease a 9x13 baking dish.

2. In a large skillet, melt butter over medium heat. Add celery and onion and sauté until softened, about 5 minutes.

3. In a large mixing bowl, combine crumbled cornbread, cooked chicken, sautéed vegetables, sage, thyme, salt, and pepper.

4. Add chicken broth and beaten eggs. Stir to combine until mixture is moist but not too runny.

5. Transfer the mixture into the prepared baking dish and spread evenly.

6. Bake for 40-45 minutes, or until the top is golden brown and crispy.

7. Let it cool for a few minutes before serving.

Notes

For added flavor, you can substitute some of the chicken broth with turkey broth.

This recipe can be made ahead and stored in the fridge, then baked when ready to serve.

Feel free to add other vegetables like carrots or bell peppers for extra texture and flavor.

Welcome to the heart of Southern comfort food with this easy cornbread dressing with chicken recipe. This traditional chicken and dressing dish has been a beloved staple for generations. It’s perfect for family dinners and festive holiday gatherings.

With a balance of hearty cornbread and tender chicken, this homemade dressing recipe offers a zenith of comfort and warmth.

Key Takeaways

  • This traditional chicken and dressing recipe is a Southern classic.
  • Simple ingredients make this dish a favorite for all cooking levels.
  • Perfect for family dinners or holiday feasts.
  • Offers a delightful blend of cornbread and tender chicken.
  • Easy to prepare and rich in comforting flavors.

Introduction to Cornbread Dressing with Chicken

Cornbread dressing with chicken is a beloved dish from Southern cooking. It’s a holiday favorite in America. The dish started with early settlers mixing cornbread and chicken for a filling meal.

It has evolved over time but remains a favorite at festive times. This dish is special because it’s hearty and versatile. It can be a side or the main dish, perfect for holidays like Thanksgiving and Christmas.

Many families across the U.S. have their own twist on this classic recipe. Some add sausage or nuts, while others keep it simple with cornbread and chicken. Its adaptability makes it a staple in holiday menus.

Cornbread dressing with chicken holds deep cultural significance. It celebrates American holidays and brings history to the table. Preparing this recipe connects you to generations past, making it ideal for any gathering.

Here’s a look at what makes cornbread dressing with chicken so beloved:

FeatureDescription
OriginDeep South, United States
Key IngredientsCornbread, chicken, broth
Typical OccasionsThanksgiving, Christmas, family gatherings
VersatilityCan be customized with various add-ins; serves as a side or main dish

This dish’s lasting appeal comes from its rich flavor and flexibility. It’s a timeless choice for holidays and everyday moments with loved ones.

Ingredients for Cornbread Chicken Dressing Casserole

This southern dish is a mix of flavors and textures. It’s the perfect comfort food. You’ll find the main parts and optional extras that make it tasty and customizable.

Main Ingredients

The base of this dish has a few key ingredients. They blend to create amazing tastes and smells:

  • 2 cups of crumbled cornbread
  • 2 cups of cooked and shredded chicken
  • 1 cup of chicken broth
  • 1/2 cup of diced onions
  • 1/2 cup of chopped celery
  • 2 eggs, lightly beaten
  • 2 tablespoons of melted butter
  • Salt and pepper to taste

Optional Add-ins

Make your casserole more exciting with these optional add-ins. They let you customize the dish to your liking:

  • 1/2 cup of diced bell peppers
  • 1/2 cup of cooked sausage
  • 1/4 cup of chopped fresh parsley
  • 1 teaspoon of dried sage for extra flavor
  • 1/2 cup of diced mushrooms

With these ingredients and a few personal touches, you can make a dish that everyone will love.

How to Prepare Cornbread for the Dressing

To get the perfect cornbread texture for your dressing, pay close attention to detail. Your journey to delicious cornbread dressing begins with these key steps.

Baking the Cornbread

First, preheat your oven to 375°F (190°C). Choose high-quality cornmeal for the best taste. Mix your dry ingredients well before adding the wet ones. This ensures even consistency.

For the best results, mix wet and dry ingredients just until they combine. Avoid overmixing to prevent a dense texture.

  1. Grease your baking pan well to prevent sticking.
  2. Pour the batter into the pan and spread it evenly.
  3. Bake for about 20-25 minutes or until a toothpick in the center comes out clean.

It’s important to watch your baking time. This ensures the cornbread stays moist but firm enough for crumbling later.

Crumbling and Preparing for Dressing

Let the cornbread cool completely after baking. This step is crucial for easy crumbling without a mushy texture. Here’s how to prepare for your casserole:

  • Break the cornbread into large chunks and let them air dry overnight if possible.
  • Use your hands to crumble the cornbread finely, ensuring uniform pieces.
  • Spread the crumbled cornbread on a baking sheet to dry for an additional hour if needed.

These tips ensure your cornbread absorbs the dressing’s rich flavors perfectly. This results in a delicious dish.

Cooking the Chicken

Getting the chicken right is key for a tasty cornbread dressing. Here are some cooking methods to make your chicken flavorful:

Poaching is great for keeping the chicken moist. Just put the chicken in a pot of water, add some seasonings, and simmer until it’s done. This method keeps the chicken tender and full of flavor.

Roasting is another good choice. Heat your oven to 375°F (190°C). Season the chicken and roast it until it’s 165°F (75°C) inside. Roasting adds a rich flavor that makes your dressing even better.

If you’re short on time, a rotisserie chicken is a quick fix. Just shred it finely so it mixes well with your dressing.

Here’s a quick look at these cooking methods:

MethodTime RequiredTextureFlavor Intensity
Poaching20-30 minutesVery TenderLightly Seasoned
Roasting45-60 minutesCrisp Exterior, Tender InteriorRich and Deep
RotisserieReady-to-UseModerately TenderWell-Seasoned

In conclusion, picking the right cooking method for your chicken is crucial. Whether you choose poaching, roasting, or a rotisserie chicken, focus on making it flavorful. This will make your cornbread dressing with chicken even more delicious.

Combining Cornbread and Chicken for Dressing

Assembling a casserole needs careful attention. You must mix the cornbread crumbs with the chicken and other ingredients well. This ensures a perfect dressing consistency.

Mixing Ingredients

Begin by crumbling cornbread in a big bowl. Add the cooked, shredded chicken and other ingredients like sautéed onions and celery. Use a wooden spoon to mix everything gently.

It is essential to take your time with this step to achieve a uniform mixture that will bake evenly.

Ensuring Proper Consistency

Getting the right consistency is crucial for your cornbread dressing. Start by adding chicken broth slowly while stirring. You want it moist but not soggy.

  1. Add broth slowly, about half a cup at a time.
  2. Stir and observe the consistency after each addition.
  3. Stop adding broth when the mixture is moist but still holds its shape.

By paying attention to mixing and ingredient integration, your cornbread dressing will be just right. It will add a delicious touch to your meal.

Seasoning the Cornbread Dressing

Seasoning your cornbread dressing is key to achieving a flavorful dressing that stands out at any gathering. Using herbs and spices like sage, thyme, and rosemary can make a big difference. They bring out the savory flavors of cornbread and chicken.

Sage is a traditional favorite, adding an earthy, slightly peppery flavor. Thyme brings a subtle lemony fragrance, while rosemary adds a hint of pine. Together, these taste enhancements make the dressing well-rounded and aromatic.

Here are some tips to ensure your seasoning is perfect:

  • Balance is crucial: Start with equal amounts of each herb, then adjust to taste.
  • Fresh vs. Dried: Fresh herbs have vibrant flavors, but dried herbs are more concentrated. Use a 3:1 ratio when substituting fresh for dried.
  • Customize to preference: Try adding parsley, marjoram, or even a dash of nutmeg for a unique twist.

The goal is to create a flavorful dressing that complements the ingredients without overpowering them. By carefully selecting and balancing your seasonings, you ensure each bite is a delightful blend of tastes. This highlights the comforting essence of cornbread and chicken.

Baking the Cornbread Dressing with Chicken

To get a perfect cornbread dressing with chicken, knowing the right oven setting and bake time is key. This guide will help you bake it to perfection. Your dish will come out beautifully with a crispy golden crust.

Optimal Baking Temperature

Start by setting your oven to 350°F. This temperature is perfect for even cooking. It ensures both the inside and outside are cooked just right. Make sure to preheat your oven well before putting the casserole in. This helps with even heat distribution.

Checking for Doneness

After about 40-45 minutes, check if it’s done. Look for a crispy golden crust on top. This means it’s baked well.

Insert a toothpick into the center. If it comes out clean or with a few moist crumbs, it’s ready. Checking the bottom and sides also confirms even baking.

StepIndicatorResult
Temperature350°FEven baking
Baking Time40-45 minutesCrispy golden crust
Toothpick TestClean or few crumbsCenter is done

Serving Suggestions for Chicken and Dressing Recipe

When it comes to finishing the meal, how you present it matters a lot. Adding vibrant colors and textures can make your dish look amazing.

Here are some tips to make your chicken and cornbread dressing look great:

  • Plating Ideas: Top your dish with fresh herbs like parsley or thyme for a touch of elegance.
  • Serving Accompaniments: Pair it with classics like cranberry sauce, gravy, and steamed greens. They’ll enhance the flavors of your chicken and cornbread dressing.
  • Adding Variety: Add a fresh salad or coleslaw for a cool contrast. It will balance the rich taste of the main dish.

Thoughtful plating and the right side dishes make a meal unforgettable. Whether it’s for a holiday or a cozy family dinner, these tips will make your meal a feast for the eyes and taste buds.

Storing and Reheating Leftover Dressing

Keeping your leftover cornbread dressing fresh and tasty is key. It’s important for meal prep, saving leftovers, and keeping food safe. With the right storage and reheating, your dressing will taste as good as new.

Storage Tips

To store your leftover dressing right, follow these tips:

  • Cool completely: Let the dressing cool to room temperature first. This stops moisture buildup and slows down bacteria growth.
  • Airtight containers: Use containers that seal well to keep freshness in and germs out. This also helps leftovers last longer.
  • Refrigeration: Put the container in the fridge at 40°F (4°C) or below. Eat leftovers within 3-4 days for safety.
  • Freezing: For even longer storage, freeze the dressing. Use containers or bags made for freezing, squeezing out air before sealing. Frozen dressing can last 2-3 months.

Reheating Instructions

Reheating leftover dressing right keeps its taste and texture. Here’s how to do it best:

  1. Oven method: Heat your oven to 350°F (175°C). Put the dressing in a dish safe for the oven, cover with foil, and heat for 20-30 minutes until warm.
  2. Microwave method: For quick reheating, use the microwave. Place the dressing in a safe dish, cover with a lid or plastic wrap, and heat on medium for 2-3 minutes. Stir halfway to heat evenly.
  3. Stirring and moisture: To keep the dressing moist, add a bit of broth or water before reheating. This works for both oven and microwave.

By following these steps, you’ll not only save leftovers but also keep your dressing safe and tasty. This way, your cornbread dressing will be a great choice for your meals.

Conclusion

This easy Cornbread Dressing with Chicken recipe is a perfect mix of comfort and taste. It starts with baking your own cornbread and cooking the chicken carefully. Each step is designed to make sure you succeed in the kitchen.

The mix of savory cornbread and tender chicken, seasoned just right, makes a dish that’s hard to resist. It’s sure to impress anyone who tries it.

In this article, we’ve given you a quick look at what you need, how to make it, and tips for leftovers. This recipe is not only simple but also flexible, making it a great addition to your family’s traditions. The smell and taste of this cornbread dressing will make your meals unforgettable.

We hope you’re inspired to make this recipe in your kitchen. It’s more than food; it’s a chance to create lasting memories and maybe even start a new family tradition. Happy cooking!

FAQ

What is cornbread dressing with chicken?

Cornbread dressing with chicken is a Southern comfort food. It mixes homemade cornbread with chicken and savory ingredients. It’s great as a side or main dish, especially at holidays.

What ingredients are needed for a cornbread chicken dressing casserole?

You’ll need cornmeal, chicken, broth, onions, and celery. Add seasonings like sage and thyme. You can also add mushrooms, cranberries, or nuts for extra flavor.

How do you prepare the cornbread for the dressing?

Bake the cornbread until it’s moist but crumbly. Let it cool, then crumble it. This makes it ready to soak up flavors.

What are some tips for cooking the chicken for this recipe?

Cook the chicken by poaching or roasting. A rotisserie chicken is also a good choice. It’s quick and flavorful.

How do you ensure the dressing has the right consistency?

Mix the cornbread crumbs with chicken and ingredients carefully. Aim for a moist but not soggy dressing.

What herbs and spices are best for seasoning cornbread dressing?

Use herbs like sage, thyme, and rosemary. Season to taste. Feel free to try other spices to make it your own.

What is the optimal baking temperature and time for this casserole?

Bake at 350°F (175°C) for 30-45 minutes. The top should be golden and crispy. Check that it’s hot and firm.

What are some good side dishes to serve with chicken and dressing?

Serve with cranberry sauce, gravy, and green veggies. These sides enhance the meal’s flavors.

How should you store and reheat leftover cornbread dressing?

Keep leftovers in an airtight container in the fridge for three days. Reheat covered in a 350°F (175°C) oven. This keeps it moist.

1 comment
0 FacebookTwitterPinterestEmail
Beef Enchiladas
Beef Enchiladas

Classic Beef Enchiladas: Perfect Dinner Idea

Serves: 4 Prep Time: Cooking Time:
Nutrition facts: 420 calories 24 grams fat
Rating: 5.0/5
( 1 voted )

Ingredients

  • 1 lb ground beef
  • 1 small onion, finely chopped
  • 2 cloves garlic, minced
  • 1 can (10 oz) enchilada sauce
  • 8 corn tortillas
  • 2 cups shredded cheddar cheese
  • 1 cup shredded mozzarella cheese (optional)
  • 1/2 tsp ground cumin
  • 1/2 tsp chili powder
  • Salt and pepper to taste
  • Olive oil (for greasing or frying tortillas)
  • Fresh cilantro (optional, for garnish)
  • Sour cream (optional, for serving)

Instructions

  1. Preheat the oven to 350°F (175°C).
  2. Cook the beef: In a large skillet, heat a bit of olive oil over medium heat. Add the ground beef, onion, and garlic. Cook until the beef is browned and the onions are softened, about 7-10 minutes.
  3. Season the beef: Stir in the cumin, chili powder, salt, and pepper. Mix well and cook for an additional 2 minutes. Remove from heat.
  4. Prepare tortillas: Lightly fry the tortillas in a hot skillet for about 30 seconds on each side until slightly crisp but still pliable. (Alternatively, you can warm them in the microwave for a few seconds).
  5. Assemble the enchiladas: Spread a small amount of enchilada sauce at the bottom of a baking dish. Place a tortilla on a plate, spoon a portion of the beef mixture in the center, and top with a sprinkle of cheddar and mozzarella cheese. Roll up the tortilla and place it seam side down in the baking dish.
  6. Repeat the process for the remaining tortillas and beef mixture.
  7. Top the enchiladas with the remaining enchilada sauce and cheese.
  8. Bake: Place the baking dish in the oven and bake for 20-25 minutes, or until the cheese is bubbly and slightly golden.
  9. Serve: Let the enchiladas cool for a few minutes before serving. Garnish with fresh cilantro and serve with sour cream if desired.

Notes

  • Tortillas: If you prefer, you can use flour tortillas instead of corn tortillas, but corn gives a more authentic texture and flavor.
  • Cheese: Feel free to mix up the cheese blend. Monterey Jack, Mexican blend, or pepper jack can all be great options.
  • Spice level: Adjust the chili powder and cumin to your preference. For more heat, add some chopped jalapeños or a pinch of cayenne pepper.
  • Make it ahead: You can assemble the enchiladas a day ahead and refrigerate them before baking. Just add an extra 5-10 minutes to the baking time if cooking from the fridge.
  • Freezing: These enchiladas freeze well. After assembling, cover tightly with foil and freeze. When ready to bake, allow them to thaw in the fridge overnight and then bake as usual.
  • Vegetarian option: Replace the beef with black beans, lentils, or a mixture of sautéed vegetables for a vegetarian version.

Want a tasty Mexican meal that will wow your family? Beef enchiladas are the ultimate comfort food. They bring authentic flavors to your dinner table. This classic recipe turns simple ingredients into a dish everyone will adore.

Making enchiladas is simpler than you think. With a few key ingredients and basic cooking skills, you can make a meal like a restaurant. The mix of seasoned ground beef, soft corn tortillas, and rich red sauce makes it a hit with everyone.

These beef enchiladas are perfect for family dinners or to spice up your meals. They’re full of flavor and easy to make. This dish brings the best of Mexican cuisine right to your home.

Key Takeaways

  • Beef enchiladas are a delicious and satisfying Mexican-inspired meal
  • The recipe is simple to make with basic cooking skills
  • Perfect for family dinners and gatherings
  • Combines classic Mexican flavors in one dish
  • Can be customized with various toppings and sides
  • Great for make-ahead meal preparation
  • Offers a balanced and filling dinner option

Why Mexican-Style Beef Enchiladas Are a Family Favorite

Beef enchiladas are more than a meal. They’re a tasty trip through Mexican cuisine that unites families. These dishes capture the essence of traditional cooking and are perfect for busy homes.

Cultural Significance of Enchiladas

In Mexican culture, enchiladas are a big deal. They share stories of generations, bringing families together for a special meal. The recipe reflects centuries of cooking traditions, mixing indigenous and Spanish flavors.

  • Origins date back to Mayan times
  • Symbolizes community and shared experiences
  • Represents culinary heritage of Mexico

Benefits of Making Enchiladas at Home

Making beef enchiladas at home has many perks. You pick the ingredients, tweak the flavors, and make a healthier meal than restaurants. You can also adjust the spice and quality of ingredients.

  1. Cost-effective meal preparation
  2. Customizable to dietary needs
  3. Fresh, high-quality ingredients

What Makes This Recipe Special

Our beef enchiladas are special because of the spices and cooking method. The mix of tender beef, rich sauce, and rolled tortillas makes for a memorable meal. It’s sure to become a family favorite.

“Enchiladas are not just food; they’re a celebration of flavor and tradition.” – Mexican Culinary Expert

Essential Ingredients for Authentic Beef Enchiladas

Making delicious beef enchiladas starts with picking the right ingredients. The secret to authentic enchiladas is using top-notch, fresh parts. These parts bring alive the vibrant Mexican flavors in your kitchen.

Your authentic enchiladas need a special mix of ingredients. Let’s look at the key parts you’ll need:

  • Beef Selection: Choose ground beef with 80/20 lean-to-fat ratio for maximum flavor
  • Corn tortillas (preferably fresh)
  • High-quality shredded cheese (typically Monterey Jack or cheddar)
  • Fresh spices and seasonings

The meat quality really matters for your beef enchiladas. Top chefs say use premium ground chuck or sirloin for the best taste.

“The soul of Mexican cuisine is in its ingredients” – Traditional Mexican Cooking Wisdom

Ingredient CategoryRecommended OptionsQuality Indicator
BeefGround chuck, sirloin80/20 fat content
TortillasCorn tortillasFresh, soft texture
CheeseMonterey Jack, cheddarFreshly shredded
SpicesCumin, chili powder, garlicFresh, whole spices

Remember, authentic enchiladas need careful attention to ingredient quality. Each part adds to the rich, complex flavor. This makes the dish a beloved Mexican classic.

Kitchen Tools and Equipment You’ll Need

Preparing delicious beef enchiladas needs the right tools and equipment. The right kitchen tools make cooking smoother and more fun. Let’s look at the essential items you’ll need before starting.

Selecting the Perfect Enchilada Baking Dish

Your enchilada baking dish is key for a great meal. Here are some good options:

  • 9×13 inch rectangular ceramic baking dish
  • Glass casserole dish with high sides
  • Heavy-duty metal baking pan

Essential Cooking Utensils

Make sure your kitchen has these must-have tools:

UtensilPurpose
Large skilletCooking ground beef
Wooden spoonStirring and mixing ingredients
TongsHandling tortillas
Cheese graterPreparing fresh cheese topping

Preparation Tools for Perfect Enchiladas

To make your enchiladas amazing, get these tools:

  1. Cutting board
  2. Sharp chef’s knife
  3. Measuring cups and spoons
  4. Mixing bowls

“The right tools can transform a good recipe into a great meal!” – Chef Maria Rodriguez

Pro tip: Choose quality kitchen tools for enchiladas. They’ll make cooking easier and more fun, helping you make meals like a pro at home.

The Perfect Beef Enchilada Recipe

Mastering beef enchiladas takes skill and love. This classic recipe will turn your kitchen into a Mexican paradise. Making enchiladas is simpler than you think!

Get set to make a meal that will wow your loved ones. The secret to great beef enchiladas is top-notch ingredients and careful steps.

Ingredients You’ll Need

  • 2 lbs ground beef
  • 12 corn tortillas
  • 2 cups red enchilada sauce
  • 2 cups shredded cheese
  • 1 diced onion
  • Taco seasoning

Ingredient Quality Matters

Choose fresh, quality ingredients for your enchilada recipe. Grass-fed ground beef and real corn tortillas make a big difference.

“Cooking is about passion, and enchiladas are a love letter to Mexican cuisine.” – Anonymous Chef

Nutrition Breakdown

NutrientAmount per Serving
Calories420
Protein28g
Carbohydrates22g
Fat24g

Understanding flavors and textures is key to making great enchiladas. Your homemade beef enchiladas will be a hit with your family!

Preparing the Seasoned Ground Beef Filling

Making the perfect ground beef for enchiladas is an art. It turns a simple dish into a memorable meal. The right preparation makes your enchiladas stand out.

Meat Selection Tips

Choosing the right ground beef is key for tasty enchiladas. Look for 80/20 ground beef for the best flavor and moisture. Leaner meats can dry out, while fattier options are juicy and rich.

  • Select fresh ground beef from a trusted butcher
  • Aim for 80/20 ground beef ratio
  • Check for bright red color without brown edges

Seasoning Techniques

Seasoning beef for enchiladas needs a mix of spices that match Mexican cuisine. Use chili powder, cumin, garlic powder, and a pinch of salt. These spices give your ground beef a deep, authentic flavor.

“The secret to great enchiladas is in the seasoning” – Mexican Cooking Experts

Cooking Methods

Browning is crucial when preparing ground beef for enchiladas. Use a large skillet and cook the meat over medium-high heat. Break the meat into small crumbles and cook it evenly. Then, drain excess fat to avoid a greasy filling.

  1. Heat skillet to medium-high
  2. Cook ground beef until no pink remains
  3. Drain excess fat thoroughly
  4. Mix in seasonings while meat is still hot

Mastering these techniques will help you make an irresistible ground beef filling. It will bring your enchiladas to life.

Making the Authentic Red Enchilada Sauce

Making homemade enchilada sauce is simpler than you might think. It can turn simple meals into amazing dishes. The key to a great red enchilada sauce is using the right ingredients and a few important techniques.

To make your enchilada sauce, you’ll need some vibrant ingredients. They add depth and richness to your dish:

  • Dried guajillo chilies
  • Tomato paste
  • Vegetable or chicken broth
  • Garlic cloves
  • Ground cumin
  • Mexican oregano
  • Salt and pepper

Here’s how to prepare your enchilada sauce:

  1. Toast the dried chilies in a hot skillet to release their rich, smoky flavors
  2. Rehydrate the chilies in hot water
  3. Blend the chilies with other ingredients until smooth
  4. Strain the sauce to remove any tough chili skin
  5. Simmer the sauce to develop deep, complex flavors

“A great enchilada sauce is the heart and soul of authentic Mexican cuisine” – Traditional Mexican Chef

Pro tip: Homemade enchilada sauce can be stored in the refrigerator for up to one week. This lets you prepare it ahead of time and enhance several meals.

Tips for Rolling and Assembling Enchiladas

Learning how to roll enchiladas is an art that makes a simple recipe into a tasty meal. The secret to great enchiladas is in the preparation and how you put them together. This ensures every bite is full of flavor.

Tortilla Preparation

Getting your tortillas ready is key for making great enchiladas. Here’s what you need to do:

  • Warm tortillas slightly to make them more flexible
  • Use fresh corn tortillas for the best taste
  • Lightly oil or steam tortillas to stop them from cracking

Rolling Techniques

Rolling enchiladas right takes practice and patience. Here are some tips from experts:

  1. Put the filling a bit off-center on the tortilla
  2. Roll tightly but carefully to avoid tears
  3. Put rolled enchiladas seam-side down in the baking dish

Layering Methods

LayerTechniquePurpose
BaseSpread a thin layer of saucePrevent sticking
MiddleArrange rolled enchiladasEnsure even cooking
TopCover with sauce and cheeseAdd moisture and flavor

“The secret to great enchiladas is in the details of rolling and assembling.” – Mexican Culinary Expert

Assembling enchiladas needs careful attention. By using these methods, you’ll make a dish that looks and tastes amazing.

Baking Instructions and Time Guidelines

Getting your beef enchiladas just right means knowing how to bake them. The temperature you use is key for that perfect golden-brown top and melted cheese. Preheat your oven to 375°F (190°C) for the best results.

For baking enchiladas, aim for 20-25 minutes. Here’s what to look for to know they’re done:

  • Cheese is fully melted and slightly bubbling
  • Edges of tortillas turn golden brown
  • Internal temperature reaches 165°F

“The magic happens when the cheese turns into a beautiful golden blanket covering your enchiladas!” – Mexican Culinary Expert

Here are some tips for baking success:

  1. Cover with aluminum foil for the first 15 minutes to prevent excessive browning
  2. Remove foil for the last 5-10 minutes to create a crispy top
  3. Let enchiladas rest for 5 minutes after baking to set

Tip: Different ovens might vary slightly, so keep an eye on your enchiladas during the last few minutes of baking to prevent overcooking.

Serving Suggestions and Side Dishes

Make your beef enchiladas special with the right sides. The right choices can turn a simple meal into a memorable dinner. It will impress everyone at the table.

Traditional Mexican Side Dishes

Try these authentic Mexican sides with your enchiladas:

  • Mexican rice with fresh cilantro
  • Refried beans with queso fresco
  • Elote (Mexican street corn)
  • Fresh guacamole
  • Crisp green salad with lime vinaigrette

Creative Garnishing Options

Make your enchiladas look great with these garnishes:

  • Sprinkle fresh chopped cilantro
  • Add crumbled queso fresco
  • Drizzle sour cream
  • Scatter sliced jalapeños
  • Garnish with diced red onions

Beverage Pairings

Choose drinks that match your enchiladas:

  • Classic margarita
  • Mexican beer like Corona or Modelo
  • Horchata
  • Sparkling water with lime

“The right side dishes can turn a good meal into an unforgettable culinary experience.” – Mexican Culinary Experts

By picking the right sides, you’ll celebrate Mexican flavors. Your dinner will be a true feast for the senses.

Storage and Reheating Tips

Keeping your homemade beef enchiladas tasty means storing them right. Whether you made a big batch or have leftovers, knowing how to store and reheat is key. This helps keep their flavor and texture just right.

Refrigerator Storage Methods

Here’s how to store enchiladas in the fridge:

  • Cool the enchiladas completely before storing
  • Use airtight containers or wrap tightly in aluminum foil
  • Store in the refrigerator for up to 3-4 days

Freezing Enchiladas

Freezing is great for storing enchiladas for later:

  • Wrap individual or entire enchilada dishes in plastic wrap
  • Add a layer of aluminum foil for extra protection
  • Freeze for up to 2-3 months

Reheating Enchiladas Perfectly

Reheating enchiladas needs care to keep them tasty and moist. Here are some good ways to do it:

Reheating MethodTemperatureTime
Oven350°F15-20 minutes
MicrowaveMedium power2-3 minutes

Pro tip: Add a small amount of fresh salsa or enchilada sauce before reheating to prevent dryness.

Always check the enchiladas’ internal temperature reaches 165°F for safety. With these tips, you can enjoy your beef enchiladas whenever you want!

Conclusion

Making the perfect beef enchilada recipe is more than cooking. It’s about bringing a piece of Mexican tradition into your home. Your homemade enchiladas mix rich flavors, techniques, and creativity. This turns a simple dinner into a special experience.

By following this recipe, you’ve learned to choose the right beef and make a real red sauce. You’ve also mastered rolling and baking enchiladas. These skills let you try new things, making your enchiladas truly yours.

Cooking is a journey. Every time you make these enchiladas, you get better and find new flavors. This recipe is a great way to start exploring Mexican cuisine, whether you’re experienced or new to cooking.

Enjoy cooking, share your food, and keep trying new Mexican dishes. They add warmth and excitement to your meals.

FAQ

How long do beef enchiladas take to bake?

Beef enchiladas bake for 20-25 minutes at 375°F (190°C). They’re done when the cheese is bubbly and the edges are crispy.

Can I make enchiladas ahead of time?

Yes, you can make them up to 24 hours in advance. Store them in the fridge. Then, bake them as directed, adding 5-10 minutes for cold enchiladas.

What are the best tortillas to use for enchiladas?

Corn tortillas are best for enchiladas. Choose fresh, soft ones. Warm them slightly before filling to avoid cracking.

How do I prevent my enchiladas from becoming soggy?

Fry or toast corn tortillas lightly before filling. Use a thin enchilada sauce. Drain excess liquid from the beef for a crisp texture.

Can I freeze beef enchiladas?

Yes, you can freeze them! Wrap them in foil or plastic wrap, then in a freezer-safe container. They last up to 3 months. Thaw in the fridge before reheating.

What sides go well with beef enchiladas?

Try Mexican rice, refried beans, guacamole, sour cream, and pico de gallo. A green salad also pairs well with the rich flavors.

Are enchiladas spicy?

The spice level varies. This recipe has a moderate heat. You can adjust it by changing the chili powder or adding hot sauce.

What type of beef is best for enchiladas?

Use ground beef with 80/20 or 85/15 fat content. The fat keeps the meat moist and adds flavor.

How many enchiladas does this recipe serve?

It makes 8-10 enchiladas, serving 4-6 people. It depends on how much you serve and the sides.

Can I make vegetarian enchiladas using this recipe?

Yes! Replace the ground beef with black beans, roasted veggies, or plant-based meat. Keep the rest the same.

2 comments
0 FacebookTwitterPinterestEmail
Verified by MonsterInsights