Home Recipes
Category:

Recipes

Healthy Ground Beef Recipes

10 Healthy Ground Beef Recipes for Quick Dinners

Serves: 4 Prep Time: Cooking Time:
Nutrition facts: 350 calories 18 grams fat
Rating: 5.0/5
( 1 voted )

Ingredients

  • 1 lb lean ground beef
  • 1 medium onion, diced
  • 1 tablespoon olive oil
  • 2 cloves garlic, minced
  • 1 bell pepper, chopped
  • 1 can diced tomatoes (14.5 oz)
  • 1 tablespoon taco seasoning (or to taste)
  • 1/2 cup low-sodium beef broth
  • Salt and pepper to taste
  • 1/2 cup chopped fresh cilantro (optional)
  • 1 cup cooked brown rice or quinoa (optional for serving)

Instructions

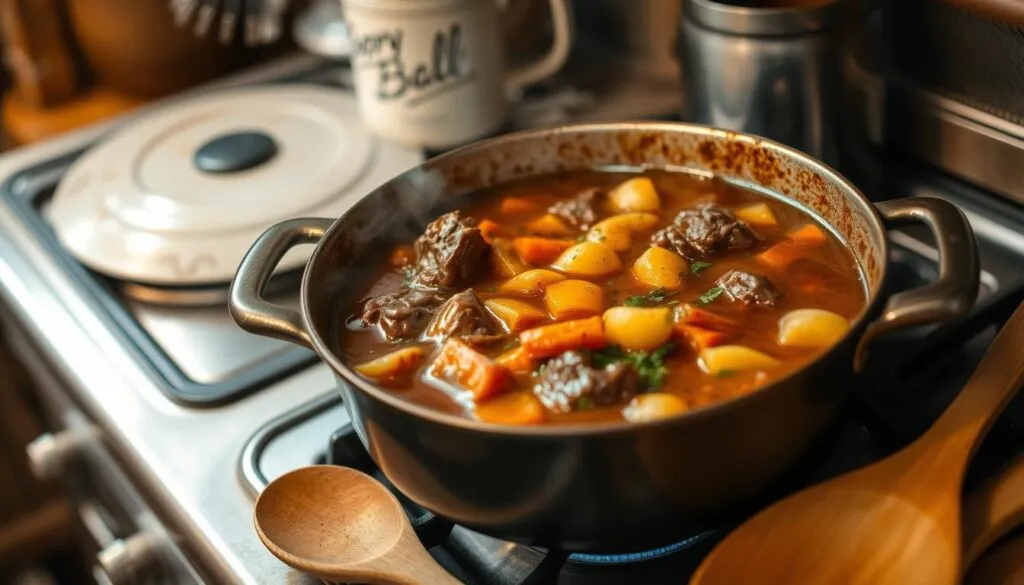
Heat olive oil in a large skillet over medium heat. Add diced onion and cook until softened, about 3 minutes. Add garlic and bell pepper and cook for an additional 2 minutes, stirring occasionally. Add ground beef to the skillet and cook until browned, breaking it apart with a spatula. Drain excess fat if needed. Stir in the taco seasoning, diced tomatoes (with juice), and beef broth. Simmer for 5-7 minutes until the mixture thickens. Season with salt and pepper to taste. Optionally, stir in chopped cilantro for added freshness. Serve the beef mixture over cooked brown rice or quinoa for a hearty meal.

Notes

his recipe can be customized by adding your favorite vegetables or swapping the beef for ground turkey for a leaner option. You can also serve this on a whole grain tortilla for a quick taco-style meal.

Busy families face the challenge of making quick, healthy meals. Healthy ground beef recipes are a great solution. They are quick, delicious, and packed with protein.

Ground beef is a versatile protein that can be used in many dishes. You can make Mexican, Asian, or classic American meals with it. These recipes will make your meal planning easier and more fun.

Key Takeaways

  • Ground beef offers versatile and nutritious meal options
  • Quick recipes can simplify weeknight dinner preparation
  • Healthy ground beef recipes support balanced family nutrition
  • Variety of cuisines can be explored using ground beef
  • Meal prep techniques can streamline dinner cooking process

Our collection of healthy ground beef recipes will make your meals exciting and nutritious. You’ll find recipes for skillet dinners and lettuce wraps. These dishes will delight everyone in your family.

Why Choose Healthy Ground Beef Recipes for Your Family Meals

Exploring tasty ground beef recipes can change how you plan meals for your family. Ground beef is a great protein that’s good for you, easy to use, and won’t break the bank.

For families looking for quick, tasty dinners, ground beef is a top choice. It’s amazing for making fast, filling meals. Let’s see why it’s a must-have in your kitchen.

Nutritional Benefits of Lean Ground Beef

Lean ground beef is a nutritional powerhouse. It gives your family important nutrients:

  • High-quality protein for muscle growth
  • Rich in vitamin B12 for energy
  • Excellent source of zinc for immune health
  • Contains iron to fight anemia

Time-Saving Advantages of Ground Beef Cooking

Quick meal preparation is easy with ground beef. You can make different dishes in under 30 minutes. It’s ideal for busy weeknights.

Cooking TimeMeal TypeComplexity
15-20 minutesSkillet MealsEasy
25-30 minutesCasserolesMedium

Budget-Friendly Meal Planning with Ground Beef

“Eating nutritiously doesn’t have to break the bank” – Home Cooking Experts

Ground beef is a budget-friendly protein. It helps you save money and reduce food waste. You can make many meals from one package.

Adding ground beef to your meals opens up a world of tasty, healthy options. You won’t have to sacrifice flavor or quality.

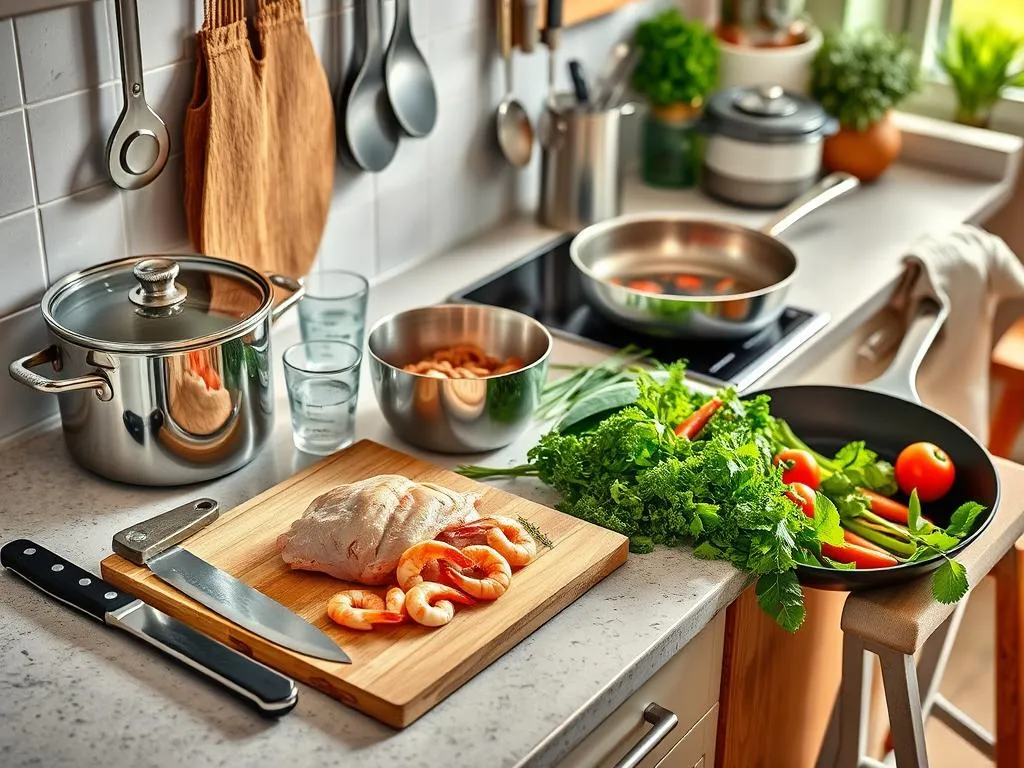
Essential Kitchen Tools and Ingredients for Ground Beef Cooking

Creating tasty dishes with ground beef and rice needs the right tools and ingredients. Start by picking versatile tools that make cooking fun and easy.

Must-Have Kitchen Tools

  • Large non-stick skillet
  • Sharp chef’s knife
  • Cutting board
  • Measuring cups and spoons
  • Wooden spatula
  • Digital meat thermometer

A good skillet is key for cooking ground beef. Choose heavy-bottomed pans for even heat and to prevent sticking. A digital meat thermometer is also important to ensure the ground beef is cooked to 160°F.

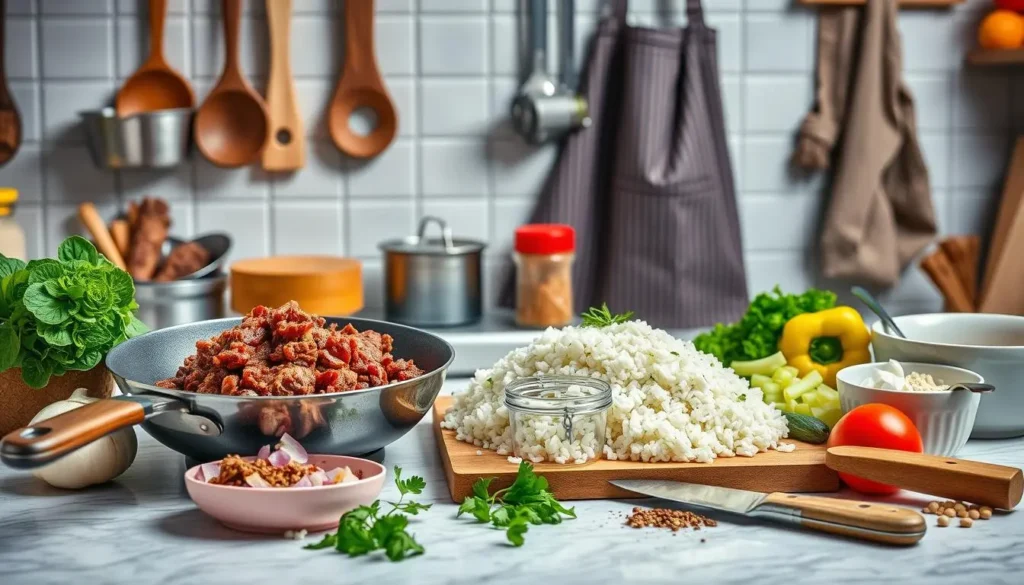
Essential Ingredients for Ground Beef Dishes

Stock your pantry with these basic ingredients for ground beef and rice recipes:

  1. Long-grain white or brown rice
  2. Olive oil
  3. Lean ground beef (90/10 or 93/7)
  4. Basic spices: garlic powder, onion powder, paprika
  5. Fresh herbs like parsley and cilantro

“The right tools and ingredients transform simple ground beef into extraordinary meals.” – Professional Chef

Pro tip: Use lean ground beef for healthier dishes. It has less fat, which means fewer calories but still lots of flavor in your ground beef and rice meals.

Smart Storage Solutions

Get airtight containers for storing prepped ingredients. Glass containers with tight lids are great for keeping ground beef and rice fresh in the fridge. Good storage helps keep ingredients fresh longer and makes meal prep easier.

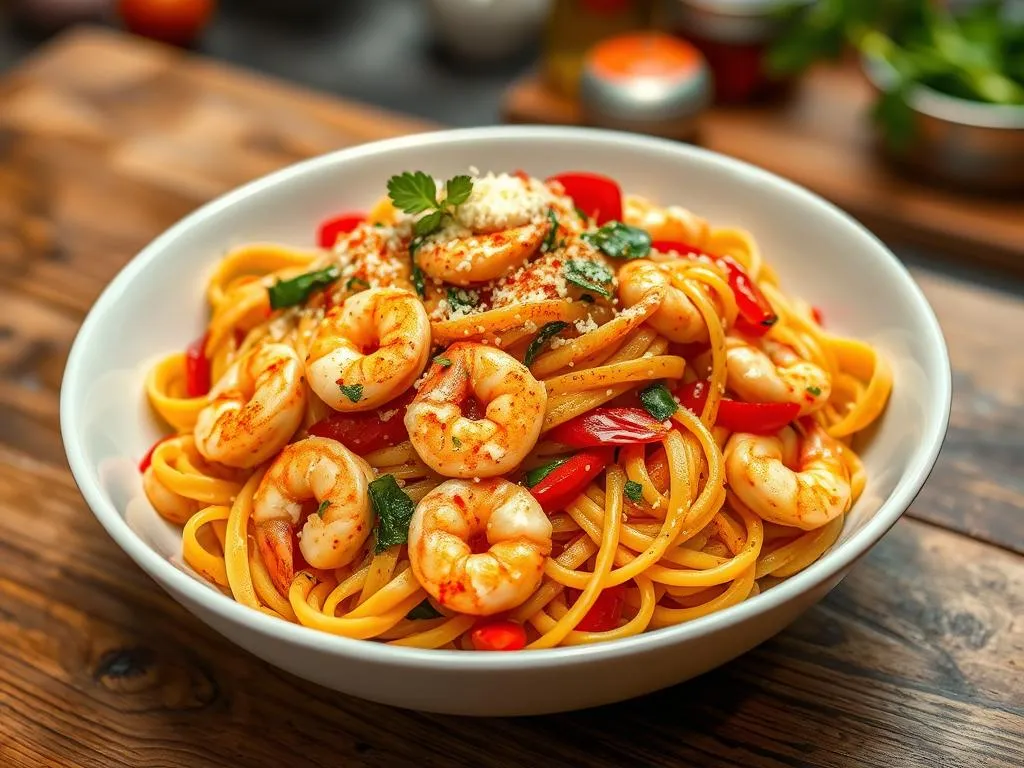
Mexican-Style Ground Beef and Rice Skillet

Spice up your dinner with this tasty Mexican-style ground beef recipe. It’s perfect for busy weeknights. It’s quick, easy, and the whole family will love it.

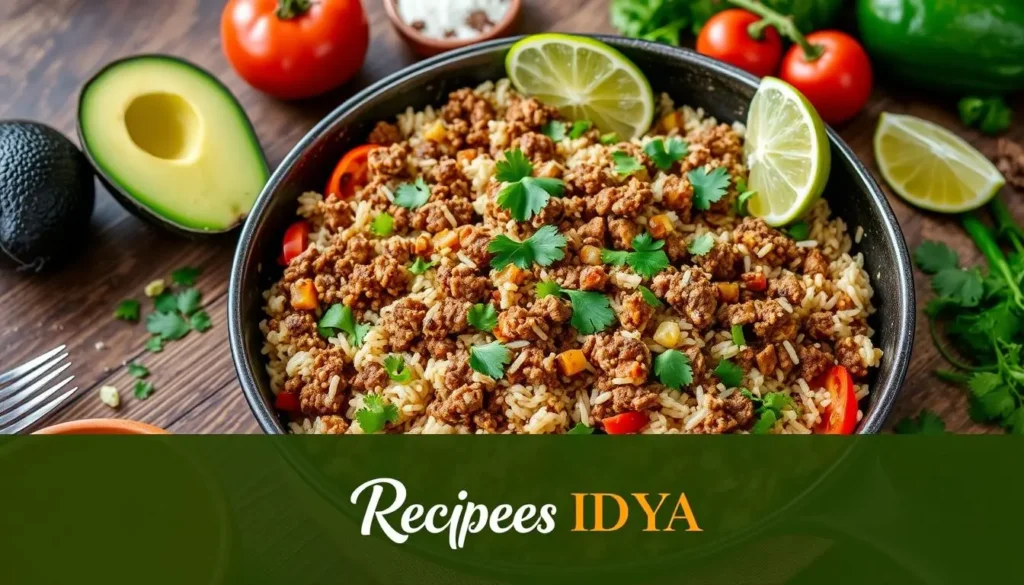
This meal is a one-pan wonder. It mixes lean ground beef with spices and fluffy rice. It’s a healthy, exciting dinner ready in under 30 minutes.

Ingredient Substitutions and Variations

Being flexible is key when cooking with ground beef. Try these quick swaps:

  • Replace ground beef with ground turkey for a leaner option
  • Use cauliflower rice for a low-carb alternative
  • Swap bell peppers with zucchini or squash
  • Choose brown rice for added fiber

Serving Suggestions and Toppings

Make your ground beef recipes even better with these toppings:

  • Fresh chopped cilantro
  • Diced avocado
  • Lime wedges
  • Crumbled queso fresco
  • Sliced jalapeños

Storage and Reheating Tips

To keep your ground beef skillet fresh, follow these tips:

Storage MethodDurationRecommended Reheating
Refrigerator3-4 daysMicrowave or stovetop with splash of water
Freezer2-3 monthsThaw overnight, reheat gently

“A delicious meal doesn’t have to be complicated. Sometimes the best dinners come from simple, fresh ingredients.” – Chef Maria Rodriguez

Try these tips and turn your weeknight cooking into a fun adventure. Everyone will want seconds!

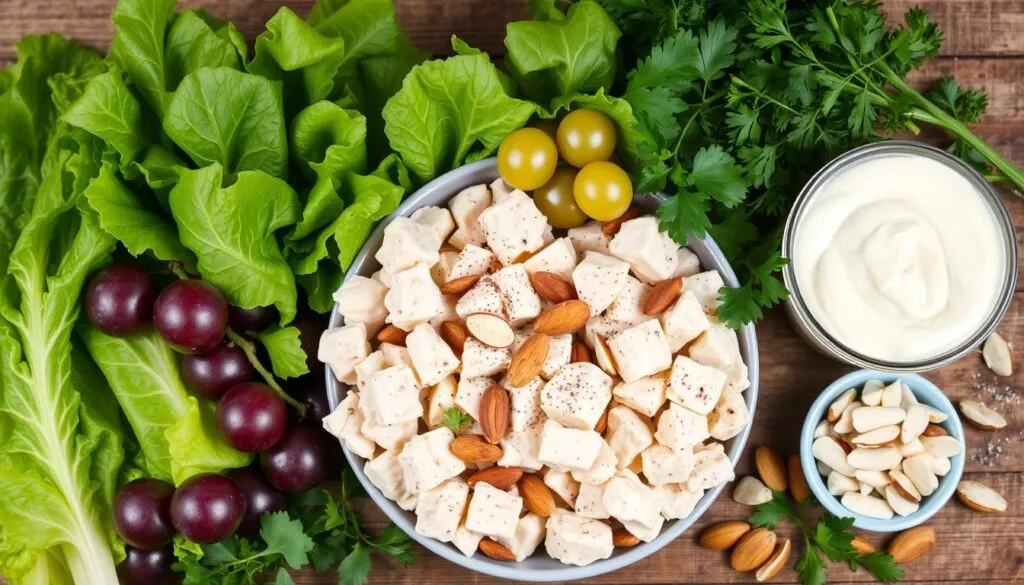
Asian-Inspired Ground Beef Lettuce Wraps

Looking for quick and healthy meals? Try Asian-inspired lettuce wraps with ground beef. They’re light, refreshing, and full of flavor. Plus, they’re low in carbs.

Making these wraps is easy and fast, under 30 minutes. Use top-quality ground beef and fresh ingredients for authentic Asian tastes.

Ingredients You’ll Need

  • 1 pound lean ground beef
  • Butter lettuce leaves
  • Minced garlic
  • Ginger
  • Soy sauce
  • Hoisin sauce
  • Chopped green onions
  • Sliced water chestnuts

Cooking Instructions

  1. Brown ground beef in a skillet
  2. Add minced garlic and ginger
  3. Mix in sauces for flavor
  4. Serve in lettuce leaves

These wraps are more than a meal; they’re an experience. They turn simple ground beef into a dish your family will adore.

“Delicious, nutritious, and quick – these Asian-inspired lettuce wraps prove that healthy eating can be incredibly tasty!” – Chef Sarah Miller

Nutritional Breakdown

Nutrition FactsPer Serving
Calories250
Protein22g
Carbohydrates5g
Fat15g

Need a quick dinner or meal prep? These Asian-inspired wraps are a hit. They show that fast meals can be both tasty and healthy!

Healthy Ground Beef Recipes That Kids Will Love

It can be tough for parents to make meals kids will enjoy. Ground beef and rice recipes are a great choice. They’re tasty and full of good stuff kids need.

To make ground beef dishes kids will love, you need to be creative. Here are some tips to make your recipes more fun for young eaters:

Making Ground Beef Dishes Kid-Friendly

  • Create fun shapes with ground beef patties
  • Use colorful ingredients to make meals visually exciting
  • Involve kids in meal preparation
  • Experiment with mild, familiar seasonings

Sneaking in Extra Vegetables

Adding veggies to ground beef recipes can be a big win. Here are some ways to do it:

  1. Finely chop vegetables and mix them into ground beef
  2. Blend vegetables into sauces
  3. Use colorful vegetables like bell peppers and carrots
  4. Create vegetable-rice blends with ground beef

“Nutrition doesn’t have to be boring – it can be delicious and fun!” – Child Nutrition Expert

Portion Control for Children

It’s important to know how much food kids should eat. Ground beef and rice meals should be balanced. This way, kids get enough protein and energy without eating too much.

How much kids should eat varies by age. But, they usually need smaller portions than adults. Try to give them 2-3 ounces of ground beef per meal. Pair it with the right amount of rice and veggies.

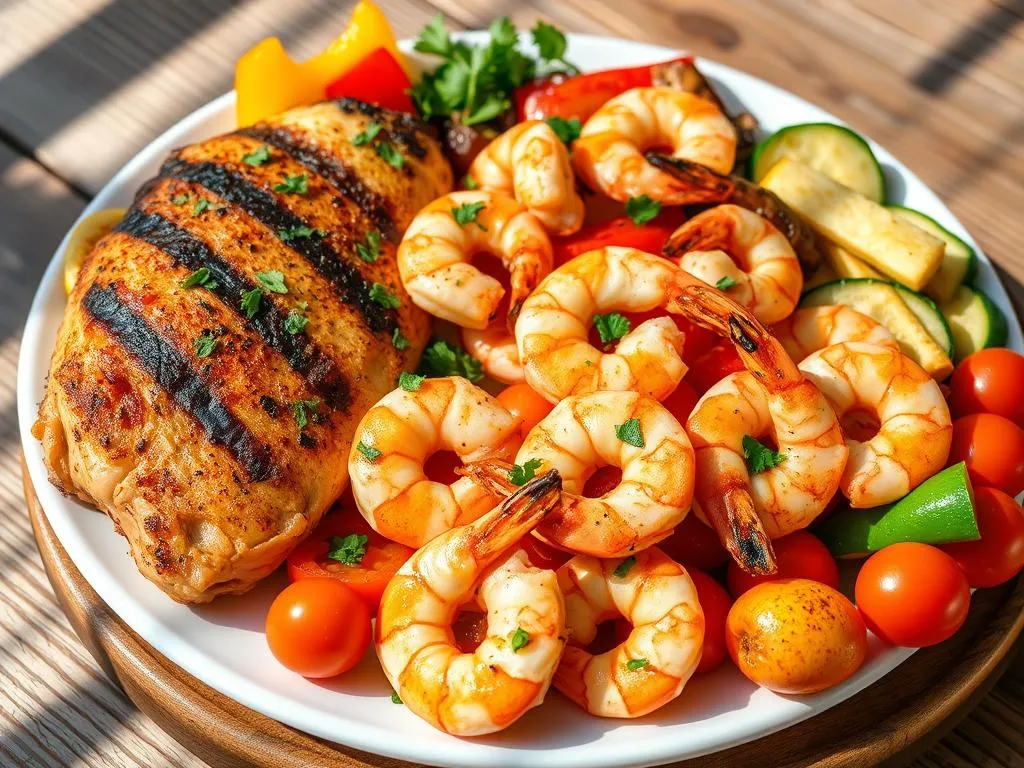
Mediterranean Ground Beef and Quinoa Bowl

Discover a tasty dinner idea with ground beef that brings the Mediterranean to your home. This recipe turns simple ingredients into a healthy and exciting meal. It’s perfect for pleasing your whole family.

Making a Mediterranean ground beef and quinoa bowl is simple. It combines lean ground beef, protein-rich quinoa, and fresh veggies. This mix is a nutritional powerhouse.

Key Ingredients

  • Lean ground beef
  • Quinoa
  • Cherry tomatoes
  • Cucumber
  • Feta cheese
  • Kalamata olives
  • Fresh herbs (parsley, mint)

The secret to authentic Mediterranean flavor is in the seasoning. Oregano, garlic, and a touch of cumin make the ground beef unforgettable.

Cooking Method

  1. Brown the ground beef with Mediterranean spices
  2. Cook quinoa in vegetable broth
  3. Chop fresh vegetables
  4. Assemble the bowl with layered ingredients
  5. Top with crumbled feta and herbs

“Eating Mediterranean-style isn’t just a diet, it’s a delicious lifestyle.” – Culinary Nutritionist

Nutritional Breakdown

NutrientAmount per Serving
Protein25g
Carbohydrates30g
Healthy Fats12g
Calories350

This Mediterranean ground beef and quinoa bowl shows healthy dinners can be delicious. It’s quick to make and full of flavor. It’s ideal for busy weeknights.

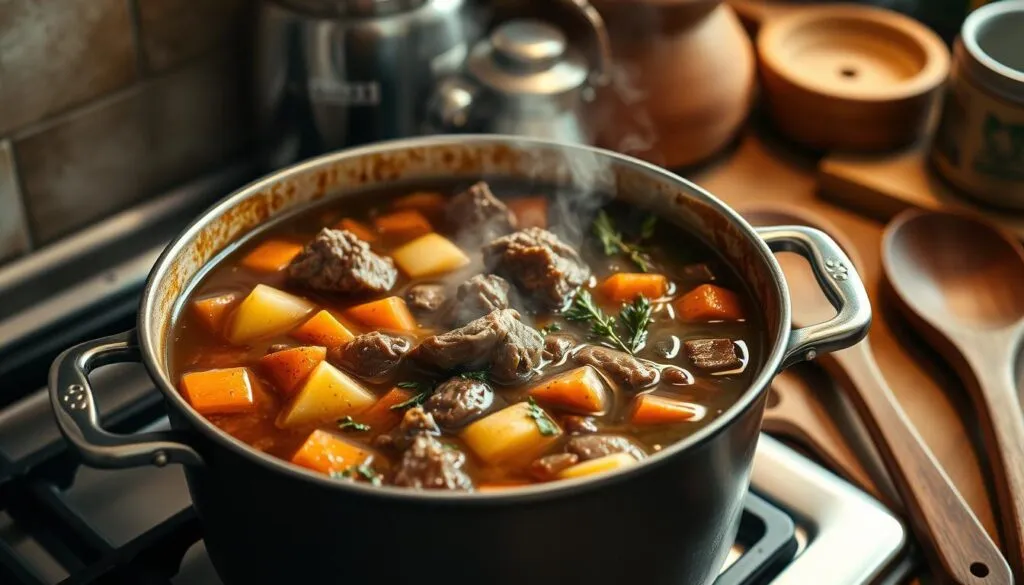
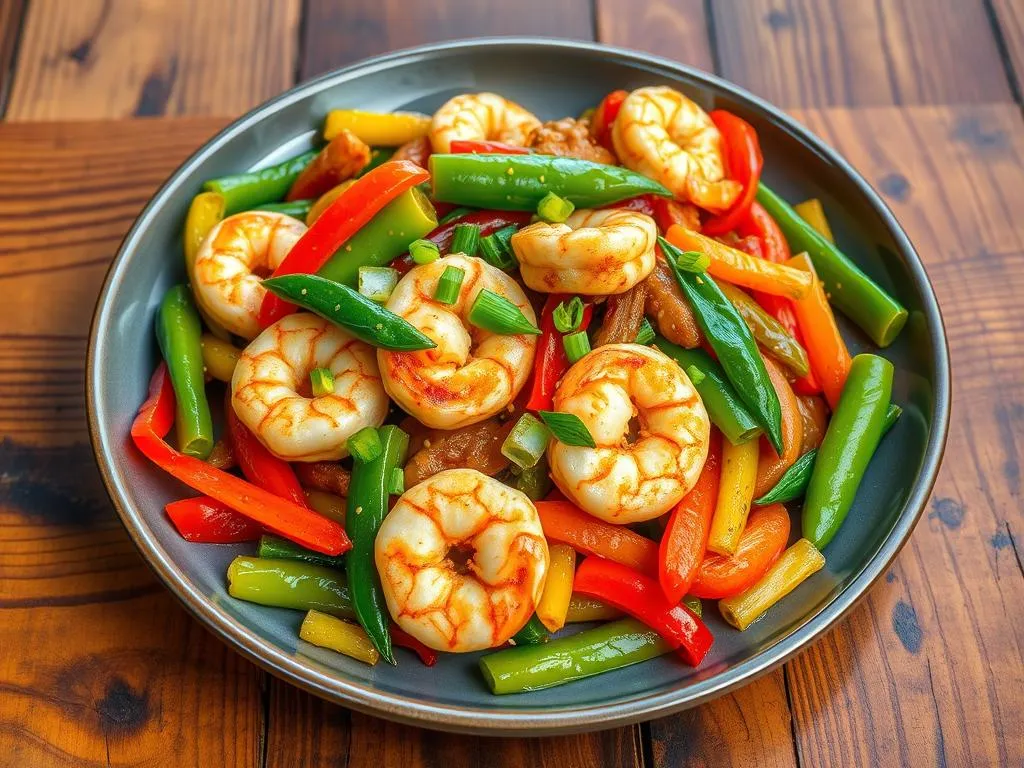
Quick Ground Beef and Vegetable Stir-Fry

Looking for quick and tasty meals with ground beef? A ground beef vegetable stir-fry is perfect for busy weeknights. It turns simple ingredients into a tasty dinner in under 30 minutes.

Stir-frying is a fast way to make healthy meals. It’s all about quick prep and cooking at high heat. This keeps flavors in and veggies crisp.

Choosing the Right Vegetables

Picking the right veggies for your stir-fry is key. Choose fast-cooking ones that stay crunchy and nutritious:

  • Bell peppers
  • Broccoli florets
  • Snow peas
  • Carrots (julienned)
  • Zucchini slices

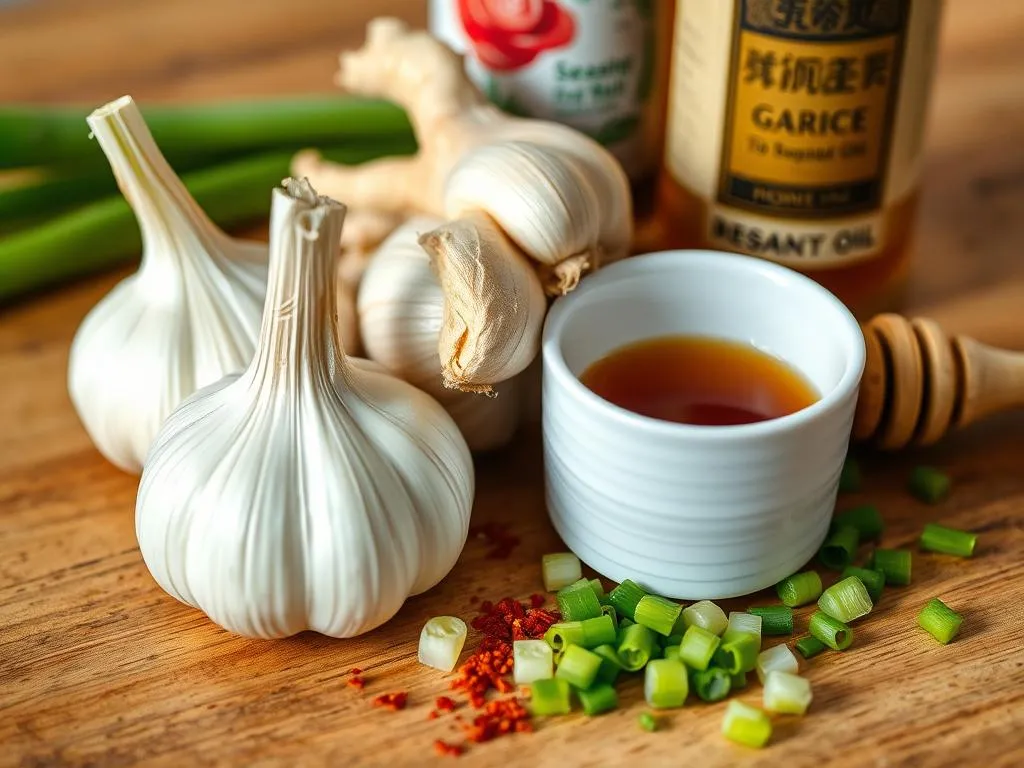
Sauce Combinations and Options

Make your meal special with unique sauces. They turn simple ground beef into a standout dish:

Sauce StyleKey IngredientsFlavor Profile
Asian-InspiredSoy sauce, ginger, garlicSavory umami
Spicy SouthwesternChipotle, lime, cuminBold and tangy
MediterraneanOregano, lemon, olive oilFresh and herbal

Time-Saving Preparation Methods

Efficiency is key when cooking with ground beef. Here are some tips to save time:

  1. Chop veggies ahead of time
  2. Use pre-minced garlic
  3. Keep premixed sauce in fridge
  4. Cook ground beef in large batches

Pro tip: A hot wok or large skillet is crucial for achieving that perfect stir-fry texture.

With these tips, you can make a restaurant-quality meal in minutes. It shows that quick meals can be both tasty and convenient.

Low-Carb Ground Beef Cauliflower Rice Bowl

Try a tasty twist on classic ground beef and rice with this low-carb cauliflower rice bowl. It’s a healthy meal that makes comfort food lighter and more nutritious.

“Eating healthy doesn’t mean sacrificing flavor – it’s about making smart ingredient choices!”

Cauliflower rice is a big hit for those watching their carbs. It’s a great base for ground beef, offering a rice-like texture but with fewer carbs.

  • Preparation time: 20 minutes
  • Total cooking time: 30 minutes
  • Serves: 4 people

To make perfect cauliflower rice, pulse cauliflower in a food processor until it’s like rice. Pro tip: Use a clean kitchen towel to remove excess moisture for the best texture.

Key Ingredients

  • 1 pound lean ground beef
  • 1 head cauliflower
  • Mixed vegetables
  • Seasonings (garlic, salt, pepper)

Choose lean ground beef for healthier recipes. This cauliflower rice bowl pairs protein-rich ground beef with veggies for a balanced meal.

“Healthy eating is a form of self-respect – fuel your body with the right ingredients!”

Add toppings like fresh herbs, cheese, or Greek yogurt to make your bowl even better. It boosts flavor and nutrition in your ground beef and rice recipes.

Meal Prep Tips for Ground Beef Dinners

Transforming your dinner ideas with ground beef can change your meal planning. Making fast hamburger meals easy is all about meal prep. Smart cooking tips help busy cooks save time and reduce stress at dinner.

Preparing ground beef meals ahead needs careful planning and techniques. With the right strategies, you can make tasty, easy meals your family will enjoy.

Proper Storage Guidelines

Storing ground beef right keeps it safe and fresh. Here are key storage tips:

  • Refrigerate raw ground beef for 1-2 days max
  • Freeze it in airtight containers for up to 4 months
  • Label containers with date and contents
  • Use freezer-safe bags to keep air out

Batch Cooking Strategies

Boost your cooking efficiency with these batch cooking tips for ground beef:

  1. Cook big batches of ground beef at once
  2. Portion meals into single servings
  3. Try different seasonings for variety
  4. Freeze meals in single-serving containers

Reheating Instructions

Reheating MethodTemperatureCooking Time
Microwave165°F1-2 minutes
Oven350°F10-15 minutes
SkilletMedium heat5-7 minutes

“Meal prep is not just about saving time—it’s about creating delicious, nutritious meals with minimal daily effort.”

Using these meal prep strategies for ground beef can make dinner easier. Enjoy fast hamburger meals without losing taste or nutrition.
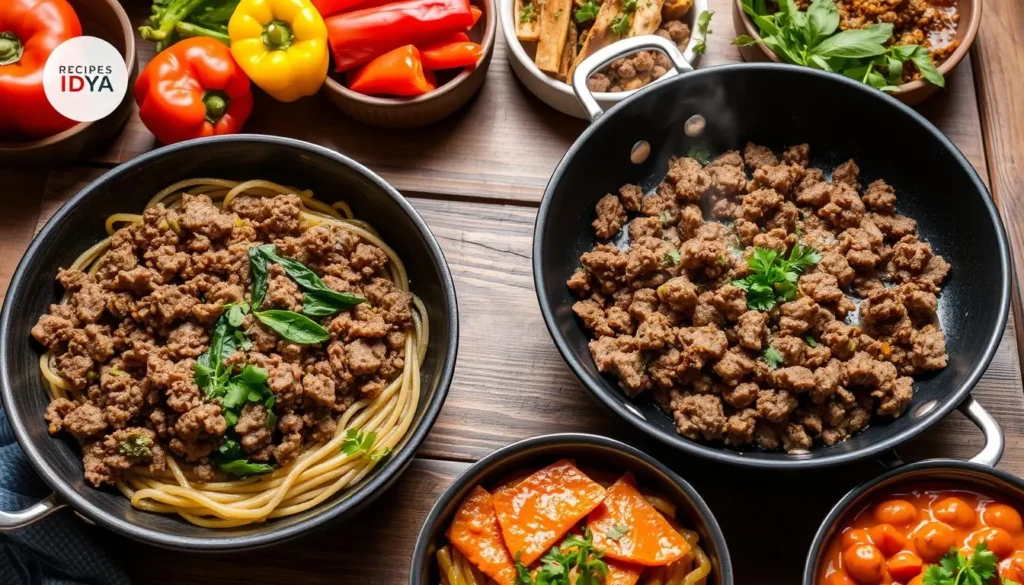
Conclusion

Exploring healthy ground beef recipes is a gateway to tasty and nutritious meals. These dishes are perfect for quick, satisfying dinners that everyone will enjoy. You can make everything from Mexican-style skillets to Asian lettuce wraps with ground beef.

Your kitchen can become a place of creativity with these recipes. Using lean ground beef adds protein and flavor to your meals. Try mixing different cuisines, vegetables, and cooking methods to keep things interesting.

Healthy ground beef recipes are about more than just protein. They’re about making meals that bring families together. With the right ingredients and a little creativity, you can make dishes that taste like they came from a restaurant. Start trying out these recipes and make your weeknights special.

Ground beef is incredibly versatile, making your meals both tasty and healthy. Your cooking journey to better, faster, and more enjoyable meals begins now.

FAQ

Are ground beef recipes really healthy?

Yes, they can be. Choose lean ground beef and add lots of veggies. This way, you get protein, iron, and zinc without too many calories or fats.

How can I make ground beef meals more nutritious?

Add whole grains and lots of veggies. Use herbs and spices instead of salt. Mix it with quinoa or cauliflower rice to increase fiber and cut calories.

What are some quick ground beef dinner ideas?

Try lettuce wraps, stir-fries, and skillet meals. Stuffed peppers and one-pan rice bowls are also great. They’re quick, tasty, and offer a variety of flavors.

Can ground beef recipes be budget-friendly?

Yes! Ground beef is often cheaper. Buy in bulk, use sales, and stretch the meat with veggies and grains. This way, you can make healthy dinners without breaking the bank.

How do I prevent ground beef from becoming dry?

Don’t overcook it. Use meat with some fat. Add moisture with diced tomatoes or broth. Braising or using sauces helps keep it moist.

Are there gluten-free ground beef recipe options?

Many recipes can be made gluten-free. Use gluten-free breadcrumbs and tamari instead of soy sauce. Make sure all seasonings and sauces are gluten-free.

How can I make ground beef meals kid-friendly?

Make them look good and use mild flavors. Add familiar tastes and hide veggies in sauces. Let kids help with cooking to get them excited about trying new foods.

What’s the best way to store leftover ground beef dishes?

Keep them in airtight containers in the fridge for 3-4 days. Freeze for up to 3 months. Cool them down first to keep food safe.

Can ground beef recipes be meal prepped?

Yes! Many are perfect for meal prep. Cook big batches, portion them out, and freeze. Choose recipes that reheat well and taste great.

Are there vegetarian alternatives for ground beef recipes?

Yes! Use lentils, mushrooms, TVP, or plant-based ground “meat” instead. They offer similar texture and protein to ground beef.

0 comments
0 FacebookTwitterPinterestEmail
peanut butter pie recipe

Peanut Butter Pie Easy and Delicious Recipe

by IDYA
peanut butter pie recipe

Easy Peanut Butter Pie Recipe

Serves: 8 Prep Time: Cooking Time:
Nutrition facts: 350 calories 22 grams fat
Rating: 5.0/5
( 1 voted )

Ingredients

  • 1 pre-made graham cracker crust
  • 1 cup creamy peanut butter
  • 1 cup powdered sugar
  • 8 oz cream cheese, softened
  • 1 cup heavy whipping cream
  • 1 teaspoon vanilla extract

Instructions

In a large mixing bowl, combine the peanut butter, powdered sugar, and softened cream cheese. Mix until smooth and creamy. In a separate bowl, whip the heavy cream and vanilla extract until stiff peaks form. Gently fold the whipped cream into the peanut butter mixture until well combined. Pour the filling into the graham cracker crust and smooth the top. Chill the pie in the refrigerator for at least 3 hours or until set. Serve chilled and enjoy!

Notes

You can top with chocolate shavings or whipped cream for extra flavor.

Indulge in the delightful simplicity of a homemade peanut butter pie. This no-bake dessert has become a beloved classic. It captures the hearts (and taste buds) of Americans nationwide. With its creamy, rich texture and irresistible peanut butter flavor, it’s no wonder this pie has earned a spot as one of the country’s favorite sweet treats.

Key Takeaways

  • Peanut butter pie is a classic no-bake dessert that’s quick and easy to make.
  • The creamy, rich texture and peanut butter flavor make it a beloved favorite among dessert lovers.
  • This recipe can be customized with various toppings and variations to suit your personal taste preferences.
  • Peanut butter pie is a crowd-pleasing dessert that’s perfect for special occasions or casual gatherings.
  • With just a few simple ingredients and minimal preparation time, you can create a delightful peanut butter pie at home.

Why Peanut Butter Pie Became America’s Favorite Dessert

Peanut butter pie is a beloved American dessert. It’s loved by many across the country. Its popularity comes from several key factors that make it a classic.

The flavor of peanut butter pie is a big reason for its appeal. The mix of creamy peanut butter and a sweet graham cracker crust is both indulgent and nostalgic. It reminds people of childhood treats and family gatherings.

Peanut butter pie is also versatile. It can be made to fit different diets and needs. This makes it a dessert that many can enjoy.

The ease of making peanut butter pie has also helped its popularity. It’s a no-bake dessert that can be quickly made and chilled. This makes it perfect for busy times, potlucks, and holidays.

“Peanut butter pie is the ultimate comfort food – rich, creamy, and utterly delicious. It’s no wonder it’s become a staple in American kitchens.”

The cultural importance of peanut butter pie is huge. It’s a beloved part of American food culture. It brings people together by sharing a favorite dessert.

In summary, peanut butter pie is loved for its flavor, versatility, convenience, and cultural significance. As a classic American dessert, it brings joy and nostalgia to people of all ages.

Essential Ingredients for Your Peanut Butter Pie Recipe

Making the perfect peanut butter pie starts with picking the right ingredients. You need creamy peanut butter and a flavorful graham cracker crust. Each part is key to getting the taste and texture just right. Let’s look at the must-haves for a homemade peanut butter pie that will impress.

Choosing the Right Peanut Butter

The peanut butter you pick is the base of your pie. Go for a high-quality, smooth peanut butter. It should be rich and creamy. Stay away from peanut butters with oils or sugars added. Natural peanut butter is the best for a classic taste.

Best Graham Cracker Crust Options

The graham cracker crust is a great match for the peanut butter filling. Choose fresh, crisp graham crackers for a sturdy base and a nice crunch. You can also try honey or cinnamon graham crackers for a unique flavor.

Cream Cheese and Cool Whip Selection

The mix of cream cheese and Cool Whip makes the pie light and airy. Use full-fat cream cheese and top-notch Cool Whip for the best results. The cream cheese adds richness, while the Cool Whip makes it smooth and fluffy.

By focusing on these key ingredients, you’re on your way to a delicious peanut butter pie. With the right peanut butter, crust, and filling, you’ll have a dessert that’s a true American classic.

Kitchen Tools and Equipment You’ll Need

Whipping up a delicious peanut butter pie requires the right tools. From mixing bowls to measuring cups, each item is crucial. Let’s look at the essential kitchen tools for making a perfect peanut butter pie.

You’ll need a strong mixing bowl for your peanut butter filling. An electric mixer or hand mixer is also key. They help make your filling smooth and creamy.

To make the ideal graham cracker crust, use a pie dish or springform pan. A rolling pin is handy for pressing the crumbs into the pan. This ensures a solid base for your pie.

  • Mixing bowls (large and small)
  • Electric or hand mixer
  • Pie dish or springform pan
  • Rolling pin
  • Measuring cups and spoons
  • Spatula or butter knife
  • Cooling rack

Remember, you’ll need measuring cups and spoons for accurate ingredient measurements. A spatula or butter knife is useful for smoothing the filling and putting your pie together. Lastly, a cooling rack is necessary for cooling your pie before serving.

With these essential tools, you’re ready to make a fantastic peanut butter pie. It will surely impress your family and friends. Happy baking!

Step-by-Step Preparation Guide

Making a delicious peanut butter pie is easy and rewarding. Follow this guide to make the perfect pie from scratch.

Crust Preparation Method

Start by making the graham cracker crust. Crush the crackers finely, by hand or with a food processor. Mix the crumbs with melted butter and press into a pie dish. Make sure it covers the bottom and sides well. Chill the crust in the fridge while you make the filling.

Mixing the Peanut Butter Filling

  1. In a big bowl, mix cream cheese, peanut butter, and powdered sugar until smooth.
  2. Add Cool Whip or whipped cream and mix gently to keep it light.
  3. Put the filling into the crust and smooth the top with a spatula.

Assembly and Decoration Tips

  • Chill the pie for at least 4 hours until the filling is firm.
  • Top with whipped cream, chopped peanuts, or chocolate, if you like.
  • Slice and serve, enjoying the creamy peanut butter and buttery crust.

Just follow these steps, and you’ll have a stunning peanut butter pie. It’s sure to impress your family and friends. Enjoy the rich, decadent taste of this classic American dessert.

Tips for Creating a No-Bake Version

Looking for a quick and easy dessert? A no-bake peanut butter pie is perfect. It’s a crowd-pleaser that saves time and shows off your baking skills without the oven.

To make a great no-bake peanut butter pie, keep these tips in mind:

  • Chill the Crust: First, chill your graham cracker crust well. This makes it sturdy for your pie.
  • Use Softened Cream Cheese: Soft cream cheese makes the filling creamy. Make sure it’s at room temperature before mixing.
  • Stabilize the Whipped Cream: When adding Cool Whip or homemade whipped cream, fold it gently. This keeps it fluffy and prevents the filling from getting dense.
  • Chill, Chill, Chill: After assembling, chill the pie in the fridge, especially overnight. This lets the filling set right, so your pie slices well.

Follow these tips to make a delicious peanut butter pie no bake. It’s a classic American dessert that’s creamy and rich. And the best part? You don’t need to use the oven.

There are many ways to make peanut butter pie your own. You can drizzle it with chocolate or top it with whipped cream. These options let you create a peanut butter and chocolate pie or peanut butter pie with cool whip that’s uniquely yours.

Chocolate Drizzle Options

Adding a chocolate drizzle can make peanut butter pie even more special. You can use melted chocolate or different types of chocolate for a unique look. The mix of creamy peanut butter and rich chocolate is irresistible.

Nutty Garnishes and Additions

  • Chopped roasted peanuts
  • Crushed graham crackers or cookie crumbs
  • Toasted coconut flakes
  • Crushed toffee bits or English toffee pieces

Adding nuts or crushed cookies can add a nice crunch. It also brings out the peanut butter flavor, making the pie even better.

Cool Whip Decorating Techniques

Top your peanut butter pie with Cool Whip for a light finish. You can pipe it into fun shapes or create a rosette pattern. It’s a great way to add a fluffy touch.

VariationDescription
Chocolate DrizzleMelted chocolate sauce or decorative chocolate pattern
Nutty GarnishesChopped peanuts, graham cracker crumbs, toasted coconut
Cool Whip ToppingPiped or swirled dollops of whipped cream

Peanut butter pie is all about trying new things. Don’t be afraid to mix flavors, use seasonal ingredients, and get creative with how you present it. This way, you can make it truly your own.

Storage and Make-Ahead Instructions

Keeping your homemade peanut butter pie fresh is crucial. Whether you’re enjoying it now or saving it for later, these tips will help. They ensure your pie stays delicious.

Refrigerating for Short-Term Storage

For immediate enjoyment, store your pie in the fridge. It stays fresh for up to 5 days when covered and chilled. Use an airtight container or wrap it tightly in plastic wrap to keep the crust moist.

Freezing for Long-Term Storage

Freezing is great for making your pie ahead of time. Wrap the whole pie or slices in plastic wrap or foil, then freeze. Frozen, your pie can last up to 3 months. Thaw it in the fridge overnight before serving.

Storage MethodShelf Life
RefrigeratorUp to 5 days
FreezerUp to 3 months

When thawing a frozen pie, let it sit in the fridge overnight. This ensures even thawing. It keeps the texture and flavor just right.

Follow these easy tips for storing and making ahead. Enjoy the delicious taste of homemade peanut butter pie whenever you want.

Troubleshooting Common Issues

Making the perfect peanut butter pie is an art. Even experienced bakers face common problems. Don’t worry, we’ve got solutions for any issues you might have.

Fixing a Runny Filling

If your filling is too soft, it might be because of the wrong mix of ingredients. To fix it, add more cream cheese or powdered sugar. Letting the filling chill in the fridge for a few hours can also help.

Preventing Crust Crumbling

A crumbling crust is frustrating. To avoid this, use the right mix of graham cracker crumbs and melted butter. Press the mixture firmly into the pie pan. Chilling the crust before adding the filling helps it stay solid.

Achieving the Perfect Texture

The perfect pie should be creamy and smooth. If it’s too dense, whip the ingredients until they’re light. Adding heavy cream or milk can make it even smoother.

By solving these common problems, you’ll make a pie that everyone will love. With practice and these tips, you’ll soon be a pro at making peanut butter pie.

Conclusion

Peanut butter pie is a favorite in American desserts, loved by all ages. This guide has shown you how to make a delicious peanut butter cream cheese pie. It’s perfect for impressing your family and friends.

You can choose between a classic baked pie or a cool no-bake version. The recipe is flexible, so you can add your own twist. The secret to a great pie is using the best ingredients and paying close attention to how you put it together.

Give this peanut butter cream cheese pie recipe a try. Enjoy the creamy texture and the amazing peanut butter taste. Making it yourself is fun, and sharing it with others creates special memories.

FAQ

What are the key ingredients for a peanut butter pie?

A classic peanut butter pie needs smooth peanut butter, cream cheese, and powdered sugar. You’ll also need Cool Whip and a graham cracker crust.

Can I make a no-bake peanut butter pie?

Yes, making a no-bake peanut butter pie is easy. It skips baking and uses a pre-made graham cracker crust.

How do I prevent the peanut butter filling from becoming too runny?

To avoid a runny filling, balance the ingredients. Use more cream cheese or powdered sugar. Chilling the pie well helps it set right.

Can I add chocolate to my peanut butter pie?

Definitely! Mixing peanut butter with chocolate is a great idea. You can drizzle chocolate on top or mix it into the filling for a chocolatey twist.

How should I store a peanut butter pie?

Keep peanut butter pie in the fridge, covered, for 3-4 days. For longer storage, freeze it for 2-3 months. Wrap it tightly in plastic and foil.

What are some tasty toppings or garnishes for peanut butter pie?

Top your peanut butter pie with whipped cream, chopped peanuts, or chocolate shavings. Caramel sauce or cocoa powder dust also add flavor.

Can I make peanut butter pie ahead of time?

Yes, peanut butter pie is perfect for making ahead. Prepare the crust and filling a day or two early. Then, assemble and chill until serving time.

0 comments
0 FacebookTwitterPinterestEmail
Sugar Cookies Recipe

Easy Sugar Cookies Recipe: Perfect 4 Every Occasion

Serves: 24 Prep Time: Cooking Time:
Nutrition facts: 100 calories 5 grams fat
Rating: 5.0/5
( 1 voted )

Ingredients

  • 2 ¾ cups all-purpose flour
  • 1 teaspoon baking soda
  • ½ teaspoon baking powder
  • 1 cup unsalted butter, softened
  • 1 ½ cups white sugar
  • 1 egg
  • 1 teaspoon vanilla extract
  • ½ teaspoon almond extract (optional)
  • ¼ cup sugar for rolling

Instructions

Preheat your oven to 375°F (190°C). Line baking sheets with parchment paper.

In a medium bowl, whisk together the flour, baking soda, and baking powder. Set aside.

In a large bowl, cream together the softened butter and white sugar until light and fluffy.

Beat in the egg, vanilla extract, and almond extract (if using).

Gradually add the dry ingredients to the wet mixture and stir until fully combined.

Roll dough into 1-inch balls, then roll each ball in sugar.

Place dough balls onto the prepared baking sheets, about 2 inches apart.

Bake in the preheated oven for 10-12 minutes, or until the edges are slightly golden.

Allow cookies to cool on the baking sheets for 5 minutes before transferring them to wire racks to cool completely.

Notes

You can add colored sugar for extra decoration.

For a softer cookie, do not overbake.

These cookies can be stored in an airtight container for up to 1 week.

Sugar cookies have been a favorite for ages, bringing joy to many. They’re great for holidays, special events, or just a sweet treat. This easy recipe lets you make delicious, soft cookies with just a few ingredients and some kitchen time.

Key Takeaways

  • Sugar cookies are a versatile and timeless classic dessert
  • This recipe provides an easy and straightforward approach to making homemade sugar cookies
  • Cookies can be customized for various holidays and events with different shapes and decorations
  • The recipe produces a soft, buttery, and delicious cookie that’s perfect for sharing
  • With a few simple tips, you can master the art of baking professional-quality sugar cookies at home

Why Sugar Cookies Are a Timeless Classic

Sugar cookies are a beloved baking staple that have stood the test of time. These delightful sugar cookies with icing and cut out cookies have captured the hearts and taste buds of generations of Americans. They are a cherished part of our culinary heritage.

The origins of sugar cookies can be traced back to the early 1700s. Bakers in Europe started experimenting with simple recipes that highlighted the sweet, buttery flavor of sugar. As these recipes made their way to the colonies, they evolved and adapted to local ingredients and traditions. Eventually, they became a quintessential part of American baking.

One of the reasons sugar cookies have endured is their incredible versatility. Whether you’re celebrating a holiday, hosting a party, or simply enjoying a cozy afternoon, these timeless treats can be easily tailored to fit the occasion. From festive cut out cookies adorned with vibrant sugar cookie icing to delicate, bite-sized varieties, the possibilities are endless.

“Sugar cookies are the chameleons of the baking world – they can be dressed up or down to fit any celebration or mood.”

Beyond their adaptability, sugar cookies also hold a special place in American baking traditions. They often evoke nostalgic memories of childhood, family gatherings, and the comforting scent of freshly baked cookies wafting through the kitchen. This timeless appeal is what has made sugar cookies a staple in households across the country for generations.

So whether you’re whipping up a batch of classic sugar cookies with icing or experimenting with innovative cut out cookies designs, you can rest assured that you’re continuing a cherished tradition. This tradition has brought joy and delight to countless bakers and cookie lovers throughout history.

Essential Ingredients for Perfect Sugar Cookies

To make delicious sugar cookies, you need the right ingredients. Whether you’re making classic cut-out cookies or a batch of dough, knowing each ingredient’s role is crucial. This ensures your cookies have the perfect texture and taste.

All-Purpose Flour vs. Cake Flour

Choosing between all-purpose flour and cake flour affects your cookies’ texture. All-purpose flour gives structure and stability. Cake flour makes cookies tender and delicate. For the best results, use all-purpose flour for a mix of chewiness and crispness.

Types of Sugar to Use

  • Granulated sugar: This classic white sugar is the backbone of sugar cookies, providing sweetness and helping to create the signature crisp edges.
  • Powdered sugar: Also known as confectioner’s sugar, this finely ground sugar adds a soft, melt-in-your-mouth texture to sugar cookies.
  • Brown sugar: Incorporating a touch of brown sugar can lend a subtle caramel note and chewier consistency to your sugar cookies.

Importance of Quality Butter

The butter you choose is key. Use high-quality, unsalted butter for a rich flavor and perfect texture. Margarine or low-fat spreads can make your cookies less desirable.

IngredientRole in Sugar Cookies
All-Purpose FlourProvides structure and stability
Granulated SugarAdds sweetness and crisp edges
Unsalted ButterContributes rich, creamy flavor and texture

Choosing the right flour, sugar, and butter is crucial. With these ingredients, your sugar cookies recipe or cut out sugar cookies will be a hit. Your cookies will impress at any event.

Basic Sugar Cookies Recipe

Finding the right sugar cookies recipe is key for holiday baking. Especially for christmas cutout cookies, which everyone loves. This recipe makes cookies that are buttery, crisp, and tender.

To start, you’ll need these ingredients:

  • 2 3/4 cups all-purpose flour
  • 1 teaspoon baking powder
  • 1/2 teaspoon salt
  • 1 cup unsalted butter, softened
  • 1 1/2 cups granulated sugar
  • 1 large egg
  • 2 teaspoons vanilla extract

In a medium bowl, whisk together the flour, baking powder, and salt. Set aside.

With a stand mixer or hand mixer, mix the butter and sugar until light and fluffy. This takes about 2-3 minutes. Then, add the egg and vanilla extract and mix well.

Slowly add the dry ingredients to the wet ingredients. Mix until a dough forms. Split the dough in half, shape each half into a disk, wrap in plastic wrap, and chill for at least 1 hour (or up to 3 days).

Preheat your oven to 350°F (175°C) when you’re ready to bake. Line baking sheets with parchment paper.

Take one disk of dough and roll it out to 1/4-inch thickness on a lightly floured surface. Use your favorite christmas cutout cookies to cut out shapes. Place the cookies on the prepared baking sheets, leaving about 1 inch of space between each cookie.

Bake for 8-10 minutes, or until the edges are lightly golden. Let the cookies cool on the baking sheets for 5 minutes. Then, move them to a wire rack to cool completely.

Enjoy your freshly baked sugar cookies recipe and have fun decorating them!

Tools and Equipment You’ll Need

Making perfect cut-out cookies needs more than a bowl and whisk. You’ll need the right tools and equipment for a smooth baking process. From baking sheets to rolling pins, let’s look at the essential items for your cut out cookies and christmas cutout cookies.

Must-Have Baking Sheets

High-quality baking sheets are key for evenly baked cut out cookies. Choose sheets made of heavy-duty aluminum or steel for even heat distribution. A light-colored, non-stick surface makes cookie removal easy.

Rolling Pin Options

  • Traditional Wooden Rolling Pin: A classic choice for controlled rolling, ideal for christmas cutout cookies dough.
  • Rolling Pin with Removable Rings: This option lets you adjust dough thickness for consistent results.
  • Marble Rolling Pin: Its cool surface is great for delicate doughs that warm up fast.

A good cut out cookies station has unique cookie cutters. You’ll find everything from classic shapes to whimsical designs. A set of nesting cutters in various sizes makes creating different christmas cutout cookies easy.

“Baking is like washing dishes, you just have to get in there and do it. But baking is infinitely more rewarding.”
– Regina Brett

Step-by-Step Mixing Technique

Mastering the art of mixing sugar cookie dough is key to perfect texture and consistency. Whether you’re a seasoned baker or a beginner, a step-by-step approach is crucial. It helps you make the most delicious homemade sugar cookies every time.

Begin by creaming butter and sugar until light and fluffy. This step is vital as it adds air to the dough. This makes the cookies tender and melt-in-your-mouth. Use quality, room-temperature butter for the best results.

Then, add eggs one at a time, beating well after each. This step emulsifies the dough, making it smooth and cohesive. After the eggs are fully incorporated, sift in the dry ingredients. This includes sugar cookies recipe flour, baking powder, and a pinch of salt.

  1. Mix the dry ingredients into the wet mixture gently until just combined. Be careful not to overmix. Overmixing can make the cookies tough and dense.
  2. Once the dough is ready, cover it and chill it in the refrigerator for at least 30 minutes. This step relaxes the gluten, making the dough easier to roll out and cut into shapes.

By following these simple steps, you’ll get the perfect consistency for your homemade sugar cookies. This sets the stage for beautifully shaped and evenly baked treats. Remember, patience and attention to detail are key when mixing the perfect sugar cookie dough.

Rolling and Cutting Tips for Perfect Shapes

Creating cut out sugar cookies or christmas cutout cookies with perfect shapes is key. The rolling and cutting steps are very important. With a few simple tips, your cookies will keep their detailed designs and crisp edges.

Proper Dough Thickness

The dough should be about 1/4 inch thick for the best results. This thickness ensures your cookies are both crisp and tender. Make sure your work area is lightly floured to prevent the dough from sticking.

  • For larger cookie cutters, use a flat spatula or your hands to lift the shapes gently. This helps avoid stretching or distorting the dough.
  • Place smaller cookie cutters close together on the dough. This helps you use less dough and get more cookies.
  • Rotate the cookie cutters as you press them into the dough. This ensures even cuts.

Chilled dough and careful handling are the secrets to perfect shapes. With practice, you’ll soon be a pro at cutting out sugar cookies!

Dough ThicknessCookie Texture
1/8 inchCrisp and thin
1/4 inchBalanced crispness and tenderness
1/2 inchSoft and cakey

Baking Temperature and Timing Guide

Getting the perfect sugar cookies needs careful attention to baking. Whether making classic cut-out cookies or sugar cookie bars, knowing the oven temperature and time is key. This ensures your cookies turn out just right.

Preheat your oven to 350°F (175°C) for the best results. This temperature helps your sugar cookies recipe bake evenly. It gives them a golden-brown edge and a soft center.

  1. For 1/4-inch thick cut out cookies, bake for 8-10 minutes. Watch them closely to avoid over-browning.
  2. Thicker cookies, about 1/2-inch, need 10-12 minutes in the oven.
  3. Sugar cookie bars bake for 12-15 minutes.

Rotating the baking sheet halfway through helps with even browning. Remember, oven temperatures can differ. So, check your cookies a minute or two before the time is up. A golden color and firm edges mean they’re done.

Cookie ThicknessBaking Time
1/4-inch8-10 minutes
1/2-inch10-12 minutes
Sugar Cookie Bars12-15 minutes

Mastering baking temperature and timing will help you make irresistible sugar cookies. They’ll impress your family and friends.

Decorating Your Sugar Cookies with Icing

Decorating your sugar cookies with icing adds a whimsical touch. It’s perfect for christmas cutout cookies or any occasion. The right icing can turn a simple cookie into a masterpiece.

Royal Icing Recipe

Start with a classic royal icing recipe for a professional look. This icing dries glossy, ideal for detailed designs. You’ll need:

  • 3 egg whites (or 3 tablespoons of meringue powder and 3 tablespoons of water)
  • 4 cups of powdered sugar
  • 1 teaspoon of vanilla extract
  • Food coloring (optional)

Flooding Techniques

“Flooding” is a popular technique for decorating. It involves using royal icing to create a smooth base. Mix the icing to a runny consistency, then outline the cookie’s edges with a piping bag or squeeze bottle. Fill in the center carefully to avoid air bubbles. Let the cookies dry before adding more details.

Color Mixing Tips

Color mixing can elevate your sugar cookies with icing. Start with primary colors and mix them for unique shades. Add food coloring gradually, as it’s easier to darken than lighten. With practice, you can create vibrant, personalized icing colors.

Storage Tips for Fresh Cookies

Keeping your homemade sugar cookies fresh is key to enjoying their taste and texture. Whether you’ve made a classic sugar cookies recipe or something creative, these tips will help. They ensure your cookies stay fresh and ready to eat.

Proper Packaging

It’s crucial to store your sugar cookies in an airtight container. A plastic container or resealable bag is perfect. It keeps the cookies from drying out or picking up bad smells. Don’t store them in open bowls or on plates, as this can make them stale faster.

Ideal Storage Conditions

  • Keep your sugar cookies recipe at room temperature, away from sunlight or heat.
  • Choose a cool, dry spot like a pantry or kitchen cabinet. This keeps the cookies soft and fresh.
  • Don’t refrigerate your homemade sugar cookies. It makes them hard and loses their soft texture.

Shelf Life

Your sugar cookies can stay fresh for up to 5 days with proper storage. But for the best taste, eat them within 2-3 days. If you need to keep them longer, freeze them. This way, they can last up to 3 months.

Storage MethodShelf Life
Room Temperature (airtight container)2-5 days
Freezer (airtight container)Up to 3 months

By using these easy storage tips, your homemade sugar cookies recipe and homemade sugar cookies will stay fresh and tasty. Enjoy them whenever you want.

Common Troubleshooting Tips

Baking sugar cookies can be a fun experience, but sometimes, bakers face challenges. Don’t worry, we’ve got some tips to help you make perfect sugar cookies every time.

Fixing Spread-Out Cookies

If your sugar cookies spread out too much, there are a few things you can do. First, make sure your dough is well-chilled before baking. This keeps the cookies’ shape.

Also, use less baking powder or soda. Too much can cause them to spread too much. Lastly, baking at a slightly lower temperature can help prevent spreading.

Preventing Burnt Edges

Burnt edges can ruin a perfect sugar cookies recipe. To avoid this, watch your cookies closely during the last few minutes. Use a light-colored baking sheet to prevent over-browning.

Also, rotate your baking sheets halfway through baking. This ensures even browning.

By following these tips, you’ll bake delicious, perfectly-shaped cut out sugar cookies. They’re sure to impress. Happy baking!

Holiday Variations and Special Occasions

Sugar cookies are incredibly versatile. They can be made into festive treats for any holiday or special event. Whether it’s for Christmas, Valentine’s Day, or a birthday, you can turn these classic cookies into something truly special.

Christmas Cutout Cookies

For the winter holidays, christmas cutout cookies are a must-try. Use seasonal cookie cutters in the shape of trees, stockings, or snowflakes. Decorate them with sugar cookies with icing in vibrant red and green hues. Or, dust them with powdered sugar for a snowy look.

Themed Cookies for Any Occasion

  • Valentine’s Day: Heart-shaped cookies with pink or red icing, topped with sprinkles or edible glitter.
  • Easter: Egg-shaped cookies in pastel colors, decorated with intricate designs or filled with colorful candy.
  • Halloween: Spooky shapes like ghosts, pumpkins, or bats, adorned with black and orange icing.
  • Birthdays: Round or square cookies customized with the celebrant’s name or age, with festive sprinkles and colorful icing.

There are endless ways to make your sugar cookies special for any event. Get creative with shapes, colors, and decorations. This way, your cookies will be the highlight of any celebration.

HolidayCookie ShapeIcing ColorsDecorative Touches
ChristmasTrees, Stockings, SnowflakesRed, GreenSprinkles, Powdered Sugar
Valentine’s DayHeartsPink, RedSprinkles, Edible Glitter
EasterEggsPastel ColorsIntricate Designs, Candy
HalloweenGhosts, Pumpkins, BatsBlack, OrangeN/A
BirthdaysRounds, SquaresCustomizedPersonalized Designs, Sprinkles

Conclusion

In this guide, you’ve learned how to make the perfect sugar cookies recipe. You now know how to pick the right ingredients and mix them just right. You also know how to roll and decorate them beautifully.

Baking these treats is fun and rewarding. It’s a great way to bring people together. Homemade sugar cookies are perfect for any special occasion or just to share a moment of joy.

We want you to get creative with your sugar cookies. Try making them in unique shapes and colors. The joy of baking and decorating them is unmatched. So, get ready to bake and decorate!

FAQ

What are the key ingredients for making perfect sugar cookies?

To make great sugar cookies, you need all-purpose flour, granulated sugar, and unsalted butter. Also, eggs, vanilla extract, and a bit of salt are crucial. The flour and sugar types can change the cookie’s texture and taste.

For the perfect dough, follow the mixing steps carefully. Cream the butter and sugar well, then add the dry ingredients slowly. This makes the dough smooth and easy to handle.

Roll the dough to about 1/4 inch thick. Use a floured surface and rolling pin to avoid sticking. Try different shapes with your cookie cutters to get creative.

How do I get the perfect baking temperature and timing for sugar cookies?

Bake at 350°F (175°C) for 8 to 10 minutes. The edges should be lightly golden, but the center soft. Adjust the time based on cookie size and thickness.

What’s the best way to decorate sugar cookies with icing?

Make a glossy royal icing by mixing powdered sugar, meringue powder, and water. Use a piping bag or spoon to decorate the cookies. Let them dry before adding more decorations.

How can I store sugar cookies to keep them fresh?

Store cooled cookies in an airtight container at room temperature for up to 5 days. You can also freeze the dough for up to 3 months. Then, thaw and bake as needed.

What are some common troubleshooting tips for sugar cookies?

If cookies spread too much, chill the dough first. To avoid burnt edges, bake at a lower temperature and watch them closely. Adjusting the flour-to-butter ratio can also help.

How can I customize sugar cookies for different holidays and occasions?

Add festive sprinkles, food coloring, or extracts like peppermint or almond to your recipe. Use various cookie shapes and decorations for any celebration.

0 comments
0 FacebookTwitterPinterestEmail
Cake Pop Recipe

Easy Cake Pop Recipe 4 Beginners

by IDYA
Cake Pop Recipe

Easy Cake Pop Recipe for Beginners

Serves: 12 Prep Time: Cooking Time:
Nutrition facts: 150 calories 6 grams fat
Rating: 5.0/5
( 1 voted )

Ingredients

  • 1 box of cake mix (plus ingredients required on the box)
  • 1 can of frosting
  • 1 bag of chocolate or candy coating
  • Lollipop sticks

Instructions

Bake the cake according to the instructions on the box, then allow it to cool.

Notes

You can use different types of coatings like white chocolate or colorful candy melts for a fun variation

Ready to explore the world of cake pops? This easy recipe will boost your baking skills. It’s perfect for parties, birthdays, and more. Cake pops mix cake’s rich flavor with a cute size.

Whether you’re new to baking or want to try something new, this guide is for you. You’ll learn to mix, shape, and decorate these treats. They’re sure to wow your loved ones.

Our simple recipe lets you make pro-looking desserts at home. No need for advanced skills. Just a bit of fun and a desire to learn!

Key Takeaways

  • Learn a foolproof cake pop recipe for beginners
  • Master the art of cake crumbling and shaping
  • Discover professional coating and decoration techniques
  • Create stunning desserts with minimal baking experience
  • Explore versatile flavor combinations

Understanding the Basics of Cake Pops

Cake pops are a fun dessert trend that mix cake’s rich taste with a fun, easy-to-eat format. These small treats turn regular cake into cute, bite-sized goodies. They’re great for parties, gifts, or a quick dessert.

What Are Cake Pops?

A cake pop is a small cake ball on a lollipop stick, covered in chocolate or candy melts. It’s decorated with fun toppings. Cake pops started in the early 2000s and quickly became a hit for their creative, easy-to-eat design.

“Cake pops are like edible works of art that fit perfectly in the palm of your hand” – Baking Enthusiast

Essential Equipment and Tools

To make perfect cake pops, you’ll need some special tools:

  • Cake pop maker or baking pan
  • Lollipop sticks
  • Melting pot or microwave-safe bowl
  • Cooling rack
  • Decorating tools (piping bags, spatulas)

Key Ingredients Overview

To make tasty cake balls, you’ll need a few important ingredients:

Ingredient CategoryEssential Components
Cake BaseBaked cake (any flavor), crumbled
Binding AgentFrosting or cream cheese
CoatingChocolate, candy melts, royal icing
DecorationsSprinkles, colored sugar, drizzles

Whether you’re new to baking or experienced, knowing these basics will help you make amazing cake pops. They’re sure to wow anyone.

Choosing the Perfect Cake Base for Your Pops

Starting with the right cake base is key to making delicious cake balls. The foundation of your cake pop recipe can make a big difference. The flavor and texture of the cake can greatly affect your cake pops.

When picking a cake for your recipe, think about these important things:

  • Moisture content
  • Crumb structure
  • Flavor intensity
  • Density of the cake

“The secret to perfect cake balls is starting with the right cake!” – Professional Pastry Chef

Different cakes are better for different types of cake pops. Here’s a detailed guide:

Cake TypeTextureRecommended Use
Vanilla SpongeLightBeginner-friendly cake balls
Chocolate CakeDenseRich, indulgent cake pops
Red VelvetMoistElegant, decorative cake pops

Pro tip: Store-bought cakes can be great for cake balls, but making your own gives you more control. A slightly stale cake often has the best texture for cake pops.

Your choice of cake will affect the taste and texture of your cake balls. Try different cakes to find your favorite!

Essential Ingredients for Professional-Looking Cake Pops

Making stunning cake pops is more than just baking. You need the right ingredients for taste and looks. Choose high-quality items for the best flavor and appearance.

Types of Frosting and Binding Agents

Cake pop icing is key to keeping your balls together. Pick a binding agent that’s right in consistency and taste. Here are some great choices:

  • Cream cheese frosting
  • Buttercream frosting
  • Chocolate ganache
  • Marshmallow fluff

Coating Chocolate Selection Guide

The coating is crucial for your cake pops. Choose chocolates that melt well and look great.

Chocolate TypeMelting EaseFlavor Profile
Candy MeltsEasySweet, neutral
White ChocolateModerateCreamy, rich
Dark ChocolateChallengingIntense, sophisticated

Decorative Toppings and Sprinkles

Turn your cake pops into showstoppers with creative decorations. Sprinkles, edible glitter, and colored sugar can make your cake pops look professional.

“The difference between good and great cake pops is in the details.” – Professional Baker

Try different toppings to find your style. Remember, practice is key to making beautiful cake pops!

Step-by-Step Cake Pop Recipe for Beginners

Making cake pops at home is simpler than you think! This recipe will show you how to make yummy treats that everyone will enjoy.

To begin your cake pop journey, you’ll need some basic ingredients:

  • 1 prepared cake (any flavor)
  • 1/2 cup frosting
  • Candy melts or chocolate for coating
  • Lollipop sticks
  • Sprinkles or decorative toppings

Here are the easy steps to make perfect cake pops:

  1. Crumble your cake into fine, even crumbs
  2. Mix in frosting until the mixture holds together
  3. Roll the mixture into small, uniform balls
  4. Chill the cake balls for 15-20 minutes
  5. Dip lollipop sticks into melted chocolate
  6. Insert sticks into chilled cake balls
  7. Coat each cake pop in melted chocolate
  8. Decorate with sprinkles or drizzles

“The key to great cake pops is patience and practice!” – Professional Baker

Your homemade cake pops will look Instagram-worthy with a bit of technique. Remember, practice makes perfect in making these tasty treats!

Pro tip for your easy cake pop recipe: Keep your cake balls cold before dipping. This prevents cracking and gives a smooth finish.

Mastering the Art of Cake Crumbling

Creating perfect cake balls starts with understanding the critical process of cake crumbling. Your cake pop recipe depends on achieving the right texture and consistency for the base. Crumbling might seem simple, but it requires precision and technique to create smooth, uniform cake balls.

Achieving the ideal crumb texture is crucial for your cake pop recipe. The goal is to break down the cake into fine, even crumbs that will bind together seamlessly.

Proper Crumb Texture Guide

  • Use completely cooled cake at room temperature
  • Remove all hard edges and crusts before crumbling
  • Break cake into small pieces using your hands or a food processor
  • Aim for uniform, fine crumbs about the size of breadcrumbs

Common Crumbling Mistakes to Avoid

MistakeSolution
Crumbs too largeContinue breaking down until fine and even
Warm cakeLet cake cool completely before crumbling
Uneven crumbsUse a food processor for consistent texture

“The secret to perfect cake balls is in the crumb – smooth, fine, and uniform.”

Practice makes perfect when mastering cake crumbling. Take your time and pay attention to the texture. Your patience will result in professional-looking cake balls that are both delicious and visually appealing.

Creating the Perfect Cake Ball Mixture

Making the perfect cake ball mixture is key to tasty cake pops. The right mix of cake crumbs and frosting is essential. It affects the texture and consistency of your treats.

“Precision is key when mixing cake balls – too dry, and they’ll fall apart; too wet, and they won’t hold their shape.”

Here are the must-follow mixing tips for your cake pop recipe:

  • Start with completely cooled cake crumbs
  • Add frosting gradually – 1 tablespoon at a time
  • Mix thoroughly using clean hands or a spatula
  • Test consistency by forming a small ball

The perfect cake ball mixture should:

  1. Hold together without cracking
  2. Feel slightly sticky but not wet
  3. Maintain shape when gently pressed
  4. Not leave residue on your hands

Professional bakers suggest using cream cheese frosting for the best results. It adds moisture and helps the balls keep their shape.

Need help? If your cake balls are too dry, add more frosting. If they’re too wet, add more cake crumbs. This will get your cake pop recipe just right.

Shaping and Sizing Your Cake Balls

Making cake balls the right shape is key for a pro look. The right method makes your treats as good to look at as they are to eat. Learning to shape cake balls well takes some practice, but it’s doable with the right steps.

Size Consistency Tips

It’s important to have cake balls that are the same size. This makes them look better and cook evenly. Here are some tips to help you keep your cake balls the same size:

  • Use a cookie scoop for precise measurement of cake balls
  • Weigh each cake ball on a digital kitchen scale
  • Roll cake balls between your palms using gentle, consistent pressure

Troubleshooting Shape Issues

Forming cake balls can sometimes be tricky. Here’s a quick guide to fix common shape problems:

ProblemSolution
Crumbly cake ballsAdd more frosting for better binding
Uneven shapesUse a consistent rolling technique
Too large cake popsMeasure with a small cookie scoop

“The key to perfect cake pops is patience and practice.” – Professional Baker

When shaping cake balls, keep your hands a bit damp to avoid sticking. Chill the mixture for 15-20 minutes before shaping. With these tips, you’ll make beautiful, uniform cake pops every time.

Proper Cake Pop Coating Techniques

Learning to coat cake pops is key to making them look professional. Your cake pop recipe will stand out when you master the coating. The right technique can turn simple cake balls into beautiful desserts.

When coating your cake pops, temperature and consistency are crucial. You need melted chocolate or candy melts that are smooth and lump-free. Here are some tips to keep in mind:

  • Maintain chocolate at 110-115°F for optimal coating
  • Use a deep, narrow container for smooth dipping
  • Tap off excess coating to prevent dripping
  • Work quickly to prevent chocolate from hardening

Dipping techniques are important for your cake pop’s look. Hold the stick at a 45-degree angle and dip the cake ball smoothly. Gently tap the stick on the bowl’s edge to remove excess coating.

“The secret to beautiful cake pops is patience and practice.” – Professional Baker

Try different coating colors and techniques for your cake pop recipe. White chocolate, milk chocolate, and colored candy melts can add endless decoration options. Remember, practice is key to improving your cake pop icing skills.

Adding Professional Decorative Touches

Turning your easy cake pop recipe into a masterpiece needs creativity and decorating skills. Cake pops are not just tasty; they’re a visual treat that grabs attention and pleases the senses.

Creating beautiful cake pops is easy with the right design strategies. You can go from simple to stunning with a few tricks.

Basic Design Patterns to Master

Begin your cake pop decorating with these simple designs:

  • Solid color coating with contrasting sprinkles
  • Drizzle technique using melted chocolate
  • Marbled effect with two-tone coating
  • Geometric pattern designs
  • Character or themed decorations

Color Combination Ideas

Choosing the right colors can make your cake pops stand out. Try these color combinations:

ThemeColor SchemeBest For
Classic EleganceWhite, Gold, CreamWeddings, Anniversaries
Playful KidsBright Blue, Yellow, PinkBirthday Parties
Seasonal DelightRed, Green, WhiteHoliday Events

Tip for your easy cake pop recipe: Use top-notch candy melts or chocolate for a smooth finish. The more you practice, the better you’ll get at making stunning cake pops!

“Decorating cake pops is where baking meets art – let your creativity shine!” – Professional Baker

Remember, making stunning cake pops takes patience and practice. Don’t hesitate to try new techniques and colors to find your style.

Storage and Shelf Life Tips

Keeping your homemade cake pops fresh is key. They can stay tasty and look great for days or weeks if stored right.

For short-term storage, handle your cake pops with care. Store them at room temperature in an airtight container for 2-3 days. Keep them away from sunlight and heat to avoid melting or damage.

  • Refrigeration extends cake pop shelf life up to one week
  • Use sealed containers with parchment paper between layers
  • Avoid moisture buildup by leaving containers slightly open

Freezing cake balls offers the longest preservation method. Wrap each pop in plastic wrap, then in a freezer-safe container. They can stay good for a month in the freezer.

“The key to perfect cake pop storage is controlling temperature and moisture.” – Professional Baker’s Tip

Thawing frozen cake pops needs patience. Take them out of the freezer and thaw them slowly in the fridge. This prevents moisture that can ruin their texture and look.

  1. Remove cake pops from freezer
  2. Place in refrigerator for gradual thawing
  3. Let stand at room temperature for 30 minutes before serving

By using these storage tips, your cake pops will stay fresh and look great. They’ll impress everyone at any event.

Common Cake Pop Problems and Solutions

Making the perfect cake pop recipe can be tough, even for experts. Every baker faces challenges that can ruin a great dessert. Knowing these common problems helps you become a cake pop master.

When making cake pops, you’ll run into typical issues that can affect their quality. It’s important to know how to avoid and fix these problems. This way, you can make cake pops that look like they were made by a pro.

Preventing Cracks and Falls

Cake pops are fragile and need careful handling. Here are some tips to avoid common problems:

  • Make sure the cake-to-frosting ratio is right for stability
  • Chill cake balls before dipping to prevent cracks
  • Handle cake pop sticks gently when inserting
  • Avoid overmixing the cake mixture

Fixing Coating Issues

Coating cake pops can be the toughest part. Achieving smooth, even coverage takes practice and skill:

  1. Melt chocolate at the right temperature (around 90°F)
  2. Tap off excess coating carefully
  3. Use a foam block to support cake pops while they set
  4. Work fast to prevent chocolate from hardening

“Perfect cake pops are about patience and precision” – Professional Baker’s Tip

Pro tip: If your cake pop coating looks streaky or uneven, try warming the chocolate again. Add a teaspoon of coconut oil to make it smoother.

Creative Flavor Combinations and Variations

Make your cake pop recipe stand out by trying new flavors. Cake balls are great for mixing and matching tastes. This lets you create unique and exciting flavors.

  • Seasonal Inspirations
    • Pumpkin Spice Latte Cake Pops
    • Peppermint Chocolate Cake Balls
    • Strawberry Shortcake Summer Pops
  • Gourmet Flavor Pairings
    • Lavender Honey Cake Pops
    • Salted Caramel Chocolate Cake Balls
    • Matcha Green Tea with White Chocolate

When mixing flavors, think about what tastes good together. Look for combinations that balance sweet and rich flavors. Add unique touches to make your cake pops special.

Base CakeFrostingCoatingFlavor Profile
VanillaRaspberryWhite ChocolateLight, Fruity
ChocolatePeanut ButterDark ChocolateRich, Decadent
Red VelvetCream CheeseMilk ChocolateClassic, Smooth

“The secret to amazing cake pops is fearless flavor experimentation!” – Professional Pastry Chef

Texture is key in making great cake balls. Make sure your mix is smooth and your coating is even. Feel free to try new things and make your own unique cake pop recipe.

Packaging and Presentation Ideas

Creating stunning cake pop presentations can turn your easy cake pop recipe into a memorable treat. The right packaging makes your cake pops look like they were made by a pro. This impresses guests and those who receive them.

  • Individual Clear Cellophane Wraps
  • Decorative Gift Boxes
  • Themed Presentation Stands
  • Custom Ribbon Tie-Offs

Your packaging should match the occasion. Weddings, birthdays, and corporate events all need special packaging. This makes your cake pops stand out.

OccasionRecommended PackagingStyling Tip
WeddingElegant White BoxesSilk Ribbons, Metallic Accents
BirthdayColorful Transparent BagsMatching Party Theme Colors
Corporate EventBranded Gift BoxesCompany Logo Stickers

For a professional look, use high-quality packaging. Clear bags, sturdy boxes, and matching ribbons make your cake pops look amazing.

“Presentation is everything – a beautifully packaged cake pop tells a story before the first bite.”

Good packaging keeps your cake pops safe and looks great. Think about temperature, travel, and display when choosing your packaging. This ensures your cake pops arrive in perfect condition.

Conclusion

Making the perfect cake pop recipe is a fun journey that mixes creativity with cooking skills. You now know how to turn simple cake into amazing treats. With a little practice, you’ll soon be a cake pop expert.

Every cake pop you make shows off your baking talent. You’ve learned how to crumble, coat, and decorate them. Feel free to try new flavors, colors, and designs that show your style.

With your new cake pop skills, you can make all sorts of tasty treats. They’re perfect for birthdays, family events, or just because. Start with the basics and watch your creativity grow with each batch.

The joy of baking comes from enjoying the process and the yummy results. Keep making your cake pops, share them with loved ones, and most importantly, have fun in the kitchen!

FAQ

What are cake pops?

Cake pops are small desserts made from cake and frosting. They’re shaped into balls and covered in chocolate. You can decorate them in many ways, making them great for parties and gifts.

How long do cake pops stay fresh?

Cake pops can last 3-4 days at room temperature. If you refrigerate them, they can last up to a week. You can also freeze them for 4-6 weeks, keeping them fresh.

Can I make cake pops without a special cake pop maker?

Yes, you can make cake pops without a special maker. Just use a baked cake, frosting, and basic tools like a bowl and sticks. Crumble the cake, mix with frosting, shape into balls, and coat them.

What are the best cake flavors for cake pops?

Flavors like vanilla, chocolate, red velvet, and funfetti are great. These cakes are moist and easy to shape into balls. They hold their shape well when coated.

How do I prevent cake pops from falling off the stick?

Make sure your cake ball mixture is firm and chilled. Dip the stick tip in chocolate before inserting it. This creates a strong seal. Also, don’t add too many decorations.

Can I make cake pops ahead of time?

Yes, you can prepare cake pops in advance. Make the cake balls 1-2 days before. Dip and decorate them the day before or on the day of the event for the best look.

What’s the best chocolate for coating cake pops?

Use candy melts or high-quality compound chocolate for coating. They give a smooth finish and come in many colors. If using real chocolate, temper it for a glossy finish.

How can I troubleshoot cracking in my cake pop coating?

Cracking happens due to temperature differences. Keep your cake balls cool but not frozen. Coat them when your chocolate is between 90-95°F. Tap off excess chocolate and let them set at room temperature to avoid cracking.

0 comments
0 FacebookTwitterPinterestEmail
Hawaiian Beef Stew Recipe

Hawaiian Beef Stew Recipe: Easy Tropical Twist on a Classic

Serves: 6 Prep Time: Cooking Time:
Nutrition facts: 350 calories 20 grams fat
Rating: 5.0/5
( 1 voted )

Ingredients

  • 2 lbs beef stew meat, cubed
  • 2 tbsp olive oil
  • 1 onion, chopped
  • 3 cloves garlic, minced
  • 2 cups beef broth
  • 1 can (14.5 oz) diced tomatoes
  • 1 cup pineapple chunks, drained
  • 1 cup carrots, sliced
  • 1 cup potatoes, diced
  • 1/2 cup green bell pepper, chopped
  • 1/4 cup soy sauce
  • 1 tbsp brown sugar
  • 1 tsp ginger, grated
  • 1/2 tsp salt
  • 1/4 tsp black pepper
  • 1 tbsp cornstarch (optional for thickening)

Instructions

1. In a large pot, heat olive oil over medium heat. Brown the beef stew meat in batches, then set aside.

2. In the same pot, sauté the onion and garlic until softened, about 3-4 minutes.

3. Add beef broth, diced tomatoes, pineapple chunks, carrots, potatoes, and green bell pepper to the pot.

4. Stir in soy sauce, brown sugar, grated ginger, salt, and pepper.

5. Bring the stew to a boil, then reduce the heat and simmer for 1.5-2 hours until the beef is tender.

6. If desired, mix cornstarch with a little water and stir into the stew to thicken the sauce.

7. Taste and adjust seasoning with more salt or soy sauce if needed.

8. Serve hot with rice or bread.

Notes

For extra flavor, add a splash of pineapple juice from the can of pineapple chunks.

You can use other root vegetables like sweet potatoes or parsnips for variety.

This stew can be made ahead of time and stored in the refrigerator for up to 3 days.

Imagine a warm, savory stew filled with the lush flavors of the Hawaiian islands. This Hawaiian beef stew recipe is a unique twist on the classic. It brings together tender beef, vibrant produce, and aromatic spices for a special culinary experience.

The recipe combines sweet and savory elements, a common feature in Hawaiian dishes. Pineapple, coconut milk, and fragrant herbs like ginger and lemongrass add a delicate balance to the rich broth. This stew is both comforting and refreshing, perfect for any meal.

Key Takeaways

  • Hawaiian beef stew blends tropical flavors with traditional stew ingredients
  • The recipe features a unique combination of sweet and savory elements
  • Pineapple, coconut milk, and aromatic herbs like ginger and lemongrass lend a distinctive Hawaiian flair
  • This dish is a popular and beloved part of local Hawaiian cuisine
  • The recipe can be adapted for slow cooker or stovetop preparation

Discover the Rich History of Hawaiian-Style Beef Stew

The old fashioned beef stew recipe stove top we love today comes from Hawaii’s rich culture. It has grown over time, showing the unique history and tastes of Hawaiian food.

Origins of Local Hawaiian Cuisine

Hawaiian food mixes many cultures, including Polynesian, Asian, and Western. The old fashioned beef stew recipe stove top started with Western recipes but added local touches.

Cultural Significance in Island Households

In Hawaiian homes, the old fashioned beef stew recipe stove top is very important. It’s a favorite at family gatherings and special events. It brings people together and keeps the island’s traditions alive.

Evolution of Traditional Recipe

The old fashioned beef stew recipe stove top has changed over the years. Each generation has made it their own, using local ingredients and cooking methods. This shows how Hawaiian tastes and cooking have evolved.

“The old fashioned beef stew recipe stove top is more than just a meal; it’s a vessel that carries the stories and traditions of our island home.”

Essential Ingredients for Authentic Hawaiian Beef Stew Recipe

Making a true Hawaiian beef stew means picking the right ingredients. These ingredients bring the islands’ lively tastes and cultural traditions to life. The dish’s core is the beef, along with local veggies, spices, and special seasonings.

The beef stew seasoning recipe centers around these key parts:

  • Locally-sourced beef, often chuck or round, cut into hearty chunks
  • Tender Hawaiian sweet potatoes, also known as uala, adding natural sweetness
  • Vibrant taro (or kalo) roots, a traditional Hawaiian staple starch
  • Fragrant ginger and garlic, infusing the stew with warm, earthy notes
  • Flavorful soy sauce and rice vinegar, balancing the savory and tangy elements
  • Aromatic Hawaiian sea salt and black pepper, enhancing the overall seasoning
  • Optional additions like pineapple chunks or macadamia nuts for a tropical twist

Even if some ingredients are tough to find outside the islands, try local produce and seasonings. This will help you get the true taste of this beef stew seasoning recipe.

With these key ingredients, you’re on your way to making a delicious Hawaiian beef stew. It will take you straight to the Pacific’s heart.

Kitchen Equipment and Preparation Tools You’ll Need

To make a real Hawaiian beef stew, you need the right tools. From the pot to the utensils, the right setup is key. It helps get the perfect texture and taste. Let’s look at what you’ll need to make this tropical dish.

Pot and Cooking Vessel Options

A Dutch oven is the best choice for beef stew. Its heavy, cast-iron body heats evenly and keeps heat well. This ensures your stew cooks perfectly. You can also use a big, heavy-bottomed pot or a slow cooker for easy cooking.

Essential Utensils and Gadgets

You’ll need some basic tools to make the beef stew recipe. A sharp knife for chopping, a strong cutting board, a wooden spoon for stirring, and a ladle for serving are must-haves. A meat tenderizer helps make the beef tender and tasty.

Time-Saving Equipment Alternatives

For those short on time, there are quick tools. A food processor can chop veggies fast, and an immersion blender can smooth the stew. An Instant Pot or pressure cooker cuts down cooking time for your beef stew recipe in a dutch oven.

With the right tools, you’re ready to make an amazing Hawaiian-style beef stew. It will taste great and feel like a trip to the islands.

Step-by-Step Cooking Instructions for Perfect Results

Learn how to make a delicious Hawaiian beef stew on your stovetop. Follow these simple steps for a dish that will take you to the tropical islands.

  1. Begin by seasoning the beef cubes with salt, pepper, and Hawaiian spices like ginger, garlic, and chili pepper. This adds bold, island flavors to the meat.
  2. Heat oil in a large pot or Dutch oven over medium-high heat. Sear the seasoned beef until it gets a nice caramelized crust. This step keeps the juices in and adds flavor.
  3. Add your aromatic vegetables like onions, carrots, and potatoes to the pot. Cook them until they’re soft and fragrant, about 5-7 minutes.
  4. Use beef broth or red wine to deglaze the pan. This brings out more savory flavors from the bottom of the pot.
  5. Then, add the rest of the beef broth, tomato paste, Worcestershire sauce, and more seasonings. Bring it to a boil, then simmer, covered, for 60-90 minutes. This makes the beef tender and the flavors rich.

To finish, add fresh pineapple chunks or coconut milk. This adds a Hawaiian touch to the stew. Serve it over steamed white rice or with warm bread for a cozy meal.

Remember, making perfect Hawaiian beef stew takes patience and care. Take your time, enjoy the process, and relish the tasty outcome of your cooking.

Slow Cooker vs. Stovetop Methods: Which to Choose

When making a delicious Hawaiian beef stew, you can choose between a slow cooker and stovetop. Each method has its own benefits. Your choice depends on what you like and how much time you have.

Benefits of Slow Cooking

The slow cooker is great for those who are busy but want a tasty stew. It cooks the stew for hours, making the beef tender and the flavors blend well. This method keeps the nutrients and moisture in, making the stew rich and comforting.

Traditional Stovetop Technique

If you like to cook hands-on, the stovetop method is for you. It lets you control the cooking and customize the stew. Searing the beef first adds depth to the flavor. You can also adjust the cooking to get the perfect texture and taste.

Timing and Temperature Guidelines

  • Slow Cooker: Cook on low for 8-10 hours or on high for 4-6 hours, until the beef is tender and the flavors have melded.
  • Stovetop: Simmer the stew on low heat for 2-3 hours, stirring occasionally, until the beef is fork-tender and the sauce has thickened.

Whether you use a slow cooker or the stovetop, patience is key. Let the flavors mix slowly for the best beef stew recipe on stove. With some prep and the right technique, you’ll make a delicious Hawaiian beef stew that will impress everyone.

Secret Tips for Tenderizing and Seasoning Your Beef

Making a delicious Hawaiian beef stew is all about tenderizing and seasoning the beef. A few simple tricks can turn tough cuts into tender, flavorful bites. Your dish will then burst with flavors that feel like a trip to the tropical islands.

Marinate for Tenderness

A good marinade is key to tender beef in your beef stew seasoning recipe. Mix pineapple juice, soy sauce, and brown sugar for a Hawaiian twist. Let the beef marinate for 2 hours or up to 24 hours for the best tenderness.

Seasonings for Island-Inspired Taste

To get the true taste of Hawaiian cuisine, use aromatic spices and herbs. Add garlic, ginger, and ‘ōlena (turmeric) for a warm base. Then, add brown sugar and Hawaiian sea salt for a balanced flavor.

“The secret to a truly remarkable Hawaiian beef stew lies in the careful selection and preparation of the beef. Tenderize it with care, and season it with the right blend of tropical flavors.”

Follow these expert tips to make a beef stew seasoning recipe as tender and flavorful as the Hawaiian islands.

Traditional Hawaiian Side Dishes and Pairings

When you serve a hearty hawaiian beef stew recipe, you’ll want to add some classic Hawaiian sides. These pairings make the meal better and show off the islands’ vibrant tastes.

Rice and Starch Options

No hawaiian beef stew recipe is complete without fluffy white rice. It’s the perfect base for the stew’s bold flavors. For a real Hawaiian touch, try it over steamed poi. Poi is a taro root paste with a sweet taste.

Complementary Vegetable Sides

To balance the hawaiian beef stew recipe, add some fresh vegetable sides. Roasted laulau or steamed luau offer a fresh contrast. Grilled or sautéed bok choy or cabbage add a nice crunch.

Authentic Hawaiian Accompaniments

  • Pickled onions or cucumbers for a tangy crunch
  • Creamy haupia (coconut pudding) for a sweet finish
  • Freshly grated coconut for a tropical touch

Adding these traditional Hawaiian sides makes your meal authentic and delightful. It perfectly complements the rich hawaiian beef stew recipe.

Storage Tips and Leftover Management

Proper storage and leftover management are crucial for your beef stew recipe from the crockpot. These tips will help keep your Hawaiian-inspired beef stew fresh and ready to enjoy again.

Storing Leftover Beef Stew

After enjoying your beef stew, move any leftovers to airtight containers. Seal them well and refrigerate for up to 4 days. For longer storage, freeze the stew in freezer-safe bags or containers for up to 3 months.

Reheating Leftover Stew

  • To reheat refrigerated stew, place it in a saucepan and gently heat on the stovetop until warmed through.
  • For frozen stew, thaw it in the refrigerator overnight before reheating on the stovetop or in the microwave.
  • Always ensure the stew is piping hot before serving to preserve its delicious flavors.

Repurposing Leftover Stew

Don’t let leftover beef stew go to waste! Get creative by repurposing it in various ways:

  1. Top baked potatoes or rice with the stew for a hearty meal.
  2. Mix it into macaroni and cheese or serve it over pasta for a comforting casserole.
  3. Use the stew as a filling for savory hand pies or empanadas.

By following these simple storage and leftover management tips, you can enjoy the flavors of your homemade beef stew long after the initial meal. Enjoy every bite and minimize food waste for a sustainable and delicious experience.

Common Recipe Variations and Regional Differences

The classic Hawaiian beef stew recipe is loved by many. But, different versions and regional twists have popped up across the islands. These unique takes offer a peek into Hawaii’s diverse and vibrant food scene.

Island-Specific Adaptations

Every Hawaiian island has its own beef stew recipe. They use local ingredients, cultural flavors, and cooking traditions. For example, the Big Island adds soy sauce and pineapple juice. Kauai’s version includes coconut milk for a creamy taste.

Modern Interpretations

The beef stew dinty moore recipe has seen modern changes. Chefs now add unique touches. They use grass-fed beef, aromatic spices, and even taro or breadfruit for new flavors.

Dietary Modifications

  • Gluten-free diets can swap soy sauce for tamari or coconut aminos.
  • Vegetarians and vegans can use mushrooms, eggplant, or jackfruit instead of beef.
  • Health-focused cooks might choose leaner beef or try lentils or tofu for more nutrients.

Trying different beef stew dinty moore recipe versions lets us dive into Hawaiian cuisine. It’s a chance to find new, exciting ways to enjoy this classic dish.

Conclusion

The Hawaiian beef stew recipe is a mix of flavors, rooted in Hawaiian culture. It started as a simple, nourishing dish. Now, it’s a favorite in island homes, loved by locals and visitors.

This article gives you the ingredients and steps to make Hawaiian beef stew. You can slow-cook or use the stovetop method. The secret to tender, flavorful beef is in tenderizing and the right seasonings.

Feel free to try different versions and make it your own. Hawaiian beef stew is flexible, fitting many diets and tastes. So, get your ingredients ready, cook it up, and enjoy the comforting flavors of this Hawaiian dish.

FAQ

What is the key difference between traditional beef stew and Hawaiian beef stew?

Hawaiian beef stew adds tropical flavors. It includes pineapple, coconut milk, and island-inspired ingredients. This gives it a unique twist compared to traditional beef stew.

What are the essential ingredients needed to make authentic Hawaiian beef stew?

Key ingredients are beef, pineapple, coconut milk, onions, carrots, potatoes, and Hawaiian seasonings. These include ginger, garlic, and soy sauce.

Can I make Hawaiian beef stew on the stovetop or does it require a slow cooker?

You can make it on the stovetop or in a slow cooker. Both methods are delicious. The slow cooker lets flavors blend longer.

How do I tenderize the beef for the best texture in Hawaiian beef stew?

Marinate the beef in pineapple juice, soy sauce, and spices before browning. This helps tenderize it. You can also use tougher cuts and simmer them until tender.

What are some traditional Hawaiian side dishes that pair well with beef stew?

Try steamed white rice, poi, and Hawaiian macaroni salad with beef stew. Roasted sweet potatoes, sautéed greens, or pineapple salsa also pair well.

Can I freeze leftover Hawaiian beef stew for later?

Yes, you can freeze it. Cool the stew, then put it in airtight containers or bags. It lasts up to 3 months in the freezer. Reheat it when you’re ready.

1 comment
0 FacebookTwitterPinterestEmail
Old-Fashioned Beef Stew Recipe

Easy Old-Fashioned Beef Stew Recipe Made on the Stove

Serves: 6 Prep Time: Cooking Time:
Nutrition facts: 350 calories 15 grams fat
Rating: 5.0/5
( 1 voted )

Ingredients

  • 2 lbs beef stew meat, cubed
  • 1 tablespoon olive oil
  • 1 medium onion, diced
  • 3 carrots, peeled and chopped
  • 3 potatoes, peeled and cubed
  • 3 cloves garlic, minced
  • 1 teaspoon dried thyme
  • 2 bay leaves
  • 6 cups beef broth
  • 1 cup red wine (optional)
  • 2 tablespoons tomato paste
  • Salt and pepper to taste
  • 1 tablespoon cornstarch (optional, for thickening)

Instructions

Heat olive oil in a large pot or Dutch oven over medium-high heat. Add beef stew meat and brown on all sides. Remove from the pot and set aside.

In the same pot, add diced onions and sauté for 3-5 minutes until softened.

Add carrots, potatoes, and garlic to the pot. Stir to combine and cook for another 3 minutes.

Add beef broth, red wine (if using), tomato paste, dried thyme, bay leaves, salt, and pepper. Bring to a simmer.

Return the beef to the pot, cover, and let the stew simmer on low heat for 1.5 to 2 hours, or until the beef is tender and the vegetables are cooked through.

Optional: For a thicker stew, mix cornstarch with a little water to make a slurry, then stir it into the stew and cook for an additional 5 minutes to thicken.

Remove bay leaves and serve hot. Enjoy with crusty bread or over mashed potatoes!

Notes

You can substitute the red wine with additional beef broth for a non-alcoholic version.

For added flavor, you can let the stew rest for an hour after cooking. It will taste even better the next day!

If you'd like to add more vegetables, parsnips or celery make great additions to the stew.

Enjoy the comfort of a hearty beef stew made on your stovetop. This classic dish has been loved by many for generations. It’s a true homemade delight, perfect for warming you up on cold winter nights.

The stew’s flavors of tender beef, fresh veggies, and rich broth blend beautifully. This beef stew recipe stove top is a beloved family favorite that lasts.

If you love cooking or are just starting, this traditional beef stew is a must-try. Its simplicity lets the natural flavors of the ingredients shine. Imagine being in your grandma’s kitchen, where the stew’s aroma filled the air, inviting everyone to a warm meal.

Key Takeaways

  • Classic old-fashioned beef stew simmered to perfection on the stovetop
  • Hearty and comforting dish perfect for cold winter evenings
  • Highlights the natural flavors of tender beef, aromatic vegetables, and a rich, savory broth
  • A family-favorite recipe that has stood the test of time
  • Easy to prepare, allowing the home cook to enjoy the process

Why Traditional Stovetop Beef Stew Remains a Family Favorite

The smell of a beef stew recipe on stove fills homes for generations. This traditional beef stew is loved for its rich history and stovetop cooking benefits.

The History Behind This Classic Comfort Dish

Beef stew’s history goes back to ancient times. It was a simple meal for peasants, cooked slowly over an open fire. Over time, traditional beef stew became a beloved comfort food, passed down through families.

Benefits of Cooking Stew on the Stovetop

Many still prefer stovetop cooking for beef stew, despite modern conveniences. It lets cooks control the temperature, making the meat tender and flavors rich. The slow simmer on the stovetop creates a broth that’s hard to beat.

“There’s something truly special about the way a traditional beef stew simmers on the stovetop, filling the kitchen with its comforting aroma. It’s a timeless tradition that connects us to our culinary past.”

Whether it’s a family recipe or a new take, beef stew recipe on stove is a favorite. It brings people together and offers a taste of the past in every bite.

Essential Ingredients for the Perfect Beef Stew

Making a delicious beef stew begins with picking the right ingredients. From the tender meat to the tasty veggies, each part is crucial. Whether you’re using a beef stew recipe dutch oven or cooking on the stovetop, knowing the traditional beef stew components is key. It helps get the perfect mix of flavors and textures.

The heart of any classic beef stew is the beef. Choose cuts like chuck roast, short ribs, or bottom round. These tougher cuts are perfect for slow cooking. They become tender and juicy as the stew cooks.

Alongside the beef, you need hearty veggies. Potatoes, carrots, onions, and celery are the classic beef stew ingredients. They give the dish a rich, nutritious base. You can also add veggies like parsnips, turnips, or peas to your liking.

To add depth to the stew, use a mix of aromatic herbs and spices. Bay leaves, thyme, rosemary, and black pepper are staples. But you can also try garlic, Worcestershire sauce, or red wine for a unique flavor.

By choosing and mixing these traditional beef stew components carefully, you’ll make a comforting dish. It’s sure to please your family and friends, with everyone asking for more.

“The secret to the best beef stew is all in the slow simmering and the perfect blend of ingredients.”

Old Fashioned Beef Stew Recipe Stove Top

Want a comforting beef stew made on your stovetop? This old-fashioned recipe is perfect. It’s filled with rich broth, tender beef, and classic veggies. It’s a family favorite that warms you up.

Preparation Time and Servings

This recipe takes 2-3 hours to prepare, including simmering. It makes 6-8 servings. It’s great for big families or meal prep.

Kitchen Equipment Needed

  • A large, heavy-bottomed pot or Dutch oven
  • A sharp knife for chopping vegetables
  • A wooden spoon or ladle for stirring
  • Measuring cups and spoons

Ingredient Measurements and Alternatives

To make the perfect stovetop beef stew, you’ll need these ingredients:

IngredientMeasurementAlternatives
Beef stew meat2 lbsChuck roast, round roast, or shoulder roast
Potatoes3 cups, cubedRusset, Yukon Gold, or red potatoes
Carrots2 cups, slicedBaby carrots, parsnips, or turnips
Onion1 large, dicedShallots or leeks
Beef broth4 cupsChicken or vegetable broth
Tomato paste2 tablespoonsCrushed tomatoes or diced tomatoes
Bay leaves2Thyme, rosemary, or oregano
Salt and pepperTo tasteGarlic powder, onion powder, or other seasonings

Adjust the ingredients to fit your taste or dietary needs. This recipe is flexible. It lets you make a beef stew recipe stove top your family will love.

Best Cuts of Beef for Traditional Stew

Choosing the right beef cuts is key for a perfect old-fashioned beef stew. Not all cuts are the same. Some are better for slow cooking, making tough meat tender and flavorful. Let’s look at the beef cuts for stew that will make your homemade stew amazing.

For tender and juicy stew, pick cuts from the chuck or shoulder area. Look for beef stew meat like chuck roast, chuck shoulder, and chuck eye. These cuts are fatty, which makes them tender after long cooking.

  • Chuck roast: A classic choice, chuck roast is an economical and flavorful option for stew.
  • Beef chuck shoulder: This cut comes from the shoulder area and is known for its beefy flavor and tender texture when properly cooked.
  • Beef chuck eye: A lean but tender cut that’s perfect for stewing, as it becomes more succulent with slow cooking.

Beef brisket is also a great tender beef for stew option. This tough cut gets tender and rich with slow cooking.

“The key to a truly exceptional beef stew is selecting the right cuts of meat. Look for well-marbled, tough cuts that will transform into melt-in-your-mouth deliciousness after hours of simmering.”

When preparing the beef, cut it into 1-inch cubes. This ensures even cooking and a consistent texture. With the right beef cuts for stew and proper preparation, you’ll make a comforting and flavorful stew that everyone will love.

Step-by-Step Cooking Instructions

Making a delicious beef stew on the stovetop is a beloved tradition. It fills your home with amazing smells. To make your beef stew recipe on stove perfect, follow these detailed steps for cooking beef stew and mastering simmering techniques.

Meat Preparation and Browning

Begin by cutting beef into 1-inch cubes for even cooking. Dry the meat with paper towels and season with salt and pepper. Heat a large Dutch oven or heavy pot over medium-high heat, adding a tablespoon of oil. Brown the beef on all sides, about 2-3 minutes per batch.

This step is key for the stew’s rich flavors.

Vegetable Addition Timeline

  • After browning the beef, remove it and set it aside.
  • Add onions to the pot and sauté until they’re translucent, about 5 minutes.
  • Stir in garlic and cook for another minute, until it’s fragrant.
  • Return the beef to the pot, along with potatoes, carrots, and other veggies.
  • Pour in beef broth or red wine, and bring to a boil.

Proper Simmering Techniques

Once boiling, lower the heat to low, cover the pot, and simmer for 1.5 to 2 hours. This makes the meat and veggies tender. Check the stew often and add more liquid if it thickens too much.

The secret to a great simmered beef stew is cooking it slowly. This blends flavors and tenderizes the beef.

By following these steps for cooking beef stew on the stovetop, you’ll make a comforting dish. Your family will love it and ask for seconds. Enjoy your homemade beef stew masterpiece!

Seasoning Secrets for Rich Flavor Development

Improving your beef stew’s flavor is about mastering seasoning. It’s about finding the right mix of herbs and spices. It’s also about using techniques that add depth to this classic dish.

For a flavorful beef stew, start by searing the meat. This creates a savory crust. Then, add dried herbs like thyme, rosemary, and bay leaves. These flavor enhancers for stew bring out earthy, aromatic flavors.

To take it up a notch, add Worcestershire sauce, soy sauce, or cocoa powder. These seasoning techniques enhance the beef’s natural taste. They make the stew taste like it’s from a restaurant.

Homemade beef stew lets you adjust the seasoning to your liking. Taste it as you go and tweak the herbs and spices. This way, you can get the perfect mix of savory, sweet, and aromatic flavors.

“The secret to the best beef stew is in the seasoning – it’s all about layering flavors to create a truly remarkable dish.”

With a few seasoning techniques, you can make an ordinary beef stew into a standout dish. So, don’t hesitate to try different beef stew seasoning recipes until you find the one you love.

Troubleshooting Common Stew Problems

Whether you’re a seasoned home cook or just starting out, you might face some challenges with beef stew. Don’t worry, we’ve got expert tips to help your stew come out perfectly every time.

Fixing Tough Stew Meat

One common problem with beef stew is tough, chewy meat. This can happen if you overcook it or use the wrong cut. Here are some ways to make the meat tender:

  • Choose a tougher cut like chuck or shoulder roast. These become tender with slow cooking.
  • Cut the meat into uniform pieces for even cooking.
  • Brown the meat well before adding it to the stew. This helps lock in juices.
  • Simmer the stew gently over low heat. This prevents the meat from getting tough.

Adjusting Stew Thickness

If your beef stew is too thin or watery, here are a few fixes:

  1. Make a roux by melting butter and whisking in flour. Stir it into the stew and simmer to thicken.
  2. Mash some cooked potatoes or vegetables in the stew. This releases starches to thicken the liquid.
  3. Add a small amount of cornstarch or arrowroot powder. Let the stew simmer until it’s thick enough.

By using these beef stew troubleshooting tips, you can fix tough stew meat and thicken beef stew. Your stovetop creation will be the highlight of the meal.

Storage and Reheating Guidelines

Storing and reheating your homemade beef stew right is crucial. It keeps the taste and texture perfect. These tips will guide you on storing beef stew and reheating stew easily.

Storing Beef Stew

After cooling, move the beef stew to an airtight container or plastic bag. This keeps flavors in and prevents drying. Beef stew stays fresh in the fridge for 3-4 days. You can freeze it for up to 3 months for longer storage.

Reheating Stew

To enjoy your leftover stew, heat it on the stovetop over medium heat. Stir it often until hot all through, about 10-15 minutes. Don’t use the microwave, as it can make the stew tough and dry.

Let the reheated beef stew rest for a few minutes before serving. This lets the flavors mix well and the stew thicken to perfection.

Freezing and Thawing Stew

  • To freeze beef stew, put it in an airtight container or freezer bag, leaving space for expansion.
  • Thaw the frozen stew in the fridge overnight before reheating.
  • Or, thaw and reheat the frozen stew on the stovetop, simmering it gently for 20-30 minutes.

By using these storage and reheating tips, you can enjoy your homemade beef stew for longer.

Conclusion

The charm of old-fashioned beef stew cooked on the stovetop is clear. This classic dish has been loved for years, offering a warm and satisfying meal. By using the recipe and techniques from this article, you can make the homemade beef stew your ancestors enjoyed.

Whether you stick to the traditional old fashioned beef stew recipe stove top or try your own twist, this method is a must-try. Enjoy the simple yet rich flavors of this beloved dish. The comforting aroma that fills your kitchen as it cooks is unforgettable.

So, put on your apron, get your ingredients ready, and dive into the world of old fashioned beef stew recipe stove top cooking. Enjoy the journey, try new spices and veggies, and make a meal your family will love for years.

FAQ

What is the best way to cook beef stew?

Cooking beef stew on the stovetop is a traditional and preferred method. The slow simmering process allows the flavors to develop fully and the meat to become tender and delicious.

What are the essential ingredients for a classic beef stew?

The essential ingredients for a classic beef stew include high-quality beef, potatoes, carrots, onions, garlic, beef broth, and a variety of herbs and seasonings like thyme, bay leaves, and black pepper.

What are the best cuts of beef for beef stew?

The best cuts of beef for beef stew are typically tougher, well-marbled cuts like chuck roast, beef shin, or brisket. These cuts become tender and flavorful when slowly simmered.

How do I ensure the meat in my beef stew is tender?

To ensure tender meat in your beef stew, be sure to brown the meat before simmering, and allow the stew to simmer slowly for at least 1-2 hours. This allows the connective tissue to break down, resulting in tender, fall-apart beef.

How can I thicken my beef stew?

To thicken your beef stew, you can try a few methods: make a roux with flour and butter, mash some of the potatoes or vegetables against the side of the pot, or add a cornstarch slurry towards the end of cooking.

How long does beef stew last in the fridge?

Properly stored, beef stew can last 3-4 days in the refrigerator. For longer storage, beef stew can be frozen for 2-3 months.

Can I make beef stew in a slow cooker or Instant Pot?

Absolutely! Beef stew can be easily adapted to be cooked in a slow cooker or Instant Pot, which can be convenient for hands-off cooking. Adjust the cooking times and liquid amounts accordingly for the appliance you’re using.

1 comment
0 FacebookTwitterPinterestEmail
Kale Crunch Salad: Easy Copycat Recipe Chick-fil-A

Chick-fil-A a Kale Crunch Salad Easy Recipe

by IDYA
Kale Crunch Salad: Easy Copycat Recipe Chick-fil-A

Kale Crunch Salad: Easy Copycat Recipe Chick-fil-A

Serves: 4 Prep Time: Cooking Time:
Nutrition facts: 250 calories 15 grams fat
Rating: 5.0/5
( 1 voted )

Ingredients

  • 4 cups fresh kale, chopped
  • 1 cup cabbage, shredded
  • 1/2 cup roasted almonds, sliced
  • 1/4 cup dried cranberries
  • 1/2 cup shredded carrots
  • 1/4 cup apple cider vinegar
  • 2 tbsp olive oil
  • 1 tbsp honey
  • 1 tsp Dijon mustard
  • 1/2 tsp garlic powder
  • 1/4 tsp salt
  • 1/4 tsp black pepper

Instructions

1. In a large bowl, combine the chopped kale, shredded cabbage, shredded carrots, almonds, and dried cranberries.

2. In a small bowl, whisk together the apple cider vinegar, olive oil, honey, Dijon mustard, garlic powder, salt, and pepper to make the dressing.

3. Pour the dressing over the salad and toss to coat evenly.

4. Let the salad sit for 5-10 minutes to allow the flavors to meld.

5. Serve chilled or at room temperature.

Notes

You can substitute the almonds with sunflower seeds or walnuts for a different texture.

For extra sweetness, add more honey or maple syrup to the dressing.

The salad is best served fresh but can be stored in the fridge for up to 2 days.

Do you love Chick-fil-A’s Kale Crunch Salad but don’t want to go out? We’ve got a simple recipe to make it at home. This way, you can save money, try new recipes, or just eat healthier. This easy Chick-fil-A Kale Crunch Salad recipe is a must-try.

Key Takeaways

  • Learn how to make a delicious and healthy copycat version of Chick-fil-A’s Kale Crunch Salad at home
  • Discover the cost-saving benefits of preparing this salad yourself
  • Understand the nutritional advantages of incorporating kale-based salads into your diet
  • Find out the essential ingredients and kitchen tools needed to recreate the authentic Chick-fil-A texture and flavors
  • Explore tips and tricks for achieving the perfect maple vinaigrette dressing and meal prep techniques

Why This Copycat Kale Crunch Salad Is a Must-Try

If you love Chick-fil-A’s kale crunch salad, you can make it at home. It’s cheaper and healthier than buying it. This salad is a great choice for anyone who cares about their health and wants tasty food.

Health Benefits of Kale-Based Salads

Kale is full of good stuff like vitamins, minerals, and antioxidants. Adding it to your kale crunch salad gives you many health perks. Here are a few:

  • High in fiber, which aids digestion and promotes feelings of fullness
  • Rich in vitamin K, which supports bone health and blood clotting
  • Abundant in vitamin C, a potent antioxidant that boosts immune function
  • A great source of iron, supporting healthy red blood cell production

Cost Savings of Making It at Home

Making your own kale crunch salad saves money. You can buy the ingredients yourself. This way, you can make as much as you want and save money.

ItemChick-fil-A PriceHomemade Cost
Kale Crunch Salad$5.99$3.50

With a single batch, you can make lots of servings. This homemade recipe for chick fil a kale salad is a smart choice for your wallet and health.

“Eating a kale crunch salad is a delicious way to nourish your body and save money at the same time.”

Essential Ingredients for Your Chick Fil A Kale Crunch Salad Recipe

Making the Chick-fil-A Kale Crunch Salad at home is simple. The secret is using the right ingredients. Let’s explore what you need to make this copycat salad.

The star of the salad is the kale. Choose a mix of curly and lacinato (dinosaur) kale. This mix gives the salad a great balance.

Shredded green cabbage adds a refreshing crunch. Toasted sliced almonds bring a nutty flavor and crunch.

Shredded carrots add vibrant color and sweetness. And, don’t forget the chick fil a kale crunch recipe must-have – crispy wonton strips. They add a fantastic crunch.

With these kale crunch salad ingredients, you’re ready to make the Chick-fil-A salad at home. Feel free to adjust the amounts to your liking. Then, enjoy the delicious flavors of this salad.

IngredientAmount
Curly kale4 cups, chopped
Lacinato (dinosaur) kale4 cups, chopped
Shredded green cabbage2 cups
Toasted sliced almonds1/2 cup
Shredded carrots1 cup
Crispy wonton strips1/2 cup

With these ingredients, you’re set to make a chick fil a kale crunch recipe that will wow everyone. Enjoy the flavors of this salad in your own home.

Kitchen Tools and Equipment Needed

To make the tasty Chick-fil-A Kale Crunch Salad at home, you need some key tools and equipment. From sharp knives to containers, the right tools make salad prep easy. Let’s look at the tools and storage you need to make your kale crunch salad better.

Here are the tools you’ll need to prepare the kale crunch salad:

  • A sharp chef’s knife or santoku knife for chopping the kale and other ingredients
  • A sturdy cutting board to provide a stable surface for slicing and dicing
  • A salad spinner to rinse and dry the kale, ensuring it’s crisp and ready for assembly
  • A large mixing bowl to toss the salad ingredients together
  • A whisk or small bowl for mixing the maple vinaigrette dressing

Storage Container Options

After making your Chick-fil-A Kale Crunch Salad, you’ll want to store it right. This keeps it fresh and tasty. Here are some storage options:

  1. Glass meal prep containers with tight-fitting lids to keep the salad fresh and prevent wilting
  2. Airtight plastic containers designed specifically for salads, with separate compartments for the greens and toppings
  3. Reusable silicone bags or pouches that can be sealed to lock in freshness

With the right tools and storage, you can make the Chick-fil-A Kale Crunch Salad at home. This ensures a delicious and satisfying meal every time.

Step-by-Step Preparation Guide

Making the perfect Chick-fil-A Kale Crunch Salad at home is simple. Just follow these easy steps to make a tasty, homemade version of this favorite salad:

  1. Begin by washing and drying the kale leaves well. Cut the kale into small pieces, removing any hard stems.
  2. Next, peel and slice the carrots into thin strips, like matchsticks. You can use a vegetable peeler or a sharp knife for this.
  3. Then, slice the red cabbage into thin, shredded pieces. This will add the classic Chick-fil-A crunch to your salad.
  4. In a big bowl, mix the chopped kale, carrot strips, and shredded red cabbage together. Gently toss them to blend well.
  5. Finally, add the crispy chicken breast pieces, sliced almonds, and Parmesan cheese on top, if you like.
  6. Drizzle the Maple Vinaigrette Dressing over the salad. Toss everything together until the salad is well coated.

By following these simple steps, you can make the signature Chick-fil-A Kale Crunch Salad in your kitchen. Enjoy a healthy and tasty meal with the perfect mix of flavors and textures.

“The key to a great kale salad is to massage the leaves with your hands, which helps to soften them and make the salad more enjoyable to eat.”

Making the Perfect Maple Vinaigrette Dressing

The secret to Chick-fil-A’s Kale Crunch Salad is the maple vinaigrette dressing. This dressing is sweet and tangy. It perfectly matches the crisp kale and crunchy toppings. Let’s explore the key ingredients and how to mix them for the best maple vinaigrette recipe at home.

Dressing Ingredients Breakdown

To make the chick fil a salad dressing, you’ll need a few basic items:

  • Maple syrup: This natural sweetener gives the dressing its unique maple flavor.
  • Apple cider vinegar: It adds a tangy taste that balances the sweetness.
  • Olive oil: This adds a silky texture and richness to the dressing.
  • Dijon mustard: It helps the dressing come together and boosts the flavor.
  • Salt and pepper: These seasonings bring all the flavors together.

Mixing and Storage Tips

Making the perfect maple vinaigrette is easy. Just mix all the ingredients in a bowl or jar. Whisk or shake until it’s smooth and well-blended. Let it sit for a few minutes to let the flavors mix.

For storage, the maple vinaigrette recipe lasts up to a week in the fridge. Shake it gently before using it on your Chick-fil-A Kale Crunch Salad. It will add a wonderful flavor.

Tips for Achieving the Authentic Chick-fil-A Texture

Making the perfect kale crunch salad at home is more than just using the right ingredients. It’s about getting that special texture that Chick-fil-A is famous for. With a few easy tips, you can get that crunchy feel in your own kitchen.

Getting the kale just right is key. Don’t just toss the leaves in your bowl. Instead, massage the kale. Use your hands to squeeze and scrunch the leaves until they’re softer. This makes the kale tender and easier to eat.

  1. Massage the kale for at least 2-3 minutes to ensure it’s properly broken down.
  2. Make sure the kale is in the right amount compared to other ingredients. Chick-fil-A uses more kale, which makes their salad special.
  3. Add a bit of apple cider vinegar or lemon juice while massaging the kale. The acidity helps make the leaves even softer.

For the chick fil a salad tips, focus on the size and shape of your ingredients. Chick-fil-A is known for its perfectly cut toppings. Try to chop your ingredients, like kale, almonds, and dried cranberries, into small, even pieces.

IngredientChick-fil-A TextureHome Version Texture
KaleTender, yet crunchySoft, wilted
AlmondsFinely chopped, evenly distributedWhole or unevenly chopped
Dried CranberriesSmall, bite-sized piecesLarger, chewier pieces

By following these tips, you can make a kale crunch salad that’s just as good as Chick-fil-A’s.

Storage and Meal Prep Recommendations

Enjoying a tasty kale salad doesn’t have to stop after one meal. With the right storage and meal prep, you can enjoy your kale crunch salad for days. Here are the best ways to keep your salad fresh and ready to eat.

Keeping Ingredients Fresh

To keep your kale salad crisp and flavorful, follow these tips:

  • Store kale leaves in a resealable bag or airtight container. Use a paper towel to soak up moisture.
  • Keep salad dressing and toppings, like shredded chicken or nuts, in separate containers in the fridge.
  • Don’t mix the salad until just before serving. This prevents it from getting soggy.

Make-Ahead Instructions

For easy meal prep, try these steps for a quick lunch or dinner:

  1. Wash and chop kale leaves ahead of time. Store them in the fridge.
  2. Make the maple vinaigrette dressing and chill it until serving time.
  3. Precook and shred chicken, then refrigerate it in an airtight container.
  4. Store toppings like dried cranberries and toasted nuts in separate containers.
  5. When you’re ready, toss the salad with dressing and enjoy.

By using these storage and meal prep tips, you can enjoy your kale crunch salad for days. It’s a healthy and convenient choice for busy days.

Recipe Variations and Substitutions

The original Chick-fil-A Kale Crunch Salad is tasty, but you can make it your own. Try new ingredients to match your taste and dietary needs. This section will show you kale crunch salad variations and chick fil a salad alternatives.

Nut Substitutions

Want to change the nutty crunch in your kale salad? Try these options:

  • Chopped almonds
  • Toasted pecans
  • Roasted cashews
  • Sunflower seeds

Vegetable Additions

Adding more veggies can make your salad better and prettier. Try these:

  • Shredded carrots
  • Diced cucumber
  • Cherry tomatoes
  • Sliced radishes

Dressing Alternatives

Want a different dressing? Here are some ideas:

  • Balsamic vinaigrette
  • Lemon-garlic dressing
  • Creamy avocado dressing
  • Honey-Dijon mustard vinaigrette

These kale crunch salad variations and chick fil a salad alternatives let you customize the Chick-fil-A Kale Crunch Salad. Mix and match to find your favorite!

Ingredient SubstitutionSuggested Alternatives
NutsAlmonds, pecans, cashews, sunflower seeds
VegetablesCarrots, cucumber, cherry tomatoes, radishes
DressingBalsamic vinaigrette, lemon-garlic, avocado, honey-Dijon

Conclusion

In this article, you’ve learned how to make your own Chick-fil-A Kale Crunch Salad. It’s easy and healthy, and you can save money and time. Now, you can enjoy this favorite dish at home.

The secret to this salad’s success is its mix of flavors and textures. The crisp kale and crunchy toppings meet the tangy maple vinaigrette dressing. It’s a meal that’s both tasty and good for you. This recipe is perfect for anyone who loves Chick-fil-A or wants to eat more kale.

So, start making your Chick-fil-A Kale Crunch Salad today. Get your ingredients ready and cook in your kitchen. With this recipe, you’ll soon be making delicious homemade salads like a pro!

FAQ

What is the Chick-fil-A Kale Crunch Salad?

The Chick-fil-A Kale Crunch Salad is a favorite at Chick-fil-A. It’s a mix of kale, cabbage, and other crunchy bits. It’s topped with a sweet maple vinaigrette dressing.

What are the main ingredients in the Chick-fil-A Kale Crunch Salad?

The salad features kale, shredded cabbage, sliced almonds, and dried cranberries. It’s all dressed up with a maple vinaigrette.

How can I make the Chick-fil-A Kale Crunch Salad at home?

Making the Chick-fil-A Kale Crunch Salad at home is easy. You’ll need kale, cabbage, almonds, and cranberries. Don’t forget the maple vinaigrette dressing.

What are the health benefits of the Chick-fil-A Kale Crunch Salad?

This salad is packed with superfoods like kale. It also has heart-healthy fats from almonds. It’s full of fiber, vitamins, and antioxidants.

How much does it cost to make the Chick-fil-A Kale Crunch Salad at home compared to buying it from the restaurant?

Making the salad at home saves money. Buying ingredients separately is cheaper. Plus, you can make more than one serving.

What kitchen tools and equipment do I need to make the Chick-fil-A Kale Crunch Salad?

You’ll need a sharp knife, cutting board, salad spinner, and mixing bowl. A food processor helps with shredding kale and cabbage.

How do I properly prepare and assemble the Chick-fil-A Kale Crunch Salad?

Start by washing and massaging the kale. Then, shred the cabbage. Mix in the kale, cabbage, almonds, and cranberries. Finish with the maple vinaigrette dressing.

How can I achieve the authentic Chick-fil-A texture in my homemade Kale Crunch Salad?

To get the Chick-fil-A texture, massage the kale well. Keep the right mix of crunchy ingredients like cabbage and almonds.

How can I store the Chick-fil-A Kale Crunch Salad and meal prep it for later?

Store the salad parts separately in the fridge. Keep the kale and cabbage in one container. Store the dressing, almonds, and cranberries in their own containers. This keeps the salad fresh and crunchy.

Can I customize or make variations to the Chick-fil-A Kale Crunch Salad recipe?

Yes, you can customize the salad. Try different kale types, add more veggies, use other nuts, or try new dressings. It’s all up to you!

0 comments
0 FacebookTwitterPinterestEmail
Chicken Salad Chick Copycat

Chicken Salad Chick Copycat Recipe: Make It at Home

Serves: 4 Prep Time: Cooking Time:
Nutrition facts: 300 calories 20 grams fat
Rating: 5.0/5
( 1 voted )

Ingredients

  • 2 cups cooked chicken, shredded or diced
  • 1/2 cup mayonnaise
  • 1/4 cup plain Greek yogurt
  • 1 tbsp Dijon mustard
  • 1 tbsp lemon juice
  • 1/4 cup diced celery
  • 1/4 cup diced red onion
  • 1/4 cup sweet pickle relish
  • 1 tsp garlic powder
  • 1/2 tsp salt
  • 1/4 tsp pepper
  • 1/2 cup chopped walnuts (optional)
  • 1/2 cup red grapes, halved (optional)

Instructions

1. In a large mixing bowl, combine the shredded chicken, mayonnaise, Greek yogurt, Dijon mustard, and lemon juice.

2. Add in the diced celery, red onion, sweet pickle relish, garlic powder, salt, and pepper. Stir to combine.

3. If desired, add the chopped walnuts and halved grapes for extra flavor and texture.

4. Taste the chicken salad and adjust the seasoning, adding more salt, pepper, or relish as needed.

5. Chill in the fridge for at least 30 minutes before serving to allow the flavors to meld.

6. Serve the chicken salad on a bed of lettuce, in a sandwich, or with crackers.

Notes

Feel free to swap Greek yogurt with additional mayonnaise for a creamier texture.

Add fresh herbs like parsley or dill to enhance the flavor.

For a lower-calorie version, use light mayo or Greek yogurt as a base.

The Chicken Salad Chick is a favorite in the Southeast for its tasty chicken salad. It’s made with tender chicken, creamy dressing, and various mix-ins. Now, you can make this delicious dish at home with our easy recipe. Enjoy the Chicken Salad Chick flavor without leaving your house.

Key Takeaways

  • Learn the secret behind Chicken Salad Chick’s signature recipe
  • Discover the essential ingredients and preparation techniques for perfect homemade chicken salad
  • Explore variations and customization options to make the recipe your own
  • Understand the nutritional information and dietary considerations
  • Get tips for storing and serving the chicken salad for maximum freshness and flavor

The Story Behind Chicken Salad Chick’s Famous Recipe

If you love Southern-style chicken salad, you’ve probably heard of Chicken Salad Chick. This restaurant chain has become famous for its delicious chicken salad. But have you ever wondered how this dish became so popular?

From Home Kitchen to Restaurant Empire

In 2008, Stacy Brown started selling her homemade chicken salad from her home in Auburn, Alabama. People loved her unique flavors, and soon, she couldn’t make enough. The demand for her chicken salad grew too big for her kitchen.

Stacy’s love for Southern-inspired recipes led her to open the first Chicken Salad Chick restaurant in 2012. Starting small, the brand has now grown to over 200 locations across the U.S.

What Makes Their Recipe Special

Chicken Salad Chick’s success comes from its high-quality ingredients and careful recipe. They use only the best, all-white meat chicken, cooked and chopped just right.

The secret spices, herbs, and seasonings in their recipe make it stand out. Whether on a croissant, in a lettuce wrap, or on its own, Chicken Salad Chick’s recipe is truly unique.

“Chicken Salad Chick is not just a restaurant, it’s a way of life. Our passion for creating delicious, Southern-inspired recipes is what drives us every day.”

– Stacy Brown, Founder of Chicken Salad Chick

Essential Ingredients for the Perfect Chicken Salad Chick Copycat

To make a perfect chicken salad chick ingredients copycat at home, you need the right mix of flavors and textures. The chicken, seasonings, and other ingredients all work together to bring out the dish’s true taste.

The core of the recipe is the chicken salad chick ingredients. Start with boneless, skinless chicken breasts, cooked and shredded or diced. This is the base of the creamy, tasty salad.

  • Cooked, shredded or diced chicken breasts
  • Mayonnaise (the higher the quality, the better)
  • Celery, finely chopped
  • Onion, finely diced
  • Dill pickle relish
  • Dried parsley
  • Salt and pepper to taste

The secret to the Chicken Salad Chick’s signature flavor is in the mix of these copycat recipe ingredients. Mayonnaise gives it a creamy base. Celery, onion, and pickle relish add crunch and tang. Dried parsley, salt, and pepper enhance the flavors, making it a perfect blend.

With these key chicken salad chick ingredients, you’re set to make a copycat recipe that’s just as good as the original. The trick is to find the right balance and adjust to your liking. You’ll impress everyone with your homemade version!

Step-by-Step Preparation Guide

Making the perfect homemade chicken salad chick recipe needs focus and some insider tips. You’ll learn how to prepare the chicken right and mix the flavors just like Chicken Salad Chick. This guide will help you get the authentic taste and texture at home.

Chicken Preparation Tips

The key to a great chicken salad is in the chicken itself. Here are some tips to ensure your chicken is tender and juicy:

  • Use boneless, skinless chicken breasts for the best texture.
  • Poach the chicken in a flavorful broth or seasoned water to infuse it with extra flavor.
  • Be careful not to overcook the chicken, as this can make it dry and crumbly.
  • Let the chicken cool completely before shredding or dicing it into the desired size.

Mixing and Seasoning Techniques

With your chicken ready, it’s time to mix the flavors. Follow these techniques for the best results:

  1. Use a combination of mayonnaise and Greek yogurt to create a creamy, tangy base.
  2. Gently fold in the chicken to avoid breaking it down too much and maintaining a chunky texture.
  3. Incorporate a variety of seasonings, such as celery salt, black pepper, and a touch of mustard powder, to replicate the Chicken Salad Chick taste.
  4. Add fresh herbs, like dill or parsley, for a bright, herbaceous note.

Achieving the Right Texture

The texture of the chicken salad is as important as the flavor. Here are some tips to nail the perfect texture:

  • Avoid overmixing the salad, as this can make it too dense and dense.
  • Adjust the mayonnaise-to-chicken ratio to achieve your desired creaminess.
  • Gently fold in any add-ins, such as chopped celery or grapes, to maintain the desired consistency.
  • Chill the salad for at least an hour before serving to allow the flavors to meld and the texture to set.

With these chicken salad chick recipe instructions and homemade chicken salad tips, you’ll be well on your way to creating a Chicken Salad Chick-worthy dish right in your own kitchen.

How to Make the Classic Carol Recipe

If you love Chicken Salad Chick’s classic carol chicken salad chick recipe, you can make it at home. The traditional chicken salad is a favorite among many. With just a few steps, you can enjoy it in your kitchen.

Ingredients:

  • 3 cups cooked and diced chicken breast
  • 1 cup mayonnaise
  • 1/4 cup finely chopped celery
  • 1/4 cup finely chopped onion
  • 1 tablespoon lemon juice
  • 1 teaspoon Dijon mustard
  • Salt and pepper to taste

Preparation:

  1. In a large bowl, mix the chicken breast with mayonnaise, celery, onion, lemon juice, and Dijon mustard.
  2. Stir until everything is well mixed and the salad is creamy.
  3. Add salt and pepper to taste. Adjust as needed.
  4. Chill the classic carol chicken salad chick recipe in the fridge for 30 minutes. This lets the flavors blend.

Try your homemade classic carol chicken salad chick recipe on lettuce, in a sandwich, or with crackers. This traditional chicken salad will delight your taste buds and bring you back to Chicken Salad Chick.

Secrets to Making Fancy Nancy at Home

Want to make the Fancy Nancy chicken salad from Chicken Salad Chick? You can do it at home with a few special ingredients and easy steps. Learn how to make this gourmet chicken salad and take your next meal to the next level.

Special Ingredients List

To get the Fancy Nancy taste, you’ll need some special ingredients. You’ll need shredded or diced chicken, plus:

  • Chopped pecans for a delightful crunch
  • Dried cranberries or cherries for a hint of sweetness
  • Grated Gruyère or Swiss cheese for a creamy, nutty flavor
  • Scallions or chives for a fresh, oniony note
  • Dijon mustard to enhance the overall savory profile

Assembly Instructions

With all the ingredients ready, follow these steps to make the Fancy Nancy chicken salad:

  1. In a large mixing bowl, combine the chicken with the pecans, cranberries or cherries, and Gruyère or Swiss cheese.
  2. In a separate small bowl, whisk together the mayonnaise, Dijon mustard, and a pinch of salt and pepper to create the dressing.
  3. Gently fold the dressing into the chicken mixture, taking care not to overmix.
  4. Garnish the chicken salad with the sliced scallions or chives, adding a final touch of flavor and visual appeal.

Follow these simple steps to make the chicken salad chick fancy nancy recipe at home. Enjoy the gourmet chicken salad experience in your kitchen. Serve it on a bed of greens, between slices of bread or croissants, or with your favorite crackers for a truly satisfying and flavorful meal.

Tips for Getting the Authentic Chicken Salad Chick Taste

Trying to make the chicken salad chick copycat flavor at home is a fun challenge. To get the taste of Chicken Salad Chick right, follow these expert tips:

  1. Choose high-quality, fresh chicken. The meat’s texture and taste are key to the authentic chicken salad flavor.
  2. Balance the seasonings well, using classic flavors like celery, onion, and a bit of sweetness. Adjust to your liking.
  3. Watch the mayonnaise-to-chicken ratio closely. Too much mayo makes it too creamy, too little too dry.
  4. Add crunchy bits like diced celery, slivered almonds, or toasted pecans. They give it the Chicken Salad Chick texture.
  5. Chill the salad for at least an hour before serving. This lets the flavors mix and the texture firm up.

By using these chicken salad chick copycat tips, you’ll make a great version of the authentic chicken salad flavor at home. Enjoy your homemade take on this Southern favorite!

Storage and Serving Suggestions

Storing and presenting your homemade chicken salad right can make a big difference. Whether it’s for a family event or your lunch, these tips will help. They ensure your chicken salad stays fresh and looks great.

Best Storage Practices

To keep your chicken salad fresh and safe, follow these steps:

  • Put the chicken salad in an airtight container as soon as you make it. This stops bacteria from growing and keeps the taste good.
  • Eat the chicken salad within 3-4 days for the best taste and safety. Throw away leftovers after that.
  • Don’t let the chicken salad sit at room temperature for more than 2 hours. Bacteria can grow fast in that time.
  • If you want to freeze it, do it within the first day. Thaw it in the fridge before you eat it.

Presentation Ideas

Making your chicken salad look good can make eating it even better. Get ideas from Chicken Salad Chick’s presentation:

  1. Put the chicken salad in individual cups or small bowls. Add fresh herbs or paprika on top.
  2. Place the chicken salad on crisp lettuce or on toasted croissants or mini buns.
  3. Make a chicken salad charcuterie board with crackers, fruits, and veggies for a stunning look.
  4. For parties or potlucks, serve it in a bread bowl or with different breads and crackers.

By using these storage and presentation tips, your homemade chicken salad will stay fresh. It will also look as good as Chicken Salad Chick’s.

Variations and Customization Options

The beauty of homemade chicken salad is its versatility. The classic Chicken Salad Chick recipe is tasty, but you can make it your own. Try these ideas to create your own unique chicken salad variations:

Fruity Twists

  • Add diced apples, grapes, or dried cranberries for a sweet and tangy twist.
  • Incorporate pineapple tidbits or mandarin orange segments for a tropical flair.
  • Mix in chopped mango or diced avocado for a creamy, fresh flavor.

Nutty Accents

  1. Sprinkle in toasted pecans, walnuts, or almonds for a crunchy texture.
  2. Fold in a handful of chopped cashews or macadamia nuts for a rich, buttery taste.
  3. Mix in a tablespoon of peanut butter or almond butter for a protein-packed twist.

Spicy Kicks

  • Stir in a teaspoon of cayenne pepper or smoked paprika for a subtle heat.
  • Add a diced jalapeño or a sprinkle of crushed red pepper flakes for a more intense kick.
  • Mix in a tablespoon of Dijon mustard or horseradish for a zesty, tangy flavor.

Creating customized chicken salad recipes is all about trying new flavors. Start with the basic Chicken Salad Chick recipe and let your creativity shine!

Nutritional Information and Dietary Considerations

The chicken salad nutrition in the Chicken Salad Chick recipe is surprisingly healthy. It’s all about knowing the calorie count and how to tweak it for your diet.

Calorie Breakdown

A serving of this chicken salad has about 350 calories. Most of these calories come from the chicken, a lean protein. The mayonnaise adds to the calories, too. The rest comes from celery, grapes, and spices.

Dietary Modifications

Want to make the chicken salad healthier? Here are some easy changes:

  • Try Greek yogurt instead of mayonnaise to cut down on fat and calories.
  • Add more veggies like celery, onions, or bell peppers to increase fiber and nutrients.
  • Swap grapes for dried cranberries or apple chunks to reduce sugar.
  • Choose grilled chicken breast for a leaner protein option.

These tweaks can turn the Chicken Salad Chick recipe into a healthy chicken salad without losing its taste.

“The key to a nutritious chicken salad is finding the right balance of lean protein, fresh produce, and healthy fats.”

Conclusion

Creating your own Chicken Salad Chick recipes at home is a joy. You get to choose the ingredients and flavors you like. This makes your chicken salad special and tailored just for you.

Maybe you’ve tried the classic Carol recipe or the fancy Fancy Nancy. Either way, you’ve learned how to make the Chicken Salad Chick taste great at home. Your hard work has paid off, giving you delicious chicken salad and special memories.

Keep making and sharing your Chicken Salad Chick recipes with others. Invite friends and family to try them out. This way, you can grow a community of people who love making homemade chicken salad. Enjoy the Chicken Salad Chick experience in your own kitchen, and share it with everyone.

FAQ

What are the essential ingredients for a Chicken Salad Chick copycat recipe?

To make a Chicken Salad Chick copycat, you need cooked chicken, mayonnaise, and celery. Add onion and seasonings like salt and pepper. Sometimes, a bit of sugar or relish is used to balance the taste.

How do I achieve the perfect texture for my homemade chicken salad?

For the right texture, chop the chicken into small pieces. Mix the ingredients gently to avoid over-mixing. Adjust the mayonnaise to chicken ratio for your desired creaminess.

What makes the Classic Carol recipe from Chicken Salad Chick so special?

The Classic Carol recipe is loved for its simple, traditional flavors. It uses chicken, mayonnaise, celery, and a touch of sweetness from relish or sugar.

How can I recreate the Fancy Nancy recipe at home?

For Fancy Nancy, add grapes, pecans, and curry powder to the basic chicken salad. The layered presentation is key to getting it right.

What are some tips for getting the authentic Chicken Salad Chick taste at home?

Use high-quality ingredients and season the salad perfectly. Pay attention to texture. Experimenting with their signature seasonings can also help.

How should I store and serve my homemade chicken salad?

Store your chicken salad in an airtight container in the fridge for 3-5 days. Serve it in lettuce cups, on crackers, or with fresh herbs for a creative touch.

Can I customize the Chicken Salad Chick copycat recipe to my personal taste?

Yes! Try adding nuts, fruits, or spices to make your own version. The base recipe is very versatile.

What are the nutritional considerations for homemade chicken salad?

Homemade chicken salad can be healthy, but watch the calories and fat. Use less mayonnaise or try lighter alternatives to make it healthier.

1 comment
0 FacebookTwitterPinterestEmail
Chicken and Shrimp Stir Fry with Garlic Ginger Sauce
Serves: 4 Prep Time: Cooking Time:
Nutrition facts: 350 calories 15 grams fat
Rating: 5.0/5
( 1 voted )

Ingredients

  • 2 chicken breasts, boneless and skinless, thinly sliced
  • 1 lb shrimp, peeled and deveined
  • 2 tbsp vegetable oil
  • 3 cloves garlic, minced
  • 1 tbsp fresh ginger, minced
  • 1 red bell pepper, sliced
  • 1 medium onion, sliced
  • 1 cup broccoli florets
  • 2 tbsp soy sauce
  • 1 tbsp oyster sauce
  • 1 tbsp honey
  • 1 tbsp rice vinegar
  • 1 tsp sesame oil
  • 2 green onions, sliced (for garnish)
  • Sesame seeds for garnish (optional)

Instructions

1. Heat vegetable oil in a large skillet or wok over medium-high heat.

2. Add chicken slices and cook for 4-5 minutes until browned and cooked through. Remove chicken from the skillet and set aside.

3. In the same skillet, add garlic and ginger. Stir fry for about 30 seconds until fragrant.

4. Add shrimp to the skillet and cook for 2-3 minutes until pink and opaque. Remove shrimp and set aside with the chicken.

5. Add red bell pepper, onion, and broccoli to the skillet. Stir-fry for 3-4 minutes until vegetables are tender but still crisp.

6. In a small bowl, whisk together soy sauce, oyster sauce, honey, rice vinegar, and sesame oil.

7. Add the chicken and shrimp back to the skillet. Pour the sauce over the mixture and toss to coat everything evenly.

8. Cook for an additional 2-3 minutes until heated through.

9. Garnish with sliced green onions and sesame seeds. Serve immediately.

Notes

You can customize the vegetables in the stir fry based on what you have on hand, such as snap peas or carrots. For extra spice, add red pepper flakes or chili sauce to the stir fry. Serve this stir fry over rice or noodles for a more filling meal.

Get ready for a flavorful journey with our chicken and shrimp stir fry recipe. This dish combines tender chicken and juicy shrimp with a savory garlic ginger sauce. Every bite is a burst of vibrant flavors!

Key Takeaways

  • Chicken and shrimp make a perfect protein-packed combination for a stir fry
  • The garlic ginger sauce adds a delightful balance of flavors to the dish
  • Stir fries are a quick and easy way to prepare a nutritious meal
  • Proper preparation and cooking techniques are key to achieving the perfect texture
  • Versatile dish that pairs well with various side dishes and can be customized to your taste

Why This Asian-Inspired Chicken and Shrimp Combination Works

The mix of chicken shrimp in a stir-fry is a culinary dream. It not only excites your taste buds but also brings health benefits. It’s a meal that’s both tasty and good for you.

Health Benefits of Combining Seafood and Poultry

Combining shrimp chicken pasta is a nutritional win. Shrimp is full of lean protein, vitamins, and minerals. Chicken is also lean, low in fat, and packed with nutrients. Together, they boost muscle growth and health.

Perfect Protein-Packed Meal Option

This chicken shrimp stir-fry is great for a balanced meal. It has lean proteins and fresh veggies. This makes it not only tasty but also keeps you full and energized.

The mix of shrimp chicken pasta in this dish is amazing. It’s perfect for any time, from a quick dinner to a weekend feast.

Essential Ingredients for the Perfect Stir Fry Sauce

Making the perfect chicken and shrimp stir fry begins with the sauce. The garlic ginger sauce is crucial. It brings out the best in your stir-fry. Let’s explore the key ingredients for this sauce.

Garlic and ginger are at the sauce’s core. They add a warm, pungent, and sweet flavor. This complements the chicken and shrimp perfectly. The right mix of these two can take your stir fry to the next level.

Soy sauce is also essential. It adds a savory umami flavor that balances the dish’s sweetness. Choose a low-sodium soy sauce to avoid too much salt.

Adding a bit of brown sugar or honey brings sweetness and depth. This small amount rounds out the flavors, making the sauce balanced.

A splash of rice vinegar or lime juice adds a tangy touch. It brightens the dish, cutting through the richness of the chicken and shrimp.

With these ingredients, you’re set to make the perfect garlic ginger sauce. It will elevate your chicken and shrimp stir fry into a culinary masterpiece.

“The secret to a great stir fry lies in the sauce – it’s the foundation that brings all the flavors together.” – Chef Liam Nguyen

Selecting and Preparing Your Chicken and Shrimp

Creating the perfect recipe for shrimp and chicken starts with the right cuts. Choose boneless, skinless chicken breasts or thighs for the best flavor. For the chicken shrimp mix, always pick fresh ingredients.

Choosing the Right Cut of Chicken

Boneless, skinless chicken breasts or thighs are perfect for this dish. They cook evenly and soak up the sauce well. Stay away from bone-in, skin-on cuts for better texture and flavor.

Tips for Fresh vs. Frozen Shrimp

  • Fresh shrimp: Choose plump, firm shrimp with a sweet smell. Shrimp in the shell offer more flavor and texture.
  • Frozen shrimp: Quick-frozen shrimp preserve their taste and texture. Thaw them in the fridge before cooking.

Proper Marinating Techniques

To boost the taste of chicken shrimp, marinate them first. Use a mix of soy sauce, rice vinegar, garlic, ginger, and sesame oil. Let it marinate for at least 30 minutes, or up to 2 hours in the fridge.

“Properly marinating your proteins is the secret to a truly flavorful stir-fry.”

Best Vegetables to Complement Your Chicken and Shrimp Stir Fry

When making a tasty chicken and shrimp stir fry, choosing the right veggies is key. They boost the dish’s flavor and health benefits. Add a mix of fresh, crunchy veggies for a meal that looks great and tastes amazing.

Here are some top veggies to go with your chicken and shrimp stir fry:

  • Broccoli – This veggie is packed with nutrients. It adds a nice crunch and a sweet taste to the stir fry.
  • Bell Peppers – Bell peppers come in many colors. They add a splash of color and a bit of sweetness to the dish.
  • Snap Peas – Snap peas are crisp and juicy. They bring a fresh, sweet flavor and a fun texture to the stir fry.
  • Carrots – Sliced or julienned carrots add a bright color and a hint of sweetness to the stir fry.
  • Mushrooms – Mushrooms, like button, shiitake, or oyster, bring an earthy flavor and depth to the dish.

Adding these tasty and healthy veggies makes your chicken and shrimp stir fry even better. It becomes a dish that’s not just delicious but also looks good and feels satisfying. Try different veggies to find the best match for your chicken and shrimp stir fry or shrimp chicken pasta.

Master the Art of Stir Fry Cooking Techniques

Mastering chicken and shrimp stir fry is more than just tossing ingredients. It’s about getting the perfect texture and flavor. Let’s explore the key techniques to take your recipe for shrimp and chicken to the next level.

Wok vs. Regular Pan Methods

A wok is the traditional choice for stir frying, but a large skillet works too. The main difference is in shape and heat distribution. Woks cook food evenly and quickly due to their shape. Regular pans might need more effort to get the right sear and caramelization.

Temperature Control Tips

Getting the temperature right is key for a chicken and shrimp stir fry that’s just right. Start with high heat to seal in juices, then adjust to avoid overcooking. A hot pan or wok ensures quick, flavorful cooking without drying out the meat.

Proper Stirring Techniques

Stirring constantly is crucial for a great stir fry. Use a spatula or tongs to toss and turn ingredients. This ensures even cooking and prevents burning. Keep the food moving to caramelize surfaces without overcooking the inside.

Mastering these chicken and shrimp stir fry techniques will help you make a recipe for shrimp and chicken that’s full of flavor and texture. Adjust the heat, choose the right pan, and stir with care for top-notch results at home.

Step-by-Step Guide to Making the Garlic Ginger Sauce

Make your chicken shrimp stir fry even better with a tasty garlic ginger sauce. This guide will help you make the perfect sauce to go with your dish.

First, gather your ingredients:

  • 3 cloves of garlic, minced
  • 1-inch piece of fresh ginger, peeled and grated
  • 1/4 cup low-sodium soy sauce
  • 2 tablespoons rice vinegar
  • 1 tablespoon honey
  • 1 teaspoon sesame oil
  • 1/4 teaspoon red pepper flakes (optional, for a touch of heat)
  • 1 tablespoon cornstarch
  • 1/4 cup water

In a small bowl, mix the minced garlic, grated ginger, soy sauce, rice vinegar, honey, and sesame oil. Whisk well to mix everything evenly.

In another small bowl, mix the cornstarch and water to make a slurry. This will thicken the sauce just right.

Heat a skillet or wok over medium-high heat. Add the garlic-ginger sauce and let it simmer. When it starts to bubble, slowly add the cornstarch slurry while stirring. Let it thicken for 1-2 minutes.

Take the garlic ginger sauce off the heat and let it cool a bit. Then, add it to your chicken shrimp stir fry. The sauce will thicken more as it cools, making your dish glossy and flavorful.

Enjoy your chicken shrimp stir fry with the homemade garlic ginger sauce. It’s like having a restaurant-quality meal at home.

How to Achieve the Perfect Texture in Your Stir Fry

Creating a tasty chicken and shrimp stir fry means getting the texture right. It’s all about when you add your ingredients and not overcooking. This way, the chicken and shrimp stay tender and juicy. Let’s uncover the secrets to perfecting the texture in your dish.

Timing Your Ingredients

The order of adding ingredients is key. Start by searing the chicken until it gets a nice brown crust. Next, add the shrimp and stir-fry until they’re pink and opaque. Finally, add the vegetables last to keep them crisp-tender. This method ensures each ingredient cooks just right, blending perfectly in your stir fry.

Preventing Overcooking

Overcooked chicken and shrimp can make your stir fry tough and rubbery. To avoid this, watch your cooking time and temperature closely. Use high heat for a quick sear, but remove the pan when the chicken is done and the shrimp are pink. The heat will keep cooking the ingredients, so slightly undercook them. This way, your stir fry will be tender, juicy, and perfectly textured.

Mastering the timing and avoiding overcooking will help you achieve the perfect texture in your chicken and shrimp stir fry. Enjoy the tender chicken, succulent shrimp, and crisp vegetables in every bite.

Common Mistakes to Avoid When Making Stir Fry

Making a tasty chicken and shrimp stir fry needs care and focus. While it’s rewarding, many home cooks face common issues. Knowing these mistakes helps you make a great recipe for shrimp and chicken.

One big mistake is putting too much in the pan at once. This can make your food steam instead of sear. Cook in batches to keep the heat high for a good stir fry.

Another mistake is not preparing everything before you start. Stir frying is fast, and you don’t want to be rushing to chop or measure while the pan is hot. Make sure your chicken and shrimp, veggies, and sauce are ready before cooking.

  • Avoid overcrowding the pan
  • Prep all ingredients in advance
  • Don’t overseason or oversauce the dish
  • Resist the urge to stir constantly
  • Allow the wok or pan to get piping hot before adding ingredients

It’s also easy to add too much seasoning or sauce. Start with a little and taste as you go. Adjust as needed. Also, don’t stir the chicken and shrimp stir fry too much. Let it sear and caramelize for the best taste.

By avoiding these mistakes, you’ll get better at making a perfect recipe for shrimp and chicken stir fry. With practice and attention to detail, you can make this dish even more delicious.

Serving Suggestions and Side Dish Pairings

Your chicken and shrimp stir fry needs the perfect side to make it even better. Serve it over steaming rice or with savory noodles. The goal is to find sides that match the bold flavors of your dish.

Rice and Noodle Options

Try serving your chicken and shrimp pasta with fluffy white or jasmine rice. This lets the stir-fry’s vibrant flavors stand out. For a nutty taste and more nutrition, choose brown rice or quinoa.

For a heartier option, shrimp chicken pasta pairs well with steaming noodles. Udon, rice noodles, or spaghetti can soak up the sauce. This creates a mix of textures and tastes that work well together.

Garnishing Tips

Make your dish look great with colorful garnishes. Add green onions, cilantro, or a squeeze of lime juice for freshness. For crunch, sprinkle sesame seeds or crushed peanuts on top.

With the right sides and garnishes, your chicken and shrimp stir fry will impress everyone. It becomes a stunning and delicious meal that’s sure to wow your guests.

Conclusion

The chicken and shrimp stir fry is a tasty dish that brings together tender chicken and juicy shrimp. It’s easy to make and packed with flavor. This dish is perfect for impressing your loved ones.

Whether you’re new to cooking or a pro, this recipe for shrimp and chicken is great. It has a perfect mix of protein, veggies, and a delicious garlic ginger sauce. It’s loved by all who try it.

Ready to give it a try? The secret to a great chicken and shrimp stir fry is using fresh ingredients and mastering cooking techniques. Don’t be afraid to add your own twist. Enjoy your meal!

FAQ

What are the key ingredients in this chicken and shrimp stir fry recipe?

The main ingredients are chicken, shrimp, and a tasty garlic ginger sauce. The sauce includes soy sauce, rice vinegar, brown sugar, and Asian-inspired seasonings.

Why is the combination of chicken and shrimp beneficial?

Chicken and shrimp together make a protein-rich meal. Chicken is lean, and shrimp are full of omega-3s. This mix is both healthy and filling.

How do I select the best chicken and shrimp for this stir fry?

Choose boneless, skinless chicken breasts or thighs. For shrimp, use fresh or frozen, peeled, and deveined. Marinating in garlic ginger sauce boosts flavor and texture.

Bell peppers, snap peas, carrots, and broccoli are great choices. They add flavor and nutrients to the dish.

What are the key techniques for achieving the perfect stir fry texture?

Control the temperature, time ingredients right, and stir gently. Use a wok or large skillet for even cooking.

How do I make the garlic ginger sauce for this stir fry?

Mix soy sauce, rice vinegar, brown sugar, garlic, ginger, and seasonings. Whisk well and adjust flavors as needed.

What are some common mistakes to avoid when making a stir fry?

Avoid overcrowding, not prepping, and bad heat management. Prepare well and follow cooking tips to avoid mistakes.

What are some good side dish options to serve with the chicken and shrimp stir fry?

Serve with rice, noodles, or steamed veggies. Add garnishes like green onions, sesame seeds, or cilantro for extra flavor and look.

0 comments
0 FacebookTwitterPinterestEmail
Chicken Shrimp Recipes

Delicious Chicken Shrimp Recipes for Every Occasion

Serves: 4 Prep Time: Cooking Time:
Nutrition facts: 400 calories 18 grams fat
Rating: 5.0/5
( 1 voted )

Ingredients

  • 2 chicken breasts, boneless and skinless, cut into cubes
  • 1 lb shrimp, peeled and deveined
  • 2 tbsp olive oil
  • 1 tbsp butter
  • 4 cloves garlic, minced
  • 1 medium onion, chopped
  • 1 red bell pepper, chopped
  • 1 zucchini, sliced
  • 1 tsp paprika
  • 1 tsp dried oregano Salt and pepper to taste
  • 1 tbsp lemon juice Fresh parsley, chopped (for garnish)

Instructions

1. Heat olive oil and butter in a large skillet over medium-high heat. 2. Add the chicken cubes to the skillet and season with paprika, oregano, salt, and pepper. Cook for 5-7 minutes, until chicken is browned and cooked through. 3. Remove the chicken from the skillet and set aside. 4. In the same skillet, add garlic, onion, bell pepper, and zucchini. Sauté for 4-5 minutes until vegetables are tender. 5. Add the shrimp to the skillet and cook for 3-4 minutes until pink and opaque. 6. Return the cooked chicken to the skillet and stir in lemon juice. Cook for an additional 2-3 minutes to combine the flavors. 7. Taste and adjust seasoning if necessary. Garnish with fresh parsley and serve.

Notes

You can add a bit of white wine or chicken broth to deglaze the pan for extra flavor. For a spicy kick, add a pinch of red pepper flakes or a dash of hot sauce. This dish pairs well with rice, quinoa, or a fresh salad.

Dinner time just got a whole lot more exciting! Whether you’re hosting a fancy soirée or craving a comforting home-cooked meal, chicken and shrimp make a dynamic duo. They can elevate any dish. From classic Cajun-inspired pasta to flavorful Mediterranean skewers, this article will guide you through a delectable array of chicken and shrimp recipes.

These recipes are sure to delight your taste buds. Discover the perfect balance of surf and turf. Unlock a world of protein-rich, flavor-packed meals that can be enjoyed year-round.

Key Takeaways

  • Explore versatile chicken and shrimp recipes for various occasions
  • Learn about the benefits of pairing these two proteins together
  • Discover essential cooking tips and techniques for chicken and shrimp
  • Understand the nutritional value of chicken and shrimp dishes
  • Gain inspiration for creating flavorful, restaurant-quality meals at home

Understanding the Perfect Chicken and Shrimp Combination

Chicken and shrimp together make a dish that’s truly special. They mix flavors and textures in a way that makes any meal better. Let’s look at why pairing these two is great, how to cook them, and their health benefits.

Benefits of Pairing Chicken with Shrimp

Chicken and shrimp work well together. Chicken’s mild taste and soft texture go well with shrimp’s sweet flavor. This mix makes for a meal that’s both tasty and satisfying.

Shrimp adds a coastal flavor, while chicken brings comfort. This combo lets you try many cooking methods and flavors.

Essential Cooking Tips for Both Proteins

  • Cook chicken and shrimp just right to keep them tender.
  • Marinate or brine chicken for extra juiciness and taste.
  • Seared shrimp get a nice caramelized outside.
  • Don’t overcook to keep their best texture.

Nutritional Value of Chicken Shrimp Dishes

Chicken and shrimp are both high in protein and have all the amino acids you need. Shrimp is full of essential omega-3 fatty acids. Chicken, on the other hand, has lots of vitamins and minerals like B vitamins, iron, and zinc.

Together, they make a meal that’s good for you. It supports your health and well-being.

NutrientChicken (4 oz)Shrimp (4 oz)
Protein26g24g
Omega-3 Fatty Acids0.1g0.4g
Vitamin B120.3mcg0.9mcg
Selenium13.8mcg40.2mcg

Knowing the benefits of chicken and shrimp, how to cook them, and their health value helps you make tasty and healthy dishes. These meals will please your taste buds and nourish your body.

Essential Kitchen Tools and Ingredients for Surf and Turf Cooking

Creating tasty chicken and shrimp dishes needs a well-stocked kitchen. You’ll need the right cookware and pantry items. These tools and ingredients can turn a good meal into a great one. Let’s look at the must-have kitchen tools and surf and turf ingredients to improve your cooking.

Essential Kitchen Equipment

To make surf and turf recipes, you need a variety of kitchen tools and equipment. Here are some key items for your kitchen:

  • Heavy-duty skillet or sauté pan for searing chicken and sautéing shrimp
  • Grill pan or outdoor grill for perfectly charred and flavorful proteins
  • Sturdy chef’s knife and paring knife for efficient chopping and dicing
  • Mixing bowls in various sizes for marinating, mixing, and preparing ingredients
  • Tongs and spatulas for handling and flipping delicate proteins
  • Meat thermometer to ensure chicken is cooked to a safe internal temperature

Surf and Turf Pantry Essentials

Having the right kitchen tools is important, but so is a well-stocked pantry. Essential ingredients are key for tasty chicken and shrimp dishes. Here are some must-have surf and turf ingredients:

  1. Boneless, skinless chicken breasts or thighs
  2. Fresh or frozen shrimp, peeled and deveined
  3. Olive oil, butter, and garlic for sautéing and adding flavor
  4. Spices and seasonings such as paprika, chili powder, dried herbs, and salt and pepper
  5. Marinades, sauces, and condiments like soy sauce, teriyaki, and Cajun seasoning
  6. Pasta, rice, or quinoa for serving as a base or side dish

With the right kitchen equipment and pantry, you can make many delicious chicken and shrimp dishes. These dishes will impress your family and friends.

Classic Cajun Chicken Shrimp Pasta Recipe

Start a flavorful journey with our Cajun Chicken Shrimp Pasta recipe. It mixes the bold Cajun taste with tender chicken and shrimp. All this is set in a bed of al dente pasta. Get ready to excite your taste buds and feel the bayou’s vibrant flavors.

Preparing the Perfect Cajun Seasoning

The secret to this recipe is the homemade Cajun seasoning blend. To get the perfect spice mix, you’ll need:

  • 2 tablespoons paprika
  • 1 tablespoon garlic powder
  • 1 tablespoon onion powder
  • 1 teaspoon cayenne pepper
  • 1 teaspoon dried oregano
  • 1 teaspoon dried thyme
  • 1 teaspoon black pepper
  • 1/2 teaspoon salt

Mix all the ingredients in a small bowl until well combined. This seasoning blend can be stored in an airtight container. Use it in your Cajun cuisine and spicy recipes later.

Cooking Timeline and Temperature Guide

To cook your Cajun Chicken Shrimp Pasta perfectly, follow this guide:

  1. Boil a large pot of salted water. Cook the pasta as the package says, usually 8-10 minutes.
  2. In a large skillet, cook the chicken and shrimp over medium-high heat until done, about 5-7 minutes.
  3. Add the Cajun seasoning blend to the skillet. Toss the chicken and shrimp to coat evenly.

Sauce Preparation Tips

The sauce is key to a great Cajun Chicken Shrimp Pasta. To make the perfect sauce:

  1. In a separate saucepan, melt butter over medium heat.
  2. Whisk in flour to make a roux, cooking for 2-3 minutes until golden.
  3. Pour in heavy cream or half-and-half slowly, whisking constantly to avoid lumps.
  4. Simmer the sauce until it thickens, about 5-7 minutes.
  5. Season the sauce with more Cajun seasoning, to taste.

Put the cooked pasta, Cajun chicken and shrimp, and sauce in a large bowl. Top with chopped parsley or green onions. Serve this Cajun cuisine and pasta dish hot. Enjoy the spicy recipes in every bite!

Mediterranean-Style Grilled Chicken and Shrimp Skewers

Try these tasty grilled chicken and shrimp skewers for a taste of the Mediterranean. They’re a mix of land and sea, offering a perfect balance of flavors and textures. Great for outdoor meals or a quick dinner, these skewers will impress your taste buds.

Start with a zesty marinade to flavor the chicken and shrimp. Mix olive oil, lemon juice, garlic, dried oregano, salt, and pepper. Let the proteins soak in these flavors for at least 30 minutes before skewering them.

Before grilling, make sure your grates are clean and oiled to avoid sticking. Grill the skewers for 2-3 minutes on each side. This ensures the chicken is cooked and the shrimp are pink. Brush them with leftover marinade for extra flavor.

Enjoy your skewers with a fresh salad and grilled veggies for a full meal. The mix of tender chicken, juicy shrimp, and Mediterranean spices will make you feel like you’re by the Mediterranean Sea.

IngredientAmount
Boneless, Skinless Chicken Breasts, cubed1 lb
Shrimp, peeled and deveined1 lb
Olive Oil1/4 cup
Lemon Juice2 tbsp
Garlic, minced2 cloves
Dried Oregano1 tsp
Salt and PepperTo taste

The mix of tender chicken, juicy shrimp, and Mediterranean spices will make you feel like you’re by the Mediterranean Sea.

One-Pan Garlic Butter Chicken Shrimp

Make your weeknight dinner special with this One-Pan Garlic Butter Chicken Shrimp recipe. It’s easy to make and full of flavor. Chicken and shrimp are cooked in a creamy garlic butter sauce, great for busy nights or casual get-togethers.

Garlic Butter Sauce Variations

The garlic butter sauce is the recipe’s highlight. You can tweak it to your liking:

  • Lemon Garlic Butter: Mix in fresh lemon juice and zest for a zesty twist.
  • Parmesan Garlic Butter: Add grated Parmesan cheese for a creamy, nutty taste.
  • Herb Garlic Butter: Use chopped herbs like parsley, thyme, or rosemary for a fragrant flavor.

Side Dish Pairing Suggestions

Pair the Garlic Butter Chicken Shrimp with your favorite sides. Here are some great options:

  1. Buttery mashed potatoes or roasted potatoes
  2. Fluffy white rice or quinoa
  3. Steamed broccoli or sautéed asparagus
  4. Fresh salad with a light vinaigrette

This One-Pan Garlic Butter Chicken Shrimp recipe is a hit. It’s quick, satisfying, and perfect for any meal. Enjoy it for a delicious dinner any time.

Asian-Inspired Stir-Fry with Chicken and Shrimp

Discover the delightful fusion of Asian cuisine and the classic combination of chicken and shrimp in this vibrant stir-fry dish. Mastering the art of stir-frying is the key to unlocking a world of quick, flavorful meals that can be enjoyed any night of the week.

The secret to a successful Asian-inspired stir-fry lies in the balance of fresh ingredients, bold seasonings, and precise cooking techniques. Start by marinating your chicken and shrimp in a blend of soy sauce, rice vinegar, and aromatic spices, allowing the flavors to meld together. As you heat your wok or large skillet to high temperature, the key is to work quickly, tossing the ingredients with ease to ensure even cooking and a delightful char on the proteins.

To complement the chicken and shrimp, choose a variety of crisp, colorful vegetables such as broccoli, bell peppers, snow peas, and carrots. These not only add vibrant pops of color to your dish but also provide a nutritional boost and a satisfying crunch. A flavorful sauce, crafted with ingredients like hoisin, garlic, and ginger, ties everything together, creating a harmonious blend of sweet, savory, and umami notes.

“Stir-frying is the essence of Asian cuisine – it’s fast, fresh, and full of flavor.”

Serve your Asian-inspired stir-fry over a bed of fluffy white rice or noodles, and enjoy the delightful interplay of tender chicken, juicy shrimp, and a medley of fresh vegetables. This quick and easy dish is sure to become a new weeknight favorite, satisfying your cravings for bold, Asian-inspired flavors.

Creamy Tuscan Chicken Shrimp Casserole

Enjoy the rich flavors of Tuscan cuisine with our Creamy Tuscan Chicken Shrimp Casserole. It’s a comforting dish with tender chicken, juicy shrimp, and a creamy Parmesan sauce. It’s perfect for any occasion, whether it’s a cozy family dinner or an impressive meal for guests.

Make-Ahead and Storage Instructions

You can prepare this casserole ahead of time. Just assemble it, cover it, and refrigerate for up to 3 days before baking. When ready, pop it in the oven and enjoy. Leftovers can be stored in an airtight container in the fridge for up to 4 days, great for meal prep and reheating.

Cheese Selection Guide

The perfect Tuscan flavor comes from the cheese. Use creamy Parmesan and tangy Asiago for a rich sauce. You can also try other Italian cheeses like Fontina or Mozzarella to match your taste.

CheeseFlavor ProfileRecommended Quantity
ParmesanNutty, salty, and creamy1/2 cup grated
AsiagoSlightly tangy and nutty1/2 cup grated
FontinaMild, melty, and buttery1/4 cup shredded

Try different cheese mixes to find your favorite flavor. The creamy Tuscan Chicken Shrimp Casserole is a comfort food classic that will be loved by all.

Healthy Sheet Pan Chicken and Shrimp Dinner

Discover the magic of sheet pan meals with this delectable and healthy chicken and shrimp dinner. It’s packed with lean proteins, fresh veggies, and a tasty seasoning blend. This one-pan wonder is perfect for busy weeknights or health-conscious gatherings.

The secret to this low-calorie dinner is even cooking of chicken and shrimp. Cut the chicken into bite-sized pieces for even cooking. Arrange the chicken, shrimp, and veggies like broccoli, bell peppers, or zucchini on a large sheet pan. Drizzle with olive oil and season with your favorite herbs and spices.

  • For maximum flavor, try a homemade Cajun seasoning or a Mediterranean-inspired blend of oregano, garlic, and lemon zest.
  • Roast the sheet pan meal in the oven at a high temperature (400°F) for 15-20 minutes, stirring halfway, until the chicken is cooked through and the shrimp are opaque.
  • Serve the healthy recipe over a bed of whole grains, such as quinoa or brown rice, for a complete and satisfying meal.

The beauty of this sheet pan meal is its simplicity and versatility. You can easily customize the veggies or swap proteins to suit your taste. Pair it with a fresh salad or a light, crisp white wine for a complete and nutritious dinner that the whole family will enjoy.

“This sheet pan chicken and shrimp dinner is a game-changer for busy weeknights. It’s healthy, delicious, and so easy to prepare – a true win-win!”

Spicy Jambalaya with Chicken and Shrimp

Explore the rich flavors of Creole cuisine with our spicy jambalaya recipe. It’s a classic dish from the South, made with chicken, shrimp, and bold Creole spices. This one-pot meal is a true delight, blending the richness of chicken with the sweetness of shrimp.

Traditional vs. Modern Preparation Methods

Old-school jambalaya recipes take time to cook, letting flavors mix and mature. But, we’ve made it quicker without losing the authentic taste. Now, you can enjoy the essence of Creole cuisine in less time.

Spice Level Adjustments

Creole cuisine is known for its bold, spicy flavors. Our jambalaya recipe packs a punch, but you can tone it down if you prefer. Just tweak the amount of Cajun or Creole seasoning to your liking.

Spice LevelCajun/Creole Seasoning
Mild2 tablespoons
Medium3 tablespoons
Spicy4 tablespoons

Whether you’re into traditional or modern cooking, and whether you like it mild or spicy, our Spicy Jambalaya is perfect. It’s a delicious mix of chicken, shrimp, and aromatic rice that will take you straight to Louisiana.

Party-Perfect Chicken Shrimp Appetizers

Make your next party unforgettable with tasty finger foods, party appetizers, and small bites made with chicken and shrimp. These recipes, from colorful skewers to creamy dips, will keep your guests wanting more.

Chicken and Shrimp Bites with Spicy Mango Dip

These party appetizers are small but pack a big punch. Juicy chicken and shrimp are seasoned and served with a tangy mango dip. They’re easy to grab and go.

Bacon-Wrapped Chicken and Shrimp Skewers

Take your finger foods to the next level with these skewers. The smoky bacon adds a rich flavor to the tender chicken and shrimp. Each bite is a burst of taste.

Creamy Chicken Shrimp Stuffed Mushrooms

For a fancy small bites option, try these stuffed mushroom caps. They’re filled with a creamy mix of chicken and shrimp. The earthy mushrooms balance out the rich filling, making them a hit at any gathering.

AppetizerServing SizePrep TimeCook Time
Chicken and Shrimp Bites with Spicy Mango Dip24 bites20 minutes15 minutes
Bacon-Wrapped Chicken and Shrimp Skewers12 skewers30 minutes20 minutes
Creamy Chicken Shrimp Stuffed Mushrooms24 mushrooms25 minutes18 minutes

Impress your guests with these delicious chicken shrimp appetizers. They offer bold flavors and elegant looks. These party-perfect bites will have everyone asking for more.

Conclusion

The mix of chicken and shrimp can turn into many tasty dishes. You can make everything from Cajun pasta to Asian stir-fries. These proteins fit into many cuisines, giving you lots of options for cooking.

Learning how to cook chicken and shrimp well is key. It helps you make meals that wow your loved ones. Whether it’s a simple dinner or a fancy party, these chicken shrimp recipes will be great for your meal planning.

Don’t hesitate to try new flavors and cooking ways. With good cooking tips and creativity, you can make amazing dishes. These dishes will excite your taste buds and make everyone want more.

FAQ

What are the key benefits of pairing chicken and shrimp in recipes?

Chicken and shrimp together make a tasty, protein-rich meal. They add different flavors and textures. This makes the dish both flavorful and satisfying.

What are some essential cooking tips for preparing chicken and shrimp together?

Cooking chicken and shrimp needs careful timing. Chicken takes longer, while shrimp cooks fast. Use techniques like searing or grilling to cook them right.

What are the nutritional benefits of chicken shrimp dishes?

Chicken and shrimp are full of lean protein and vitamins. They make a meal that’s good for your health and taste great.

What kitchen tools and ingredients are essential for preparing chicken and shrimp recipes?

You’ll need a good skillet, a sharp knife, and spices for tasty chicken and shrimp dishes. Don’t forget chicken, shrimp, olive oil, garlic, and fresh herbs.

How do I make the perfect Cajun seasoning for a Cajun Chicken Shrimp Pasta dish?

Mix paprika, garlic powder, onion powder, cayenne pepper, and herbs in a bowl. Adjust the spice to your taste.

What is the ideal cooking timeline and temperature for the Cajun Chicken Shrimp Pasta?

Cook pasta first. Then, sear chicken and shrimp over medium-high heat. Finish with a creamy Cajun sauce.

How do I prepare the perfect sauce for the Cajun Chicken Shrimp Pasta?

Sauté garlic and onions in butter. Then, add heavy cream, Parmesan, and Cajun seasoning. Simmer until thick, then toss with pasta, chicken, and shrimp.

What are some tips for grilling Mediterranean-style Chicken and Shrimp Skewers?

Marinate chicken and shrimp in olive oil, lemon, and herbs. Grill over medium-high heat until cooked. Use separate skewers for even cooking.

How can I make variations of the garlic butter sauce for the One-Pan Garlic Butter Chicken Shrimp dish?

Try adding lemon, white wine, Parmesan, or herbs to the garlic butter sauce. You can also add a bit of spice for extra flavor.

What are some suggested side dishes to serve with the One-Pan Garlic Butter Chicken Shrimp?

Serve with roasted veggies, a green salad, or crusty bread. These options complement the dish well.

How can I adjust the spice level in the Spicy Jambalaya with Chicken and Shrimp?

Adjust the spice by changing the amount of Cajun seasoning or cayenne pepper. Start with a small amount and add more to taste. Balance the heat with tomatoes or bell peppers.

What are some party-perfect chicken and shrimp appetizer ideas?

Try chicken skewers with sweet chili glaze, shrimp cocktail, or mini quesadillas. These are tasty, easy to eat, and impress your guests.

2 comments
0 FacebookTwitterPinterestEmail
Verified by MonsterInsights