Home Recipes
Category:

Recipes

Easy Baked Chicken Wings

Easy Baked Chicken Wings: The Perfect Recipe

Serves: 4 Prep Time: Cooking Time:
Nutrition facts: 250 calories 15 grams fat
Rating: 5.0/5
( 1 voted )

Ingredients

  • 10-12 chicken wings
  • 2 tablespoons olive oil
  • 1 teaspoon garlic powder
  • 1 teaspoon onion powder
  • 1/2 teaspoon paprika
  • Salt and pepper to taste
  • 1/2 teaspoon dried thyme or rosemary (optional)

Instructions

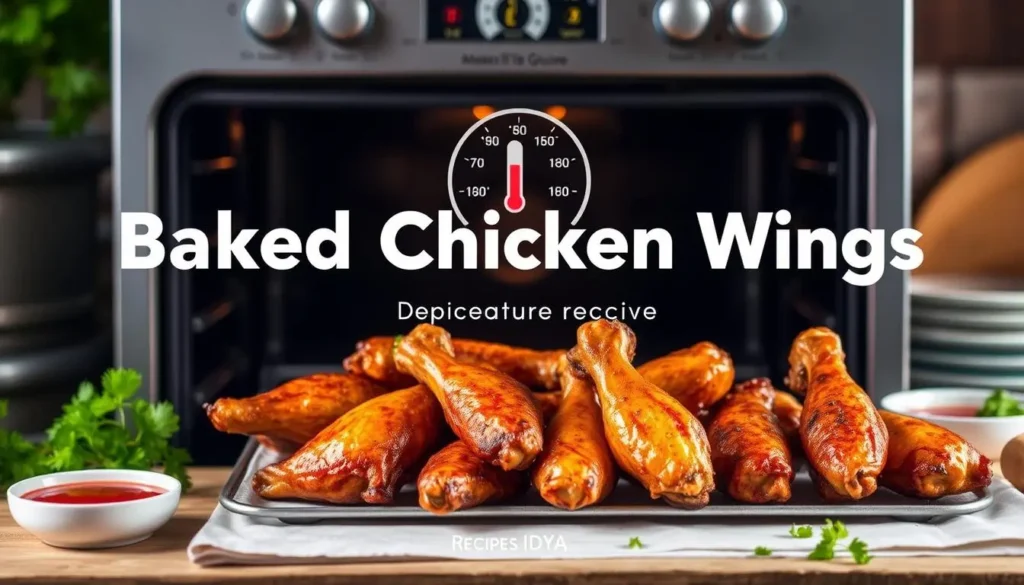
Preheat your oven to 400°F (200°C). Line a baking sheet with parchment paper or foil. Pat the chicken wings dry with paper towels to ensure they get crispy when baked. In a large bowl, toss the chicken wings with olive oil, garlic powder, onion powder, paprika, salt, and pepper. Arrange the wings in a single layer on the prepared baking sheet. Bake for 25-30 minutes, flipping halfway through, until the wings are golden and crispy. Optional: Sprinkle with dried thyme or rosemary for added flavor. Remove from the oven and serve hot with your favorite dipping sauce.

Notes

For extra crispy wings, you can broil them for the last 2-3 minutes of cooking. Serve with ranch or blue cheese dressing for dipping.

Ever wondered why restaurant-style chicken wings are hard to make at home? Making the ultimate chicken wings recipe is actually quite simple.

Creating an easy chicken wings recipe doesn’t need fancy chef skills. It’s perfect for game day or a family dinner. Baked chicken wings can make your meal special.

This guide will show you how to make crispy, flavorful wings at home. No deep fryer is needed. Just simple ingredients, smart techniques, and passion for cooking.

Key Takeaways

  • Baked wings can be just as delicious as fried wings
  • Anyone can master a professional-quality chicken wings recipe
  • Simple techniques make crispy wings achievable at home
  • Versatile dish perfect for multiple occasions
  • Healthier alternative to traditional deep-fried wings

Introduction to Baked Chicken Wings

Chicken wings are a favorite dish that brings people together. Baking them is a healthier, easier way to cook than frying. The best chicken wings recipe is about making a tasty, nutritious meal that’s simple to make.

Cooking wings in the oven has many benefits. It makes them a great choice for your next meal. Let’s see why baked chicken wings are so special.

What Makes Baked Wings Special?

Baked chicken wings become amazing with a few techniques. The recipe helps you get a crispy outside and a juicy inside.

  • Healthier cooking method with less oil
  • Consistent heat distribution
  • Easy cleanup compared to frying
  • More control over seasoning

Benefits of Baking Over Frying

Baking is a smart choice for your health. Fried wings can be greasy, but baked wings are lighter. They still taste great.

Cooking MethodCaloriesFat ContentPreparation Time
Deep Frying400-500 caloriesHigh30-45 minutes
Baking250-350 caloriesLow45-60 minutes

“Baking chicken wings is not just a cooking method—it’s a healthier lifestyle choice.” – Culinary Expert

Understanding baking’s benefits will change your wing-cooking game. You’ll impress everyone with delicious, crispy, and healthier chicken wings.

Essential Ingredients for Chicken Wings

Starting a homemade chicken wings recipe means picking the right ingredients. Whether it’s a classic or spicy recipe, the ingredients’ quality is key. It can make or break your dish.

Choosing the right chicken wings is crucial. You’ll find three main types in most stores:

  • Whole Wings: Includes the drumette, flat, and tip sections
  • Drumettes: The meatier, drumstick-like portion of the wing
  • Flats: The middle section with two parallel bones

Selecting the Best Wing Cuts

Most home cooks prefer drumettes or flats for their recipes. These cuts are easier to eat and cook evenly. Fresh, high-quality chicken is vital for the best flavor and texture.

Spices and Marinades That Elevate Your Wings

A great spicy chicken wings recipe needs the right spices and marinades. Here are some must-haves:

  • Paprika
  • Garlic powder
  • Cayenne pepper
  • Black pepper
  • Salt

“The secret to amazing wings is in the seasoning!” – Professional Chef

Pro tip: For the best flavor, marinate your wings for at least 2 hours before cooking. This lets the spices soak into the meat, enhancing the taste.

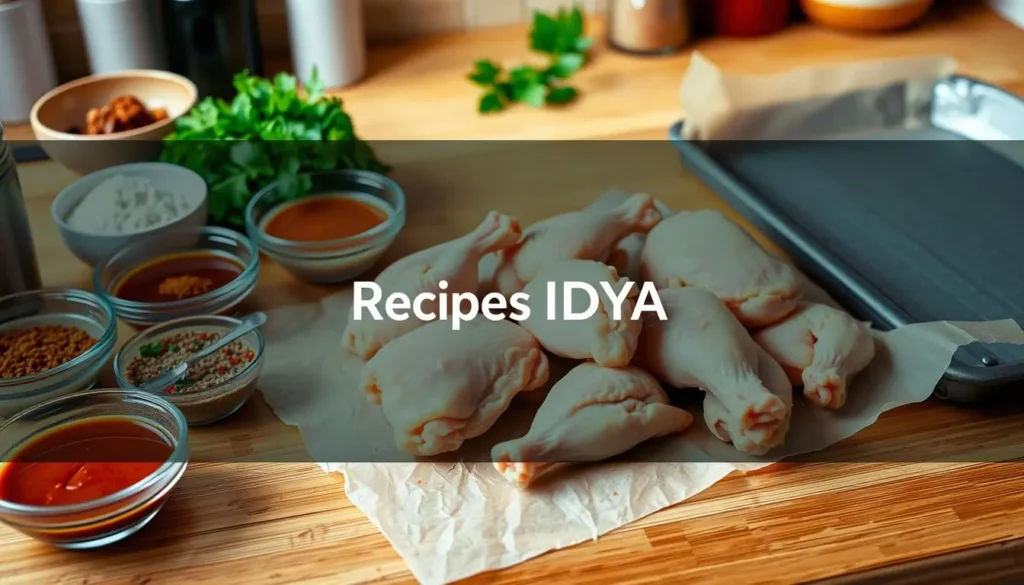
Preparing Chicken Wings for Baking

Starting with the right preparation is key to a great easy chicken wings recipe. The right steps can turn simple chicken wings into a dish that wows everyone. It will also make your taste buds happy.

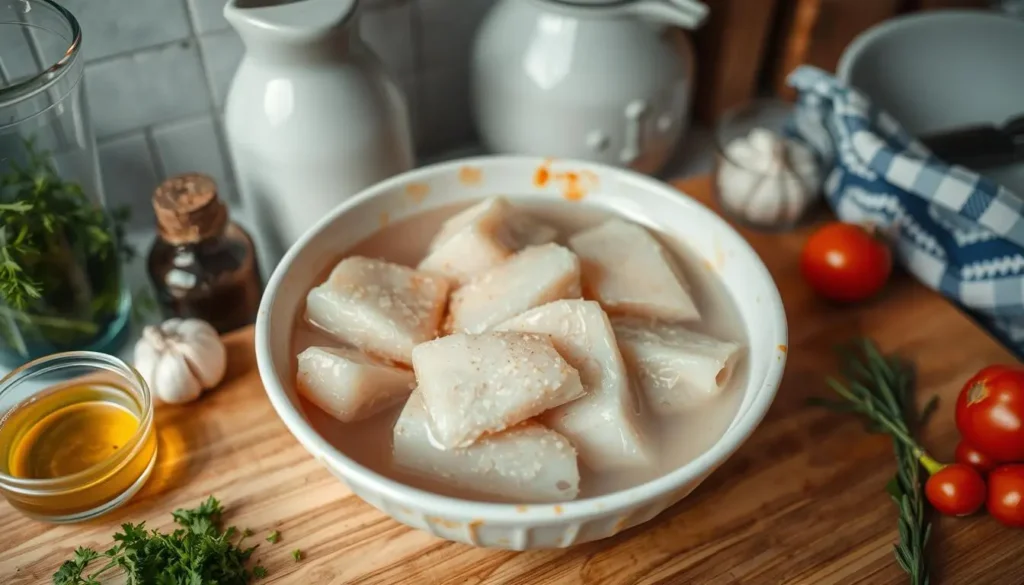
Cleaning Your Chicken Wings

Cleaning your chicken wings is the first step. Here’s what you need to do:

  • Rinse wings under cold water
  • Pat completely dry with paper towels
  • Remove any loose feathers
  • Trim excess fat if necessary

“The key to crispy wings is removing excess moisture” – Professional Chef

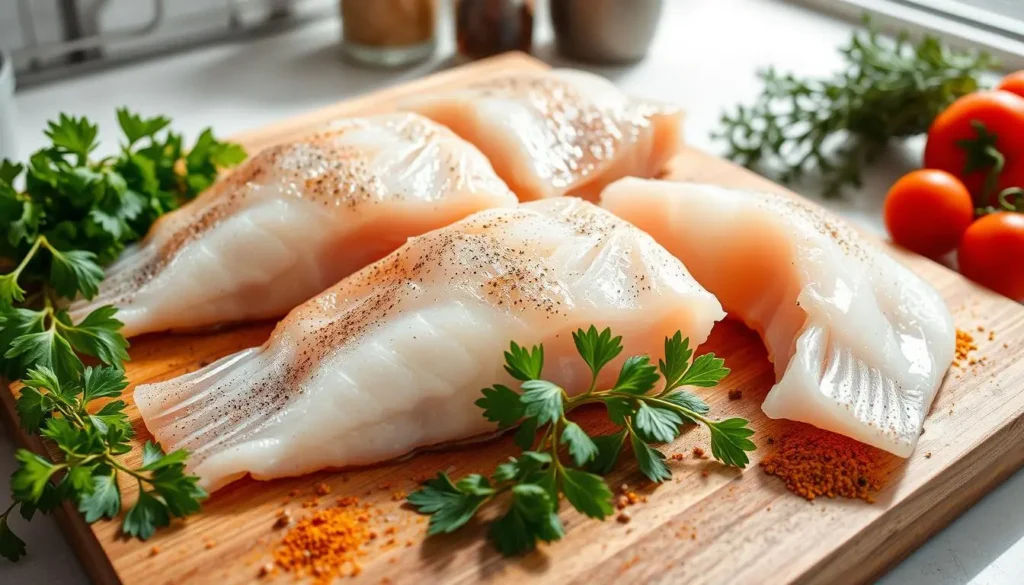
Mastering Even Seasoning Techniques

Even seasoning is crucial for a tasty easy chicken wings recipe. Here’s how to do it right:

  1. Use a large mixing bowl or resealable plastic bag
  2. Spread seasonings evenly
  3. Massage spices into wing surface
Seasoning MethodProsCons
Bowl MixingEven coverageMore dishes to clean
Plastic BagEasy cleanupLess precise coating

Pro tip: Let seasoned wings sit for 15-30 minutes before baking to enhance flavor absorption.

Choosing the Right Baking Method

Getting your baked chicken wings just right means knowing the best baking techniques. The method you pick can really change how crispy and tasty your wings are.

How you bake your chicken wings is very important. Different ways can turn your wings from good to great.

Baking on a Rack vs. Directly on a Tray

Your choice of baking surface is key for crispy chicken wings. Here’s what you need to know:

  • Baking Rack: Allows air to circulate, making wings more even crispy
  • Direct Tray Baking: Can make bottoms soggy and cooking uneven

“The secret to perfect wings is all in the technique” – Professional Chef

Foil vs. Parchment Paper: Choosing Your Surface

Choosing the right baking surface is crucial for your chicken wings:

  • Parchment Paper: Non-stick, easy to clean, helps wings get crispy
  • Aluminum Foil: Reflects heat, can cause uneven cooking

Pro tip: For the crispiest wings, use a wire rack on a baking sheet. This method ensures great air circulation and fat rendering, giving you that perfect crispy exterior.

Cooking Temperatures and Times

Mastering the art of baking chicken wings requires precise temperature control and timing. Your best chicken wings recipe depends on understanding how heat transforms these tasty morsels into crispy, delectable treats.

Achieving the perfect chicken wings recipe isn’t just about throwing them in the oven. Temperature and cooking time are critical factors that determine your wings’ texture and flavor.

Ideal Temperature for Crispy Wings

The secret to crispy wings lies in high-heat baking. Professional chefs recommend:

  • Preheating your oven to 425°F (218°C)
  • Maintaining consistent oven temperature
  • Using a reliable meat thermometer

Cooking Times Based on Wing Size

Different wing sizes require varied cooking durations. Here’s a comprehensive guide to help you nail your best chicken wings recipe:

Wing SizeCooking TimeInternal Temperature
Small Wings (2-3 oz)35-40 minutes165°F (74°C)
Medium Wings (3-4 oz)40-45 minutes165°F (74°C)
Large Wings (4-5 oz)45-50 minutes165°F (74°C)

“The key to perfect wings is patience and precision.” – Culinary Expert

Pro tip: Always let your wings rest for 5-10 minutes after baking to lock in those delicious juices and ensure maximum crispiness.

Flavoring Your Chicken Wings

To turn a simple homemade chicken wings recipe into a flavor explosion, you need creativity and the right techniques. Whether you want a classic spicy chicken wings recipe or something new, knowing about marinades and dry rubs can make a big difference.

Marinades and dry rubs are key to making delicious chicken wings. They add deep flavors that can completely change how you enjoy your wings.

Classic Marinades to Try

  • Buffalo-style hot sauce
  • Honey garlic glaze
  • Korean gochujang sauce
  • Teriyaki blend

Unique Flavor Combinations

Want to try something new with your homemade chicken wings recipe? Here are some unique flavor combinations:

  1. Maple bourbon dry rub
  2. Lemon pepper seasoning
  3. Jamaican jerk spice blend
  4. Sriracha honey glaze
Flavor CategoryKey IngredientsFlavor Profile
SpicyCayenne, Paprika, Hot SauceIntense Heat
SweetHoney, Brown Sugar, Maple SyrupRich Sweetness
TangyVinegar, Citrus, MustardSharp Brightness

“The secret to great wings is layering flavors and being bold with your seasonings.” – Professional Chef

Creating a spicy chicken wings recipe doesn’t have to be hard. Start with basic spices and add more complexity as you go. Remember, marinating for at least 30 minutes can really boost the flavor of your wings.
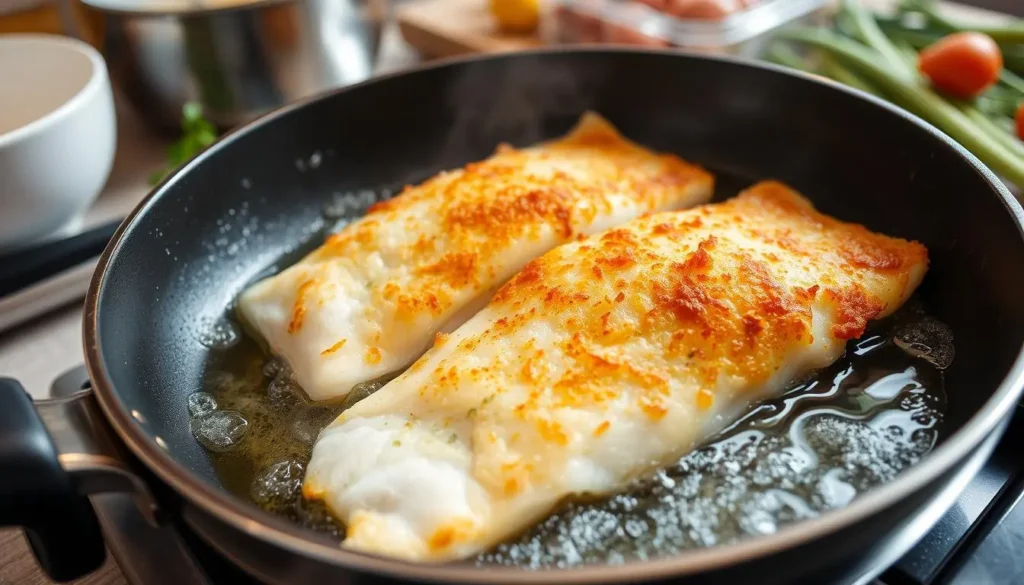
Crispy Skin Secrets

To get perfect crispy chicken wings, you need some insider tips. Baked wings can be as tasty as fried ones with the right techniques. These methods help you achieve that crunchy texture everyone loves.

For incredibly crispy baked chicken wings, a few simple steps are crucial. You want to get rid of moisture and make the wings crunchy like deep-fried ones.

Game-Changing Crunch Techniques

  • Pat wings completely dry with paper towels
  • Use baking powder as a secret weapon
  • Allow wings to air-dry in the refrigerator
  • Space wings evenly on a wire rack

Baking Powder: The Crispy Skin Miracle

Baking powder is a game-changer for crispy chicken wings. It breaks down proteins on the skin’s surface. This creates tiny bubbles for an extra-crispy outside.

“The key to restaurant-quality crispy wings is understanding the science behind skin texture.” – Professional Chef

TechniqueCrispiness Impact
Baking Powder CoatingHigh Crispiness
Refrigerator DryingMedium-High Crispiness
Paper Towel DryingMedium Crispiness

For the best baked chicken wings, use 1 teaspoon of baking powder per pound. Sprinkle it evenly and let the wings sit uncovered in the fridge for at least an hour before baking.

Pro Tips for Maximum Crunch

  1. Use aluminum-free baking powder
  2. Avoid using baking soda, which can taste bitter
  3. Flip wings halfway through cooking
  4. Finish with a quick broil for extra crispiness

Remember, patience is key when creating the ultimate crispy chicken wings at home!

Saucing Your Wings

The final touch to any great chicken wings recipe is the sauce. Your easy chicken wings recipe isn’t complete without the perfect coating. This turns simple baked wings into a flavor explosion. Saucing is an art that can elevate your dish from good to unforgettable.

Picking the right sauce can make or break your wing experience. The best chicken wings recipe incorporates sauces that complement the crispy baked exterior. They add depth of flavor.

  • Classic Buffalo: Tangy and spicy, perfect for traditionalists
  • Honey BBQ: Sweet with a smoky undertone
  • Garlic Parmesan: Rich and creamy
  • Korean Gochujang: Spicy and slightly sweet

Sauce Application Techniques

When it comes to applying sauce to your chicken wings recipe, timing is crucial. For maximum crispiness, wait until the wings are fully baked and hot. You have two primary methods:

  1. Tossing: Place wings in a large bowl and coat evenly
  2. Brushing: Use a silicone brush for precise application

“The secret to great wings is not just the recipe, but how you sauce them!” – Chef’s Pro Tip

Pro tip for your easy chicken wings recipe: Always serve extra sauce on the side. This allows guests to customize their wing experience. It ensures everyone gets their perfect level of sauciness.
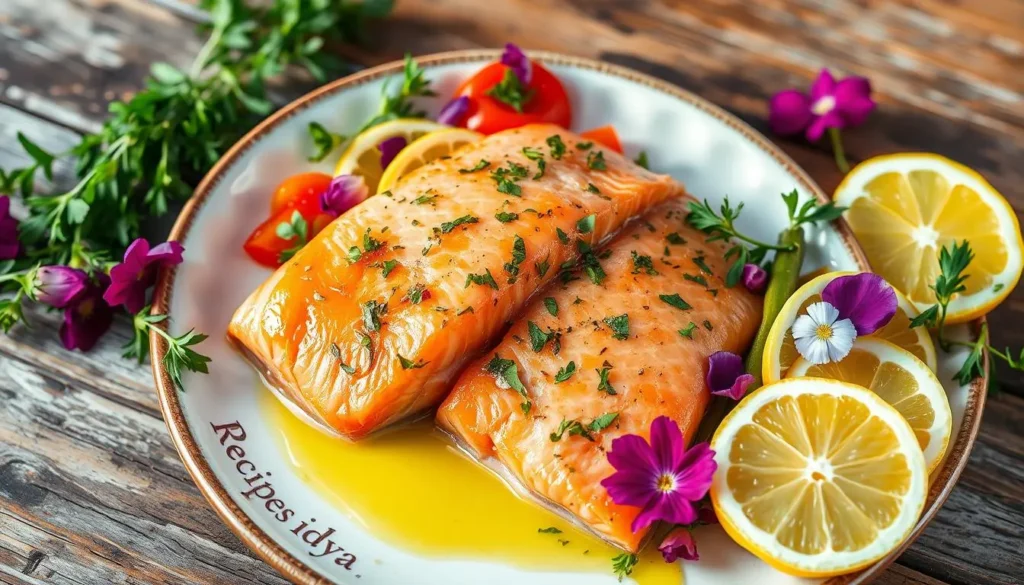
Serving Suggestions

Improving your best chicken wings recipe is more than just cooking. The right way to serve them can turn a simple meal into a memorable experience. Your homemade chicken wings should be the star with creative serving ideas that impress everyone.

Perfect Dips and Side Companions

Choosing the right dips can make your chicken wings stand out. Here are some tasty options:

  • Classic blue cheese dressing
  • Creamy ranch sauce
  • Spicy sriracha mayo
  • Tangy honey mustard

Creative Serving Techniques

There are many ways to serve your best chicken wings recipe:

  1. Wing platter with different flavors
  2. Wing-topped salad for a lighter option
  3. Wrapped in warm tortillas for a unique twist
  4. Appetizer-style mini skewers

“Great wings are about flavor, presentation, and imagination!” – Chef Michael Rodriguez

Beverage Pairings

Pair your homemade chicken wings with refreshing drinks. Cold beer, crisp white wine, or zesty craft sodas can boost the flavor.

Serving chicken wings is an art. Try different ways and find what suits your taste and audience.

Storing Leftover Chicken Wings

Enjoying your crispy chicken wings recipe is just the start. Knowing how to store and reheat them is key. This way, you can enjoy every last bite. Proper storage keeps your wings safe and tasting great.

When refrigerating leftover chicken wings, pay close attention. This ensures they stay fresh and safe to eat.

Refrigeration Best Practices

  • Cool wings to room temperature within 2 hours of cooking
  • Store in an airtight container
  • Refrigerate at 40°F or below
  • Consume within 3-4 days for optimal taste

Reheating for Maximum Crispiness

Reheating chicken wings can be a challenge. But with the right methods, you can keep them crispy.

Reheating MethodTemperatureTimeCrispiness Level
Oven350°F10-15 minutesHigh
Air Fryer375°F3-4 minutesExcellent
Toaster Oven375°F8-10 minutesGood

“The key to great reheated wings is low and slow heating to preserve that crispy exterior.” – Culinary Expert

For crispy chicken wings, avoid microwaving. It can make them soggy. Instead, use the oven or air fryer to get that crunch back.

Freezing Options

Freezing is a great way to keep your chicken wings fresh longer. Wrap them tightly in freezer-safe containers or bags. Remove as much air as you can. They can last up to 4 months in the freezer.

Always label your containers with the date to keep track of storage time!

Common Mistakes to Avoid

Getting your baked chicken wings just right means avoiding some common mistakes. These errors can turn your dish into a letdown. Knowing what to watch out for will help you make wings that everyone will love.

Perfect baked chicken wings are more than just tossing ingredients in the oven. Beginners often make mistakes that affect the taste and texture. It’s important to avoid these errors to make great wings.

Overcooking and Undercooking Challenges

The biggest challenge is getting the wings cooked just right. If they’re overcooked, they become dry and tough. Undercooked wings are not safe to eat.

  • Use a meat thermometer to ensure internal temperature reaches 165°F
  • Check wings at the thickest part of the meat
  • Rotate baking sheet midway through cooking for even heat distribution

The Critical Drying Step

Many people forget to dry the chicken wings before baking. This step is key for crispy skin.

MistakeConsequenceSolution
Wet WingsSoggy, Rubbery SkinPat dry with paper towels
Overcrowded PanSteamed Instead of CrispyUse larger baking sheet, space wings apart
Wrong Oven TemperatureUneven CookingPreheat to 425°F

“Cooking is about precision, especially with chicken wings. Every detail matters.” – Professional Chef

Creating perfect baked chicken wings is an art that needs practice and focus. By avoiding these mistakes, you’ll improve your wing-making skills. You’ll make delicious, crispy wings every time.

Conclusion: Enjoying Your Baked Chicken Wings

Learning to make tasty chicken wings takes time, but you now have the skills. You can make wings like a pro, whether you bake them or use an air fryer. These techniques will make cooking at home better.

Don’t stop trying new things with your wings. Try different marinades, spices, and cooking ways. Each time you make wings, you get better and find new flavors to love.

Final Tips for Perfect Wings

Keep a few things in mind: dry your wings well, season them right, and watch the temperature. With these tips, you’ll get crispy skin and juicy meat. Feel free to change recipes to fit your taste.

Encouragement to Experiment with Recipes

Start with what you’ve learned and get more confident. Your homemade wings can be a hit at any event. Keep trying new things and enjoy the tasty results of your cooking.

FAQ

How long do I need to bake chicken wings to make them crispy?

Bake chicken wings at 425°F for 45-50 minutes, flipping them halfway. Make sure the inside is 165°F and the skin is golden and crispy. A baking powder coating can make them even crisper.

Can I make chicken wings ahead of time?

Yes, you can prep chicken wings ahead. Marinate them up to 24 hours before or cook them partially and finish just before serving. Store cooked wings in a sealed container in the fridge for 3-4 days.

What’s the best way to get crispy skin without deep frying?

For crispy skin, pat the wings dry, use baking powder, and bake on a wire rack. Start at 250°F, then finish at 425°F to crisp the skin.

Are baked chicken wings healthier than fried wings?

Yes! Baked wings are much healthier than fried ones. They have less oil, which means fewer calories and fats. A baked wing has 50-70 calories less than a fried one.

How do I prevent my chicken wings from becoming dry?

To keep wings juicy, don’t overcook them. Use a thermometer to check for 165°F. Marinate, use baking powder, and don’t overcrowd the baking sheet.

Can I make chicken wings in an air fryer?

Yes, air fryers are great for wings! Cook at 380°F for 20-25 minutes, shaking halfway. They’re crispy with less oil and cook faster than baking.

What are some unique wing flavor ideas beyond traditional buffalo sauce?

Try flavors like Korean gochujang, honey sriracha, lemon pepper, garlic parmesan, Caribbean jerk, teriyaki, or maple bourbon. Experiment with spices and ingredients to create your own wing recipe.

How far in advance can I season my chicken wings?

Season wings up to 24 hours before. For best flavor, marinate or rub with dry spices 2-4 hours before. Use salt-based seasonings just before cooking to avoid drying out the wings.

What’s the best way to reheat leftover chicken wings?

Reheat in an oven or air fryer at 350°F for 10-15 minutes. Microwaves can make wings soggy. Brush with sauce if they’re dry to add moisture.

Do I need to use a wire rack when baking chicken wings?

A wire rack isn’t necessary but helps with even cooking and crispier skin. Without a rack, use parchment paper and flip the wings halfway for good results.

0 comments
0 FacebookTwitterPinterestEmail
Creamy Corn Chowder recipe

Creamy Corn Chowder recipe: Easy

Serves: 6 Prep Time: Cooking Time:
Nutrition facts: 350 calories 18 grams fat
Rating: 5.0/5
( 1 voted )

Ingredients

  • 4 cups fresh or frozen corn kernels
  • 1 medium onion, chopped
  • 2 medium potatoes, peeled and diced
  • 4 strips bacon, cooked and crumbled
  • 3 cups chicken broth
  • 2 cups heavy cream
  • 1 teaspoon garlic powder
  • 1 teaspoon salt
  • 1/2 teaspoon black pepper
  • 1 tablespoon olive oil
  • Chopped fresh parsley for garnish

Instructions

In a large pot, heat olive oil over medium heat. Add chopped onion and cook until soft, about 5 minutes. Add the diced potatoes, corn kernels, and chicken broth to the pot. Bring to a boil, then reduce heat and simmer for 20 minutes or until potatoes are tender. Add the garlic powder, salt, and black pepper, and stir well. Stir in the heavy cream and cooked bacon, and simmer for another 10 minutes until heated through. Use an immersion blender to partially blend the chowder for a thicker, creamier consistency, or leave it chunky if you prefer. Serve hot, garnished with fresh parsley.

Notes

For extra flavor, you can add a pinch of cayenne pepper or smoked paprika. This chowder also works great with crusty bread on the side.

Creamy Corn Chowder: Delicious and Easy Recipe. Ever wondered why homemade corn chowder is so comforting? It’s a steaming bowl of creamy goodness that warms you up. It’s filled with sweet corn kernels and a rich, velvety texture.

A perfect corn chowder recipe is more than just a meal. It’s a culinary experience that connects you to traditional American cooking. It turns simple ingredients into a flavor celebration. The sweetness of fresh corn meets a luxurious, creamy base that touches your soul.

Whether you’re a seasoned cook or new to the kitchen, this corn chowder will be your new favorite. Get ready to learn how to make this beloved classic.

Key Takeaways

  • Discover the ultimate comfort food with a classic corn chowder recipe
  • Learn how simple ingredients create extraordinary flavor
  • Master the techniques for a perfectly creamy chowder
  • Explore versatile cooking methods for all skill levels
  • Understand the cultural significance of this beloved dish

Introduction to Corn Chowder

Corn chowder is a classic American dish that warms the heart and soul. It’s made with simple ingredients to create a satisfying meal. This dish is all about tradition and comfort.

What is Corn Chowder?

An easy corn chowder recipe mixes sweet corn, cream, potatoes, and veggies into a rich soup. It’s thick and hearty, filling you up and comforting you. Its simplicity and flavor make it special.

  • Creamy base made from milk or cream
  • Fresh or frozen corn kernels
  • Diced potatoes for substance
  • Aromatic vegetables like onions and celery

The History of Corn Chowder

Corn chowder’s roots go back to Native American and early settler cooking. Indigenous people grew corn for centuries, sharing cooking methods. These methods evolved into the chowder we love today.

New England’s coastal areas especially loved this hearty soup. They made it with local ingredients, turning it into a regional favorite.

“A bowl of corn chowder is like a warm embrace from your grandmother’s kitchen.” – Traditional Food Historian

Why You Should Make This Recipe

Making an easy corn chowder recipe at home is rewarding. You get a nutritious meal that’s quick to make and full of flavor. It’s perfect for family dinners or parties, impressing everyone with its creamy goodness.

  1. Minimal cooking skills required
  2. Budget-friendly ingredients
  3. Customizable with different add-ins
  4. Comforting and satisfying

Ingredients for Your Corn Chowder

Making the best corn chowder starts with picking the right ingredients. Knowing your options lets you make a simple chowder that tastes great and wows your guests.

Fresh Corn vs. Canned Corn

Choosing between fresh and canned corn affects your chowder’s taste. Here’s what you need to know:

  • Fresh Corn: Gives a sweet, vibrant flavor and a crisp texture
  • Canned Corn: Easy to find and tastes the same all year

Essential Spices and Seasonings

The right spices make a simple chowder unforgettable. Here are the key spices to use:

SpiceFlavor ProfileRecommended Quantity
ThymeEarthy and subtle1 teaspoon dried
PaprikaSlightly smoky1/2 teaspoon
Black PepperSharp and warm1/4 teaspoon

Optional Add-ins for Extra Flavor

Want to make your corn chowder even better? Try these exciting add-ins:

  1. Crispy bacon bits
  2. Diced jalapeños
  3. Fresh chopped chives
  4. Shredded cheddar cheese

“The secret to an amazing corn chowder is balancing fresh ingredients with bold seasonings.” – Professional Chef

Trying out these ingredients will make your corn chowder both cozy and thrilling. It’s perfect for any time.

Essential Cooking Tools and Equipment

Creating a tasty savory corn chowder needs more than just good ingredients. The right kitchen tools can make your quick corn chowder recipe stand out. Let’s look at the key equipment for a smooth and fun cooking experience.

Must-Have Kitchen Gadgets

Some kitchen tools can really help with making savory corn chowder. Here are the top gadgets to have:

  • Immersion Blender: Creates a smooth, creamy texture without hot liquid spills
  • Corn Stripper: Makes removing kernels from fresh corn easy for your quick corn chowder recipe
  • Digital Kitchen Scale: Helps with exact ingredient measurements
  • Cutting Board with Juice Groove: Keeps liquid from spilling when chopping

Choosing the right cookware is key for rich flavors in your corn chowder:

  • Heavy-bottomed Dutch Oven: Keeps heat even and prevents burning
  • Stainless Steel Stock Pot: Ideal for big batches of chowder
  • Non-stick Sauté Pan: Best for starting with ingredient prep

Tools for Efficient Preparation

“The right tools can turn cooking from a chore into a pleasure.” – Professional Chef

To make preparing corn chowder quick and fun, get these efficient tools:

  1. Sharp Chef’s Knife: Allows for fast and precise chopping
  2. Measuring Cups and Spoons: Ensures your recipe is spot on
  3. Silicone Spatula: Helps get every last bit of chowder from the pot
  4. Large Wooden Spoon: Great for stirring without scratching pots

With these tools, you’ll be ready to make a delicious savory corn chowder. It will surely impress your family and friends.

Step-by-Step Instructions

Making the perfect corn chowder is all about precision and passion. This guide will show you how to make a delicious homemade corn chowder. It will warm your soul and impress your dinner guests.

Preparing the Ingredients

First, gather all your ingredients and prep them carefully. You’ll need:

  • Fresh corn kernels (or high-quality canned corn)
  • Diced potatoes
  • Chopped onions
  • Crispy bacon (optional)
  • Heavy cream
  • Chicken or vegetable broth

Cooking the Chowder Base

Start by making a flavorful base for your chowder. In a large pot, sauté onions until they’re translucent. Then, add butter and flour to make a roux. This roux will thicken your chowder.

Slowly pour in broth, whisking all the time to avoid lumps.

“The secret to a great corn chowder is patience and layering flavors.” – Professional Chef

Adding the Corn and Cream

The last steps are key to getting the perfect consistency. Gently fold in corn kernels and let them simmer. Then, stir in heavy cream for a rich, velvety texture.

  • Simmer corn for 5-7 minutes
  • Add cream gradually
  • Season with salt and pepper
  • Taste and adjust seasonings

Pro tip: For an extra depth of flavor, consider roasting your corn kernels before adding them to the chowder.

Tips for Perfecting Your Chowder

Making the perfect easy corn chowder recipe is more than just following a recipe. It’s about understanding the small details that make a dish stand out. Both professional chefs and home cooks know that mastering creamy corn chowder takes time and knowledge.

Achieving the Right Consistency

The secret to a great creamy corn chowder is its texture. You want it to be smooth and velvety, not too thin or too thick. Here are some tips to help you achieve the perfect consistency:

  • Use a mix of heavy cream and milk for the right thickness
  • Slowly simmer to let it thicken naturally
  • Try adding cornstarch or flour for a bit more thickness
  • Blend some of the corn to add natural creaminess

Enhancing Flavor with Herbs

Fresh herbs can take your easy corn chowder recipe to the next level. Here are some herbs that can enhance the flavor:

  • Thyme adds a rich, earthy taste
  • Fresh basil brings a bright, fresh flavor
  • Chives have a mild onion-like taste
  • Parsley adds a clean, fresh taste

“Great cooking is about passion, technique, and understanding your ingredients.” – Unknown Chef

Common Mistakes to Avoid

When making creamy corn chowder, avoid these common mistakes:

  1. Don’t overcook the corn, as it can become tough
  2. Use fresh, high-quality corn
  3. Be careful not to burn the bottom of the pot
  4. Don’t skip seasoning the chowder

Pro tip: Always taste and adjust the seasonings as you go to ensure a perfectly balanced chowder.

Variations on Classic Corn Chowder

Trying out different versions of the best corn chowder recipe can make cooking more fun. Each twist adds new flavors and textures to this beloved dish. This lets you make your simple corn chowder just how you like it.

Spicy Southwest Corn Chowder

Give your corn chowder a spicy kick with a Southwest twist. This version packs bold flavors that will excite your taste buds:

  • Roasted green chiles
  • Jalapeño peppers
  • Smoked paprika
  • Cumin

To make the best spicy corn chowder, mix heat with creamy texture. Add diced bell peppers and a bit of hot sauce to the classic recipe.

Creamy Potato and Corn Chowder

Adding potatoes makes your corn chowder more filling. Diced russet or Yukon gold potatoes mix well with sweet corn. This creates a rich, comforting dish.

“A good chowder should warm your soul and satisfy your hunger.” – Midwest Cooking Magazine

Vegan Corn Chowder Options

Even vegans can enjoy a tasty corn chowder with these options:

  • Coconut milk instead of heavy cream
  • Nutritional yeast for cheesy flavor
  • Cashew cream base
  • Plant-based vegetable broth

These vegan choices let everyone enjoy a creamy, flavorful corn chowder. Try different ingredients to find your favorite version of this classic dish.

Storing and Reheating Corn Chowder

Your delicious savory corn chowder needs the right care to keep its amazing taste and texture. Storing and reheating it right ensures you can enjoy it many times.

Best Practices for Storing

Keeping your corn chowder fresh and tasty is key. Follow these tips for the best flavor and safety:

  • Cool the chowder completely before storing
  • Use airtight containers with tight-fitting lids
  • Refrigerate within two hours of cooking
  • Store in the refrigerator for up to 3-4 days

How to Reheat Without Losing Flavor

Reheating your corn chowder needs gentle methods to keep it creamy:

  1. Remove the chowder from the refrigerator 15 minutes before heating
  2. Use a medium-low heat setting on the stove
  3. Stir frequently to prevent scorching
  4. Add a splash of milk or cream to restore creaminess

“The secret to great reheated chowder is patience and gentle heating.”

Freezing Corn Chowder Safely

Freezing your corn chowder is a great way to save it for later:

  • Use freezer-safe containers with minimal air space
  • Leave about 1 inch of space for expansion
  • Label containers with the date of freezing
  • Freeze for up to 2-3 months

Pro tip: Avoid freezing chowder with potatoes, as they can become grainy when thawed. If your recipe includes potatoes, it’s best to enjoy fresh or refrigerated.

Serving Suggestions

Your corn chowder recipe is more than just a meal. The right way to serve it can make it a special experience. It will delight your eyes and taste buds.

Perfect Pairings: Bread and Salads

Pair your homemade corn chowder with sides that make it even better. Here are some great options:

  • Crusty sourdough bread for dipping
  • Warm garlic herb focaccia
  • Light spring mix salad with vinaigrette
  • Crisp arugula salad with lemon dressing

Garnishing Your Chowder

Make your corn chowder stand out with these garnishes:

  • Fresh chopped chives
  • Crispy bacon bits
  • Roasted corn kernels
  • Cracked black pepper
  • Dollop of sour cream

Creative Serving Ideas

Try these creative ways to serve your homemade corn chowder:

  1. Bread Bowl Serving: Hollow out a round sourdough loaf and pour chowder inside
  2. Mini cast-iron skillets for individual portions
  3. Rustic ceramic bowls with contrasting colors
  4. Garnish with edible flowers for an elegant touch

“A beautifully presented dish is a feast for both the eyes and the palate.” – Culinary Experts

Nutritional Information

Learning about the nutritional value of an easy corn chowder recipe is key. Your favorite creamy corn chowder is not just tasty. It’s also full of important nutrients that can help you eat well.

Caloric Breakdown of Ingredients

Knowing the nutritional content of your chowder lets you enjoy it without guilt. Here’s a detailed look at what’s in it:

IngredientCaloriesProtein (g)Carbs (g)
Fresh Corn602.413.7
Heavy Cream3402.83.4
Potatoes1102.526
Bacon (optional)433.10.1

Health Benefits of Corn

Corn is more than a tasty addition to your easy corn chowder recipe. It has many health benefits:

  • Rich in dietary fiber
  • Contains essential vitamins like B6 and folate
  • Provides antioxidants that support eye health
  • Supports digestive system function

Balancing Your Chowder with Nutrients

To make your creamy corn chowder healthier, try these tips:

  • Use low-fat milk instead of heavy cream
  • Add extra vegetables like spinach or kale
  • Include lean protein such as grilled chicken
  • Reduce bacon quantity or use turkey bacon

“Healthy eating is about balance, not perfection.” – Unknown Nutritionist

Your corn chowder can be both comforting and nutritious if you make it with care.

Conclusion: Enjoying Your Corn Chowder

Your journey to make the best corn chowder is almost over. This simple recipe is more than just food. It’s a way to connect with traditional comfort and show off your creativity.

Recap of Key Points

We’ve covered everything to make an amazing corn chowder. From picking fresh ingredients to mastering cooking techniques. The best recipes come from trying new things and knowing your ingredients well.

Encouragement to Experiment

Don’t be shy to make this recipe your own. Add your favorite spices, swap out ingredients, or try different cooking methods. Your unique twist will turn this simple chowder into a masterpiece. Cooking is all about being creative and expressing yourself.

Share Your Corn Chowder Experience

We encourage you to share your cooking with others. Every version of this recipe is a story—your story. By sharing, you join a community of home cooks who love making delicious, comforting meals.

FAQ

What makes corn chowder different from other soup recipes?

Corn chowder stands out because of its creamy base and strong corn flavor. It uses fresh or canned corn as a main ingredient. This makes it thick and sweet, unlike other soups.

Can I make corn chowder with frozen corn?

Yes, you can! Frozen corn is a great substitute for fresh corn. It’s easy to find and keeps its flavor and nutrients. Just thaw and drain it before adding it to your chowder.

How long can I store homemade corn chowder?

You can keep homemade corn chowder in the fridge for 3-4 days. Use an airtight container. When reheating, do it gently to keep it creamy.

Is corn chowder gluten-free?

Traditional corn chowder isn’t gluten-free by default. To make it gluten-free, use cornstarch or potato starch instead of flour. Make sure all ingredients are gluten-free.

Can I make a vegetarian version of corn chowder?

Yes, you can make a vegetarian version. Use vegetable broth instead of chicken broth and skip the meat. Add extra veggies or tofu for more nutrition and taste.

What are the best toppings for corn chowder?

Try adding crispy bacon, chopped chives, shredded cheese, sour cream, or oyster crackers. These toppings add texture and flavor to your chowder.

How can I make my corn chowder more creamy?

For a creamier chowder, use heavy cream, blend part of the soup, or add cream cheese. An immersion blender can also help. These methods make the chowder richer and smoother.

Can corn chowder be frozen?

Yes, you can freeze corn chowder for up to 3 months. But, dairy-based soups might separate when thawed. Cool it down first, then stir well when reheating to get the right texture.

0 comments
0 FacebookTwitterPinterestEmail
Cottage Cheese Recipes

The Best Cottage Cheese Recipes

by IDYA
Cottage Cheese Recipes

The Best Cottage Cheese Recipes

Serves: 4 Prep Time: Cooking Time:
Nutrition facts: 200 calories 10 grams fat
Rating: 5.0/5
( 1 voted )

Ingredients

  • 2 cups cottage cheese
  • 1/2 cup diced cucumber
  • 1/4 cup chopped fresh dill
  • 1 tablespoon olive oil
  • 1 tablespoon lemon juice
  • Salt and pepper to taste
  • 1 tablespoon sesame seeds (optional)

Instructions

In a medium bowl, combine cottage cheese, diced cucumber, and fresh dill. Drizzle olive oil and lemon juice over the mixture, then stir to combine. Season with salt and pepper to taste. If desired, sprinkle sesame seeds on top for extra crunch and flavor. Serve chilled as a refreshing snack or side dish.

Notes

You can also add chopped tomatoes, olives, or other vegetables to personalize this dish. This recipe works well as a dip with pita bread or fresh vegetables.

Are you tired of the same old boring meals? Want to spice up your cooking and boost your nutrition? Welcome to the world of cottage cheese recipes. This culinary adventure will change how you see this versatile ingredient.

Cottage cheese is more than just a diet food. These easy recipes will show you how it can be the main attraction at any meal. Whether you’re into fitness, busy with work, or just want healthier meals, cottage cheese has you covered.

Imagine making dishes that taste great and are good for you. From breakfast pancakes to dinner casseroles, cottage cheese recipes will be your new kitchen best friend. You’ll see how this simple ingredient can make your cooking better and add amazing flavor and nutrition.

Key Takeaways

  • Cottage cheese is incredibly versatile across all meal types
  • High protein content makes it perfect for health-conscious eaters
  • Easy cottage cheese recipes can transform your daily meals
  • Suitable for multiple dietary preferences
  • Nutrient-dense ingredient with multiple cooking applications

Introduction to Cottage Cheese

Cottage cheese is a great ingredient for healthy recipes. It’s creamy and nutritious, loved by those who care about their health.

What is Cottage Cheese?

Cottage cheese is made from cow’s milk through a simple process. It has small, white curds in a creamy liquid. It’s high in protein and low in calories, making it perfect for a balanced diet.

  • Produced by separating milk into curds and whey
  • Available in various fat percentages
  • Mild, versatile flavor profile

Nutritional Benefits of Cottage Cheese

This food is great for your body. A single serving gives you:

NutrientAmount per 1/2 cup
Protein14 grams
Calcium120 mg
Calories110

“Cottage cheese is not just a diet food – it’s a nutritional marvel that can support muscle growth, weight management, and overall health.” – Nutrition Expert

Looking to build muscle or manage your weight? Cottage cheese is a great choice. It’s high in protein for muscle recovery and low in calories for those watching their diet.

Breakfast Recipes Featuring Cottage Cheese

Start your day with tasty cottage cheese recipes. They make your breakfast better and are full of protein. They’re great for those who love healthy food.

Breakfast is key, and cottage cheese makes it even better. These recipes are easy to make and keep you full until lunch.

Fluffy Cottage Cheese Pancakes

Try something new with these protein-packed pancakes. They’re light and taste amazing:

  • Mix cottage cheese with eggs and flour
  • Add a touch of vanilla extract
  • Cook until golden brown
  • Top with fresh berries or maple syrup

Energizing Cottage Cheese Smoothies

Make a smoothie that’s both tasty and healthy. These smoothies are full of nutrients:

  1. Combine cottage cheese with frozen fruits
  2. Add honey for natural sweetness
  3. Blend until smooth and creamy
  4. Optional: Add protein powder for extra nutrition

Protein-Packed Breakfast Bowls

Make breakfast bowls that are filling and nutritious. These recipes are versatile and healthy.

“Cottage cheese transforms ordinary breakfast into an extraordinary meal” – Nutrition Expert

Mix cottage cheese with granola, fresh fruits, and honey. It’s a quick, healthy breakfast that supports your health goals.

Lunch Ideas Using Cottage Cheese

Make your midday meals better with tasty and healthy cottage cheese recipes. They are easy to make and very satisfying. These options are great for those who want to eat well but are short on time.

Cottage cheese makes lunchtime meals more filling and full of protein. It’s perfect for meal prep or a quick lunch. These recipes will change how you think about lunch.

Cottage Cheese Salad with Fresh Veggies

Make a colorful salad with cottage cheese and fresh veggies. It’s a light but satisfying meal. It’s also good for you because of the protein and low calories.

  • High protein content from cottage cheese
  • Low-calorie option for weight-conscious eaters
  • Customizable with seasonal vegetables

Cottage Cheese Wraps with Turkey and Spinach

Turn a simple wrap into a protein-packed meal. Add lean turkey, fresh spinach, and cottage cheese. It’s a tasty and healthy choice for lunch.

IngredientNutritional ValueServing Size
Cottage Cheese14g Protein1/2 cup
Turkey22g Protein3 oz
Spinach1g Protein1 cup

“Lunch doesn’t have to be boring or complicated. With cottage cheese, you can create meals that are both quick and nutritionally balanced.” – Nutrition Expert

These cottage cheese recipes show that healthy food can be tasty and easy to make. Try different veggies, proteins, and spices to find your favorite lunch.

Dinner Recipes Incorporating Cottage Cheese

Cottage cheese is more than just a snack or breakfast item. It’s a versatile ingredient that can make your dinner recipes better. These vegetarian cottage cheese recipes add protein, creaminess, and nutrition to your evening meals.

Exploring cottage cheese recipes for dinner opens up a world of delicious possibilities. Whether you’re looking for comfort food or a light, nutritious meal, these recipes will satisfy your hunger and delight your taste buds.

Baked Ziti with Cottage Cheese

Create a rich, creamy pasta dish that reimagines traditional ziti. Cottage cheese replaces ricotta, offering a lighter texture and protein boost. Key ingredients include:

  • Whole wheat ziti pasta
  • Low-fat cottage cheese
  • Fresh marinara sauce
  • Mozzarella cheese
  • Fresh basil

Savory Cottage Cheese Stuffed Peppers

Transform ordinary bell peppers into a hearty vegetarian main course. These stuffed peppers combine cottage cheese with quinoa and vegetables for a complete meal packed with flavor.

“Cottage cheese adds incredible creaminess and protein to vegetarian dishes” – Chef Maria Rodriguez

Cottage Cheese and Spinach Quiche

A protein-rich quiche that’s perfect for dinner or brunch. The cottage cheese creates a light, fluffy texture while adding essential nutrients. This vegetarian cottage cheese recipe works great with a homemade or store-bought crust.

Pro tip: Drain your cottage cheese slightly before using in recipes to prevent excess moisture in your dishes.

Snack Options with Cottage Cheese

Cottage cheese is great for more than just main meals. It’s perfect for quick snacks, whether you like sweet or savory flavors. These bites will keep you full until your next meal.

Choosing the right snacks is key. They should be full of nutrients to keep your body going. Cottage cheese is packed with protein, calcium, and lots of taste options.

Cottage Cheese with Fruit and Honey

Want a sweet treat that’s good for you? Try this easy mix:

  • 1/2 cup cottage cheese
  • Sliced strawberries
  • Blueberries
  • Drizzle of local honey
  • Optional: Sprinkle of chia seeds

“A delicious snack that feels indulgent but nourishes your body.” – Nutrition Expert

Savory Cottage Cheese Dip with Crackers

Prefer something savory? This herbed dip is great for any time:

  • 1 cup cottage cheese
  • Chopped fresh chives
  • Minced garlic
  • Cracked black pepper
  • Whole grain crackers for serving

Pro tip: Blend the ingredients for an ultra-smooth texture that spreads easily.

These snacks show how cottage cheese can be tasty and healthy. They’re quick fixes for hunger and help you reach your health goals.

Healthy Cottage Cheese Desserts

Want something sweet that’s good for you? Cottage cheese makes desserts healthy and tasty. These recipes are full of protein and creamy goodness. They’re a great way to enjoy sweet treats without feeling guilty.

Creamy cottage cheese recipes are perfect for desserts. They’re high in protein, making them both tasty and filling. They’re ideal for those who love food but also care about their health.

Cottage Cheese Chocolate Pudding

Enjoy a chocolate dessert that’s good for you. This recipe is easy to make. It uses:

  • Low-fat cottage cheese
  • Cocoa powder
  • Natural sweetener
  • Vanilla extract

“Dessert doesn’t have to be a diet disaster. With cottage cheese, you can create something delicious and nutritious!” – Nutritionist Sarah Thompson

Cottage Cheese Parfaits with Berries

Make a healthy dessert with layers of berries. Cottage cheese and berries make a protein-rich treat. It’s both tasty and good for you.

  1. Start with a base of smooth cottage cheese
  2. Add layers of mixed berries
  3. Sprinkle with granola or chopped nuts
  4. Drizzle with honey for natural sweetness

Pro tip: Choose full-fat cottage cheese for a richer texture and more satisfying dessert experience.

International Cottage Cheese Recipes

Exploring global cuisine opens up exciting ways to enjoy cottage cheese. You’ll find delicious and unexpected dishes. These recipes show how cottage cheese is used in different cultures.

International cottage cheese recipes add a twist to traditional cooking. They turn cottage cheese into amazing meals. These dishes are full of flavor and true to their cultural roots.

Indian Paneer Tikka Style Cottage Cheese

Try a spicy and tangy cottage cheese recipe inspired by India. It uses cottage cheese instead of paneer. You’ll need:

  • Low-fat cottage cheese
  • Yogurt marinade
  • Garam masala spices
  • Fresh cilantro
  • Lemon juice

Marinate cottage cheese cubes in yogurt and spices. Then, grill or bake until charred. This dish brings authentic Indian flavors to your table.

Greek Cottage Cheese Gyro Bowl

Make a Mediterranean-inspired meal with this gyro bowl. It uses cottage cheese as a protein base. This makes for a lighter yet satisfying dish.

IngredientQuantityPurpose
Cottage Cheese1 cupProtein base
Cucumber1/2 cupFresh crunch
Tomatoes1/4 cupFlavor depth
Tzatziki sauce2 tbspCreamy dressing

“Global cuisine is about embracing flavors and reimagining traditional ingredients in exciting new ways.” – Culinary Explorers Magazine

These recipes show how cottage cheese can be turned into amazing meals. Whether you want spicy Indian flavors or fresh Mediterranean ingredients, cottage cheese is a versatile ingredient for creativity in the kitchen.

Creative Uses for Cottage Cheese in Sides

Make your meals more exciting with easy cottage cheese recipes. These recipes turn cottage cheese into tasty side dishes. They’re great for vegetarians because they’re full of protein and flavor.

Cottage cheese is more than just for breakfast or snacks. It can be used in many creative ways to make your meals better.

Cottage Cheese Veggie Dip

Make a creamy dip that’s perfect for parties or quick snacks. Mix cottage cheese with fresh herbs and veggies for a tasty spread.

  • Blend cottage cheese with roasted garlic
  • Mix in finely chopped fresh herbs
  • Add diced bell peppers for crunch

“A good dip can turn simple vegetables into an irresistible side dish!” – Culinary Chef

Baked Cottage Cheese and Herb Patties

Turn cottage cheese into crispy patties that will impress your guests. These vegetarian recipes are both healthy and tasty.

IngredientQuantityPurpose
Cottage Cheese1 cupProtein base
Fresh Herbs1/4 cupFlavor enhancement
Breadcrumbs1/2 cupBinding agent

Try different herbs to make your own special side dish. You can use dill, basil, or anything else you like. These easy recipes let you get creative.

These sides are best served hot from the oven. They go well with salads, grilled veggies, or as a snack on their own.

Tips for Cooking with Cottage Cheese

Learning to cook with cottage cheese opens up a world of tasty and healthy recipes. It doesn’t matter if you’re new to cooking or have years of experience. Knowing how to pick, store, and use cottage cheese can change your cooking game.

Getting the most out of cottage cheese requires some key tips. These tips will help you choose the best quality and flavor for your recipes.

How to Choose the Best Cottage Cheese

Choosing the right cottage cheese is crucial for your dishes. Here are some important things to consider:

  • Check the fat content: Low-fat options work great for lighter recipes
  • Examine the curd size: Small curds blend smoothly, large curds add texture
  • Look for fresh packaging with a recent production date
  • Opt for organic brands for higher quality ingredients

“The quality of your cottage cheese can elevate any recipe from good to extraordinary.” – Culinary Expert

Storage Tips for Freshness

Storing cottage cheese right is key to keeping its taste and texture. Follow these tips:

  1. Keep refrigerated at 40°F or below
  2. Store in original sealed container
  3. Consume within 5-7 days after opening
  4. Always use clean utensils when scooping

Pro tip: If your cottage cheese develops an off smell or unusual color, it’s time to discard it.

By mastering these simple tips, you’ll unlock cottage cheese’s full potential in your cooking. You’ll create nutritious and delicious meals that everyone will love.

Pairing Drinks with Cottage Cheese Dishes

Adding the right drink can make your cottage cheese recipes even better. Finding the perfect drink can open up new flavors in your favorite dishes.

Refreshing Smoothies and Juices

Sweet cottage cheese recipes pair well with fresh, healthy drinks. Here are some great options:

  • Blueberry cottage cheese smoothie with almond milk
  • Green juice with spinach and cottage cheese protein boost
  • Tropical fruit smoothie featuring cottage cheese

“A well-crafted smoothie can turn a simple cottage cheese dish into a gourmet experience.”

Wine Pairings for Sophisticated Meals

Choosing the right wine can make your cottage cheese dishes even better. Light, crisp wines are best for cottage cheese.

  • Sauvignon Blanc pairs excellently with herb-infused cottage cheese appetizers
  • Pinot Grigio matches well with cottage cheese salads
  • Sparkling rosé enhances creamy cottage cheese desserts

Try these pairings to find your favorite cottage cheese match. Your taste buds will love it!

Conclusion: Embracing Cottage Cheese in Your Diet

Cottage cheese is a nutritional powerhouse that can change your meal planning. It offers a variety of options, from low carb recipes to breakfast and dinner ideas. Your kitchen can become a place for fun and healthy cooking with cottage cheese.

Adding healthy cottage cheese recipes to your meals gives you protein, nutrients, and great taste. You can make a quick breakfast smoothie, a protein-packed lunch wrap, or a savory dinner with it. Cottage cheese is also low in calories, making it a great choice for healthy meals.

Starting with cottage cheese is easy. Begin with simple recipes and then try more. Mix it with your favorite fruits or herbs to find new flavors. Remember, cooking is about trying new things and finding what you like.

Choosing cottage cheese is a smart move for your health. It’s full of protein, which is good for muscles. Plus, it’s so versatile that you’ll never get tired of your meals. Your body will thank you, and so will your taste buds.

FAQ

What makes cottage cheese such a versatile ingredient?

Cottage cheese is versatile because of its mild taste and creamy texture. It’s great for both sweet and savory dishes. You can use it in breakfast pancakes, dinner casseroles, smoothies, dips, and even desserts. It’s also high in protein and low in calories, making it perfect for healthy cooking.

Is cottage cheese good for weight loss?

Yes, cottage cheese is good for weight loss. It’s packed with protein, which keeps you full longer. A serving has about 14 grams of protein and only 100 calories. This makes it a great choice for those trying to lose weight while keeping muscle.

Can I use cottage cheese if I’m lactose intolerant?

Many with mild lactose intolerance can handle cottage cheese. It has less lactose than other dairy products. But, if you have severe intolerance, talk to your doctor or look for lactose-free options.

How long does cottage cheese last in the refrigerator?

Unopened cottage cheese lasts 5-7 days after the printed date in the fridge. Once opened, use it in 3-5 days. Always store it in the coldest part of your fridge. Check for spoilage signs like bad smell or mold before eating.

What are some quick ways to eat cottage cheese?

There are many quick ways to enjoy cottage cheese. Spread it on toast, mix with fruits, add to smoothies, or use as a dip. It’s easy to prepare and very nutritious.

Is cottage cheese a good source of protein?

Absolutely! Cottage cheese is a top-notch protein source. It has about 14-25 grams of protein per cup, depending on fat content. It has all nine essential amino acids, making it a complete protein for muscle building and recovery.

Can I use cottage cheese in baking?

Yes, cottage cheese is great in baking. It adds moisture and protein to pancakes, muffins, cheesecakes, and bread. Its creamy texture makes baked goods tender and nutritious. Just blend it smooth for the best results.

Are there different types of cottage cheese?

Yes, there are different types of cottage cheese. You can find non-fat, low-fat, reduced-fat, and full-fat options. There are also small and large curd varieties. Each type has its own texture and nutritional profile, so you can choose based on your needs.

How can I make cottage cheese more flavorful?

There are many ways to make cottage cheese more flavorful. Mix in fresh herbs, black pepper, everything bagel seasoning, fruits, honey, cinnamon, or savory spices. You can also use it as a dip base or in complex recipes for creaminess and protein.

Is cottage cheese keto-friendly?

Cottage cheese can be part of a keto diet, especially full-fat varieties. Just be careful with portion sizes and choose low-carb options. A 1/2 cup serving has about 3-5 grams of carbs, fitting most keto plans when eaten wisely.

0 comments
0 FacebookTwitterPinterestEmail
Crack Chicken Recipe

Crack Chicken Recipe: Easy

Serves: 4 Prep Time: Cooking Time:
Nutrition facts: 350 calories 30 grams fat
Rating: 5.0/5
( 1 voted )

Ingredients

  • 4 boneless, skinless chicken breasts
  • 8 oz cream cheese, softened
  • 1 packet ranch seasoning mix
  • 1 cup shredded cheddar cheese
  • 1/2 cup cooked bacon, crumbled
  • 1/4 cup green onions, chopped

Instructions

Place the chicken breasts in the slow cooker. Top with cream cheese, ranch seasoning, and shredded cheddar cheese. Cover and cook on low for 4 hours or until chicken is fully cooked. Shred the chicken with two forks and mix it with the creamy sauce. Top with crumbled bacon and chopped green onions before serving.

Notes

This recipe can also be made in the Instant Pot or oven for a quicker alternative. You can add extra toppings like jalapenos for a spicy kick.

Ever wondered why some dishes are so addictive? Welcome to the world of crack chicken recipe. It’s a culinary sensation sweeping home kitchens!

This recipe is more than a meal. It’s a flavor explosion that turns ordinary chicken into something amazing. With creamy ranch seasoning and tender chicken, it’s your new comfort food.

Perfect for weeknights or weekend gatherings, this recipe is versatile and delicious. It’s sure to impress, whether you’re new to cooking or a pro.

Key Takeaways

  • Discover an incredibly tasty chicken recipe that’s easy to prepare
  • Learn multiple cooking methods for crack chicken
  • Understand why this recipe has become a viral sensation
  • Explore versatile serving options
  • Master a dish that’s perfect for any meal occasion

What is Crack Chicken?

Crack chicken has become a favorite dish, loved for its tasty flavors and easy making. It’s called “crack” because it’s so good, people can’t stop eating it.

This recipe is more than a meal; it’s a taste adventure. It mixes creamy, savory, and exciting flavors into one amazing dish. To make crack chicken, you need to know its key features:

  • Incredibly creamy texture
  • Rich, bold flavor profile
  • Versatile serving options
  • Quick and easy preparation

A Culinary Phenomenon

Crack chicken started as a hit recipe. It combines shredded chicken with cream cheese, ranch seasoning, and more tasty stuff. It quickly became a favorite on social media and in home cooking circles, loved by families and food lovers alike.

Roots of a Flavor Sensation

The story of crack chicken begins with home cooks looking for amazing, easy meals. Its name hints at how addictive it is. Try it, and you’ll see why it’s so popular.

“Crack chicken is more than a recipe – it’s a culinary experience that brings people together!” – Home Cooking Enthusiast

CharacteristicDescription
Primary IngredientsChicken, Cream Cheese, Ranch Seasoning
Preparation Time30-45 minutes
PopularityHigh in home cooking communities

Whether you’re new to cooking or have years of experience, crack chicken has something for you. Its easy ingredients and amazing taste make it a favorite dish for many.

Key Ingredients for Crack Chicken

To make the perfect homemade crack chicken, you need the right ingredients. These ingredients turn a simple meal into a special dish. The secret is in the mix of flavors and textures.

Selecting the Perfect Chicken Breasts

Your chicken breasts are the base of this recipe. Choose fresh, high-quality chicken. It should be:

  • Boneless and skinless
  • Organic or free-range
  • Even in thickness for even cooking

Cream Cheese and Ranch Seasoning Blend

The sauce is the heart of the creamy crack chicken. You’ll need:

IngredientQuantityPurpose
Cream Cheese8 ozCreates rich, creamy texture
Ranch Seasoning1 packetAdds bold, tangy flavor

Exciting Topping Options

Make your homemade crack chicken even better with these toppings:

  1. Crispy bacon bits
  2. Shredded cheddar cheese
  3. Chopped green onions
  4. Diced jalapeños for extra kick

Pro tip: The key to an unforgettable crack chicken is balancing flavors and textures!

Step-by-Step Crack Chicken Recipe

Making an easy crack chicken recipe is simple. It combines basic ingredients with tasty flavors that everyone loves. Whether you’re new to cooking or experienced, this recipe is easy and fun.

To start making crack chicken, first gather your ingredients and follow a few steps. The beauty of this recipe is its simplicity and delicious taste.

Preparing the Chicken

Begin with top-quality chicken breasts. Here’s what you’ll need:

  • Fresh boneless, skinless chicken breasts
  • Sharp knife for trimming
  • Cutting board
  • Paper towels for patting dry

Mixing the Ingredients

The secret to great crack chicken is in the mix. Mix these ingredients carefully:

  1. Softened cream cheese
  2. Ranch seasoning mix
  3. Shredded cheddar cheese
  4. Crispy bacon bits (optional)

“The key to great crack chicken is balancing your flavors and ensuring everything is well mixed!” – Home Cooking Expert

Cooking Methods

You can cook crack chicken in several ways. Each method has its own benefits:

  • Oven Baking: Slow, even cooking
  • Instant Pot: Quick and tender results
  • Slow Cooker: Hands-off approach

Pro tip: Always cook chicken to 165°F for safety. Try different cooking methods to find your favorite!

Instant Pot Crack Chicken

Using the Instant Pot makes your easy crack chicken recipe even simpler. This kitchen tool speeds up cooking, making the recipe quick to prepare.

Why Choose an Instant Pot?

The Instant Pot changes how you cook crack chicken for the better. It offers several benefits:

  • Cuts cooking time by up to 70%
  • Locks in moisture and flavor
  • Requires minimal cleanup
  • Perfect for busy home cooks

Quick Cooking Method

Preparing your crack chicken recipe in an Instant Pot is easy. Just follow these steps:

  1. Place chicken breasts in the Instant Pot
  2. Add cream cheese and ranch seasoning
  3. Seal and set to high pressure
  4. Cook for 10-12 minutes
  5. Quick release the pressure
  6. Shred chicken with two forks

“The Instant Pot turns a good chicken recipe into a great meal in minutes!” – Home Cooking Enthusiasts

Make sure the chicken’s internal temperature is 165°F for safety. Your easy crack chicken recipe is now ready to serve and enjoy!

Slow Cooker Crack Chicken

Turn your slow cooker into a flavor powerhouse with this recipe. It makes a creamy, mouth-watering meal with little effort. It’s perfect for busy cooks, offering tender, juicy chicken with amazing taste.

Preparing Your Slow Cooker Setup

To start the creamy crack chicken recipe, prepare your slow cooker well. Here’s what to do:

  • Choose a 6-quart slow cooker for the best results
  • Lightly grease the inner ceramic pot
  • Make sure your chicken breasts are fresh and trimmed
  • Have all ingredients measured and ready

Mastering Cooking Times and Temperatures

Your slow cooker crack chicken recipe needs precise temperature control. Different heat settings affect the dish’s texture and flavor:

Heat SettingCooking TimeResult
Low Heat6-7 hoursUltra-tender, deeply infused flavor
High Heat3-4 hoursQuick, evenly cooked chicken

“The magic of slow cooking is transforming simple ingredients into extraordinary meals.” – Culinary Experts

Pro tip: Always use a meat thermometer to check your chicken’s internal temperature. It should be 165°F for safe eating. The slow cooker method ensures moist, tender chicken every time.

Tips for the Perfect Crack Chicken

Making the best crack chicken recipe is more than just following steps. Your homemade crack chicken can really stand out with a few expert tips. These tips will take your dish from good to amazing.

Selecting Top-Quality Ingredients

The first step to a great homemade crack chicken recipe is choosing the right ingredients. Pick fresh, high-quality items to make your dish special:

  • Use fresh, boneless chicken breasts from a trusted local source
  • Opt for full-fat cream cheese for maximum richness
  • Select high-quality ranch seasoning mix or make your own blend
  • Use fresh herbs when possible for enhanced flavor

Mastering Spice Adjustments

Customizing your best crack chicken recipe means knowing how to balance spices. Since everyone’s taste is different, feel free to try new things:

  • Start with recommended spice quantities
  • Taste and adjust seasonings gradually
  • Add extra ranch seasoning for more intense flavor
  • Incorporate red pepper flakes for a spicy kick

“The secret to an amazing crack chicken recipe is understanding your own taste preferences and being willing to customize.” – Professional Chef

Creating the perfect crack chicken is about being confident in your cooking and open to trying new things. Your homemade crack chicken recipe should show off your unique cooking style.

Serving Suggestions

Your crack chicken recipe is perfect for any meal. It’s great for family dinners or quick weeknight meals. These tips will make your meal even better.

Perfect Side Dish Pairings

The creamy crack chicken recipe goes well with many sides. Here are some tasty options:

  • Crispy roasted vegetables
  • Fluffy white rice
  • Creamy mashed potatoes
  • Fresh garden salad
  • Buttered egg noodles

Creative Serving Ideas

Your crack chicken recipe can be more than just a main dish. Try these creative ways to serve it:

  1. Sandwich Sensation: Use as a delicious sandwich filling on toasted brioche
  2. Stuff into bell peppers for a low-carb meal
  3. Transform into a dip with crispy tortilla chips
  4. Top baked potatoes for an indulgent twist
  5. Roll into tortillas for quick wraps

“Creativity in the kitchen turns a good recipe into an unforgettable meal!” – Professional Chef

With these ideas, your crack chicken recipe will be a hit. Everyone will want seconds.

Storage and Reheating Tips

Keeping your easy crack chicken recipe fresh is key. You can enjoy it many times with the right storage and reheating. This way, you won’t lose its creamy, savory taste and texture.

Refrigeration Essentials

Store your homemade crack chicken in the fridge for 3-4 days. Use airtight containers to keep it fresh. Remember, separate the chicken from crispy toppings to keep them crunchy.

  • Use glass or BPA-free plastic containers
  • Cool the chicken completely before storing
  • Store in shallow containers for even cooling

Freezing Your Crack Chicken

Freezing is a great way to keep your crack chicken fresh for longer. It can stay good for 2-3 months in the freezer without losing its flavor.

Storage MethodDurationBest Practices
Refrigerator3-4 daysAirtight container, separate crispy toppings
Freezer2-3 monthsUse freezer-safe containers, remove excess air

Reheating Without Losing Flavor

Reheat your homemade crack chicken carefully to keep it delicious. Gentle heating is the secret to preserving its creamy texture and preventing it from drying out.

  1. Microwave: Use 50% power, stir every 30 seconds
  2. Oven: Cover with foil, heat at 350°F for 10-15 minutes
  3. Stovetop: Reheat in a skillet with a splash of chicken broth

“The secret to great leftovers is gentle reheating and a little extra love!” – Home Cooking Enthusiast

Tip: Always check the internal temperature reaches 165°F to ensure food safety when reheating your crack chicken.

Variations of Crack Chicken

Make your crack chicken recipe exciting with new twists. You can change it to fit special diets or just to try something new. There are many ways to make this classic dish your own.

Keto-Friendly Options

If you’re on a ketogenic diet, you can make crack chicken work for you. Use homemade ranch seasoning with herbs like dill and parsley. Replace high-carb ingredients with low-carb ones to keep it creamy and light.

Spicy Crack Chicken Recipe

Want something spicy? Add jalapeños, red pepper flakes, or sriracha to your crack chicken. These will make it taste bold and fiery. Remember, start with a little spice and add more if you like it hotter.

Trying different crack chicken recipes keeps your meals fresh and fun. Whether you prefer it spicy or keto-friendly, there’s a version for everyone.

FAQ

What exactly is crack chicken?

Crack chicken is a creamy dish made with shredded chicken, cream cheese, and ranch seasoning. You can add bacon or cheese for extra flavor. It’s called “crack” because it’s so addictive and delicious.

Can I make crack chicken if I’m on a low-carb diet?

Yes! For a low-carb version, use full-fat cream cheese and skip thickeners. Serve it over cauliflower rice or in a lettuce wrap.

What cooking methods work best for crack chicken?

You can make crack chicken in several ways. Use the Instant Pot for quick cooking, a slow cooker for ease, or stovetop and oven for flavor. Each method has its own benefits.

How long can I store leftover crack chicken?

Store leftover crack chicken in an airtight container in the fridge for 3-4 days. Reheat it gently to keep the sauce creamy.

Is crack chicken spicy?

No, traditional crack chicken isn’t spicy. But, you can add jalapeños or hot sauce to make it spicy.

Can I freeze crack chicken?

Yes, freeze it for 2-3 months. Use a freezer-safe container and thaw it in the fridge. Reheat it carefully to keep it creamy.

What are the best side dishes to serve with crack chicken?

Serve it with rice, mashed potatoes, salad, or roasted veggies. It also goes well with garlic bread.

Can I make crack chicken with something other than chicken breasts?

Absolutely! Try using chicken thighs, rotisserie chicken, or turkey. Each will give a different flavor.

How can I make crack chicken healthier?

Use low-fat cream cheese and Greek yogurt instead of full-fat. Add more veggies and lean chicken. Control your portions for a healthier version.

Is crack chicken good for meal prep?

Yes! It’s perfect for meal prep. Make a big batch and portion it out for the week. It reheats well and stays delicious.

0 comments
0 FacebookTwitterPinterestEmail
Tuna Pasta Salad
Tuna Pasta Salad

Tuna Pasta Salad: The Perfect Meal

Serves: 4 Prep Time: Cooking Time:
Nutrition facts: 350 calories 15 grams fat
Rating: 5.0/5
( 1 voted )

Ingredients

  • 200g (7 oz) pasta (penne or fusilli)
  • 1 can of tuna (in olive oil or water), drained and flaked
  • 1 cup cherry tomatoes, halved
  • 1/2 cup cucumber, diced
  • 1/4 cup red onion, finely chopped
  • 1/4 cup black olives, sliced
  • 1/2 cup mayonnaise (or Greek yogurt)
  • 2 tbsp lemon juice
  • 1 tbsp olive oil
  • Salt and pepper, to taste
  • Fresh parsley, chopped (optional)

Instructions

Boil a large pot of salted water. Cook the pasta according to the package instructions. Drain and rinse under cold water to cool down. In a large bowl, combine the drained tuna, cherry tomatoes, cucumber, red onion, and olives. In a small bowl, whisk together mayonnaise (or Greek yogurt), lemon juice, olive oil, salt, and pepper. Add the cooled pasta to the bowl with the vegetables and tuna. Pour the dressing over the salad and toss until everything is well coated. Sprinkle fresh parsley on top if desired and serve.

Notes

You can add more vegetables like bell peppers or peas for extra flavor and crunch. This salad can be prepared in advance and stored in the refrigerator for up to 2 days.

Ever thought about the ultimate summer meal? Something refreshing and satisfying? A cold tuna pasta salad might be it. It mixes protein-rich tuna with perfectly cooked pasta, making a meal that cools you down.

This dish is more than just a quick lunch. It’s a recipe that pleases everyone. It’s great for picnics, barbecues, or a light dinner. It’s full of flavor and easy to make.

This dish is super flexible. You can add your favorite ingredients. It can be a classic mayo dish or a zesty Mediterranean mix. There’s something for everyone in a tuna pasta salad.

Key Takeaways

  • Tuna pasta salad is a versatile summer meal option
  • Easy to prepare and customize with various ingredients
  • Perfect for picnics, gatherings, and quick meals
  • Provides a balance of protein and carbohydrates
  • Can be made ahead and stored for convenient eating

What Is Tuna Pasta Salad?

classic tuna pasta salad is a tasty summer dish. It mixes simple ingredients into a fulfilling meal. This salad is a favorite in many American homes, perfect for a quick and healthy lunch or dinner.

This salad started as a way to use leftover pasta and canned tuna. It became popular as people found it easy and flexible to make.

The Classic Ingredients

The base of a classic tuna pasta salad includes:

  • Canned chunk light or white tuna
  • Cooked pasta (often shell or elbow macaroni)
  • Mayonnaise or light dressing
  • Diced celery
  • Chopped onions
  • Salt and pepper to taste

Variations You Can Try

An easy tuna pasta salad is a canvas for creativity. You can add new ingredients to make it your own.

Variation StyleKey Ingredients
MediterraneanKalamata olives, feta cheese, red onions
SouthwesternBlack beans, corn, cilantro, lime juice
Greek-inspiredCucumber, dill, red bell peppers

“A great tuna pasta salad is like a blank canvas – limited only by your imagination!” – Culinary Experts

Whether you like the traditional or want to try new flavors, this salad has something for everyone. The secret is to mix flavors well and keep it fun to make.

Health Benefits of Tuna Pasta Salad

healthy tuna pasta salad is not just tasty; it’s full of nutrients that boost your health. Knowing what’s in this dish helps you choose better foods.

Nutritional Highlights of Tuna

Tuna is a key part of a healthy tuna pasta salad. It’s a lean protein that offers many health benefits:

  • High-quality protein for muscle maintenance
  • Rich in omega-3 fatty acids
  • Excellent source of vitamin D
  • Contains essential minerals like selenium

“Tuna is a nutrient-dense food that provides exceptional health benefits in a single serving.” – Nutritional Science Institute

The Role of Pasta in a Balanced Diet

Pasta, especially whole grain, adds a lot of nutrition to your salad. Carbs give you energy, and fiber helps your digestion.

NutrientTunaWhole Grain Pasta
Protein22g per 100g7g per 100g
Fiber0g5g per 100g
Omega-3HighLow

Mixing tuna and pasta makes a balanced meal that boosts energy and muscle health. Your tuna pasta salad is a great pick for a healthy diet.

How to Choose the Right Pasta

Creating the best tuna pasta salad starts with picking the right pasta. The right shape can make your dish amazing, offering a great texture and taste.

Ideal Pasta Shapes for Tuna Salad

For a top-notch tuna pasta salad, some pasta shapes are better than others. Your best picks are:

  • Rotini: Spiral pasta that grabs dressing well
  • Shell pasta: Makes little pockets for tuna and veggies
  • Penne: Offers a solid bite and texture
  • Fusilli: Adds visual appeal and holds ingredients well

Pasta Cooking Techniques

Cooking pasta for your tuna salad needs care. Here are expert tips for the perfect texture:

  1. Use plenty of salted water
  2. Cook until al dente (firm to the bite)
  3. Rinse with cold water to stop cooking
  4. Drain well before mixing

“The secret to a great pasta salad is perfectly cooked pasta that’s neither mushy nor too firm.” – Culinary Expert

Remember, your pasta should be cool and slightly firm when mixing with tuna and other ingredients. This keeps your tuna pasta salad tasty and not soggy.

Essential Tuna Pasta Salad Dressing Options

Creating the perfect dressing can make your homemade tuna pasta salad stand out. The right dressing brings all the ingredients together. It adds flavor and moisture that makes each bite a joy.

Homemade Dressings vs. Store-Bought Options

When making a tuna pasta salad with mayo, you can choose to make your own dressing or buy one. Making your own has many benefits:

  • Complete control over ingredients
  • Ability to adjust flavors
  • Fresher taste
  • Lower preservative content

Flavor Combinations to Consider

Try something new beyond traditional mayonnaise with these options:

  1. Greek Yogurt Base: Lighter and tangier alternative
  2. Lemon-Herb Vinaigrette: Bright and zesty
  3. Dijon Mustard Blend: Adds subtle complexity
  4. Olive Oil and Vinegar Mix: Mediterranean-inspired

“The secret to an amazing tuna pasta salad is in the dressing—experiment fearlessly!” – Culinary Chef

Your dressing should enhance the tuna and pasta without taking over. Taste as you go and adjust seasonings to your liking.

Step-by-Step Tuna Pasta Salad Recipe

Making a tasty tuna pasta salad is simple. This recipe will guide you to a refreshing dish perfect for summer or quick meals.

First, collect all your ingredients for a smooth cooking process. The secret to a great salad is using fresh ingredients and following easy steps.

Essential Ingredients

  • 8 oz pasta (shell or rotini)
  • 2 cans of solid white tuna
  • 1/2 cup mayonnaise
  • 1/4 cup diced celery
  • 2 tablespoons chopped fresh parsley

Preparation Instructions

  1. Cook pasta as the package says
  2. Drain and rinse pasta with cold water
  3. Drain tuna and flake it into small pieces
  4. Mix pasta, tuna, and veggies in a big bowl
  5. Add mayonnaise and seasonings
  6. Chill for 30 minutes before serving

Food Safety Guidelines

Remember these safety tips when making your tuna pasta salad:

Safety TipRecommendation
RefrigerationKeep salad below 40°F
Storage TimeConsume within 3-5 days
Handling TunaUse clean utensils, wash hands

Pro tip: Always use fresh ingredients and store your homemade tuna pasta salad in an airtight container in the refrigerator.

“The secret to a great pasta salad is in the details and fresh ingredients!” – Culinary Chef

Customizing Your Tuna Pasta Salad

Make your tuna pasta salad special by adding your own twist. You can turn a simple dish into a masterpiece. It’s all about making it your own, with flavors and ingredients you love.

Adding Vegetables for Extra Crunch

Boost your tuna pasta salad with fresh veggies. The right mix can make it tastier and healthier. Here are some great options:

  • Crisp bell peppers (red, yellow, green)
  • Crunchy cucumber slices
  • Sweet cherry tomatoes
  • Diced red onions
  • Sliced radishes
  • Chopped celery

These veggies not only look good but also add nutrients and crunch. They make your salad more exciting.

Protein Alternatives for Variety

Want to try something new? There are many protein options besides tuna:

Protein OptionFlavor ProfileDietary Considerations
Grilled ChickenMild, versatileLow-fat protein source
Hard-boiled EggsRich, creamyVegetarian-friendly
ChickpeasNutty, heartyVegan, high in fiber
TofuNeutral, absorbs dressingsPlant-based protein

“The beauty of a tuna pasta salad with vegetables is its flexibility. Don’t be afraid to mix and match ingredients!” – Culinary Expert

Try different veggies and proteins to keep your salad fresh and healthy. Each change brings a new flavor, making every meal a surprise.

Serving Suggestions for Tuna Pasta Salad

Make your cold tuna pasta salad stand out with smart serving ideas. These tips will wow your guests and make mealtime fun. The dish’s versatility lets you get creative with presentation and pairings, turning a simple salad into a special meal.

Perfect Pairings for Your Cold Tuna Pasta Salad

Pair your cold tuna pasta salad with dishes that boost its flavors. Here are some great pairing ideas:

  • Crusty artisan bread for added texture
  • Grilled summer vegetables
  • Light white wines
  • Fresh fruit salads

Serving Sizes for Different Occasions

Knowing the right portion sizes helps plan meals better. Here are serving size guidelines for your cold tuna pasta salad:

OccasionServing SizeRecommended Quantity
Individual Meal1 cup1 serving
Small Gathering1/2 cup4-6 servings
Large Party1/3 cup10-12 servings

Pro tip: Always make a little extra for seconds or surprise guests. Your cold tuna pasta salad will be a hit with thoughtful serving.

*”A well-served dish is half the enjoyment of eating”* – Culinary Wisdom

How to Store Leftover Tuna Pasta Salad

Storing your tuna pasta salad right is key to keeping its taste and avoiding foodborne illness. Proper storage lets you enjoy your meal safely and cuts down on waste.

Your tuna pasta salad needs careful handling to stay fresh and tasty. Refrigeration is essential for keeping it safe and delicious.

Essential Storage Tips for Freshness

  • Cool the tuna pasta salad to room temperature before storing
  • Cover the salad tightly to prevent moisture loss
  • Refrigerate within two hours of preparation
  • Consume within 3-5 days for optimal taste and safety

Selecting the Best Storage Containers

Choosing the right container is crucial for keeping your tuna pasta salad fresh.

Container TypeProsCons
Glass ContainersNon-porous, easy to cleanHeavier, can break
Plastic ContainersLightweight, affordableMay retain odors
Airtight ContainersPrevents air exposureSlightly more expensive

“The key to great tuna pasta salad is not just in the preparation, but in how you store it.” – Culinary Expert

Always use clean utensils when serving and avoid cross-contamination. Your tuna pasta salad will stay fresh and delicious by following these simple storage tips.

Make your tuna pasta salad recipe stand out by trying new flavors. This dish is very versatile. You can mix different tastes and ingredients to create something special.

Exploring global tastes can make your tuna pasta salad recipe amazing. Two great variations will inspire you to try something new in the kitchen.

Mediterranean Tuna Pasta Salad

Take a trip to the Mediterranean with this tuna pasta salad. It’s filled with:

  • Kalamata olives
  • Crumbled feta cheese
  • Sun-dried tomatoes
  • Fresh oregano
  • Extra virgin olive oil

“The Mediterranean approach transforms a simple tuna pasta salad into a gourmet experience.” – Culinary Experts

Southwest-Inspired Tuna Pasta Salad

Add bold, spicy flavors to your tuna pasta salad with a Southwest twist. This version includes:

  • Black beans
  • Roasted corn
  • Jalapeño peppers
  • Cilantro
  • Chipotle dressing

Both variations show how you can change a classic tuna pasta salad. They prove it’s easy to make it your own.

VariationKey Flavor ProfileSignature Ingredients
MediterraneanBright, TangyFeta, Olives, Sun-dried Tomatoes
SouthwestSpicy, BoldBlack Beans, Corn, Chipotle

Try these variations to find your favorite tuna pasta salad recipe. It will make meal planning more fun.

FAQs About Tuna Pasta Salad

Tuna pasta salad can raise many questions for those cooking at home. Whether it’s your first time making it or you’re trying to improve your recipe, knowing key details is important. It helps you make a tasty dish that everyone will love.

Common Ingredient Questions

Many wonder about swapping ingredients in tuna pasta salad. Canned tuna is convenient, but fresh grilled tuna adds a gourmet touch. Choose between chunk light or albacore tuna based on your taste.

If you’re watching your sodium intake, pick low-sodium options. Or, rinse canned tuna before adding it to your salad.

Storage and Shelf-Life Details

Your tuna pasta salad stays fresh in the fridge for 3-5 days in an airtight container. Look out for signs of spoilage like bad smells or color changes. It’s best served cold, so keep it refrigerated and eat it within the suggested time frame.

Freezing tuna pasta salad isn’t a good idea. The pasta and veggies can get mushy when thawed. For the best taste, make smaller batches and enjoy them fresh within a few days.

FAQ

How long can tuna pasta salad be stored in the refrigerator?

Tuna pasta salad can stay in the fridge for 3-5 days in an airtight container. Always check for spoilage signs like bad smell or color change. Keep it at 40°F or below to stay fresh and prevent bacteria.

Can I make tuna pasta salad ahead of time?

Yes, you can make tuna pasta salad ahead. It’s better to make it a few hours before to let the flavors mix. Add crunchy veggies just before serving to keep them fresh. Store it in the fridge and stir well before serving.

What are the best types of pasta for tuna pasta salad?

Short, sturdy pasta shapes are best for tuna pasta salad. Rotini, shell pasta, and penne are great because they hold dressing well. Their curves and ridges trap dressing and mix well with other ingredients.

Is tuna pasta salad a healthy meal option?

Tuna pasta salad can be healthy if made right. Tuna has lean protein and omega-3s, and whole grain pasta adds fiber. Use Greek yogurt instead of mayonnaise, add fresh veggies, and watch your portion size for a healthier meal.

Can I use fresh tuna instead of canned tuna?

Absolutely! Fresh tuna is a tasty alternative to canned. Grill or sear it, cool, and flake it into your salad. Fresh tuna has a different taste and texture, so you might need to add more seasoning.

Are there any vegetarian alternatives to tuna in the pasta salad?

Yes, you can use plant-based proteins like chickpeas, white beans, or tofu. Canned or grilled artichoke hearts are also great substitutes. They offer similar texture and protein, making the salad vegetarian-friendly.

How can I prevent my pasta from becoming mushy in the salad?

To avoid mushy pasta, cook it al dente and rinse with cold water after cooking. Drain well and cool completely before mixing. Don’t overcook the pasta, and add dressing just before serving for the best texture.

What are some creative mix-ins for tuna pasta salad?

Try adding capers, artichoke hearts, sun-dried tomatoes, olives, diced cucumber, chopped herbs, or feta cheese. These mix-ins can turn your tuna pasta salad into a gourmet dish with rich flavors and textures.

0 comments
0 FacebookTwitterPinterestEmail
Salmon Patties Recipe

Salmon Patties Recipe: Easy and Simple

Serves: 4 Prep Time: Cooking Time:
Nutrition facts: 250 calories 15 grams fat
Rating: 5.0/5
( 1 voted )

Ingredients

  • 2 cans (14.75 oz each) of pink salmon, drained and flaked
  • 1/2 cup breadcrumbs
  • 1/4 cup finely chopped onion
  • 2 tablespoons mayonnaise
  • 1 tablespoon Dijon mustard
  • 1 teaspoon lemon juice
  • 1/2 teaspoon garlic powder
  • 1/4 teaspoon black pepper
  • 1/4 teaspoon salt
  • 1 large egg
  • 2 tablespoons vegetable oil (for frying)

Instructions

1. In a large bowl, combine the salmon, breadcrumbs, chopped onion, mayonnaise, Dijon mustard, lemon juice, garlic powder, salt, and black pepper.

2. Beat the egg and add it to the mixture. Stir until everything is well combined.

3. Form the mixture into patties, about 1/2 inch thick, making sure they hold together.

4. Heat the vegetable oil in a skillet over medium heat.

5. Fry the patties in the skillet for about 3-4 minutes on each side, until golden brown and crispy.

6. Remove the patties from the skillet and place them on a paper towel-lined plate to drain excess oil.

7. Serve hot with your favorite dipping sauce or side dish.

Notes

You can substitute breadcrumbs with crushed crackers for a different texture. For a gluten-free option, use gluten-free breadcrumbs. These patties can also be baked at 375°F for 15-20 minutes if you prefer a healthier, oil-free method.

Are you tired of boring weeknight dinners that take hours to prepare? Imagine making a tasty meal in just 30 minutes. Our salmon patties recipe is perfect for quick, healthy dinners without sacrificing flavor.

Salmon patties are a quick and tasty dinner idea. They turn ordinary fish into a crispy, golden delight. This recipe uses simple ingredients and expert techniques to impress your family and save time.

These patties are full of protein and omega-3s, making them a healthy choice. They’re great for busy people or anyone looking for easy, nutritious meals. This recipe will be your new favorite for quick, satisfying dinners.

Key Takeaways

  • Quick and easy salmon patties recipe perfect for busy weeknights
  • Nutritious meal option rich in protein and omega-3 fatty acids
  • Simple ingredients create a delicious and versatile dish
  • Can be prepared in under 30 minutes
  • Suitable for various cooking methods like baking or frying

Introduction to Salmon Patties

Salmon cakes are a tasty and versatile dish loved by many in America. They mix fresh or canned salmon with other ingredients. This creates a dish that’s both healthy and enjoyable.

What Exactly Are Salmon Patties?

Fish patties are small, round pieces of seasoned seafood. They are flattened and cooked until they’re golden. Salmon patties use salmon, breadcrumbs, eggs, and herbs. They’re great for any meal.

  • Made from fresh or canned salmon
  • Typically pan-fried or baked
  • Packed with protein and omega-3 fatty acids

A Fascinating Culinary Journey

The history of salmon cakes goes back many years. It started in coastal areas where seafood was plentiful. People made these patties to use what they had, turning simple salmon into a tasty dish.

“Salmon patties are more than just a recipe – they’re a delicious piece of culinary heritage.” – Coastal Cooking Magazine

Origin PeriodCultural SignificanceTypical Preparation
Late 19th CenturyCoastal Fishing CommunitiesHand-mixed, pan-fried
Mid-20th CenturyFamily Dinner StapleCanned salmon became popular
Modern EraGourmet Seafood RecipeDiverse ingredient variations

Whether you’re a pro chef or just starting with seafood, salmon patties are a great choice. They offer a fun and meaningful cooking experience.

Ingredients You’ll Need

Making tasty salmon patties begins with picking the right stuff. Whether you’re a pro in the kitchen or just starting, knowing your ingredients can make a big difference. It can turn a simple dish into something amazing.

Fresh Salmon vs. Canned Salmon: Making the Right Choice

Choosing between fresh and canned salmon is a big decision. Each has its own benefits for your recipe.

  • Fresh salmon gives you a richer flavor and better texture for your recipes.
  • Canned salmon is handy and lasts longer.
  • For quick and easy recipes, canned salmon is a budget-friendly choice.

“The secret to great salmon patties lies in choosing high-quality fish”

Essential Herbs and Spices for Maximum Flavor

To take your salmon patties to the next level, you need the right seasonings. The right herbs can really boost the taste of your dish.

Herb/SpiceFlavor ProfileRecommended Amount
DillFresh, tangy1-2 teaspoons
ParsleyBright, clean2 tablespoons
Old Bay SeasoningZesty, complex1 teaspoon

Try out these ingredients to find your favorite flavor mix. Remember, cooking is an art – don’t be afraid to make it your own!

Preparing the Salmon

Making tasty salmon patties begins with picking and preparing your salmon right. Whether it’s fresh or canned, getting it ready is crucial. This ensures your dish will wow your loved ones.

Cooking salmon needs careful attention and knowing the right techniques. Fresh and canned salmon need different methods for the best taste and texture.

Cooking Fresh Salmon

For fresh salmon patties, you can use several cooking ways:

  • Poaching: Cook the salmon in simmering liquid for tender, flaky results
  • Baking: Preheat oven to 400°F and cook for 12-15 minutes until fish flakes easily
  • Grilling: Get beautiful char marks while keeping it moist

After cooking, let the salmon cool a bit before flaking it with a fork. Pro tip: Remove any skin and bones for a smooth patty texture.

Tips for Preparing Canned Salmon

Canned salmon is a handy option for cooking. Here’s how to get the best results:

  1. Drain the salmon well
  2. Look for and remove any small bones
  3. Gently flake the fish with a fork

“Quality canned salmon can be just as delicious as fresh when prepared correctly.” – Culinary Expert

Choose wild-caught canned salmon in water for the best taste and nutrition.

Salmon TypePreparation MethodCooking Time
Fresh SalmonPoach, Bake, or Grill12-15 minutes
Canned SalmonDrain and FlakeNo cooking required

Learning these salmon preparation techniques is key to making perfect patties. They will be both yummy and healthy.

Making the Patties

Making homemade fish cakes is all about detail and technique. Forming salmon patties is an art that mixes simple ingredients with careful prep.

Your salmon patty mixture is key to a great seafood dish. Let’s go through the steps easily.

Step-by-Step Patty Formation

  1. Start with top-notch salmon, fresh or canned
  2. Drain any extra liquid from the salmon
  3. Flake the salmon with a fork until it’s smooth
  4. Add binding ingredients like:
    • Breadcrumbs
    • Beaten eggs
    • Finely chopped onions
  5. Season with salt, pepper, and herbs
  6. Mix gently without overdoing it

Avoiding Common Preparation Mistakes

When making salmon patties, remember these tips:

  • Don’t overwork the mixture – it makes patties tough
  • Make patties the same size (about 3 inches)
  • Chill the mixture for 15-20 minutes before shaping
  • Use wet hands to prevent sticking when forming patties

“The secret to perfect homemade fish cakes is gentle handling and proper chilling.”

Follow these tips to make salmon patties that are crispy outside and tender inside.

Cooking Methods

Discovering the perfect cooking technique can make your salmon patties amazing. You can choose to cook them in the oven or on the stovetop. Each method has its own benefits for making tasty fish cakes.

Cooking salmon patties needs careful attention for a crispy outside and a moist inside. Professional chefs say the best methods are baking and pan-frying.

Baking Salmon Cakes: A Healthier Option

Baked salmon cakes are a lighter choice than frying. To get great results:

  • Preheat your oven to 400°F
  • Line a baking sheet with parchment paper
  • Lightly brush patties with olive oil
  • Bake for 10-12 minutes, flipping halfway through

Pan-Fried Fish Patties: Crispy Perfection

For a golden-brown crust, pan-fried fish patties are perfect. Follow these steps for crispy results:

  • Heat vegetable oil in a skillet over medium-high heat
  • Cook patties for 3-4 minutes per side
  • Ensure internal temperature reaches 145°F
  • Drain on paper towels to remove excess oil

Pro tip: Refrigerate salmon patties for 30 minutes before cooking to help them maintain their shape and prevent falling apart.

Each cooking method has its own advantages. Baking uses less oil, while pan-frying gives a crispy outside. Your choice depends on what you like and your diet.

Serving Suggestions

Creating the perfect salmon patty is just the start. The right sides and accompaniments can make your meal unforgettable. Let’s look at some tasty ways to enhance your seafood dish.

Ideal Side Dishes

Your salmon patties need sides that match their rich taste. Here are some delicious options:

  • Crisp garden salad with lemon vinaigrette
  • Roasted asparagus with garlic
  • Quinoa pilaf with fresh herbs
  • Sweet potato wedges
  • Coleslaw with a tangy dressing

Creative Seafood Sauces

No salmon patty is complete without a great sauce. These sauces will add a burst of flavor to your fish cakes:

  1. Zesty Lemon-Dill Yogurt Sauce
    • Greek yogurt base
    • Fresh dill
    • Lemon zest
    • Minced garlic
  2. Spicy Remoulade
    • Mayonnaise
    • Dijon mustard
    • Capers
    • Hot sauce
  3. Classic Tartar Sauce
    • Mayonnaise
    • Pickle relish
    • Chopped onions
    • Lemon juice

“The right sauce can elevate a simple salmon patty into a gourmet experience.” – Culinary Expert

Try these ideas to make a meal that will wow your taste buds and impress your guests.

Nutritional Benefits of Salmon

Salmon patties are not only tasty but also packed with nutrients. Choosing salmon as your protein source is a smart move for your health.

Exploring salmon’s health benefits shows a wealth of nutrients. This protein-rich seafood is more than just delicious.

Heart Health and Omega-3 Fatty Acids

Omega-3 in fish is key for heart health. Salmon is a top source of these fatty acids. They help:

  • Reduce inflammation in blood vessels
  • Lower risk of heart disease
  • Support healthy cholesterol levels
  • Promote brain function

“Eating salmon is like giving your heart a natural protective shield.” – Nutrition Experts

High-Quality Protein Source

Salmon is a top choice for protein-rich seafood. Each serving has all the amino acids your body needs for muscle growth and repair.

NutrientAmount per 3 oz ServingDaily Value %
Protein22 grams44%
Omega-3 Fatty Acids1.5 grams100%
Vitamin D447 IU112%

Salmon’s nutritional profile makes it an exceptional food for health. Adding salmon patties to your diet gives your body a tasty boost of essential nutrients.

Perfecting the Texture

Making the perfect salmon patties is an art. It’s about finding the right mix of texture and flavor. You want crispy cakes with a moist, flaky inside that will wow anyone.

To get moist fish patties, you need to prepare and cook them just right. Success comes from a few key steps. These steps turn simple ingredients into a dish that’s truly special.

Secrets to a Crispy Exterior

Here are some tips for crispy salmon cakes:

  • Use panko breadcrumbs for extra crunch
  • Lightly dust patties with flour before cooking
  • Ensure pan is hot before adding patties
  • Cook on medium-high heat for perfect browning

Keeping the Interior Perfectly Moist

For the perfect salmon patty texture, focus on keeping it moist. Your technique is crucial here.

  1. Add Greek yogurt or mayonnaise to the mixture
  2. Avoid overmixing the ingredients
  3. Let patties rest before cooking
  4. Never press down on patties while cooking

“The secret to great salmon patties is balancing crisp and tender – it’s an art form in the kitchen.” – Professional Chef

By using these techniques, you can make amazing crispy salmon cakes. They’ll be moist, flavorful, and irresistible.

Storing Leftovers

After making your tasty salmon patties, you’ll want to keep them fresh for later. The right way to store and reheat them can really help. This keeps their flavor and texture just right.

Best Practices for Refrigerating Fish Cakes

Here are some key tips for storing salmon patties:

  • Cool the patties completely before refrigerating
  • Use an airtight container to prevent moisture loss
  • Store in the refrigerator for up to 3-4 days

“Proper storage is key to enjoying delicious salmon patties days after cooking.”

Reheating Seafood with Expert Techniques

Reheating seafood can be tricky, but these methods will help you maintain the patties’ original taste and texture:

  1. Oven Method: Preheat to 350°F and warm for 10 minutes
  2. Skillet Method: Gently reheat with a small amount of oil for 2-3 minutes per side
  3. Air Fryer Option: Cook at 350°F for 3-4 minutes until crispy

Pro tip for reheating seafood: Always avoid using the microwave, as it can make your salmon patties tough and rubbery.

Freezing for Long-Term Storage

If you want to keep your salmon patties longer, freezing is a great choice. Wrap each patty in plastic wrap, then put them in a freezer-safe bag. They’ll last up to 2 months.

By using these storing and reheating tips, your salmon patties will stay a great meal choice all week.

Variations of Salmon Patties

Exploring different salmon patty recipes can turn a simple dish into a fun adventure. These fish cakes packed with veggies offer endless ways to get creative and healthy. You can add more veggies or try flavors from around the world to make your patties stand out.

Vegetable-Packed Fish Cakes: Nutrition Boosters

Make your salmon patties healthier by adding colorful veggies. These not only taste great but also add important nutrients:

  • Finely chopped spinach for iron and vitamins
  • Grated zucchini for moisture and extra nutrients
  • Diced bell peppers for crunch and color
  • Minced carrots for sweetness and beta-carotene

Global Seafood Recipes: International Flavor Inspiration

Turn your salmon patties into a dish from around the world with these flavors:

CuisineFlavor ProfileKey Ingredients
Thai-InspiredBright and SpicyLemongrass, ginger, chili
MediterraneanHerbaceous and TangyFeta, olives, oregano
MexicanZesty and BoldCilantro, jalapeño, lime

“Cooking is about passion, so it may look slightly temperamental in a way that it’s too assertive to the naked eye.” – Gordon Ramsay

Pro tip: When trying new salmon patty recipes, keep the main ingredients balanced. Salmon should always be the main attraction. Add other ingredients to enhance its flavor.

Conclusion

Salmon patties are a versatile seafood dish you can make at home. They turn simple ingredients into a tasty meal that’s good for you. With a few easy steps, you’ll make healthy fish dishes that everyone will love.

Why This Recipe Wins Every Time

This salmon patty recipe shows how easy gourmet cooking can be. You learn to pick the best salmon and try new seasonings. Making tasty seafood is simple, even without being a pro chef.

These salmon patties are perfect for anyone, whether you’re experienced or new to cooking. They’re packed with protein, herbs, and are easy to make. Start now and see why they’ll be a favorite in your kitchen.

Ready to elevate your dinner game? Get your ingredients ready and follow the steps. You’re in for a treat with this delicious and healthy seafood dish.

FAQ

What are salmon patties?

Salmon patties are tasty seafood cakes. They’re made from salmon, breadcrumbs, and eggs. You can bake, fry, or pan-sear them. They’re quick, nutritious, and loved by many.

Can I use canned salmon instead of fresh salmon?

Yes, you can! Canned salmon is easy to find and affordable. It’s just as good as fresh. Just drain it and remove bones before making patties.

How do I prevent my salmon patties from falling apart?

To keep patties together, chill the mix first. Use eggs and breadcrumbs well. Don’t overmix. Handle them gently when cooking. A light flour or breadcrumb coat helps too.

Are salmon patties healthy?

Absolutely! Salmon patties are full of omega-3s, protein, and vitamins. Baking them is healthier than frying. They’re great for your heart and taste amazing.

What are some good side dishes to serve with salmon patties?

Try green salads, roasted veggies, or rice pilaf. Asparagus, quinoa, coleslaw, or cucumber salad are also good. You can put them on a bun or on greens for a full meal.

How long can I store salmon patties?

Cooked patties last 3-4 days in the fridge. Freeze them for 2-3 months for longer storage. Reheat in the oven or skillet to keep them crispy.

Can I make salmon patties gluten-free?

Yes, use gluten-free breadcrumbs or almond meal. Make sure all ingredients are gluten-free for a safe dish.

What variations can I try with salmon patties?

Get creative! Add veggies like bell peppers or zucchini. Try Thai flavors or Mediterranean with olives and feta. A Southwest twist with jalapeños is also tasty.

0 comments
0 FacebookTwitterPinterestEmail
Salted Cod Fish
Salted Cod Fish

Salted Cod Fish Recipe: Delicious and Easy

Serves: 4 Prep Time: Cooking Time:
Nutrition facts: 350 calories 10 fat
Rating: 5.0/5
( 1 voted )

Ingredients

  • 1 lb salted cod fish
  • 2 tablespoons olive oil
  • 1 onion, chopped
  • 2 cloves garlic, minced
  • 1 bell pepper, chopped
  • 2 tomatoes, chopped
  • 1 teaspoon paprika
  • Salt to taste
  • Pepper to taste
  • 1/2 cup olives
  • 1/2 cup capers
  • 1/4 cup fresh parsley, chopped

Instructions

1. Soak the salted cod fish in water for at least 12 hours, changing the water 2-3 times to remove excess salt. 2. Drain and shred the cod into bite-sized pieces. 3. Heat olive oil in a pan over medium heat. Add onions and garlic and sauté until fragrant. 4. Add bell pepper and tomatoes, cooking until softened. 5. Stir in the shredded cod fish and cook for 10-15 minutes, allowing the flavors to meld. 6. Add paprika, olives, and capers, and season with salt and pepper. 7. Continue to cook for another 5 minutes. 8. Garnish with fresh parsley before serving.

Notes

Ensure to soak the salted cod fish thoroughly to reduce the saltiness. You can adjust the amount of olives and capers to your taste.

Ever thought about how a simple way to keep fish turned it into a worldwide favorite? Salted cod fish is more than a meal. It’s a tradition that links people across the globe.

The story of salted cod fish is a journey through time and taste. It started with Portuguese fishermen and now is loved in kitchens around the world. This preserved seafood has become a key part of many cuisines.

Salted fish is more than just keeping food fresh. It’s a way to keep traditional cooking alive. It turns a simple ingredient into a special dining experience.

Key Takeaways

  • Salted cod fish has deep historical roots in maritime cultures
  • Preservation techniques make salted cod a versatile ingredient
  • Global cuisines have embraced this unique seafood delicacy
  • Salted cod represents more than food—it’s cultural heritage
  • Nutritional value makes salted cod a healthy protein option

What is Salted Cod Fish?

Salted cod fish is a way to preserve fish that has been around for a long time. It turns fresh fish into a lasting food item. This is done through salting, which has shaped food traditions around the world.

The making of salted fish is a fascinating process. It turns simple seafood into a loved ingredient everywhere. It started with sea cultures and became key for sailors, traders, and coastal folks.

The History of Salted Cod

Sailors and fishermen found out salt could keep fish fresh for a long time. This changed how food was stored and traded. Salted cod fish became a vital survival method on long sea trips.

  • Started in medieval European fishing communities
  • Was key for trans-Atlantic trade
  • Kept fish fresh without refrigeration

Understanding the Salting Process

The salting process for cod fish involves layering fresh fish with salt. This removes moisture that could spoil the fish. It makes the fish last longer and gives it a special taste.

Salting StageProcess DescriptionDuration
CleaningRemove fish scales and internal organs1-2 hours
Initial SaltingCover fish completely with coarse salt24-48 hours
DryingHang fish in well-ventilated areaSeveral days to weeks

“Salt has been the sailor’s best friend, transforming perishable fish into a lasting provision that could feed entire crews across vast oceans.” – Maritime Historian

The salting technique for cod fish is still loved today. It connects modern kitchens with centuries of sea history.

Nutritional Benefits of Salted Cod Fish

Salted cod fish is a nutritional powerhouse. It boosts your diet with its health benefits. This traditional seafood is not just tasty but also packed with nutrients for overall wellness.

Exploring salted cod fish reveals a protein-rich food. It changes how you plan meals and think about nutrition. The preservation process makes its nutrients even more valuable.

High Protein Content

Salted cod fish is an excellent protein source. A single serving gives you:

  • Approximately 20 grams of protein per 100-gram portion
  • Complete amino acid profile
  • Low in saturated fats

“Protein is the building block of muscle, and salted cod fish delivers a clean, lean protein source.” – Nutrition Experts

Omega-3 Fatty Acids

The omega-3 fatty acids in salted cod fish are very beneficial. They help with heart health, brain function, and reduce inflammation.

NutrientAmount per 100gHealth Benefit
Omega-30.3gCardiovascular support
Protein20gMuscle maintenance
Vitamin B122.5mcgNervous system health

When you make a cod fish recipe, you’re doing more than just cooking. You’re improving your nutrition. Salted cod fish is a versatile ingredient for healthy dishes.

How to Prepare Salted Cod Fish

Preparing salted cod fish needs careful steps to make it tasty. You must learn the right ways to cook it for the best flavor and texture.

First, you must learn to desalt and rehydrate the fish. This step is key to a great cod fish recipe.

Soaking Methods for Perfect Desalting

Removing salt is the first step. Here are some effective soaking methods:

  • Cold water soak: Place fish in cold water, changing water every 8-12 hours
  • Refrigerator method: Keep fish in clean, cold water for 24-48 hours
  • Temperature matters: Use cold water to prevent bacterial growth

Essential Cooking Techniques

After desalting, you can try different cooking methods:

Cooking MethodFlavor ProfileCooking Time
PoachingDelicate, tender8-10 minutes
BakingCrisp exterior15-20 minutes
Pan-fryingCrispy, golden4-6 minutes per side

Pro tip: Pat the fish dry before cooking. This helps get the best texture and prevents too much moisture.

“The key to perfect salted cod is patience in preparation and precision in cooking.” – Culinary Experts

Salted cod fish dishes take you on a journey through many cultures. Each recipe turns this preserved seafood into a feast for the senses. From Portuguese kitchens to French bistros, these dishes show the fish’s versatility and rich flavors.

Looking into these classic dishes shows how adaptable salted cod is. Chefs use many techniques to make delicious meals that showcase the fish’s unique taste.

Bacalhau à Brás: A Portuguese Delicacy

Bacalhau à Brás is a key Spanish bacalao recipe from Portugal. It’s a comforting mix of shredded salted cod, crispy straw potatoes, onions, and scrambled eggs. The ingredients come together beautifully, showing off traditional cooking skills.

  • Shredded salted cod
  • Crispy straw potatoes
  • Caramelized onions
  • Scrambled eggs
  • Garnished with parsley

Brandade de Morue: French Culinary Elegance

Brandade de Morue is another standout salted cod dish from French cuisine. It’s a creamy mix of salt cod, olive oil, and sometimes potatoes or bread. It’s a rich spread or main course that needs skill to get right.

“Brandade de Morue transforms simple ingredients into a culinary masterpiece” – French Culinary Magazine

Both dishes show how different cultures turn salted cod into a gourmet treat. Whether you’re having Bacalhau à Brás or Brandade de Morue, these recipes give a taste of the world of salted cod dishes.

How to Choose the Best Salted Cod

Choosing the right salted cod fish can make your cooking better. Knowing the differences in this traditional seafood helps you pick the best for your recipe.

When you’re looking for salted cod fish, several things affect its quality and taste. You need to pay close attention and understand what makes a great product.

Types of Salted Cod Variations

  • Portuguese style (thicker cut)
  • Norwegian clipfish
  • Mediterranean preparation
  • Canadian Atlantic salt cod

Quality Indicators for Salted Cod

Quality AspectPositive IndicatorsRed Flags
ColorUniform white to light beigeYellow or brown discoloration
TextureFirm and consistentSoft or mushy appearance
Salt ContentBalanced, not overpoweringExcessive saltiness

Experts say to buy salted cod from trusted seafood markets or specialty stores. Look for vacuum-sealed packages. They keep the fish fresh and prevent moisture from getting in.

“The secret to an outstanding salted cod dish lies in selecting the highest quality fish.” – Culinary Experts

When making your best salted cod fish recipe, follow these expert tips. They will help you make a delicious and true seafood dish.

Storing Salted Cod Fish

Keeping salted cod fish fresh is important. It helps keep the fish good for longer. Whether you cook at home or in a restaurant, knowing how to store it well is key.

Refrigeration Techniques

Temperature and moisture are crucial when storing salted cod fish. Unopened packages can stay in a cool, dry place. But once you open it, move it to the fridge right away.

  • Store in an airtight container
  • Keep away from direct light
  • Maintain consistent refrigeration temperature

Shelf Life Expectations

The shelf life of salted fish depends on how you store it. If stored right, salted cod can last months. But, always check it regularly.

Storage MethodUnopened Shelf LifeOpened Shelf Life
Refrigerated12-18 months3-5 days
Frozen24 months2-3 months

Freezing Salted Cod Fish

Freezing is a great way to keep salted cod fish fresh longer. Wrap the fish tightly in moisture-proof packaging before freezing. When you’re ready to use it, thaw it slowly in the fridge to keep its taste and texture.

“The key to great salted cod is not just in the preparation, but in the careful storage.” – Culinary Expert

Look out for signs of spoilage like bad smells, color changes, or a slimy feel. These signs mean it’s time to throw the fish away for safety.

Global Popularity of Salted Cod

Salted cod has traveled far beyond its original maritime roots. It has become a cherished ingredient in cuisines around the world. From the bustling markets of Portugal to the vibrant kitchens of the Caribbean, this preserved fish has woven itself into the cultural fabric of numerous regions.

Regional Culinary Journeys

The global journey of salted cod reveals remarkable diversity in preparation and appreciation. Caribbean salted cod stands out as a particularly distinctive culinary tradition. Each island presents unique interpretations of this versatile ingredient.

  • Portugal: Bacalhau is considered a national treasure
  • Spain: Spanish bacalao recipe features in countless traditional dishes
  • Norway: Crucial to historic preservation techniques
  • Brazil: Essential in multiple festive and everyday recipes

Cultural Significance

Beyond mere sustenance, salted cod represents a deep connection to maritime heritage. Coastal communities developed intricate preservation methods. These methods transformed this fish into a cultural symbol of resilience and creativity.

“Salted cod is more than food—it’s a narrative of survival, trade, and culinary innovation.”

RegionSignature DishCultural Importance
PortugalBacalhau à BrásNational culinary identity
CaribbeanSalt Fish FrittersColonial and indigenous fusion
SpainBrandadeFestive and family gatherings

The global popularity of salted cod shows how a single ingredient can connect cultures. It does this through shared culinary experiences.

Pairing and Serving Suggestions

To make your salted cod fish dishes stand out, think about what to pair and how to present them. Salted cod has a unique taste that needs the right sides and flavors to shine.

Best Accompaniments

Choosing the right sides for your salted cod fish recipe is key. Look for things that balance its salty taste. Here are some great options:

  • Roasted potatoes with herbs
  • Crisp green salads
  • Steamed vegetables
  • Crusty artisan bread
  • Creamy polenta

Wine Pairing Recommendations

Choosing the right wine can elevate your salted cod dishes. White wines with a crisp, acidic taste are perfect. They help cut through the fish’s rich texture.

Wine TypeFlavor ProfileBest Match
Sauvignon BlancCitrusy, CrispGrilled Salted Cod
AlbariñoMineral, BrightBaked Salted Cod Dishes
Pinot GrigioLight, RefreshingFried Salted Cod

Pro tip: Serve your salted cod fish dishes with a wedge of lemon to brighten the flavors and cut through the saltiness.

“The art of serving salted cod is in understanding its subtle nuances and complementing its robust character.” – Culinary Expert

Cooking Tips for Perfect Salted Cod

Learning to cook salted cod needs special techniques and careful prep. This fish is delicate and requires attention to detail. It turns from a preserved ingredient into a tasty meal.

Avoiding Common Cooking Mistakes

When making a cod fish recipe, some mistakes can ruin your dish. Here are the main errors to avoid:

  • Skipping the desalting process
  • Overcooking the fish
  • Using the wrong water temperature
  • Not removing excess salt

Expert Flavor Enhancement Strategies

Improve your salted cod with these expert tips:

  1. Soak cod in cold water for 24-48 hours, changing water often
  2. Pat fish dry before cooking for a crispy exterior
  3. Add aromatic herbs like parsley, thyme, and bay leaves

“The secret to perfect salted cod is patience and precise preparation.” – Mediterranean Culinary Expert

Cooking MethodRecommended TemperatureCooking Time
Baking375°F12-15 minutes
Poaching160°F8-10 minutes
Grilling400°F6-8 minutes

By using these tips, you’ll make your salted cod into a dish that wows everyone.

Salted Cod in Culinary Traditions

Salted cod has become a key part of global cuisine, telling stories across cultures. It’s found in Mediterranean kitchens and Caribbean homes, loved by many. Each place has made its own version of the Spanish bacalao recipe, creating unique dishes.

Mediterranean Influences

Mediterranean countries have mastered salted cod over the years. In Spain, chefs use it in many dishes, like bacalao al pil pil and bacalao a la vizcaína. These recipes show off the fish’s strong taste.

Greece and Italy also love salted cod, adding their own twist to it. They make it a part of their special dishes.

Latin American Dishes

In the Caribbean, salted cod is a big part of the culture, thanks to old trade routes and cultural mix. In Puerto Rico, you can find bacalaítos, salt cod fritters, on the streets. Brazil and Portugal also have their own ways of cooking it, making it a part of their food heritage.

Learning about these traditions shows us the power of salted cod. It’s not just a fish; it’s a symbol of creativity and connection between people and their food.

FAQ

How long do I need to soak salted cod before cooking?

Soaking salted cod takes 24-48 hours. Change the water 3-4 times a day. Thicker fish might need 48 hours to remove salt well.

Can I freeze salted cod fish?

Yes, you can freeze salted cod. Unopened packages can go in the freezer for 6 months. Rehydrated fish should be wrapped tightly and frozen for 2-3 months. Always thaw it in the fridge.

What are the best dishes to make with salted cod?

Popular dishes include Portuguese Bacalhau à Brás and Spanish Brandade de Morue. You can also make Caribbean salt fish fritters and Italian baccalà. These dishes show how versatile salted cod is.

Is salted cod healthy?

Salted cod is rich in protein and omega-3s. It’s low in calories and full of nutrients like vitamin B12. But, it’s high in sodium. Soaking reduces the salt before cooking.

How can I tell if salted cod has gone bad?

Look for bad signs like a bad smell, color change, or sliminess. Good salted cod is firm and smells slightly salty. It can last months if stored right, but check it before cooking.

What’s the best way to remove salt from salted cod?

Soak it in cold water, changing it every 4-6 hours. Use a big container and keep it cold. The water should be clear before cooking. Some use warm water first to speed up the process.

Can I use salted cod in different types of cuisine?

Yes! Salted cod is used in many cuisines. It’s great in stews, fritters, casseroles, salads, and even pasta or rice dishes.

0 comments
0 FacebookTwitterPinterestEmail
Fried Cod Fish Seafood

Fried Cod Fish: Easy recipe of Seafood

Serves: 4 Prep Time: Cooking Time:
Nutrition facts: 300 calories 18 grams fat
Rating: 5.0/5
( 1 voted )

Ingredients

  • 4 cod fillets (6 oz each)
  • 1 cup all-purpose flour
  • 1 teaspoon paprika
  • 1/2 teaspoon garlic powder
  • 1/2 teaspoon onion powder
  • Salt and pepper to taste
  • 1 cup buttermilk
  • 1 egg, beaten
  • Vegetable oil for frying
  • Lemon wedges for serving
  • Fresh parsley (optional, for garnish)

Instructions

In a shallow bowl, combine the flour, paprika, garlic powder, onion powder, salt, and pepper. In another shallow bowl, whisk together the buttermilk and egg until smooth. Dip each cod fillet first into the buttermilk mixture, ensuring it's well coated, then dredge it in the seasoned flour mixture. Press gently to ensure the flour sticks. Heat 1-2 inches of vegetable oil in a large skillet or frying pan over medium-high heat. Once the oil is hot (about 350°F or 175°C), carefully add the coated cod fillets to the pan. Fry for 4-5 minutes on each side, or until golden brown and crispy. Remove the fillets from the oil and place them on a paper towel-lined plate to drain excess oil. Serve the fried cod fish with lemon wedges and garnish with fresh parsley if desired.

Notes

For a lighter option, you can bake the cod fillets in the oven at 400°F (200°C) for about 12-15 minutes instead of frying. Feel free to adjust the seasoning by adding cayenne pepper for a spicier kick. Serve with your favorite dipping sauce, such as tartar sauce or a spicy mayo.

Ever wondered why fried cod fish is so loved around the world? It turns a simple fish into a crispy, golden delight. This dish excites your taste buds and fills your belly like nothing else.

Fried cod fish is more than just a meal. It brings people together, mixing different cooking styles and cultures. It’s a favorite in both coastal restaurants and home kitchens, loved for its crispy outside and soft inside.

If you love seafood or just want to try something new, fried cod fish is amazing. Each bite is a mix of crunchy outside and soft, flaky fish. It’s a meal that’s both comforting and thrilling.

Key Takeaways

  • Fried cod fish is a versatile and popular seafood dish
  • The dish offers a perfect balance of crispy texture and delicate flavor
  • Suitable for various cooking styles and cultural cuisines
  • Provides a delicious protein option for seafood lovers
  • Can be prepared using different cooking techniques

What is Fried Cod Fish?

Dive into the world of crispy fried cod, a seafood dish loved by many. It turns simple fish into a culinary delight. Fried cod fillet is a perfect mix of flavor, texture, and nutrition, loved by food lovers in the United States.

Fried cod is a straightforward yet mouthwatering dish. It involves coating fresh cod fillets in a crispy exterior. The cooking method includes several key steps:

  • Selecting high-quality cod fillets
  • Creating a light, crispy batter
  • Frying to golden perfection

A Closer Look at the Dish

The magic of crispy fried cod is in its simplicity. Chefs and home cooks love its versatility. Whether you’re looking for a quick meal or a classic seafood dish, it’s a winner.

Nutritional Powerhouse

Beyond its taste, cod is a nutritional powerhouse. It’s packed with nutrients that support your health:

  • High-quality protein for muscle maintenance
  • Omega-3 fatty acids for heart health
  • Essential vitamins and minerals

“A single serving of fried cod can provide a significant portion of your daily nutritional needs,” says marine nutrition expert Dr. Sarah Richards.

While fried foods should be enjoyed in moderation, crispy fried cod can be part of a balanced diet. The key is using quality ingredients and cooking techniques that minimize excess oil.

The History of Fried Cod Fish

Fried cod fish has a long and interesting history. It has traveled far, changing from a basic food to a favorite dish worldwide. Exploring fried cod fish shows how it became a key part of many cuisines.

Origins in Seafaring Cultures

Coastal communities started using fried cod fish for food. Fishermen in Europe found ways to keep it fresh for long trips. This was key for sailors and traders who needed good food for their journeys.

Cultural Significance Across Regions

Different places made fried cod fish their own:

  • Portuguese sailors made bacalhau, a famous salt cod dish
  • British cuisine made fish and chips popular
  • New England fishermen created their own special recipes
RegionFried Cod Fish TraditionKey Characteristics
PortugalBacalhauSalt-cured, many ways to prepare
United KingdomFish and ChipsCrispy batter, a pub favorite
New EnglandClassic Fried CodFresh, light breading

“Fried cod fish is more than a meal—it shows human creativity and adaptability.” – Maritime Food Historian

Learning about fried cod fish’s history shows how it became a beloved dish worldwide. It connects people through food.

Choosing the Right Cod

Choosing the perfect cod is key for a great fried cod recipe. The fish’s quality affects the taste and texture of your dish. Learning about cod selection can make your seafood cooking better.

Fresh vs. Frozen Cod: Making the Right Choice

You’ll find two main options: fresh and frozen cod. Fresh cod tastes better and feels nicer, but frozen cod can be just as good. Here’s what to consider:

  • Fresh cod should smell like the ocean, not too fishy
  • It should be firm and clear, with no color changes
  • Frozen cod is good if it was frozen fast after catching

Types of Cod Perfect for Frying

Not all cod is the same for frying. Each type adds something special to your dish:

Cod VarietyFlavor ProfileBest Frying Method
Atlantic CodMild, sweetDeep frying
Pacific CodSlightly firmerPan frying
Icelandic CodDelicate textureLight batter frying

“The secret to an incredible fried cod is selecting the right fish and treating it with respect.” – Seafood Chef Michael Reynolds

Pro tip: Pat dry your cod before coating. This step is crucial for that crispy exterior everyone loves.

Essential Ingredients for Fried Cod Fish

Making delicious fried cod is more than just throwing fish in hot oil. It’s about choosing the right ingredients and frying with care.

The Perfect Batter Composition

Creating a great batter is key for crispy, golden-brown fried cod. Your batter needs to balance texture and flavor well.

  • All-purpose flour as the base
  • Sparkling water or beer for lightness
  • Seasonings to enhance taste

Flavor Enhancers for Irresistible Cod

Make your fried cod even better with the right flavor enhancers. These should match the fish’s delicate taste.

  1. Herbs: Fresh parsley, dill, or chives
  2. Spices: Paprika, garlic powder, cayenne
  3. Zesty additions: Lemon zest, fresh ground pepper

“The right ingredients transform good fish into an extraordinary meal.” – Culinary Experts

When you learn to fry cod, remember quality ingredients are crucial. Try different mixes to find your favorite taste.

Preparing Cod for Frying

Making a tasty homemade fried cod needs careful steps. The secret to a great fried cod fillet is in the preparation before frying. Knowing the right techniques will improve your seafood cooking and make your dish delicious.

Essential Cleaning Techniques

Start by cleaning your cod well. Here are the important steps to prepare your fried cod fillet:

  • Rinse the cod under cold water to remove any surface impurities
  • Pat the fish dry with paper towels to ensure crispy coating
  • Check for any remaining bones using fish tweezers
  • Trim away any dark or discolored sections

Expert Filleting Strategies

Getting the perfect fried cod fillet needs precision. Use sharp knives and steady hands for the best results.

Filleting StepKey Technique
Remove SkinUse a sharp knife at a 45-degree angle
Cut SizeAim for uniform 4-6 ounce portions
Bone RemovalCarefully cut along the center bone line

Marinating for Maximum Flavor

Marinating your homemade fried cod adds extra flavor. Try these quick marinades:

  1. Lemon and herb blend
  2. Garlic and white wine mixture
  3. Spicy chili and lime marinade

“The secret to great fried cod is in the preparation, not just the cooking.” – Culinary Chef

Marinating time should be 15-30 minutes. Longer times can make the fish too soft, affecting the texture of your fried cod fillet.

Cooking Methods for Fried Cod Fish

Learning to fry cod fish is all about mastering different cooking techniques. These methods can turn this delicate seafood into a crispy treat. Whether you’re cooking at home or in a professional kitchen, picking the right frying method is key to a delicious crispy fried cod dish.

Deep Frying Techniques

Deep frying gives your cod fish a crispy outside. Here’s what you need to do:

  • Use a deep, heavy-bottomed pot for even heat distribution
  • Heat oil to 375°F for perfect golden-brown results
  • Maintain consistent oil temperature using a reliable thermometer
  • Avoid overcrowding the pan to ensure crispy fried cod

“The secret to perfect deep-fried cod is maintaining the right oil temperature and not rushing the process.” – Professional Chef

Pan-Frying Essentials

Pan-frying is a lighter option for those who want to fry cod with less oil. Here are some important tips:

  1. Select a non-stick or cast-iron skillet
  2. Use medium-high heat for optimal browning
  3. Add just enough oil to coat the bottom of the pan
  4. Cook cod for 3-4 minutes per side until golden

Both methods can help you make crispy fried cod like a pro. Your choice depends on what you like, what you have at home, and the texture you want.

Flavor Variations for Fried Cod Fish

Take your fried cod to the next level by trying new flavors. You can make a simple dish into a world-class meal. Just play with different seasonings and cooking methods.

Exploring unique flavors can make your seafood dish unforgettable. It will wow your taste buds and impress your guests.

Southern-Style Seasoning

Southern cuisine adds bold flavors to fried cod. Your seasoning mix could include:

  • Cayenne pepper for heat
  • Smoked paprika for depth
  • Garlic powder for richness
  • Dried thyme for herbal notes

International Twists

Trying flavors from around the world can change your fried cod game:

CuisineFlavor ProfileKey Ingredients
JapaneseLight, CrispyPanko breadcrumbs, wasabi
MediterraneanHerb-InfusedOregano, lemon zest
CaribbeanSpicy, TangyJerk seasoning, lime

“Cooking is an art, and fried cod is your canvas. Paint with flavors!” – Chef Marcus Rivera

By trying these flavors, you’ll turn your fried cod into a masterpiece. It will celebrate flavors from all over the world.

Serving Suggestions

To make your fried cod fish special, think about how you present it. The right sides and how you plate it can make your meal unforgettable.

Classic Accompaniments

For fried cod fish, traditional pairings are key. Here are some classic choices:

  • Fresh lemon wedges for a bright, citrusy touch
  • Homemade tartar sauce
  • Malt vinegar for that authentic fish and chips flavor
  • Crispy french fries or sweet potato wedges

Creative Side Dishes

Try new things with your crispy cod fish. Here are some exciting side dish ideas:

  1. Roasted seasonal vegetables
  2. Quinoa salad with fresh herbs
  3. Tangy coleslaw
  4. Mixed green salad with light vinaigrette

Plating Tips for Visual Appeal

How you present your fried cod fish matters. Here are some tips for a beautiful plate:

  • Use white plates to make the golden-brown fish stand out
  • Arrange sides in a strategic, artistic manner
  • Garnish with fresh herbs like parsley or dill
  • Create height by stacking components

“Great food is about creating an experience, not just a meal.” – Unknown Chef

Whether it’s a casual dinner or a fancy seafood dinner, these tips will help you serve your fried cod fish beautifully.

Craving a delicious seafood meal? Try these two easy fried cod recipes. They’ll make your kitchen feel like a gourmet seafood restaurant. Whether you’re experienced or new to cooking, these recipes will impress everyone.

Classic Beer-Battered Cod

The best fried cod recipe uses a classic beer batter. This method gives a crispy, golden outside and keeps the fish’s flavor inside. Here’s what you need:

  • Fresh cod fillets
  • All-purpose flour
  • Cold beer
  • Seasonings
  • Vegetable oil for frying

“The secret to perfect beer-battered cod is in the batter’s consistency and oil temperature.” – Seafood Cooking Expert

Spicy Cod Fish Tacos

Make your easy fried cod recipe spicy with fish tacos. This dish mixes crispy fried cod with bold Mexican flavors.

IngredientQuantity
Cod fillets1 pound
Taco seasoning2 tablespoons
Corn tortillas8 pieces
Lime2 pieces

For the best fried cod, heat your oil to 375°F. Pat your cod dry before battering to avoid sogginess.

  • Coat fish in seasoned flour
  • Dip in beer batter
  • Fry until golden brown
  • Serve hot with your favorite sides

Remember, practice makes perfect when it comes to frying cod. Don’t be discouraged if your first attempt isn’t restaurant-quality!

Tips for Perfectly Fried Cod Fish

Getting crispy fried cod right takes skill and patience. An easy fried cod recipe needs focus and the right cooking methods. Keeping the temperature right and preparing well are key to great seafood.

Common Mistakes to Avoid

Many home cooks mess up when frying cod. Too hot oil burns the batter, and cold fish cooks unevenly. Also, too much fish in the pan lowers the oil temperature, making it soggy.

Best Practices for Texture and Flavor

For a great easy fried cod recipe, follow these steps. Dry the fish before battering for extra crispiness. Use a thermometer to keep the oil at 350-375°F for a golden finish.

Drain the fried cod on wire racks, not paper towels, to keep it crispy. Letting the battered cod rest for a few minutes before frying helps. This makes the batter stick better and the coating even.

With these tips, your home cooking will impress. You’ll serve fried cod as good as any restaurant.

FAQ

What type of cod is best for frying?

Atlantic and Pacific cod are top picks for frying. Look for fresh, firm fillets. They should be white and flaky. Choose thick fillets for a crispy outside and a moist inside.

How do I prevent my fried cod from becoming greasy?

To avoid greasy cod, heat your oil to 375°F. Use a light batter and drain the fish well after frying. Pat the fish dry before battering and fry in batches to keep the oil hot.

Can I prepare fried cod ahead of time?

Fried cod is best served fresh, but you can warm it in a 200°F oven. Fry the fish just before serving for the best texture. If reheating, use the oven to restore crispiness.

What are the best side dishes to serve with fried cod?

Serve with french fries, coleslaw, and tartar sauce. Green salads, roasted veggies, mushy peas, and lemon wedges are also great. Pair with a crisp white wine or light beer.

Is fried cod healthy?

Cod is nutritious, high in protein and low in fat. But frying adds calories and fat. Use light batter and try baking or air frying. Pair with veggies for a balanced meal.

How long should I fry cod?

Fry cod for 3-4 minutes on each side. It’s done when golden and reaches 145°F. Watch closely to avoid overcooking, as thickness and oil temperature matter.

Can I use frozen cod for frying?

Yes, frozen cod works, but thaw it first and pat dry. Thaw in the fridge, then remove excess moisture before frying. This ensures a crispy exterior.

What type of oil is best for frying cod?

Use vegetable, canola, or peanut oil for frying cod. They have high smoke points and neutral flavors. Avoid olive oil, as it can burn at high temperatures.

0 comments
0 FacebookTwitterPinterestEmail
King Salmon Seafood
King Salmon Seafood

King Salmon: Take Your Meals

Serves: 4 Prep Time: Cooking Time:
Nutrition facts: 350 per serving calories 20 grams per serving fat
Rating: 5.0/5
( 1 voted )

Ingredients

  • 4 King Salmon fillets (6 oz each)
  • 2 tablespoons olive oil
  • 1 tablespoon lemon juice
  • 1 teaspoon garlic powder
  • 1 teaspoon onion powder
  • 1/2 teaspoon smoked paprika
  • Salt and pepper to taste
  • Lemon wedges for serving
  • Fresh herbs (optional, for garnish)

Instructions

Preheat your grill or oven to 400°F (200°C). If using an oven, line a baking sheet with parchment paper. Pat the salmon fillets dry with paper towels and place them on a plate or baking dish. Drizzle the olive oil and lemon juice over the salmon fillets, then sprinkle with garlic powder, onion powder, smoked paprika, salt, and pepper. Rub the seasonings evenly over the fillets. For grilling: Place the salmon fillets on the grill and cook for about 4-5 minutes per side, or until the salmon flakes easily with a fork. For baking: Place the salmon fillets on the prepared baking sheet and bake for about 12-15 minutes, or until the salmon is cooked through and flakes easily with a fork. Serve the salmon with lemon wedges and garnish with fresh herbs if desired.

Notes

You can substitute the smoked paprika with regular paprika or chili powder for a different flavor. For a lighter option, use a non-stick pan and cook the salmon with less oil. This recipe can be served with steamed vegetables or a fresh salad for a complete meal.

Ever wondered why king salmon is the top seafood choice? It’s not just another fish. It turns simple meals into special dining moments.

Alaskan king salmon is the best of the best in seafood. It has a rich, buttery taste that stands out. Whether you’re a pro chef or a home cook, king salmon takes your meals to new heights.

This fish comes from Alaska’s clean waters to your plate. It adds a gourmet touch to any dish. Its texture and flavor make king salmon a seafood superstar.

Key Takeaways

  • King salmon offers a superior culinary experience
  • Sourced from pristine Alaskan waters
  • Rich, buttery flavor distinguishes it from other salmon
  • Versatile ingredient for various cooking methods
  • Brings gourmet sophistication to home cooking

What is King Salmon?

King salmon, also known as Chinook salmon, is the most prized Pacific salmon species. It’s a top pick for those who love seafood and care about their health. Wild caught king salmon is especially sought after.

These fish are found in the North Pacific Ocean, mainly in Alaska and the Pacific Northwest. Fresh king salmon is known for its rich, buttery taste and great health benefits.

Exploring Salmon Species Diversity

Pacific salmon have different species, but king salmon is unique. Here’s why:

  • Largest of all Pacific salmon species
  • Highest fat content
  • Most sought-after by chefs and seafood lovers
  • Distinctive deep-red flesh

Nutritional Powerhouse

King salmon is packed with nutrients that can improve your health. Each serving gives you:

NutrientBenefits
ProteinMuscle development and repair
Omega-3 Fatty AcidsHeart and brain health
Vitamin DBone strength and immune support

“Wild caught king salmon represents nature’s most delicious nutrition package.” – Seafood Nutrition Council

Whether you love cooking or focus on nutrition, king salmon is a great choice. It combines amazing taste with health benefits.

The Unique Flavor Profile of King Salmon

King salmon is a true culinary gem. It has a rich, unique taste that seafood fans adore. Its buttery texture and complex flavor make it a top pick for both home cooks and chefs.

Understanding king salmon’s unique traits is key when cooking it. This fish has a flavor depth that makes it stand out from other salmon types.

Salmon Variety Flavor Comparison

Salmon VarietyFlavor IntensityTexture
King SalmonRich, ButterySmooth, Tender
Sockeye SalmonStrong, RobustFirm
Coho SalmonMild, DelicateSofter

Best Cooking Methods to Enhance Flavor

Exploring the best king salmon recipes means knowing the best cooking methods:

  • Grilling: Creates delicious caramelized exterior
  • Baking: Preserves moisture and delicate flavor
  • Pan-searing: Develops rich, crispy crust

“The key to perfect king salmon is respecting its natural flavor while using techniques that complement its unique characteristics.”

When cooking your king salmon, keep seasoning simple. A squeeze of lemon, some fresh herbs, and gentle cooking will elevate your dish to gourmet status.

Best Time to Enjoy King Salmon

Knowing when to buy fresh king salmon is key to enjoying it. This knowledge ensures you get the best fish for your meals.

King salmon, or Chinook salmon, is caught at different times in various places. The main season is from May to September. Each area has its own best time for catching.

Seasonal Fishing Peaks

  • Alaska: June to September
  • Pacific Northwest: May to September
  • California: June to October

Fresh vs. Frozen King Salmon

When buying king salmon online, you’ll find both fresh and frozen. Each type has its own benefits for cooking and eating.

“Fresh doesn’t always mean better – sometimes frozen king salmon can be superior in quality and taste!” – Seafood Experts

Fresh King SalmonFrozen King Salmon
Peak flavor during seasonAvailable year-round
Higher price pointMore budget-friendly
Limited availabilityConsistent quality

To enjoy fresh king salmon, buy it in summer. If you can’t, frozen salmon is a great choice. It keeps the fish’s taste and nutrients well.

How to Choose Quality King Salmon

Choosing the right sustainable king salmon can make your meals better. When you buy king salmon online or at local markets, knowing how to pick the best is key.

Your seafood journey starts with knowing what makes fish fresh and quality. Chefs and seafood experts say a few important steps will help you get the best king salmon.

Visual Inspection Tips

  • Look for bright, metallic skin with vibrant silver coloration
  • Check for firm, elastic flesh that springs back when touched
  • Avoid fish with discolored or dried-out edges
  • Ensure no strong fishy odor is present

Quality Certification Checklist

When buying sustainable king salmon, look for specific labels that show it’s responsibly sourced:

CertificationWhat It Means
Marine Stewardship Council (MSC)Confirms sustainable wild-caught fishing practices
Aquaculture Stewardship Council (ASC)Verifies responsible farm-raised salmon production
Best Aquaculture Practices (BAP)Ensures environmental and social responsibility

“The key to exceptional seafood is knowing your source and understanding quality markers.” – Seafood Sustainability Expert

Online Purchasing Strategies

When buying king salmon online, choose reputable sellers who offer:

  1. Detailed shipping information
  2. Vacuum-sealed packaging
  3. Guaranteed overnight or expedited shipping
  4. Clear sourcing documentation

By following these tips, you’ll confidently pick top-quality sustainable king salmon. It will taste great and be good for you.

Delicious King Salmon Recipes

Exploring the best king salmon recipes can elevate your cooking at home. King salmon has a rich, buttery taste that’s great for many cooking styles. Whether you’re an experienced chef or just starting, these recipes will help you make dishes that rival those from top restaurants.

Learning how to cook king salmon means understanding its unique taste and texture. These recipes will show you two popular ways to prepare it, highlighting its natural richness.

Grilled King Salmon with Lemon Butter

  • Ingredients:
    • 4 king salmon fillets (6 oz each)
    • 1/4 cup unsalted butter
    • 2 fresh lemons
    • Fresh dill
    • Salt and pepper to taste
  • Preparation steps:
    1. Preheat grill to medium-high heat
    2. Melt butter and mix with lemon juice
    3. Season salmon with salt and pepper
    4. Grill for 4-5 minutes per side
    5. Drizzle with lemon butter sauce

Baked King Salmon with Herbs

  • Ingredients:
    • 4 king salmon fillets
    • 3 tablespoons olive oil
    • Fresh rosemary
    • Fresh thyme
    • Garlic cloves
    • Sea salt
  • Cooking method:
    1. Preheat oven to 400°F
    2. Coat salmon with olive oil
    3. Sprinkle chopped herbs on top
    4. Bake for 12-15 minutes
    5. Garnish with fresh herb sprigs

“The key to perfect king salmon is treating it simply and letting its natural flavors shine through.” – Professional Chef

These recipes show how versatile king salmon is. Try different methods to find your favorite way to cook this delicious seafood.

Cooking MethodCooking TimeFlavor Profile
Grilling8-10 minutesSmoky, crisp exterior
Baking12-15 minutesTender, herb-infused

Wine Pairing Suggestions for King Salmon

Finding the perfect wine for your king salmon can make a meal special. The rich flavors of Alaskan king salmon need wines that bring out its taste.

Think about the fish’s buttery texture and strong flavor when picking wines. You want a wine that goes well with the fish without hiding its taste.

White Wine Recommendations

White wines often pair best with king salmon. Here are some top picks:

  • Chardonnay: Especially unoaked ones with sharp acidity
  • Pinot Gris: It has light, refreshing notes that match the salmon’s richness
  • Sauvignon Blanc: It adds a zesty contrast to the fish’s flavor

Red Wine Options

Some light red wines can also go well with king salmon:

Wine VarietyFlavor ProfilePairing Suitability
Pinot NoirLight, fruityExcellent
GamayBright, low tanninVery Good

“The right wine can elevate king salmon from a simple dish to a gourmet experience.” – Culinary Expert

Try different wines with Alaskan king salmon to find what you like best. Remember, what tastes good to you is what matters most for a great meal.

Health Benefits of Including King Salmon in Your Diet

Discovering the health advantages of wild caught king salmon can change how you view nutrition. Fresh king salmon is a powerhouse of wellness. It offers remarkable benefits that support your overall health and vitality.

Heart Health Champion

Your heart system gets amazing support from wild caught king salmon. The fish is packed with nutrients that boost heart wellness:

  • Reduces inflammation in blood vessels
  • Helps lower blood pressure naturally
  • Decreases risk of heart disease

Omega-3 Fatty Acids Powerhouse

Fresh king salmon has an amazing omega-3 profile. These essential fatty acids boost your body in many ways:

  1. Supports brain function and cognitive health
  2. Reduces joint inflammation
  3. Promotes healthy cell development

“Eating wild caught king salmon is like giving your body a natural health supplement.” – Nutrition Experts

Adding wild caught king salmon to your diet is a smart choice for long-term wellness. It’s packed with high-quality proteins, essential fatty acids, and vital nutrients. This makes it an exceptional addition to your diet.

Sustainable Sourcing of King Salmon

Protecting our ocean’s ecosystems begins with smart seafood choices. King salmon, a favorite in many homes, needs careful thought when it comes to where it comes from.

The future of wild caught king salmon relies on good fishing methods. These methods keep our oceans and fish populations healthy. This way, we can enjoy this tasty seafood for years to come.

Understanding Sustainable Fishing Impact

  • Protects marine biodiversity
  • Maintains healthy fish stock levels
  • Supports local fishing communities
  • Reduces environmental damage

Identifying Sustainably Sourced King Salmon

When you’re looking for sustainable king salmon, look for certain certifications. These certifications show that the fishing was done responsibly:

CertificationKey Features
Marine Stewardship Council (MSC)Rigorous environmental standards
Alaska Seafood Marketing InstituteWild-caught, sustainable fisheries
Monterey Bay Aquarium Seafood WatchVerified sustainable sourcing

“Sustainable fishing is not just about protecting fish, but preserving entire marine ecosystems.” – Ocean Conservation Expert

Your choices when buying seafood really matter for marine conservation. By picking wild caught king salmon from trusted sources, you help support good fishing practices. This helps keep our oceans safe.

Practical Tips for Sustainable Salmon Selection

  1. Check for official sustainability certifications
  2. Ask fishmongers about sourcing
  3. Prefer wild-caught over farm-raised options
  4. Research local and regional fishing practices

Remember: Every sustainable king salmon purchase contributes to marine ecosystem preservation.

FAQs About King Salmon

King salmon is a favorite among seafood lovers for its rich taste and health benefits. If you’re thinking of buying king salmon online or want to learn how to cook it, this FAQ has you covered. It answers your key questions about this tasty fish.

Top Cooking Questions Answered

When cooking king salmon, the temperature is key. Cook it until it hits 145°F to ensure it’s safe and stays moist. To cook king salmon at home, try grilling, baking, or pan-searing. These methods help keep its natural flavor and texture.

Storage and Selection Tips

Fresh king salmon should look bright and smell clean. When buying online, check the shipping and make sure it’s kept cold fast. Keep your salmon in the fridge’s coldest spot. Eat it within 1-2 days for the best taste and quality.

Perfect Preparation Techniques

To bring out the best flavor, pat your king salmon dry before cooking. Season it lightly with salt, pepper, and herbs. Let it sit at room temperature for 15 minutes before cooking. This helps it cook evenly. But be careful not to overcook it, as it can dry out quickly.

FAQ

What makes king salmon different from other salmon varieties?

King salmon, also known as Chinook salmon, is known for its rich flavor and buttery texture. It has the most fat of all salmon, making it taste luxurious. It’s also bigger and more colorful than other salmon, making it a favorite among seafood lovers.

Is king salmon a healthy food choice?

Yes, it is! King salmon is full of protein, omega-3s, and important nutrients. It’s good for your heart, reduces inflammation, and has vitamins B12 and D. Eating it can greatly benefit your health, making it a great choice for your diet.

How can I ensure I’m buying sustainable king salmon?

Choose wild-caught Alaskan king salmon with MSC certification. This shows it’s caught responsibly. Also, look for labels from the Alaska Seafood Marketing Institute. They ensure the fish is caught in a way that’s good for the environment.

What’s the best way to cook king salmon?

King salmon can be cooked many ways. Try grilling, baking, pan-searing, or poaching. Just don’t overcook it, as it can dry out. Cook it until it’s just done, so it stays moist and flavorful.

How should I store fresh king salmon?

Store it in the fridge at 32-38°F. Use it within 1-2 days. If you can’t cook it right away, freeze it for up to 3 months. Wrap it tightly in plastic or aluminum to keep it fresh.

When is king salmon in season?

King salmon season varies by region. In Alaska, it’s from May to September. This is when it’s freshest and most flavorful. But, you can find frozen or sustainably caught salmon all year.

What wines pair well with king salmon?

Its rich flavor goes well with white and light red wines. Try Chardonnay or Sauvignon Blanc for its buttery taste. Light reds like Pinot Noir offer a nice contrast. Choose a wine that complements the salmon’s flavor without overpowering it.

Can I buy king salmon online?

Yes, you can buy it online from trusted seafood retailers. Look for those that sell fresh or flash-frozen seafood. Make sure they provide info on where it comes from, how it’s caught, and how it’s shipped. Many online seafood vendors ship high-quality king salmon nationwide.

0 comments
0 FacebookTwitterPinterestEmail
Tuna Macaroni Salad
Tuna Macaroni Salad

Delicious Tuna Macaroni Salad - Easy Recipe

Serves: 6 Prep Time: Cooking Time:
Nutrition facts: 300 calories 15 grams fat
Rating: 5.0/5
( 1 voted )

Ingredients

  • 2 cups elbow macaroni, cooked and drained
  • 1 can (5 oz) tuna in water, drained and flaked
  • 1/2 cup mayonnaise
  • 1 tablespoon Dijon mustard
  • 1 tablespoon white vinegar
  • 1/4 cup celery, finely chopped
  • 1/4 cup red onion, finely chopped
  • 1/4 cup sweet relish
  • 1 teaspoon garlic powder
  • 1/2 teaspoon salt
  • 1/4 teaspoon black pepper
  • 1/4 teaspoon paprika (optional)

Instructions

Cook the elbow macaroni according to package instructions. Drain and set aside to cool. In a large mixing bowl, combine the cooled macaroni, tuna, mayonnaise, Dijon mustard, vinegar, celery, red onion, and sweet relish. Add garlic powder, salt, black pepper, and paprika (if using). Stir until all ingredients are well combined. Cover the bowl and refrigerate for at least 30 minutes before serving to allow the flavors to meld together. Serve chilled as a side dish or light lunch.

Notes

For a creamier texture, you can add more mayonnaise or use Greek yogurt for a lighter version. Feel free to add other veggies like peas, carrots, or bell peppers for extra crunch and flavor. This salad can be made ahead of time and stored in the refrigerator for up to 2 days

Ever thought about how simple ingredients can make a big impact? The easy tuna macaroni salad is a game-changer in the kitchen!

This dish combines tuna’s protein, pasta’s comfort, and a creamy dressing that excites your taste buds. It’s more than just a recipe; it’s a flexible meal for any occasion.

Whether you’re short on time or love cooking, this tuna macaroni salad is a winner. It’s quick to make and packed with flavor. You’ll impress everyone with just a few ingredients and a little prep.

Key Takeaways

  • Quick and easy recipe perfect for multiple occasions
  • Nutritious meal combining protein and carbohydrates
  • Versatile dish that can be customized to personal taste
  • Requires minimal cooking skills
  • Great for meal prep and advance planning

What is Tuna Macaroni Salad?

A classic tuna pasta salad is more than a simple dish. It’s a staple at American dinner tables for generations. It mixes tuna’s protein with macaroni’s comfort, making a meal that’s both healthy and tasty.

This dish started in the mid-20th century. Home cooks used affordable ingredients like tuna and macaroni. It quickly became a hit for picnics and family meals.

A Brief History of the Dish

The 1950s saw a big change in American cooking. Canned tuna and pasta became common. This made quick, tasty meals easy to make.

  • 1930s: Canned tuna became a pantry staple
  • 1950s: Tuna macaroni salad gained popularity
  • 1960s: Became a standard recipe in community cookbooks

Cultures worldwide have made their own tuna pasta salads. Each one shows off local tastes and ingredients.

RegionUnique Ingredients
MediterraneanOlives, capers, fresh herbs
Asian-InspiredSesame oil, soy sauce, green onions
Southern United StatesPickles, celery, sweet relish

“A good tuna macaroni salad is like a culinary time machine, connecting generations through a simple, delicious recipe.” – Food Historian

Whether for lunch or a summer side, tuna pasta salad is a favorite. It’s a recipe that keeps adapting and pleasing food lovers everywhere.

Ingredients You’ll Need

Making the perfect creamy tuna macaroni salad begins with choosing top-notch ingredients. Whether it’s for a quick lunch or a big potluck, the right stuff makes a big difference.

Essential Components for Your Tuna Macaroni Salad

To make the best tuna macaroni salad, you’ll need these key items:

  • Elbow macaroni (8 oz)
  • Canned tuna (2 cans, drained)
  • Mayonnaise (1/2 cup)
  • Diced celery (1/2 cup)
  • Chopped red onion (1/4 cup)
  • Salt and pepper to taste

Optional Add-Ins for Extra Flavor

Make your creamy tuna macaroni salad even better with these tasty extras:

  • Diced pickles
  • Chopped fresh dill
  • Sliced hard-boiled eggs
  • Diced bell peppers
  • Chopped fresh parsley
Ingredient CategoryRecommended QuantityQuality Tips
Pasta8 ozChoose high-quality elbow macaroni
Protein2 cansUse solid white albacore tuna
Creamy Base1/2 cupUse full-fat mayonnaise for best texture

Pro tip: Always drain your tuna thoroughly to prevent a watery salad and ensure maximum flavor concentration.

Choosing the right ingredients can turn a simple tuna macaroni salad into a memorable dish. Remember, fresh, quality ingredients are key to the best taste.

Step-by-Step Preparation Guide

Making a tasty tuna and mayo macaroni salad is easy. This guide will show you how to make a dish that will wow your family and friends.

Cooking the Pasta Perfectly

The key to a great tuna macaroni salad is perfectly cooked pasta. Here’s how to get it right:

  1. Choose high-quality elbow macaroni
  2. Bring a large pot of salted water to a rolling boil
  3. Cook pasta for 8-10 minutes until al dente
  4. Drain and rinse with cold water to stop cooking

Mastering the Mixing Technique

To make a creamy tuna and mayo macaroni salad, mix ingredients carefully:

  • Ensure pasta is completely cooled
  • Drain canned tuna thoroughly
  • Use a large mixing bowl for easy blending

“The secret to a perfect tuna macaroni salad is in the details of preparation.”

IngredientMeasurementPreparation Tip
Macaroni2 cupsCook until just tender
Canned Tuna1 can (5 oz)Drain completely
Mayonnaise1/2 cupMix evenly

Pro tip: Mix ingredients gently to avoid breaking up the tuna or mashing the pasta. Chill for at least an hour before serving to let the flavors blend.

Tips for Making the Perfect Tuna Macaroni Salad

Making the best tuna macaroni salad needs focus and some tricks. Whether you’re cooking at home or in a kitchen, these tips will guide you. You’ll make a creamy tuna macaroni salad that will wow everyone.

Choosing the Right Tuna

Choosing the right tuna is key for a great macaroni salad. Not all canned tuna is the same. Your pick can change the taste and feel of your dish.

  • Solid white albacore: Offers a firmer texture and mild flavor
  • Chunk light tuna: More budget-friendly with a stronger fish taste
  • Oil-packed vs. water-packed: Oil-packed provides richer flavor

Optimal Dressing Techniques

The secret to a creamy tuna macaroni salad is in its dressing. A good dressing can make your salad go from good to great.

Dressing ComponentBest Practice
MayonnaiseUse full-fat, high-quality mayonnaise for maximum creaminess
AcidAdd a splash of vinegar or lemon juice for brightness
SeasoningMix in fresh herbs and spices for depth of flavor

“The key to a perfect tuna macaroni salad is balancing flavors and textures.” – Culinary Expert

Pro tip: Always chill your salad for at least an hour before serving. This lets the flavors mix well, making your salad even better. Your patience will pay off with a dish that’s unforgettable.

Best Serving Suggestions

Your cold tuna macaroni salad is ready to impress at dinner. The right way to serve it can make it a hit at any event. It’s perfect for picnics, potlucks, and family gatherings.

Classic Side Dish Pairings

Pairing your tuna macaroni salad with the right sides can make the meal better. Here are some tasty options:

  • Grilled summer vegetables
  • Crisp garden salad
  • Crusty artisan bread
  • Light summer sandwiches

Creative Ways to Serve

Try new ways to serve your cold tuna macaroni salad. It will keep things interesting and impress your guests:

  1. Serve in hollowed-out tomatoes
  2. Create individual appetizer portions
  3. Use as a sandwich filling
  4. Stuff into cucumber boats
Serving StyleBest OccasionPreparation Time
Classic BowlFamily Dinner5 minutes
Appetizer CupsParties10 minutes
Sandwich SpreadLunch3 minutes

“The secret to a great tuna macaroni salad is in the presentation and temperature. Always serve it cold for the best flavor!” – Culinary Expert

Remember, the secret to a memorable tuna macaroni salad is to keep it chilled. Serve it with creativity and passion.

Storing and Reheating Leftovers

Keeping your cold tuna macaroni salad fresh is key. Proper storage and refrigeration are vital. They help keep the salad’s taste and ensure food safety.

Best Practices for Refrigeration

Here are the top tips for storing your tuna macaroni salad:

  • Use an airtight container with a tight-fitting lid
  • Refrigerate within two hours of preparation
  • Keep the salad at or below 40°F (4°C)
  • Consume within 3-5 days for optimal taste and safety

Maintaining Flavor During Reheating

Most tuna macaroni salads are best served cold. Reheating can change the texture and taste. If you need to warm it, here’s how:

  1. Remove the salad from the refrigerator 15 minutes before serving
  2. Gently stir to redistribute ingredients
  3. Add a small amount of fresh dressing if needed

“The key to a great cold tuna macaroni salad is proper storage and serving temperature.”

Storage MethodMaximum Storage TimeBest Serving Temperature
Refrigerated (Airtight Container)3-5 days40°F or below
Room Temperature2 hours maximumNot recommended

Food safety is very important when making and storing tuna macaroni salad. Always check the salad’s smell and look. If it smells bad or looks off, throw it away.

Nutritional Benefits of Tuna Macaroni Salad

Your favorite tuna pasta salad is not just tasty—it’s also full of great health benefits. This classic dish is a powerhouse of nutrients. It supports your overall health and gives you essential nutrients in every bite.

Protein Powerhouse

Tuna is a top-notch protein source. A serving of tuna pasta salad gives you about 20-25 grams of protein. This helps build and repair muscles. It’s perfect for athletes, fitness lovers, and anyone wanting a balanced diet.

Omega-3 Fatty Acids

The main ingredient, tuna, is full of omega-3 fatty acids. These good fats are great for your heart, reduce inflammation, and boost brain function. Wild-caught tuna has even more of these beneficial fats.

NutrientAmount per ServingHealth Benefit
Protein20-25gMuscle repair and growth
Omega-3 Fatty Acids500-1000mgHeart and brain health
Vitamin D40-60 IUBone strength

Essential Vitamins and Minerals

Your tuna pasta salad is packed with important nutrients:

  • Vitamin B12 for energy metabolism
  • Selenium for immune system support
  • Potassium for heart and muscle function
  • Magnesium for nerve and muscle health

“Food is not just calories, it’s information. It talks to your DNA and tells it what to do.” – Dr. Mark Hyman

Enjoying tuna macaroni salad is more than just eating. It’s nourishing your body with a meal full of nutrients.

Common Mistakes to Avoid

Making the perfect easy tuna macaroni salad needs focus and avoiding common errors. Many home cooks face mistakes that can make a tasty salad a letdown.

Pasta Preparation Pitfalls

The biggest mistake in tuna macaroni salad is overcooking the pasta. Overcooked macaroni can mess up the dish’s texture and taste. Here are some tips for perfect pasta:

  • Salt the water well before boiling
  • Cook pasta al dente – firm to the bite
  • Drain immediately and rinse with cold water
  • Don’t overcook by checking pasta 1-2 minutes before package instructions

The Importance of Chilling

Not chilling the salad is another mistake. Chilling helps flavors mix and improves the salad’s taste.

“A well-chilled tuna macaroni salad is like a symphony of flavors waiting to be enjoyed” – Culinary Experts

MistakeConsequenceSolution
Overcooking PastaMushy, Unappetizing TextureCook Al Dente, Rinse with Cold Water
Skipping Chill TimeBland, Underdeveloped FlavorRefrigerate for 1-2 Hours Before Serving

Avoiding these mistakes can make your tuna macaroni salad amazing. Take your time, follow the steps, and enjoy a delicious dish.

Fun Facts About Tuna and Pasta

Explore the amazing world of tuna pasta salad ingredients. Discover surprising facts that make this dish even more interesting. From nutritional benefits to cultural treasures, tuna and pasta have fascinating stories.

The Incredible Health Benefits of Tuna

Tuna is more than just a tasty protein for your tuna macaroni salad with sweet pickles. It’s a nutritional powerhouse:

  • High-quality lean protein for muscle health
  • Rich in omega-3 fatty acids
  • Excellent source of vitamin D
  • Contains selenium for thyroid function

“One serving of tuna can provide up to 26 grams of protein with minimal fat content.” – Nutrition Experts

Pasta’s Global Cultural Significance

Your favorite tuna pasta salad connects you to a rich culinary heritage. Pasta is more than food; it’s a symbol of tradition, creativity, and community worldwide.

In Italy, pasta is a symbol of family ties. Mediterranean cultures see it as a versatile food that brings people together at meals.

Whether you’re making a classic tuna macaroni salad or trying new recipes, you’re part of a global culinary conversation. It spans generations.

Frequently Asked Questions

When making an easy tuna macaroni salad, people often wonder about storage and prep. Knowing the best ways can help you make a tasty and safe dish. Everyone will love it.

How Long Does Tuna Macaroni Salad Last?

Your tuna macaroni salad will keep in the fridge for 3-5 days in an airtight container. It’s important to keep it cold at 40°F or below to stop bacteria. Always check for spoilage before eating leftovers.

Can I Make It Ahead of Time?

Yes, you can make your tuna macaroni salad ahead of time. In fact, it’s better. The flavors get stronger when it chills for a few hours. You can prepare it up to 24 hours before, keeping it in the fridge for the best taste and texture.

Remember, keeping your tuna macaroni salad fresh and safe is key. By following these tips, you can enjoy a delicious and easy meal. It’s perfect for any time.

FAQ

How Long Does Tuna Macaroni Salad Last in the Refrigerator?

Tuna macaroni salad can last 3-5 days in the fridge. Keep it in an airtight container and check for spoilage. For the best taste, eat it within 2-3 days.

Can I Make Tuna Macaroni Salad Ahead of Time?

Yes, you can make it ahead. It’s great for letting flavors mix. Just store it in the fridge and stir gently before serving.

What Type of Tuna Works Best for This Salad?

Use chunk light or white tuna. Choose water-packed for a lighter taste or oil-packed for richer flavor. Drain the tuna well before mixing.

Can I Make a Vegetarian Version of This Salad?

Replace tuna with chickpeas, tofu, or plant-based proteins. Keep the dressing and veggies the same for a classic taste.

How Can I Make My Tuna Macaroni Salad Healthier?

Use whole wheat pasta and Greek yogurt instead of mayonnaise. Add more veggies like bell peppers or cucumber. Choose light tuna and less dressing for fewer calories.

What Are Some Common Mix-Ins for Tuna Macaroni Salad?

Sweet pickles, celery, red onion, hard-boiled eggs, green peas, and herbs like dill or parsley are great. They boost flavor and nutrition.

Is Tuna Macaroni Salad Gluten-Free?

No, traditional tuna macaroni salad has gluten from pasta. But, use gluten-free pasta for a gluten-free version. Always check labels for gluten-free.

How Do I Prevent My Pasta from Getting Mushy?

Cook pasta al dente and rinse with cold water. This stops cooking and prevents mushiness. Drain well before mixing to avoid moisture.

0 comments
0 FacebookTwitterPinterestEmail
Verified by MonsterInsights