Home Recipes
Category:

Recipes

Healthy Breakfast

Easy Healthy Breakfast Ideas: Delicious

by IDYA
Healthy Breakfast

Easy Healthy Breakfast Ideas: Delicious

Serves: 2 Prep Time: Cooking Time:
Nutrition facts: 250 calories 8 grams fat
Rating: 5.0/5
( 1 voted )

Ingredients

  • 2 large eggs
  • 1/2 cup spinach, chopped
  • 1 tablespoon olive oil
  • 1/4 cup diced tomatoes
  • 1/4 cup shredded cheese (optional)
  • 1/2 avocado, sliced
  • Salt and pepper to taste

Instructions

Heat olive oil in a skillet over medium heat. Add spinach and sauté for 1-2 minutes until wilted. Crack the eggs into the skillet and scramble with the spinach. Season with salt and pepper. Once eggs are cooked, add diced tomatoes and cook for an additional 1 minute. Top with shredded cheese (optional) and avocado slices. Serve warm and enjoy!

Notes

You can customize this breakfast by adding your favorite veggies or protein sources like turkey bacon or sausage.

Easy Healthy Breakfast Recipes

Easy Healthy Breakfast Ideas Delicious Nutritious

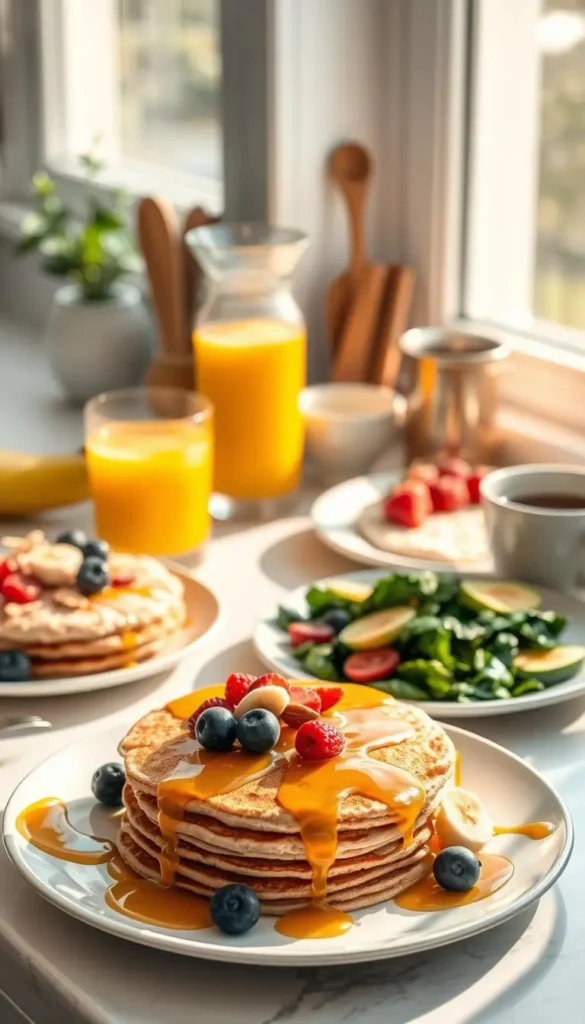
Easy Healthy Breakfast Ideas: Delicious. Are you tired of breakfasts that make you feel slow and unsatisfied? Finding easy healthy breakfast recipes can change your mornings. Quick and healthy breakfasts do more than just fill your belly. They give you energy and help you stay well.

The right breakfast can make your whole day better. By using simple, healthy ingredients, you can make tasty meals fast. These recipes show that eating well doesn’t need to be hard or take a lot of time.

Whether you’re busy, a student, or just want to eat better, these ideas will change your mornings. You’ll find everything from smoothies to egg dishes and protein bowls. There’s a world of healthy and delicious breakfasts waiting for you.

Key Takeaways

  • Breakfast is crucial for daily energy and nutrition
  • Quick recipes can be both delicious and healthy
  • Variety keeps breakfast interesting and enjoyable
  • Nutrient-dense meals support overall wellness
  • Preparation can be simple and time-efficient

Why Breakfast is the Most Important Meal of the Day

Starting your day with a nutritious breakfast can change everything. Breakfast is more than a morning habit. It’s a key fuel that powers your body and mind all day.

Benefits of a Nutritious Breakfast

Choosing simple breakfast recipes full of nutrients has many health benefits. Your morning meal is key to staying physically and mentally sharp.

  • Boosts metabolism and energy levels
  • Stabilizes blood sugar throughout the day
  • Supports cognitive function and concentration
  • Helps manage weight more effectively

How Breakfast Affects Mood and Energy

Eating balanced, nutritious breakfasts sets you up for success. Skipping breakfast can make you feel irritable, less focused, and tired in the morning.

Research shows that eating a healthy breakfast leads to:

  1. Improved mental clarity
  2. More stable emotional regulation
  3. Enhanced physical stamina
  4. Better overall daily performance

“Breakfast is the most important meal of the day – not just a saying, but a scientifically proven fact.” – Nutrition Experts

By focusing on your morning nutrition, you’re investing in your health and daily success.

Quick and Easy Breakfast Smoothies

Start your day with tasty and nutritious breakfast meals. Smoothies are perfect for busy people who need a quick energy boost. They’re quick to make and full of good stuff for your body.

Smoothies are a great way to get important nutrients fast. They can make your morning routine better, giving you energy and essential vitamins to start your day right.

Green Smoothie Ingredients

Making a green smoothie is simple. Here are some key ingredients:

  • Spinach or kale for leafy greens
  • Banana for natural sweetness
  • Almond milk or coconut water
  • Chia seeds for protein
  • Frozen pineapple for tropical flavor

Berry Bliss Smoothie Recipe

If you like fruity flavors, try a berry smoothie. It’s full of antioxidants and tastes great. Here’s a simple recipe:

  1. 1 cup mixed berries (strawberries, blueberries, raspberries)
  2. 1/2 cup Greek yogurt
  3. 1 tablespoon honey
  4. Handful of ice cubes
  5. Blend until smooth

Pro tip: Make smoothie packs ahead of time. Put ingredients in freezer bags. This makes your mornings easier when you’re in a rush.

Wholesome Overnight Oats Ideas

Overnight oats are a big hit for those looking for quick, healthy breakfasts. They are easy to make and taste great. Perfect for busy mornings with little time to cook.

Easy Healthy Breakfast Ideas Delicious Nutritious

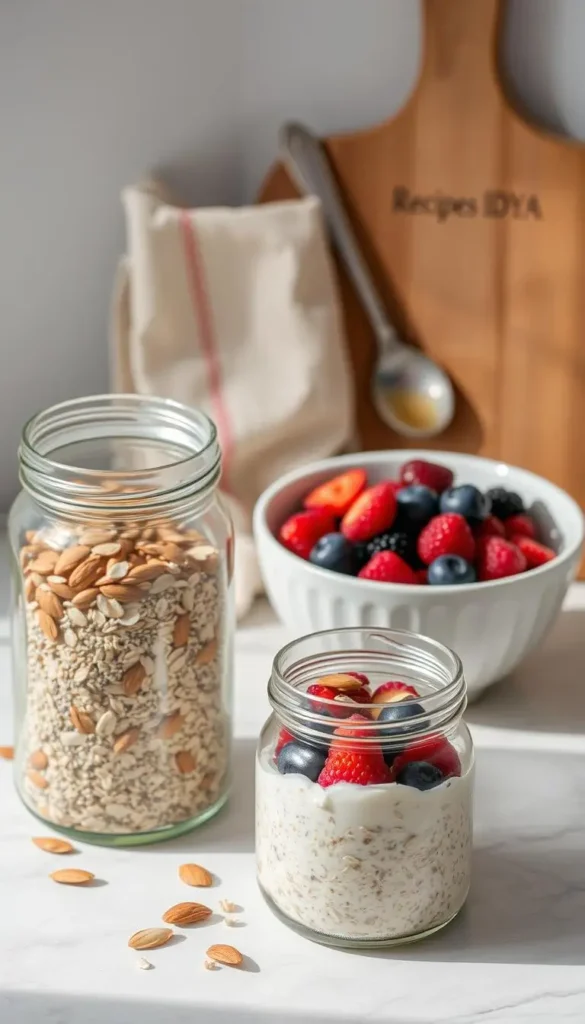
Making overnight oats is easy. You soak oats in liquid overnight. This makes them soft and creamy, ready for your morning.

Classic Overnight Oats Recipe

To start your oats, you need:

  • 1/2 cup rolled oats
  • 1/2 cup milk (dairy or plant-based)
  • 1 tablespoon chia seeds
  • 1 tablespoon honey or maple syrup

Flavor Variations to Explore

Overnight oats can be many things. Try these tasty twists:

  1. Apple Cinnamon: Add diced apples and a sprinkle of cinnamon
  2. Chocolate Peanut Butter: Mix in cocoa powder and a spoonful of peanut butter
  3. Tropical Fruit: Incorporate mango chunks and shredded coconut

These recipes are full of good stuff like fiber and protein. They keep you full and happy. Make a few jars ahead of time for a quick, tasty breakfast every day.

Heart-Healthy Avocado Toast Recipes

Avocado toast is a favorite for easy, healthy breakfasts. It’s full of good fats and nutrients. This turns a simple bread into a nutritious meal.

Choosing the right bread is key for great avocado toast. Go for whole grain or sourdough. They add nutrition and make your breakfast satisfying.

Mediterranean Avocado Toast

Make a Mediterranean-inspired dish with these steps:

  • Mash ripe avocado on toasted whole grain bread
  • Sprinkle crumbled feta cheese
  • Add sliced cherry tomatoes
  • Drizzle extra virgin olive oil
  • Garnish with fresh herbs like basil or oregano

Spicy Avocado Toast with Eggs

For a spicy morning meal, try this version:

  • Spread mashed avocado on crispy toast
  • Top with a perfectly fried egg
  • Sprinkle red pepper flakes
  • Add a dash of hot sauce
  • Finish with a pinch of sea salt

Pro tip: Choose avocados that are slightly soft to the touch for the creamiest avocado toast.

Nutritious Breakfast Wraps and Burritos

Breakfast wraps are a great choice for those looking for healthy meals that taste good. They are both nutritious and easy to carry, perfect for quick mornings.

When making breakfast wraps, you can fit lots of nutrients into one meal. Choose ingredients that are both healthy and tasty.

Breakfast Burrito with Veggies

Make your breakfast burrito a nutritional powerhouse with the right ingredients. Here’s a simple recipe to start your day:

  • Whole wheat tortilla as the base
  • Scrambled eggs for protein
  • Colorful bell peppers
  • Spinach leaves
  • Low-fat cheese sprinkle
  • Optional: salsa for extra flavor

This meal is quick to make and will keep you full and energized all morning.

Whole Wheat Wrap with Hummus

For a plant-based option, try a whole wheat wrap with hummus. It’s a lighter choice compared to other breakfasts:

  • Spread generous hummus layer
  • Add cucumber slices
  • Sprinkle feta cheese
  • Include fresh arugula
  • Roll in whole wheat tortilla

These wraps are great for meal prep. Just wrap them in foil and refrigerate for a quick breakfast on the go.

Pro tip: Try different veggies and proteins to keep your wraps interesting and full of nutrients!

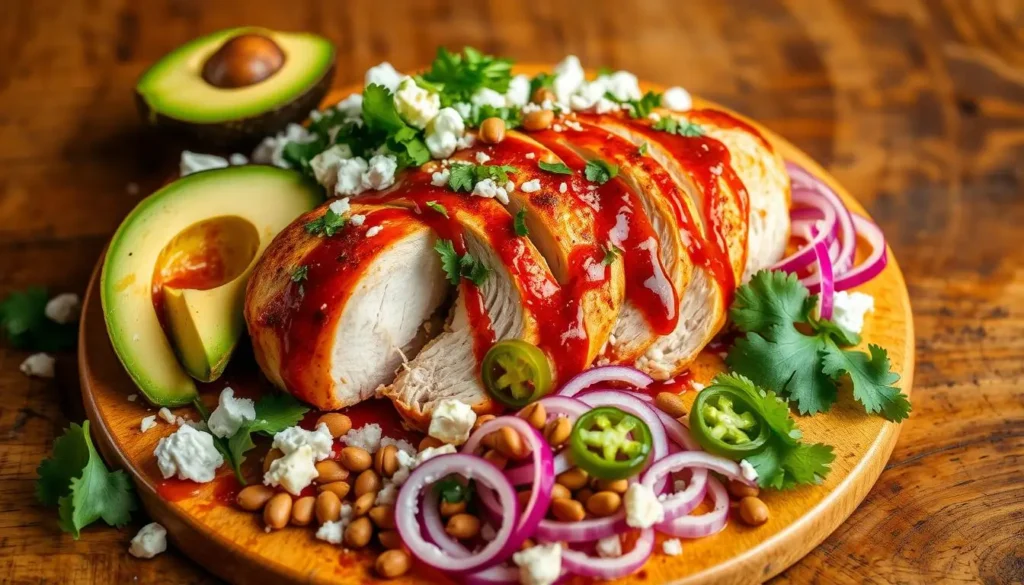
Delicious Protein-Packed Breakfast Bowls

Starting your day with nutritious breakfast options can change your morning. Protein-packed breakfast bowls are a fun way to make easy, healthy meals. They keep you full and energized all morning.

Breakfast bowls are popular for a reason. They mix nutrients well, letting you pick what you like. This way, you get a meal that’s just right for you.

“A well-constructed breakfast bowl can be your secret weapon for sustained energy and wellness.” – Nutrition Expert

Quinoa Breakfast Bowl Recipe

Quinoa is great for a protein-rich breakfast bowl. Here’s a simple recipe to start with:

  • 1 cup cooked quinoa
  • 1/2 cup mixed berries
  • 2 tablespoons chopped almonds
  • 1 tablespoon honey
  • Pinch of cinnamon

Cook quinoa the night before to save time. Layer the ingredients and drizzle honey for a delightful morning meal.

Yogurt Parfait Bowl Ideas

Greek yogurt is a top choice for protein-packed bowls. You can mix and match toppings to create many variations:

  • Greek yogurt base
  • Fresh seasonal fruits
  • Crunchy granola
  • Chia seeds
  • Nut butter drizzle

These recipes are easy to make ahead of time. They make your morning routine healthier and smoother.

Tasty and Simple Egg Dishes

Eggs are a powerhouse of nutrition and super versatile for quick, healthy breakfasts. They’re packed with protein and essential nutrients. This makes your morning meal exciting. Whether you’re busy or a home cook, these egg recipes will change your breakfast routine.

Eggs are flexible for making nutritious meals. They’re not just tasty but also easy to make. Let’s look at two egg dishes that will make your mornings better and more energetic.

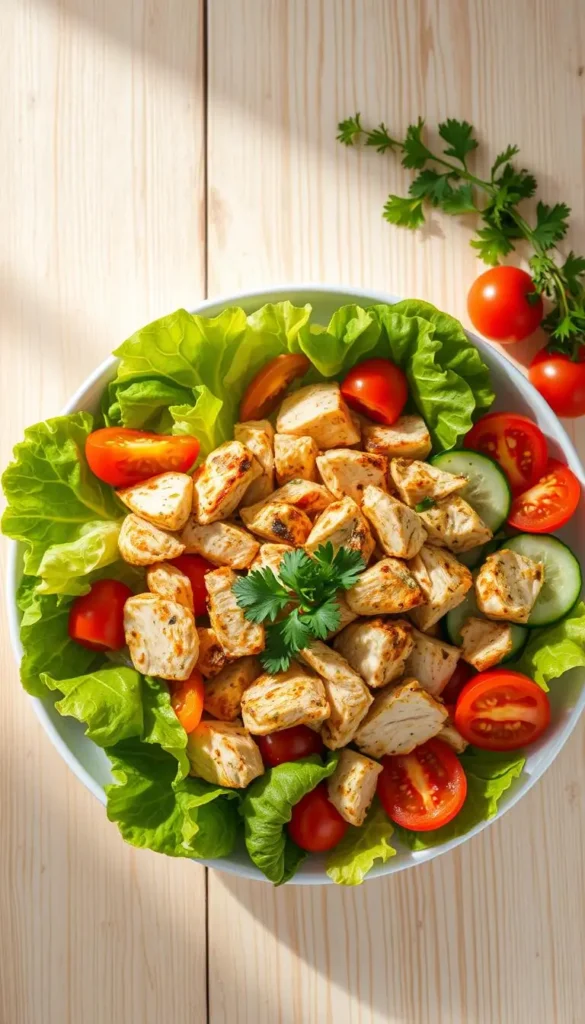
Veggie Scramble with Spinach

Make a vibrant, nutritious breakfast with this spinach scramble. Here’s what you need:

  • 4 large eggs
  • 1 cup fresh spinach
  • 1/4 cup diced bell peppers
  • 2 tablespoons olive oil
  • Salt and pepper to taste

Whisk the eggs, sauté the veggies, and mix for a colorful, protein-rich breakfast. It’s ready in under 10 minutes.

Baked Eggs with Tomatoes and Feta

This Mediterranean dish makes your breakfast better with little effort:

  • 4 eggs
  • 1/2 cup cherry tomatoes
  • 1/4 cup crumbled feta cheese
  • Fresh herbs like basil or oregano
  • Olive oil for drizzling

Bake the eggs with tomatoes and feta in a preheated oven. It’s a restaurant-quality breakfast that looks great but is easy to make.

Pro tip: Always use fresh, high-quality eggs from free-range chickens for the best flavor and nutritional value.

Fiber-Rich Granola and Cereals

Start your day with healthy breakfast choices that boost your nutrition. Fiber-rich granola and cereals are great for a quick and nutritious meal. They not only taste good but also give you the energy you need.

Choosing the right breakfast cereals can really help your health. Not all cereals are the same. It’s important to pick ones that are good for you.

Homemade Granola Recipe

Making your own granola lets you control what goes into it. Here’s a simple recipe to try:

  • 3 cups rolled oats
  • 1 cup mixed nuts (almonds, pecans)
  • 1/2 cup honey or maple syrup
  • 1/4 cup coconut oil
  • 1 tsp vanilla extract
  • Pinch of salt

Mix everything together, spread it on a baking sheet, and bake at 325°F for 25 minutes. Stir it a few times. Let it cool completely for the best crunch!

Best Crunchy Cereals to Try

Not all cereals are the same. Look for ones that are high in fiber and low in sugar.

Cereal BrandFiber ContentSugar per Serving
Kashi GO10g6g
Nature’s Path Organic8g5g
Fiber One Original14g0g

Adding fiber-rich granola and cereals to your breakfast can help your digestion and keep you full. Try different mixes to find your favorite morning meal!

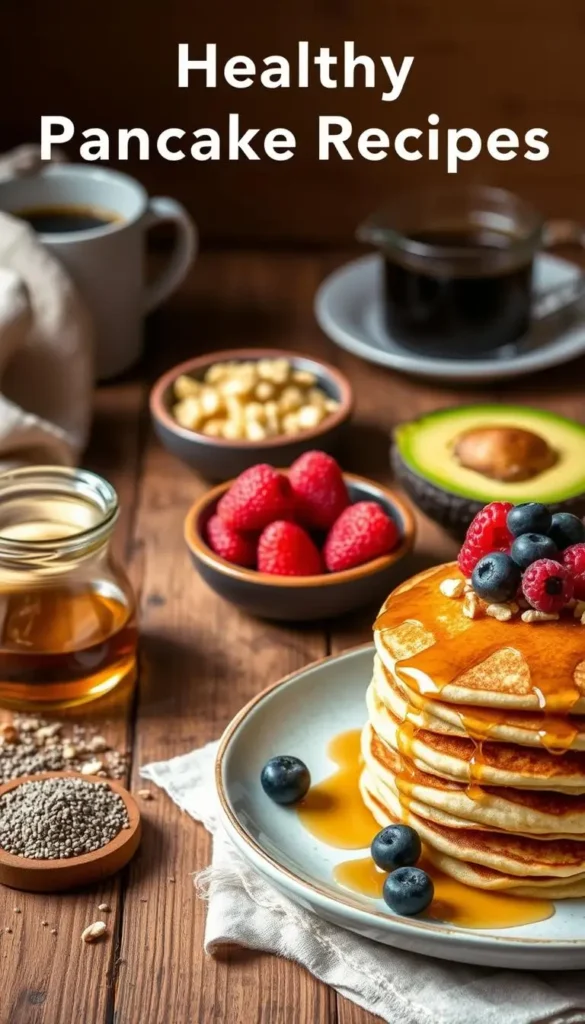
Creative Pancakes for a Healthy Twist

Pancakes are a favorite breakfast dish, but they can be heavy. You can make them healthier without losing flavor. These new pancake ideas are nutritious and keep you full and energized in the morning.

Using better ingredients can make pancakes much healthier. You can ditch the refined flour and sugar for something better.

Banana Oatmeal Pancakes

Banana oatmeal pancakes are great for a gluten-free breakfast. They mix the sweetness of bananas with the texture of oats.

  • Mash ripe bananas for natural sweetness
  • Use rolled oats for added fiber
  • Mix with eggs for protein
  • Optional add-ins like cinnamon or chia seeds

Almond Flour Pancakes

Almond flour pancakes are perfect for low-carb or keto diets. They are protein-rich and offer a lighter, healthier breakfast.

  • Almond flour provides healthy fats
  • Low in carbohydrates
  • High in protein and nutrients
  • Great for meal prep and freezing

Pro tip: Add fresh berries, Greek yogurt, or maple syrup on top. It boosts both taste and health.

Gluten-Free Breakfast Options

Looking for nutritious breakfasts that are gluten-free can change your morning. People with gluten issues or wanting low-calorie options have tasty choices. These meals are full of flavor and good for you.

Gluten-free breakfasts are full of variety and health benefits. You can make meals that give you energy and are packed with nutrients. And you can avoid foods with wheat.

Chia Seed Pudding: A Nutritional Powerhouse

Chia seed pudding is a top choice for a gluten-free breakfast. These small seeds are very nutritious:

  • Rich in omega-3 fatty acids
  • High in fiber and protein
  • Supports digestive health
  • Can be prepared ahead of time

To make it, mix chia seeds with your favorite milk, let it sit overnight. Then, top it with fresh fruits or nuts for extra taste.

Creative Rice Cake Toppings

Rice cakes are another great gluten-free choice for breakfast. Pick whole grain ones and pair them with natural nut butters for a protein boost.

  • Almond butter with sliced bananas
  • Cashew butter with berries
  • Sunflower seed butter with honey

When picking rice cakes and nut butters, choose ones without added sugars. This keeps your breakfast healthy and low in calories.

Pro tip: Always check labels to ensure complete gluten-free certification, especially for those with celiac disease.

Your gluten-free breakfast can be delicious, nutritious, and easy to make. Try out these ideas to find your favorite morning meal.

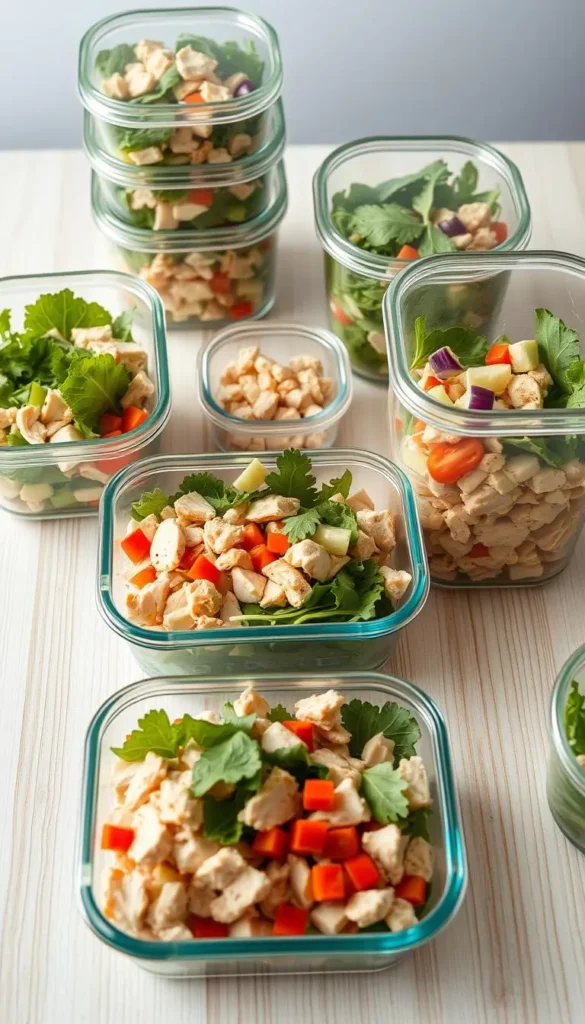
Satisfying Breakfast Ideas for Meal Prep

Busy mornings need smart breakfast solutions. Meal prepping quick healthy breakfast ideas can change your week. It makes eating nutritious easy and convenient. With planning, you can make tasty homemade breakfasts that save time and help your health.

Preparing breakfasts ahead keeps your diet balanced, even when you’re busy. Meal prep lets you enjoy healthy meals without spending hours cooking every morning.

Batch-Cooked Egg Muffins: A Protein-Packed Breakfast Solution

Egg muffins are the best meal prep breakfast. These portable, protein-rich foods can be made in many ways to keep your mornings fun.

  • Prep ingredients in advance
  • Use silicone muffin trays for easy removal
  • Store in airtight containers for up to 4 days

Freezer-Friendly Smoothie Packs: Instant Nutrition

Make grab-and-blend smoothie packs for a quick morning. Pre-measuring ingredients means a fast, healthy start to your day.

Smoothie Pack IngredientsNutritional Benefits
Frozen berriesAntioxidants
SpinachIron and vitamins
BananaPotassium
Chia seedsOmega-3 fatty acids

Your meal prep strategy can change your breakfast. Spending a bit of time on weekends means you’ll have delicious, healthy morning meals. These meals will boost your health and energy.

Tips for Making Healthy Breakfast Choices

Creating healthy breakfasts is easy. Your morning meal is key to a day full of energy. Simple recipes and planning can make your breakfast a wellness boost.

Start by knowing what you need for breakfast. Mix lean proteins, complex carbs, and healthy fats. Eggs or Greek yogurt keep you full, while whole grains give lasting energy. Prep ingredients the night before to make mornings easier.

Smart Ingredient Swaps

Choosing better ingredients can make a big difference. Swap white bread for whole grains, sugary cereals for steel-cut oats, and use natural sweeteners. These changes can make your breakfast healthier without losing flavor.

Portion Control and Mindful Eating

Controlling portions is crucial for a balanced diet. Use small plates and measure your food. Listen to your hunger to avoid overeating. Try new breakfasts to keep things interesting and nutritious. Breakfast is your chance to energize for the day.

FAQ

Why are healthy breakfast recipes important?

Healthy breakfasts give you the nutrients you need. They boost your metabolism and keep your blood sugar stable. This gives you energy all day long.

They also help you focus better, manage your weight, and stay healthy.

How can I prepare quick healthy breakfast options when I’m short on time?

Make-ahead meals like overnight oats and egg muffins are great. They’re easy to prepare in advance. Just reheat or assemble them in the morning.

Are smoothies a good breakfast option?

Yes! Smoothies are quick and packed with nutrients. You can mix in fruits, veggies, proteins, and healthy fats. They’re customizable to your taste and needs.

What are some protein-rich breakfast ideas?

Try Greek yogurt parfaits, egg dishes, and quinoa bowls. Also, protein smoothies, chia seed puddings, and breakfast wraps with eggs or hummus. These keep you full and energized.

How can I make my breakfast healthier?

Choose whole grains and add lots of fruits and veggies. Opt for lean proteins and limit sugars. Use whole foods instead of refined ones.

Are there good gluten-free breakfast options?

Yes! Enjoy chia seed pudding, rice cakes with nut butter, and vegetable frittatas. Also, smoothie bowls, quinoa bowls, and gluten-free pancakes made with almond or coconut flour.

How can I meal prep breakfast for the week?

Cook batches of egg muffins, overnight oats, and breakfast burritos. Store them in containers in the fridge or freezer. This saves time and keeps your meals healthy.

What are some low-calorie breakfast ideas?

Try vegetable egg white scrambles, Greek yogurt with berries, and chia seed pudding. Also, green smoothies, avocado toast, and vegetable-packed wraps. These are filling and low in calories.

How important is breakfast for weight management?

Breakfast is key for weight management. It boosts your metabolism and reduces cravings. It also keeps you full and provides the nutrients your body needs.

Can breakfast help improve my mood and energy?

Definitely! A balanced breakfast stabilizes your blood sugar and gives you the nutrients for your brain. It also gives you the energy to start your day right. Healthy breakfasts improve your focus, mood, and mental performance.

0 comments
1 FacebookTwitterPinterestEmail
Healthy Turkey Ground Beef

The Best Healthy Turkey and Ground Beef Recipes

Serves: 4 Prep Time: Cooking Time:
Nutrition facts: 400 calories 15 grams fat
Rating: 5.0/5
( 1 voted )

Ingredients

  • 1 lb ground turkey
  • 1/2 lb ground beef (lean)
  • 1 small onion, finely chopped
  • 2 cloves garlic, minced
  • 1 tablespoon olive oil
  • 1 tablespoon tomato paste
  • 1 teaspoon cumin
  • 1 teaspoon chili powder
  • 1/2 teaspoon salt
  • 1/4 teaspoon black pepper
  • 1/4 cup chopped cilantro
  • 1 tablespoon lime juice

Instructions

In a large skillet, heat olive oil over medium heat. Add the chopped onion and garlic, and sauté until softened (about 3-4 minutes). Add the ground turkey and ground beef to the skillet. Cook, breaking up the meat with a spoon, until browned and cooked through (about 8-10 minutes). Stir in the tomato paste, cumin, chili powder, salt, and pepper. Cook for another 2-3 minutes, allowing the flavors to combine. Remove from heat and stir in chopped cilantro and lime juice. Serve with your favorite sides or in tacos, wraps, or bowls.

Notes

For a lighter version, use all ground turkey instead of a mix of turkey and beef. You can also add vegetables like bell peppers or spinach for added nutrition.

Are you tired of bland diet meals that leave you feeling unsatisfied? What if you could enjoy delicious and nutritious ground meat recipes? These recipes can turn your everyday cooking into a healthy culinary adventure.

Healthy turkey ground beef recipes offer an exciting solution for home cooks. They provide a perfect protein combination that can elevate your dining experience. This combination supports your wellness goals.

From quick weeknight dinners to meal prep solutions, these recipes will change how you approach healthy eating. Our comprehensive guide will show you multiple cooking techniques and creative recipes. These make nutrition delightful and enjoyable.

Key Takeaways

  • Discover protein-rich recipes combining turkey and ground beef
  • Learn multiple cooking techniques for ground meats
  • Explore nutritious meal options for different dietary preferences
  • Master quick and easy healthy recipe strategies
  • Transform traditional recipes into healthier versions

Why Choose Turkey and Ground Beef for Healthy Meals?

Choosing the right protein sources is key to a balanced diet. Turkey and ground beef are excellent choices because of their nutritional benefits. They help you make healthier, more enjoyable meals.

Nutritional Benefits of Turkey

Turkey is a lean protein that’s packed with nutrients. It has less fat and more essential nutrients. Here are some of its key benefits:

  • Low in calories
  • High in protein
  • Rich in vitamins B6 and B12
  • Contains selenium and zinc

Advantages of Ground Beef

Ground beef adds flavor and nutrients to your meals. But, it’s important to choose lean cuts for the most health benefits.

NutrientAmount per 3 oz Lean Ground Beef
Protein22g
Iron2.2mg
Zinc5.4mg
Vitamin B122.3mcg

Pairing the Two for Balanced Meals

Mixing turkey and ground beef offers dynamic balanced diet options. This combination helps:

  1. Reduce overall fat intake
  2. Increase protein variety
  3. Enhance meal flavor profiles
  4. Maximize nutritional intake

How you choose your proteins greatly affects your health and meal satisfaction. Knowing the nutritional strengths of turkey and ground beef helps you make better, tastier meals.

Delicious Turkey Ground Beef Meatballs

Looking for quick and tasty meals for your family? Meatballs are a great choice for busy nights. They mix turkey and beef for a protein-rich dish that tastes amazing.

Meatballs turn simple ground meat into a special treat. They’re perfect for families wanting easy and yummy meals.

Classic Italian Style Meatballs

Try this classic Italian meatball recipe for a healthy dinner:

  • Mix ground turkey and beef in equal parts
  • Add fresh parsley and grated Parmesan cheese
  • Include minced garlic for extra flavor
  • Use breadcrumbs for binding

Spicy Asian-Inspired Meatball Variation

Add an Asian twist to your meals with these meatballs:

  • Incorporate ginger and soy sauce
  • Add red pepper flakes for heat
  • Mix in green onions for freshness
  • Garnish with sesame seeds

Pro Tips for Perfect Meatballs

TechniqueBenefit
Soak breadcrumbs in milkEnsures moisture and tenderness
Use grated vegetablesAdds extra moisture and nutrition
Don’t overmixPrevents tough texture
Use gentle rolling techniqueCreates uniform meatballs

Pro tip: Always use a meat thermometer to ensure your meatballs reach a safe internal temperature of 165°F.

Flavorful Turkey and Beef Stir-Fry Recipes

Stir-frying is a great way to make quick, healthy meals. It uses lean turkey and beef with fresh veggies. This mix is full of flavor and good for you.

Stir-frying is quick and easy. It cooks food fast, keeping nutrients in. You get tasty, healthy meals in no time.

Quick Veggie Stir-Fry Basics

Start with the right ingredients for a great stir-fry. Pick lean meats and colorful veggies. This combo makes a meal that’s both tasty and nutritious.

  • Choose lean ground turkey or beef as your protein base
  • Select colorful vegetables for maximum nutrition
  • Use minimal oil for a healthier cooking method
  • Experiment with different seasonings

Orange-Ginger Beef and Turkey Stir-Fry

This recipe mixes beef and turkey with a zesty sauce. It makes low carb dinners fun and tasty.

IngredientQuantityNutritional Benefit
Ground Turkey1/2 poundLean protein
Ground Beef1/2 poundRich in iron
Fresh Ginger2 tablespoonsAnti-inflammatory
Orange Zest1 tablespoonVitamin C boost

“Stir-frying is not just cooking, it’s an art of creating quick and nutritious meals in minutes!” – Professional Chef

By mixing turkey and beef, you get a meal that’s filling and energizing. These stir-fry recipes show that healthy food can be easy and yummy.

Wholesome Turkey and Ground Beef Casseroles

Casseroles are the ultimate comfort food for healthy dinners. They mix convenience with great taste, perfect for busy homes. They pack many food groups into one meal that everyone enjoys.

Making a tasty casserole means choosing the right ingredients and cooking smart. You aim to make meals that are both healthy and delicious.

Comforting Cheesy Casserole

This cheesy casserole makes traditional comfort food healthier. Using lean turkey and beef cuts down on fat but keeps the flavor strong.

  • Select low-fat cheese varieties
  • Include colorful vegetables for nutrition
  • Use whole grain pasta or quinoa as a base

Layered Vegetable Medley Casserole

This casserole is packed with veggies and protein from ground meats. It helps you make balanced meals that are good for your family’s health.

IngredientNutritional BenefitQuantity
Ground TurkeyLean Protein1 lb
Ground BeefIron and Zinc1/2 lb
Mixed VegetablesVitamins and Fiber3 cups

Pro tip: Prep these casseroles ahead of time and store them in the fridge or freezer. Your family will love having quick, healthy dinners ready to go.

Satisfying Turkey and Beef Burgers

Burger lovers rejoice! You don’t have to give up flavor when you choose protein-packed meals. These turkey and beef burger recipes are tasty and keep your nutrition goals in check.

Making the perfect burger is all about creativity and smart choices. Mixing ground turkey and beef creates burgers that are both healthy and delicious.

Healthy Black Bean Turkey Burgers

Black beans make turkey burgers a nutrient-rich treat. These burgers are full of good stuff and are lean:

  • High protein content from ground turkey
  • Fiber-rich black beans for added nutrition
  • Lower fat compared to traditional beef burgers
  • Versatile recipe adaptable to various dietary needs

Gourmet Beef & Turkey Burger Toppers

Take your burger to the next level with these gourmet toppings:

  1. Avocado slices for healthy fats
  2. Grilled portobello mushrooms
  3. Homemade herb-infused aioli
  4. Crispy caramelized onions

These low carb dinner ideas show that healthy eating can be tasty and fulfilling. Try different toppings to find your favorite burger!

Tasty Turkey and Ground Beef Tacos

Make your weeknight dinners exciting with these tasty meals. Turkey and ground beef tacos are a hit for healthy dinners that everyone will enjoy.

The Best Healthy Turkey Ground Beef Recipes

For the perfect taco, mix flavors and nutrition. Using turkey and ground beef makes a meal that’s full of protein and fun.

Zesty Taco Filling Secrets

Your taco filling can make or break a meal. Here’s a simple way to make a flavorful blend:

  • Use a 50/50 mix of lean ground turkey and ground beef
  • Season with cumin, chili powder, and smoked paprika
  • Add minced garlic and diced onions for depth of flavor
  • Cook until meat is fully browned and spices are fragrant

Fresh Toppings for the Ultimate Taco

Boost your healthy dinners with these fresh toppings. They add nutrition and crunch:

ToppingNutritional Benefit
Diced tomatoesRich in vitamin C
Shredded lettuceLow-calorie crunch
Homemade guacamoleHealthy fats and fiber
Greek yogurtProtein-packed sour cream alternative

Pro tip: Try lettuce cups instead of tortillas for a lighter meal. Your family will love these tacos without feeling too full.

Easy One-Pan Turkey and Ground Beef Meals

Busy home cooks love simple weeknight recipes. These meals are quick, nutritious, and easy to clean up. One-pan meals with turkey and ground beef are perfect for families.

These dishes make cooking easy and pack a protein punch. Mixing two lean meats means healthier, tastier meals for everyone.

Mediterranean One-Pan Bake

Enjoy the Mediterranean’s bright flavors with this easy dish. Your recipe will include:

  • Ground turkey and beef blend
  • Kalamata olives
  • Diced tomatoes
  • Crumbled feta cheese
  • Fresh herbs like oregano and parsley

This recipe is ready in 30 minutes. It’s perfect for families who want quick, healthy meals.

Southwestern Skillet Dish

Make dinner exciting with a Southwestern one-pan meal. It combines ground beef and turkey with bold flavors:

  • Black beans
  • Roasted corn
  • Bell peppers
  • Chili powder and cumin
  • Optional toppings like cilantro and lime

These meals can be tailored to your liking. They offer a delicious, stress-free cooking experience.

Hearty Turkey and Ground Beef Soups

Soup lovers rejoice! Finding healthy turkey ground beef recipes is now easy. These dishes turn ordinary soup into a balanced meal that’s both filling and good for you.

Making soups with turkey and ground beef is great for those who want nutritious meals. The mix of proteins adds important nutrients and keeps your meals tasty.

Balanced Tomato Soup with Protein Boost

Make classic tomato soup better by adding lean ground turkey and beef. This version makes a comforting dish more filling and nutritious.

  • Lean ground turkey (90% lean)
  • Extra-lean ground beef
  • Fresh tomatoes
  • Herbs and spices

“A great soup is like a warm hug for your body and soul” – Chef Maria Rodriguez

Flavorful Protein-Packed Chili Recipe

Turn your chili recipe into a nutritional powerhouse by mixing ground turkey and beef. This way, you get a meal that’s both tasty and healthy.

  • Mix ground turkey and beef for optimal flavor
  • Add beans for extra protein and fiber
  • Include colorful vegetables
  • Experiment with spice levels

Pro tip: Make big batches of these healthy recipes. It makes meal prep easier and keeps you ready with a nutritious meal.

Creative Salads with Turkey and Ground Beef

Salads are more than just rabbit food. Turn your low carb dinner ideas into protein-packed meals that are both satisfying and nutritious. These delicious and nutritious ground meat recipes will change how you see salads. They turn them into hearty main courses that keep you full and energized.

Making salads with lean proteins like turkey and ground beef is a great way to enjoy a balanced meal. These ingredients add a lot of nutrition and amazing flavor to your meals.

Protein-Packed Taco Salad

Your taco salad can be a nutritional powerhouse with the right ingredients. Start with crisp romaine lettuce. Then mix in seasoned ground turkey and beef.

  • Lean ground turkey: Low in fat, high in protein
  • Seasoned ground beef: Adds rich flavor
  • Fresh vegetables: Tomatoes, bell peppers, onions
  • Homemade light dressing: Yogurt-based for fewer calories

Fresh Mediterranean Turkey Salad

Mediterranean-inspired salads offer a vibrant approach to low carb dinner ideas. Mix ground turkey with fresh ingredients for a meal that’s both light and satisfying.

IngredientNutritional Benefit
Ground TurkeyHigh protein, low fat
CucumberHydrating, low calorie
TomatoesRich in antioxidants
OlivesHealthy fats

Try out these salad recipes to keep your meals exciting and nutritious. Prep ingredients ahead of time to make weeknight dinners easy.

Mouthwatering Turkey and Beef Pasta Dishes

Make your healthy family dinners more exciting with protein-rich meals. Ground turkey and beef are great for pasta dishes. They make meals that are both tasty and good for you.

Pasta nights can be fun and healthy with lean proteins. Ground turkey and beef turn simple pasta into a meal the whole family will enjoy.

Spinach and Turkey Pasta Bake

Make a delicious casserole with lean ingredients and great taste. This dinner is packed with nutrients and flavor:

  • Whole grain pasta
  • Lean ground turkey
  • Fresh spinach
  • Low-fat cheese blend

Beefy Stuffed Shells with Turkey

Take your pasta night to the next level with a protein-packed dish. These stuffed shells are a creative twist on classic recipes:

IngredientNutritional Benefit
Ground TurkeyLean protein source
Ground BeefRich in iron and zinc
Low-fat RicottaCalcium and protein
Mixed VegetablesAdded nutrients and fiber

Pro tip: Make these dishes ahead of time for quick dinners on busy days. Just refrigerate or freeze, then reheat when you’re ready.

Meal Prep Ideas Featuring Turkey and Ground Beef

Make your kitchen routine easier with meal prep recipes using turkey and ground beef. Spend a few hours on the weekend to prepare delicious meals. This way, you’ll have healthy dinners ready to go on busy weeknights.

Batch cooking is key for quick weeknight meals. Cook big batches of taco fillings, meatballs, or stir-fry ingredients. Use good containers to keep food fresh and prevent freezer burn. Always label containers with the date and what’s inside.

Make-Ahead Recipes for Busy Weeks

Plan your meal prep to use up ground turkey and beef efficiently. Cook several dishes at once, like stuffed shells, burger patties, and casseroles. Then, portion them out into individual or family-sized containers. This way, you’ll have a variety of healthy meals all week without daily cooking stress.

Freezing Tips and Storage Solutions

Freezing food right is important to keep it tasting good. Cool dishes down before freezing and remove air to avoid freezer burn. Most turkey and beef dishes can be frozen for 2-3 months. Always reheat to 165°F to ensure food is safe and tastes great.

FAQ

Why combine turkey and ground beef in recipes?

Mixing turkey and ground beef makes meals balanced and nutritious. Turkey adds lean protein, while beef brings rich flavor. This combo reduces fat but keeps dishes tasty and satisfying.

Are these recipes suitable for meal prep?

Yes! These recipes are great for meal prep. You can make meatballs, casseroles, and taco fillings ahead. Store them in containers in the fridge or freezer for easy, healthy meals all week.

How can I make these recipes lower in calories?

To cut calories, choose lean ground beef and turkey breast. Add veggies, use herbs for flavor, and bake or grill instead of fry. This makes dishes healthier and lighter.

Can I substitute ingredients in these recipes?

Absolutely! These recipes are flexible. Swap veggies, change spices, or use different ingredients for dietary needs or taste. Try lettuce wraps or almond flour for low-carb options.

Are these recipes good for weight management?

Yes, these recipes are healthy and support weight management. They use lean meats, veggies, and control portions. This makes meals nutritious and satisfying.

How long can I store these prepared meals?

Store meals in the fridge for 3-4 days or freeze for up to 3 months. Use airtight containers and cool food well before storing. This keeps food safe and fresh.

Are these recipes kid-friendly?

Many recipes are family-friendly. Kids love meatballs, tacos, and pasta bakes. You can adjust spice levels and involve kids in cooking to make meals fun.

What if I have dietary restrictions?

These recipes can be adapted for different diets. Use gluten-free breadcrumbs for gluten-free diets or low-carb ingredients for low-carb diets. Always check with a nutritionist for specific advice.

Can vegetarians enjoy these recipes?

While these recipes focus on meat, vegetarians can use plant-based alternatives. Try Beyond Meat or Impossible Burger. You can also adjust cooking methods and flavors for vegetarian tastes.

How can I add more vegetables to these recipes?

Increase veggies by adding them to meatballs or mixing into patties. Use veggie noodles instead of pasta or make big salads with meat as toppings. This boosts nutrition and flavor.

0 comments
0 FacebookTwitterPinterestEmail
Shrimp Recipes

Nutritious Shrimp Recipe: Easy 4 Dinner

by IDYA
Shrimp Recipes

Nutritious Shrimp Recipe: Easy 4 Dinner

Serves: 4 Prep Time: Cooking Time:
Nutrition facts: 250 calories 8 grams fat
Rating: 5.0/5
( 1 voted )

Ingredients

  • 1 pound large shrimp, peeled and deveined",
  • "2 tablespoons olive oil",
  • "3 cloves garlic, minced",
  • "1/2 teaspoon paprika",
  • "1/2 teaspoon chili flakes",
  • "1 tablespoon fresh lemon juice",
  • "1 tablespoon chopped fresh parsley",
  • "Salt and pepper to taste

Instructions

Heat the olive oil in a large skillet over medium-high heat. Add the minced garlic to the skillet and sauté for 1-2 minutes until fragrant. Add the shrimp to the skillet, sprinkle with paprika and chili flakes, and cook for 3-4 minutes until the shrimp turn pink and opaque. Season with salt and pepper to taste. Drizzle with fresh lemon juice and sprinkle with chopped parsley before serving. Serve with a side of roasted vegetables or over a bed of quinoa for a complete meal.

Notes

For extra flavor, consider adding a dash of white wine to the pan while cooking the shrimp, or pair with a garlic butter sauce. You can also substitute shrimp with chicken for a variation of the recipe.

Are you tired of boring weeknight meals? Do you feel uninspired and unsatisfied? What if shrimp could change your healthy cooking game?

Healthy shrimp meals are here to spice up your dinner routine. They’re packed with lean protein and nutrients. You can enjoy them in under 30 minutes.

Nutritious shrimp recipes are perfect for quick, tasty meals. They’re easy to make and don’t sacrifice health. Try zesty stir-fries or light salads for a delicious, healthy dinner.

Key Takeaways

  • Shrimp provides high-protein, low-calorie meal options
  • Cooking shrimp takes minimal time and effort
  • Versatile protein suitable for multiple cuisines
  • Rich in essential nutrients like omega-3 fatty acids
  • Easy to incorporate into various meal styles

Introduction to Healthy Shrimp Recipes

Exploring easy healthy shrimp dishes is a tasty way to eat well. Shrimp is a top pick for those who follow clean eating. It’s a great mix of flavor and health benefits.

Benefits of Including Shrimp in Your Diet

Shrimp is a nutritional powerhouse. It’s a key ingredient in heart-healthy recipes. Here’s why it’s so good for you:

  • High-quality protein with few calories
  • Full of omega-3 fatty acids
  • Good for your heart
  • Helps with metabolism and muscle growth

Nutritional Profile of Shrimp

Shrimp is a nutritional superstar. Let’s look at what’s in a 3-ounce serving:

NutrientAmount
Calories84
Protein20g
Fat1g
Selenium48% Daily Value

Quick Cooking Tips for Shrimp

Cooking shrimp is easy. Quick cooking methods make them a fast, healthy meal. Cook for 2-3 minutes on each side. Look for a pink color and slight curl to know they’re done.

“Shrimp: Small in size, massive in nutrition!” – Culinary Nutritionists

Classic Shrimp Stir-Fry Recipes

Looking for quick and healthy shrimp meals? Stir-fry recipes are perfect for busy cooks. They mix lean protein with fresh veggies for a tasty, nutritious meal in minutes.

Stir-frying is great for keeping nutrients in your shrimp dishes. It uses high heat and little oil. This makes it quick and easy for weeknight dinners.

Vegetable-Packed Shrimp Stir-Fry

This colorful stir-fry turns simple ingredients into a healthy feast. Here’s what you need:

  • 1 pound fresh shrimp, peeled and deveined
  • Mixed vegetables (bell peppers, broccoli, carrots)
  • Garlic and ginger for flavor
  • Low-sodium soy sauce
  • Olive oil for light cooking

“Eating healthy doesn’t mean sacrificing taste – it’s about making smart, delicious choices!” – Nutrition Expert

Thai Basil Shrimp Stir-Fry

Experience a flavorful journey with this Thai-inspired dish. Fresh basil leaves and lime juice make ordinary shrimp into a special meal.

  • Ingredients highlight lean protein
  • Rich in antioxidants from fresh herbs
  • Minimal cooking time (under 15 minutes)
  • Perfectly balanced flavor profile

These recipes show that healthy shrimp meals can be exciting and satisfying. Try these methods to make your own healthy shrimp dishes that will wow your family and support your health goals.

Light and Fresh Shrimp Salads

Exploring nutritious shrimp recipes is a joy. These vibrant salads are light and healthy. They’re great for those who want tasty, nourishing meals.

Shrimp salads are a great way to get protein without feeling heavy. They turn simple ingredients into delicious dishes that excite your taste buds.

Shrimp Avocado Salad

This salad is a creamy, zesty mix of shrimp and avocado. It’s packed with healthy fats and protein.

  • Fresh jumbo shrimp
  • Ripe avocado
  • Mixed greens
  • Cilantro
  • Lime dressing

Mediterranean Shrimp Quinoa Salad

This salad takes you to the Mediterranean. It’s filled with whole grains and colorful veggies.

IngredientNutrition
QuinoaComplete protein
ShrimpLow-calorie protein
CucumberHydrating
Feta cheeseCalcium source

Citrus Shrimp Salad

This salad is bright, zingy, and refreshing. Oranges and grapefruits add a tangy twist to the shrimp.

Pro tip: Always choose fresh, wild-caught shrimp for the best flavor and nutritional value.

Each salad can be made in under 20 minutes. They’re perfect for busy days or quick lunches. Try these recipes to find your favorite shrimp dish!

Easy Shrimp Pasta Dishes

Pasta lovers rejoice! Shrimp pasta dishes are both tasty and healthy. They turn classic comfort food into nutritious meals that meet your health goals.

When making healthy shrimp meals, choose smart ingredients. Use whole grain pasta for more fiber and nutrients. Shrimp adds lean protein and essential nutrients without too many calories.

Lemon Garlic Shrimp Spaghetti

This vibrant shrimp recipe healthy option brings bright flavors to your dinner table. Here’s a quick breakdown of ingredients:

  • Whole wheat spaghetti
  • Fresh shrimp
  • Minced garlic
  • Fresh lemon juice
  • Extra virgin olive oil
  • Fresh parsley

Cooking tip: Use minimal oil and maximize flavor with herbs and citrus. Sauté shrimp quickly to preserve nutrients and prevent overcooking.

Shrimp and Spinach Pesto Pasta

Transform traditional pesto into a nutrient-packed meal by incorporating fresh spinach. This recipe brings together protein-rich shrimp and antioxidant-loaded greens for a truly balanced dish.

  • Whole grain pasta
  • Fresh shrimp
  • Baby spinach
  • Homemade basil pesto
  • Pine nuts
  • Parmesan cheese (optional)

Pro tip: Blend spinach directly into your pesto for an extra nutritional boost. This simple trick increases vegetable intake without sacrificing flavor.

Flavorful Shrimp Tacos

Make your weeknight dinners exciting with nutritious shrimp recipes. Shrimp tacos are a tasty way to enjoy healthy meals that are easy to make.

These healthy shrimp recipes mix lean protein with fresh ingredients. Tacos let you try new flavors while staying healthy.

Spicy Shrimp Tacos with Cabbage Slaw

Make a dish that’s both tasty and healthy:

  • Marinate shrimp in chili powder and lime juice
  • Prepare a crisp cabbage slaw with fresh herbs
  • Use corn tortillas for a lighter base

“Spice up your meal with these protein-packed tacos that deliver maximum flavor with minimal calories!” – Nutrition Expert

Tropical Shrimp Tacos with Pineapple Salsa

Add a tropical twist to your shrimp tacos:

  • Grill shrimp for a smoky flavor
  • Create a fresh pineapple salsa
  • Garnish with cilantro and lime

Pro tip: Choose wild-caught shrimp for the best flavor and nutritional profile in your light and healthy shrimp dishes.

Health-Conscious Shrimp Skewers

Grilling shrimp skewers is a great way to enjoy tasty and healthy meals. These recipes are perfect for those who want to eat well without much effort.

Grilling is a great method for cooking shrimp without extra fat. It keeps the natural flavors of the shrimp and veggies intact.

Grilled Garlic Shrimp Skewers

Make your dinner special with these easy and delicious skewers:

  • Choose large, deveined shrimp
  • Marinate in minced garlic, olive oil, and herbs
  • Grill for 2-3 minutes per side
  • Garnish with fresh parsley

Lemon Herb Shrimp Skewers with Vegetables

Make a colorful and healthy meal with these vibrant skewers:

  • Mix shrimp with zucchini, bell peppers, and red onions
  • Season with lemon zest, thyme, and rosemary
  • Brush lightly with extra virgin olive oil
  • Grill until vegetables are tender and shrimp are pink

Pro tip: Soak wooden skewers in water for 30 minutes before grilling to prevent burning. Your healthy shrimp skewers will be a crowd-pleaser that supports your wellness goals!

Hearty Shrimp Soups and Stews

Warm up your weeknight dinners with delicious and heart-healthy shrimp recipes. These recipes turn simple ingredients into comforting meals. Soups are great for enjoying protein-packed shrimp with lots of veggies and wholesome ingredients.

When making nutritious shrimp recipes, soup is a great choice. Shrimp adds lean protein and important nutrients. This makes these recipes perfect for health-conscious cooks who want to try new dishes.

Shrimp and Tomato Basil Soup

This soup is light and refreshing. It combines the taste of fresh tomatoes with tender shrimp. The main ingredients are:

  • Fresh ripe tomatoes
  • Tender shrimp
  • Fresh basil leaves
  • Low-sodium vegetable broth
  • Garlic and onions

This recipe is quick and packed with nutrients. It’s a great choice for busy families. It’s a heart-healthy shrimp recipe that’s ready in under 30 minutes.

Shrimp Chowder with Corn

If you want something more filling, try this corn-infused chowder. It’s creamy without too many calories. The key ingredients are:

  • Fresh corn kernels
  • Lean shrimp
  • Cauliflower for added creaminess
  • Herbs for enhanced flavor
  • Reduced-fat milk

Using lighter alternatives instead of heavy cream makes it rich and satisfying. This shows how healthy shrimp dishes can be tasty and balanced.

Shrimp Cooking Methods for Healthy Meals

Learning to cook shrimp healthily is easy with the right techniques. Clean eating shrimp recipes focus on preserving nutrients and flavor. To make light and healthy shrimp dishes, it’s key to know how to cook them well.

Cooking shrimp needs care to keep its texture and nutrients intact. Different methods can make your shrimp recipes stand out.

Grilling Shrimp to Perfection

Grilling is a great way to make healthy shrimp dishes with little fat. Here’s how to grill shrimp right:

  • Preheat grill to medium-high heat
  • Use metal or soaked wooden skewers
  • Marinate shrimp in herbs for extra flavor
  • Cook 2-3 minutes per side until pink

Baking Shrimp for a Healthy Twist

Baking is a low-fat way to cook shrimp. Minimal seasoning can maximize natural flavors.

  • Preheat oven to 400°F
  • Line baking sheet with parchment paper
  • Season with lemon, garlic, and herbs
  • Bake 6-8 minutes until opaque

Sautéing Shrimp with Minimal Oil

Sautéing is quick and keeps fat content low. Here’s how to sauté shrimp for tasty, light meals:

  • Choose a non-stick pan
  • Use just 1 teaspoon of olive oil
  • Cook on high heat for 2-3 minutes
  • Season with fresh herbs

Learning these cooking methods will help you make nutritious, tasty shrimp dishes. They support your healthy eating goals.

Shrimp Meal Prep Ideas

Turning easy healthy shrimp dishes into meal prep can change your cooking routine. You don’t need to spend a lot of time or effort. With the right prep, you can enjoy healthy shrimp meals all week while saving time and keeping your diet balanced.

Smart Make-Ahead Shrimp Dish Strategies

When you prep shrimp dishes ahead, planning and storage are key. Here are some tips for your shrimp recipes:

  • Cook shrimp slightly under your usual doneness to prevent overcooking during reheating
  • Separate wet and dry ingredients to maintain texture
  • Use airtight containers for maximum freshness
  • Label containers with preparation and expected consumption dates

Safe Storage and Reheating Techniques

Storing your shrimp meals right is important for their quality and safety. Follow these tips to keep your dishes tasty and healthy:

  1. Refrigerate cooked shrimp within two hours of preparation
  2. Store in shallow containers to promote quick cooling
  3. Consume refrigerated shrimp within 3-4 days
  4. Reheat only once and ensure internal temperature reaches 165°F

By using these meal prep tips, you can enjoy nutritious shrimp dishes easily. Try different marinades and cooking ways to make your meals fun and tasty.

Conclusion: Enjoying Healthy Shrimp Recipes

Your journey through nutritious shrimp recipes doesn’t have to end here. Exploring delicious and healthy shrimp meals can change your weeknight dinner routine. These meals offer both flavor and nutrition in every bite.

Shrimp recipes are simple and adaptable. You can grill, sauté, or bake them easily. By trying different seasonings, vegetables, and cooking methods, you’ll find healthy eating exciting and easy.

Encouragement to Experiment with Shrimp

Don’t be afraid to get creative in your kitchen. Each recipe is a chance to improve your cooking skills and nourish your body. Shrimp can make your meals better with little effort and lots of taste.

Recap of Nutritional Benefits and Meal Ideas

Shrimp is packed with protein, omega-3 fatty acids, and minerals. Adding these recipes to your weekly menu is a smart health choice. Start small, trust your instincts, and see how shrimp recipes can change your cooking.

FAQ

Are shrimp actually healthy to eat?

Yes, shrimp are very healthy. They are low in calories and rich in nutrients like omega-3 fatty acids and vitamin B12. They offer many health benefits and are great for many recipes.

How often can I include shrimp in my diet?

You can eat shrimp 2-3 times a week. They are good for your heart and help with weight control. They are also packed with nutrients.

What is the healthiest way to cook shrimp?

Grilling, baking, and sautéing with little oil are best. These methods keep nutrients in and fat out. Use herbs and spices instead of heavy sauces for more nutrition.

How can I ensure my shrimp is cooked safely?

Cook shrimp until they are opaque and reach 145°F. They cook quickly, in 2-3 minutes. They should be pink and firm. Buy from trusted sources and store right to avoid illness.

Are frozen shrimp as nutritious as fresh?

Yes, frozen shrimp are as good as fresh. They are frozen quickly after catching, keeping nutrients and flavor. Just thaw them in the fridge before cooking.

Can shrimp help with weight loss?

Shrimp are great for losing weight. They have few calories and lots of protein. They make you feel full and give you important nutrients. Eat them with veggies and whole grains for a healthy meal.

What are some heart-healthy shrimp recipes?

Try grilled shrimp skewers, shrimp and veggie stir-fries, Mediterranean salads, and baked shrimp with little oil. These recipes are lean, full of veggies, and cooked healthily.

How do I prevent overcooking shrimp?

Look for color and shape changes. Shrimp turn pink and curl when done. Cook for 2-3 minutes and stop heat right away. Overcooked shrimp are tough and lose flavor.

Are there any concerns about shrimp cholesterol?

Shrimp have a lot of cholesterol, but it doesn’t raise blood cholesterol much. They have healthy fats and are low in saturated fat. They are a good protein choice in moderation.

What are good side dishes to serve with shrimp?

Serve shrimp with quinoa, brown rice, roasted veggies, green salads, or zucchini noodles. These sides add fiber and nutrients, making the meal balanced and healthy.

0 comments
0 FacebookTwitterPinterestEmail
Healthy Chicken Salad

Healthy Chicken Salad: Easy Meal

by IDYA

Healthy Chicken Salad Recipe

Are you tired of bland diet meals that leave you feeling unsatisfied? What if you could create a delicious healthy chicken salad recipe that’s both nutritious and incredibly tasty?

Creating the perfect easy chicken salad is more than just mixing ingredients. It’s an art that blends nutrition, flavor, and simplicity. Your journey to a mouthwatering meal starts right here.

A healthy chicken salad recipe is not just a meal. It’s a versatile solution that can change your eating habits. Whether you need a quick lunch, a protein-packed dinner, or a meal prep option, this recipe will be your favorite.

Key Takeaways

  • Discover a nutritious and delicious chicken salad recipe
  • Learn how to create an easy chicken salad in minutes
  • Understand the nutritional benefits of a well-prepared chicken salad
  • Explore versatile serving and preparation options
  • Master the art of balancing flavors and ingredients

Introduction to Healthy Chicken Salad

A homemade chicken salad can be a tasty and healthy meal. It turns simple ingredients into a flavor and health powerhouse. When made with care, it’s more than lunch. It’s a smart choice for those looking for a low calorie salad that tastes great.

What Makes a Chicken Salad Healthy?

Making a healthy chicken salad starts with picking the right ingredients. You need lean proteins, fresh veggies, and nutrient-rich parts that feed your body.

  • Lean protein from chicken breast
  • Fresh, crisp vegetables
  • Minimal processed ingredients
  • Balanced macronutrient profile

Benefits of Eating Chicken Salad

Eating this nutritious meal is good for your body. A well-made chicken salad has many health benefits. It’s more than just food.

Nutritional BenefitImpact on Health
High Protein ContentSupports muscle repair and growth
Low Calorie ProfileAssists in weight management
Rich in VitaminsBoosts immune system
Provides Healthy FatsPromotes heart health

Choosing a low calorie chicken salad doesn’t mean you have to give up taste. By using fresh ingredients and careful preparation, you can make a meal that’s both filling and full of nutrients.

Key Ingredients for a Healthy Chicken Salad

Making the best chicken salad recipe begins with picking top-notch, healthy ingredients. These ingredients should bring both taste and health benefits. With the right mix, your chicken salad can become a nutritional powerhouse.

Choosing the Right Chicken

For a healthy chicken salad, choose lean proteins for the best nutrition. Skinless chicken breast is a great choice. It offers:

  • High protein content
  • Low fat profile
  • Essential amino acids
  • Easy to digest

Fresh Vegetables to Include

Adding a variety of fresh veggies boosts your salad’s nutrition. Variety is key for a nutritious chicken salad. Here are some great options:

  1. Crisp celery for crunch
  2. Bell peppers for vitamin C
  3. Leafy greens for added nutrients
  4. Cucumber for hydration

Healthy Fats and Add-Ins

Enhance your chicken salad with healthy fats and nutrient-rich add-ins. Ingredients like avocado, nuts, and seeds make your dish stand out.

“Healthy fats are not just delicious – they’re essential for nutrient absorption and overall wellness.” – Nutrition Experts

Adding almonds, walnuts, or a bit of olive oil brings omega-3 fatty acids. This boosts your chicken salad’s nutritional value.

Types of Chicken Salad Recipes

Exploring different chicken salad recipes can make your meals exciting. A simple chicken salad can be many things, from tasty to healthy. It fits many tastes and diets.

Chicken salad is very flexible. You can try many new flavors and textures. It’s a fun way to explore cooking.

Classic Chicken Salad

The traditional chicken salad is always loved. It has:

  • Shredded chicken
  • Mayonnaise
  • Chopped celery
  • Diced onions
  • Salt and pepper

Mediterranean Chicken Salad

Try a Mediterranean twist on chicken salad. It includes:

  • Grilled chicken
  • Kalamata olives
  • Crumbled feta cheese
  • Diced cucumber
  • Olive oil and lemon dressing

Asian-Inspired Chicken Salad

For an Asian-style chicken salad, use these ingredients:

  • Shredded rotisserie chicken
  • Mandarin orange segments
  • Sliced almonds
  • Sesame seeds
  • Sesame oil dressing

These chicken salad styles offer something special. Whether you like the classic or global flavors, there’s a recipe for you.

Preparation Tips for Best Results

Making the perfect grilled chicken salad needs focus and smart cooking tricks. Whether it’s for lunch or dinner, knowing a few key steps can make your dish stand out.

How to Cook Chicken Perfectly

Cooking chicken for your salad is all about precision. Here’s how to get juicy, tasty meat:

  • Choose boneless, skinless chicken breasts for lean protein
  • Season with salt, pepper, and your favorite herbs
  • Grill at medium-high heat (around 375-400°F)
  • Cook until internal temperature reaches 165°F
  • Let chicken rest for 5-7 minutes before cutting

Chopping Vegetables: Best Practices

Right vegetable prep can make your chicken salad shine. Use sharp knives and keep your cuts even for a pro look.

VegetableCutting TechniqueRecommended Size
CeleryDiagonal slice1/4 inch pieces
CucumberUniform dice1/2 inch cubes
Red OnionFine mince1/8 inch pieces

Combining Flavors for Maximum Taste

For a tasty grilled chicken salad, balance your flavors. Mix tangy items like Greek yogurt or light mayonnaise with fresh herbs and spices. Add nuts for crunch or dried fruits for sweetness.

Pro tip: Always taste and adjust seasonings before serving your chicken salad!

Dressing Options for Healthy Chicken Salad

Making the perfect homemade chicken salad is all about the dressing. A good dressing can turn a simple salad into a feast. It keeps the dish healthy and tasty.

The right dressing adds flavor without adding too many calories. You want to boost the salad’s taste while keeping it healthy.

Homemade Dressing Recipes

Making your own dressings lets you control what goes in. Here are some easy, healthy recipes:

  • Greek Yogurt Dressing: It’s got protein and a tangy taste
  • Lemon-Herb Vinaigrette: It’s light and zesty
  • Avocado-based Creamy Dressing: It’s full of healthy fats

Healthier Store-Bought Dressings

When you’re short on time, choose store-bought dressings carefully. Look for ones with:

  1. Less than 50 calories per serving
  2. Minimal processed ingredients
  3. No added sugars

Brands like Primal Kitchen and Tessemae’s have clean, tasty dressings. They pair well with your homemade chicken salad.

Meal Prep with Chicken Salad

Preparing an easy chicken salad in advance can change your meal planning. It’s perfect for busy people who want to eat healthy but don’t have time to cook.

Storing your chicken salad right keeps it fresh and safe. The right way to store it helps keep its quality for days.

Smart Storage Strategies

  • Use airtight glass containers with secure lids
  • Store chicken salad in the refrigerator at 40°F or below
  • Consume within 3-5 days for optimal taste and safety

Ideal Meal Prep Containers

Choosing the right containers is key for meal prep. Here are some great options for your chicken salad:

Container TypeProsBest For
Glass ContainersNon-reactive, Easy to CleanHome Storage
Leak-Proof Plastic ContainersLightweight, PortableLunch Boxes
Compartment ContainersSeparate Ingredients, Prevent SogginessLong-Term Meal Prep

Pro tip: Separate wet and dry ingredients until ready to eat to maintain the perfect texture of your easy chicken salad. This simple step prevents soggy vegetables and keeps your meal fresh and crisp.

Serving Suggestions for Chicken Salad

Make your chicken salad stand out with creative serving ideas. A flavorful chicken salad can be exciting when served with imagination. Add thoughtful accompaniments to elevate it.

Don’t just serve your chicken salad on bread. Find new ways to present it. Impress your family and friends with these ideas.

Ideal Side Dishes

Choosing the right sides can make your meal unforgettable. Here are some great options:

  • Crisp mixed green salad
  • Roasted vegetable medley
  • Whole grain crackers
  • Fresh fruit slices
  • Quinoa or brown rice

Creative Serving Ideas

Try something different with your chicken salad. Here are some unique ways to serve it:

  1. Lettuce wraps for a low-carb option
  2. Stuffed avocado halves
  3. Cucumber boats
  4. Whole wheat pita pockets
  5. Served atop grilled portobello mushrooms

Try these ideas to keep your chicken salad interesting. Enjoy it at every meal.

Dietary Considerations

Making a healthy chicken salad that fits different diets is simple. You can avoid gluten, stick to a low-carb diet, or keep to a keto lifestyle. Enjoy a tasty and healthy chicken salad that matches your dietary needs.

Gluten-Free Chicken Salad Variations

Turning your chicken salad gluten-free is easy. Just make a few simple changes. Here’s how to make a gluten-free chicken salad:

  • Swap mayo for Greek yogurt or avocado dressing
  • Use gluten-free mustard instead of regular mustard
  • Forget the bread and serve on lettuce or gluten-free crackers
  • Always check labels for hidden gluten

Low-Carb and Keto-Friendly Options

Make your chicken salad low-carb by choosing high-protein, low-carb ingredients. Focus on adding lots of veggies and avoiding carbs.

  • Try cauliflower rice instead of regular grains
  • Add olive oil and nuts for extra fat
  • Use low-carb veggies like cucumber, celery, and bell peppers
  • Hard-boiled eggs add more protein

With these tips, you can make a chicken salad that’s good for any diet. It’s full of flavor and keeps you satisfied.

Enhancing Flavor and Nutrition

Making a tasty chicken salad is more than just mixing stuff. It’s about finding the right balance of taste and health. The best chicken salad recipe turns a simple dish into a feast for your senses and a boost for your health.

Herbs and Spices to Elevate Your Dish

Here are some herbs and spices to make your chicken salad pop:

  • Fresh basil for a bright, aromatic touch
  • Dried dill to add a tangy, garden-fresh flavor
  • Smoked paprika for depth and warmth
  • Cracked black pepper for a subtle kick

Crunchy Additions for Texture and Nutrition

Fruits and nuts can make your chicken salad amazing. They add a nice crunch and more nutrients:

  • Sliced almonds for protein and healthy fats
  • Diced green apples for crisp sweetness
  • Dried cranberries for a burst of antioxidants
  • Chopped walnuts for omega-3 fatty acids

Try these flavor boosters to make a chicken salad that’s both tasty and healthy. The best chicken salad is one that suits your taste and needs.

Chicken Salad for Special Occasions

Making your easy chicken salad perfect for special events is easy. It’s great for picnics or lunch at work or school. A simple chicken salad is always a good choice.

Perfect Dishes for Picnics

Picnics need food that’s easy to carry and tasty. Your simple chicken salad can be the hit of the party. Just follow these tips:

  • Pack chicken salad in sealed containers
  • Use ice packs to keep ingredients fresh
  • Bring separate bread or lettuce wraps
  • Choose ingredients that hold up well in transport

To make your chicken salad picnic-perfect, pick ingredients that stay fresh. Crisp vegetables and well-seasoned chicken make a big difference.

Chicken Salad in Lunchboxes

Making a great lunch is simple. Your chicken salad is perfect for school or work. Just pack it smartly and choose the right ingredients.

  • Use leak-proof containers
  • Keep dressing separate until serving
  • Include protein-rich ingredients
  • Add variety with different herbs and spices

With these tips, your chicken salad will impress at picnics and please in lunchboxes.

Common Mistakes to Avoid

Making a healthy chicken salad is more than just mixing ingredients. Many people make mistakes that add a lot of calories. Knowing these common errors can help you make a tasty and healthy chicken salad every time.

Creating a healthy chicken salad is not just about picking ingredients. It’s about choosing wisely to get the most nutrition and flavor.

Avoiding Overdressing Disaster

One big mistake in making a healthy chicken salad is using too much dressing. Too much dressing can make your meal very high in calories.

  • Measure dressing carefully
  • Use Greek yogurt as a lighter alternative
  • Consider vinegar-based dressings
  • Aim for light, flavorful coating

Ingredient Selection Matters

Choosing the right ingredients is key for a healthy chicken salad. Not all ingredients are the same.

AvoidChoose
Fatty mayonnaiseGreek yogurt
Processed chickenGrilled, lean chicken breast
CroutonsNuts or seeds

Your goal is to make a balanced, nutrient-rich meal that tastes good and is healthy. By avoiding these mistakes, you’ll make your chicken salad stand out.

“Healthy eating is about making smart choices, not restricting yourself.” – Nutrition Expert

Remember, a great nutritious chicken salad is all about balance, quality ingredients, and careful preparation.

Conclusion: Your Go-To Healthy Meal

Making the best chicken salad recipe is an art. It mixes nutrition, flavor, and creativity. Your journey to find healthy chicken salad recipes is just starting. Every ingredient and technique you learn brings you closer to a meal that’s good for you and tastes great.

Healthy chicken salad recipes are very flexible. You can change them to fit your taste, diet, and health goals. Whether it’s for lunch, a picnic, or dinner, chicken salad is always a good choice. Try new herbs and ingredients to find your favorite version.

The secret to a great chicken salad is using fresh ingredients and balanced flavors. Your kitchen is a place to be creative. Trust yourself and enjoy making a meal that’s healthy and delicious.

Encouragement to Experiment with Recipes

Don’t be scared to try new things. Explore different flavors and ingredients. Your perfect chicken salad is out there, waiting for you to find it.

Final Thoughts on Enjoying Healthy Chicken Salad

Healthy chicken salad is a mix of nutrition and pleasure. Use the best ingredients and stay open to new ideas. This way, you’ll make a simple dish into a special experience that’s good for you and fun to eat.

FAQ

What makes a chicken salad healthy?

A healthy chicken salad uses lean chicken breast and fresh veggies. It might have a little mayo or Greek yogurt instead. Adding herbs, nuts, and seeds makes it even better. The goal is to balance protein, veggies, and healthy fats while avoiding too much processed stuff.

How long can I store homemade chicken salad?

Homemade chicken salad stays fresh for 3-5 days in the fridge. Keep it in an airtight container and always chill it. Use clean utensils when serving to keep it fresh and prevent bacteria.

Can I make chicken salad if I’m following a specific diet?

Yes! Chicken salad is super flexible. For gluten-free, use gluten-free mayo or yogurt. Skip the bread for low-carb or keto diets and serve in lettuce wraps. Paleo followers can use compliant ingredients, and vegetarians can try tofu or chickpeas instead of chicken.

What are the best proteins to use for chicken salad?

Boneless, skinless chicken breast is the best choice for its lean protein. Grilled or poached chicken is best to avoid extra oils. Rotisserie chicken is convenient, just remove the skin to keep it lean.

How can I add more flavor to my chicken salad without adding calories?

Use fresh herbs like basil, cilantro, or dill for flavor. Add spices like paprika or cumin, or citrus zest. Vinegar-based dressings and chopped pickles or capers can also add flavor without many calories.

Is chicken salad good for meal prep?

Chicken salad is perfect for meal prep. You can make it ahead and store it in containers for up to 5 days. Keep the dressing separate to keep it fresh. Use quality containers to keep it fresh and prevent spills.

How can I make a low-calorie chicken salad?

Use Greek yogurt instead of mayonnaise and add more veggies. Add plenty of fresh herbs and control your portions. Choose grilled chicken breast and limit added fats. Focus on flavor from herbs, spices, and fresh ingredients, not from dressings.

What are some creative ways to serve chicken salad?

Try chicken salad in lettuce wraps, stuffed in bell peppers, or on whole-grain crackers. You can also top mixed greens or use it as a sandwich filling. It’s great in grain bowls or as a topping for cucumber boats.

0 comments
0 FacebookTwitterPinterestEmail
Chocolate Martini Recipe

Chocolate Martini Recipe 4 Your Cocktail Party

Serves: 1 Prep Time: Cooking Time:
Nutrition facts: 350 calories 18 grams fat
Rating: 5.0/5
( 1 voted )

Ingredients

  • 2 oz vodka
  • 1 oz chocolate liqueur
  • 1 oz heavy cream
  • 1/2 oz simple syrup
  • Chocolate shavings or cocoa powder for garnish
  • Ice cubes

Instructions

Fill a cocktail shaker with ice cubes. Pour vodka, chocolate liqueur, heavy cream, and simple syrup into the shaker. Shake vigorously for about 10-15 seconds until chilled and well mixed. Strain the mixture into a chilled martini glass. Garnish with chocolate shavings or a dusting of cocoa powder. Serve immediately and enjoy your decadent Chocolate Martini!

Notes

For an extra chocolatey flavor, use a higher-quality chocolate liqueur. You can adjust the sweetness by varying the amount of simple syrup used.

Ever wondered how to make an ordinary evening special? What if one chocolate martini recipe could make your party unforgettable?

The chocolate martini is more than a drink. It’s a mix of luxury and skill that makes any party special. This recipe combines rich tastes with beautiful presentation, perfect for any event.

Whether you’re an expert mixologist or just starting, learning this recipe opens up new flavors. Get ready to wow your guests with a drink that’s both rich and impressive.

Key Takeaways

  • Learn a foolproof chocolate martini recipe
  • Discover professional mixology techniques
  • Impress guests with a sophisticated cocktail
  • Understand flavor balancing in cocktails
  • Create restaurant-quality drinks at home

What Is a Chocolate Martini?

A chocolate martini is a rich cocktail that turns the classic martini into a sweet treat. It mixes the elegance of a martini with the deep taste of chocolate. It’s perfect for anyone who loves cocktails or chocolate.

This drink has become a favorite at parties. It combines vodka’s boldness with chocolate liqueurs’ sweetness. This makes it a drink that everyone remembers.

A Brief History of the Cocktail

The chocolate martini started in the late 20th century. Bartenders were trying new things with cocktails back then. By the 1990s, chocolate martini ingredients were all over fancy bars and trendy spots.

  • Originated in sophisticated urban cocktail bars
  • Gained popularity in the late 1990s and early 2000s
  • Evolved from classic martini recipes

Key Ingredients in a Chocolate Martini

Making a great chocolate vodka martini needs the right ingredients. The main ones are:

  1. Vodka – choose a smooth, top-notch brand
  2. Chocolate liqueur – gives it a rich chocolate taste
  3. Crème de cacao – adds more chocolate flavor
  4. Optional cream or milk – makes it creamier

The secret to a chocolate martini is balancing sweet and strong flavors. Each part is important for a drink that will wow your guests and excite your taste buds.

Essential Ingredients for Your Recipe

Making the perfect gourmet chocolate martini starts with choosing top-notch ingredients. The right mix of spirits and mixers can turn a simple drink into a special treat.

Types of Vodka to Use

Your vodka choice is key to a great chocolate martini. Here are some options:

  • Premium Vodka: Smooth, clean-tasting vodkas like Grey Goose or Belvedere work best
  • Flavored Vodka: Vanilla or caramel-infused vodkas can add depth to your cocktail
  • Craft Vodkas: Local distilleries often produce unique spirits perfect for a gourmet chocolate martini

Chocolate Liqueurs: A Guide

Choosing the right chocolate liqueur is vital for a true chocolate martini experience. Here are some top picks:

  • Godiva Chocolate Liqueur – rich and creamy
  • Baileys Chocolate Luxe – smooth with intense chocolate flavor
  • Creme de Cacao – classic choice with traditional chocolate notes

Optional Ingredients to Enhance Flavor

Take your chocolate martini to the next level with these creative additions:

  • Dark chocolate shavings
  • Espresso powder
  • Kahlúa for extra depth
  • Chocolate syrup for rimming the glass

Try out these ingredients to find your ideal gourmet chocolate martini recipe.

Step-by-Step Instructions

Making a perfect chocolate martini needs care and love. This guide will show you how to make a delicious chocolate martini. It will wow your guests and excite your taste buds.

Chilling Your Glasses: The Foundation of a Great Drink

Start with chilled glassware for a great chocolate martini. Put your martini glasses in the freezer for 15 minutes before serving. This step keeps your martini cool and refreshing from start to finish.

  • Use stemmed martini glasses for best results
  • Aim for a frosted appearance
  • Remove glasses just before mixing your drink

Mixing Ingredients with Precision

Your chocolate martini recipe needs careful mixing. Get top-notch vodka, chocolate liqueur, and crème de cacao. Mix these in a cocktail shaker filled with ice until well combined.

  1. Fill shaker 2/3 full with ice
  2. Pour ingredients in measured proportions
  3. Shake vigorously for 10-15 seconds

Mastering the Chocolate Martini Garnish

A great garnish makes your martini stand out. Try these ideas for a stunning look:

  • Chocolate shavings around glass rim
  • Fresh raspberries on a cocktail pick
  • Cocoa powder dusting
  • Chocolate curls as a elegant topper

Pro tip: The right chocolate martini garnish can transform your drink into a true conversation piece!

Variations on the Classic Chocolate Martini

Explore exciting variations to elevate your gourmet chocolate martini experience. These unique twists will turn your chocolate dessert martini into a culinary adventure. Whether you’re a chocolate lover or want to impress guests, these options are perfect.

White Chocolate Martini: A Creamy Delight

The white chocolate martini is a luxurious and smooth alternative. To make this decadent drink, use:

  • White chocolate liqueur instead of dark chocolate
  • Add a splash of cream for extra richness
  • Garnish with white chocolate shavings

“White chocolate brings a delicate sweetness that transforms the traditional chocolate martini into a sophisticated treat.” – Cocktail Experts

Dark Chocolate Twist: Intense and Bold

The dark chocolate martini offers a deep, rich flavor. Key elements include:

  • Using high-percentage dark chocolate
  • Incorporating dark chocolate liqueur
  • Add a hint of espresso for complexity

Vegan Chocolate Martini Options

Dietary restrictions shouldn’t stop anyone from enjoying a chocolate dessert martini. Vegan alternatives can be made by:

  • Substituting dairy cream with coconut or almond milk
  • Using vegan chocolate liqueurs
  • Selecting plant-based vodka brands

Each variation adds its own unique character to the gourmet chocolate martini. This ensures there’s a perfect version for every palate and preference.

Tips for Perfecting Your Chocolate Martini

Making the perfect chocolate martini is more than just mixing ingredients. It’s an art that needs precision, quality, and creativity. You must approach your chocolate cocktail recipe with care.

To make a memorable chocolate martini, you need to understand chocolate and flavors. Your aim is to turn a simple drink into a special cocktail experience.

Choosing the Right Chocolate

Choosing high-quality chocolate is key for a great gourmet chocolate martini. Keep these tips in mind:

  • Use premium chocolate with at least 60% cocoa content
  • Try single-origin chocolates for unique tastes
  • Avoid sweet milk chocolate

Balancing Flavors: Sweet vs. Bitter

The secret to a perfect chocolate martini is finding the right flavor balance. Bitter dark chocolate can be balanced with sweet liqueur, making a perfect taste.

Experimenting with Additional Flavors

Don’t be shy to try new flavors in your chocolate martini:

  • Add a hint of sea salt for depth
  • Infuse with espresso for a mocha twist
  • Try spices like cinnamon or cayenne

Your chocolate martini should show your taste and creativity. Every small change can make a big difference. It can turn an ordinary drink into a showstopper that wows your guests.

Serving Suggestions for Your Cocktail Party

To make your chocolate martini a hit, think about how you present it. A well-presented chocolate dessert martini can be the highlight of your party.

Ideal Glassware Selection

The right glass can make your martini stand out. Choose V-shaped martini glasses for their elegance. Chilled glasses add an instant wow factor:

  • Frosted martini glasses for a sophisticated touch
  • Clear crystal glasses to highlight the cocktail’s color
  • Stemmed glasses that prevent hand warming

Perfect Food Pairings

Pair your martini with the right appetizers and desserts. Flavor harmony is crucial for a memorable taste experience:

  • Dark chocolate truffles
  • Salted caramel bites
  • Fresh strawberries
  • Raspberry cheesecake squares

Creative Presentation Techniques

Make your martini a visual delight with creative serving ideas. Here are some exciting ways to present your drink:

  1. Rim glasses with cocoa powder or crushed chocolate
  2. Create chocolate garnish art on glass edges
  3. Use mini chocolate spoons as unique stirrers
  4. Offer personalized cocktail garnish stations

Your guests will love the extra effort you put into making the drink special.

Hosting a Successful Cocktail Party

Planning a perfect cocktail party is more than just mixing drinks. You want to create an unforgettable experience for your guests. A well-made chocolate martini can be the highlight of the evening.

Creating the right atmosphere is key for a memorable party. Your space should be inviting and comfortable. Use strategic lighting and background music to encourage conversation.

Essential Bar Tools for Your Chocolate Martini Night

Having the right tools makes mixing cocktails smooth and professional. Here are the must-haves for your home bar:

  • Cocktail shaker
  • Martini glasses
  • Jigger for precise measurements
  • Strainer
  • Bar spoon
  • Ice bucket

Guest Invitation Strategies

When inviting guests, consider these tips:

  1. Send personalized invitations 2-3 weeks in advance
  2. Specify dress code if desired
  3. Request RSVPs to plan cocktail quantities
  4. Provide drink and dietary information

Setting the Perfect Ambiance

Your party’s success depends on a welcoming environment. Soft lighting, background jazz, and carefully curated seating can make your party unforgettable.

A great cocktail party is about connections, conversation, and creating memorable moments.

How to Store Leftover Ingredients

After making your chocolate vodka martini, it’s key to store leftovers right. This keeps your martini ingredients fresh. So, your next drink will be just as good as the first.

Storing your cocktail parts needs careful attention. Each ingredient needs its own way to stay fresh and tasty.

Liqueur Storage Secrets

Liqueurs for your martini need special care to keep their flavor:

  • Keep opened chocolate liqueur bottles in a cool, dark spot
  • Seal bottles well after each use
  • Chill cream-based liqueurs in the fridge
  • Drink opened liqueurs within 6-12 months

Vodka and Chocolate Preservation Techniques

Your top-notch vodka and chocolate need extra care:

  1. Keep vodka at room temperature, away from sunlight
  2. Store chocolate in a cool, dry spot
  3. Use airtight containers for chocolate
  4. Avoid big temperature changes

Pro tip: Always check expiration dates and look at ingredients before making your next chocolate martini. This ensures the best taste.

Chocolate Martini Pairing Ideas

Make your gourmet chocolate martini even better by trying out perfect pairings. These pairings can turn your drink into a special treat. They add a new layer of flavor to your experience.

Savory Food Pairings to Enhance Your Martini

Finding the right food to pair with your martini can really boost its taste. Here are some tasty options:

  • Aged blue cheese with dark chocolate undertones
  • Prosciutto-wrapped asparagus
  • Roasted nuts with sea salt
  • Charcuterie board with aged cheddar

Delightful Dessert Combinations

Your chocolate martini also goes great with sweet treats. These treats share its rich flavor:

  • Chocolate truffles
  • Raspberry cheesecake
  • Salted caramel brownies
  • Tiramisu
Pairing CategoryRecommended SelectionsFlavor Complexity
Cheese PairingsBlue cheese, Aged cheddarHigh
Dessert PairingsChocolate truffles, TiramisuVery High
Savory SnacksProsciutto, Roasted nutsMedium

Remember, what you like matters a lot in pairing. Try new things and find what you love!

Troubleshooting Common Issues

Making the perfect chocolate martini can be tricky. Even skilled bartenders face challenges. Knowing how to fix common problems will help you get it right.

Managing Sweetness Levels

If your martini is too sweet, you have a few ways to fix it:

  • Add a splash of unflavored vodka to cut through sweetness
  • Include a small amount of unsweetened cocoa powder
  • Try dark chocolate liqueur instead of milk chocolate
  • Add a pinch of sea salt to balance sweetness

Resolving Mixture Consistency Issues

A thin martini can be a problem. Here’s how to fix it:

  • Use more chocolate liqueur
  • Add cream or half-and-half for thickness
  • Shake well with ice
  • Try a bit of chocolate syrup
IssueRecommended SolutionExpected Result
Overly SweetAdd vodka or unsweetened cocoaBalanced flavor profile
Thin MixtureIncrease liqueur, use creamCreamy, rich texture
Weak Chocolate TasteUse premium chocolate liqueursIntense chocolate flavor

Getting your chocolate martini recipe right takes practice. Every tweak brings you closer to perfection. Don’t hesitate to try new things and find your perfect mix.

Making a Batch for Larger Gatherings

Hosting a party and want to impress your guests with a chocolate martini? Scaling up your recipe needs careful planning. This ensures every drink tastes as good as the first one.

  • Prepare ingredients in advance
  • Use large-batch mixing techniques
  • Maintain consistent flavor proportions

Scaling Up Your Chocolate Martini Recipe

To make a big batch of chocolate martinis, keep the ingredient ratios the same. For every six drinks, multiply the ingredients as needed. Pro tip: Mix your base liquids in a large pitcher or container before serving to ensure even distribution of flavors.

Preparing in Advance for Convenience

Make your party prep easier by getting some things ready early. You can:

  1. Chill glasses several hours before guests arrive
  2. Pre-mix liqueur and vodka base
  3. Prepare chocolate garnishes in advance

Planning ahead makes your party smooth and stress-free. You’ll serve an elegant chocolate martini that will wow your guests.

Healthier Alternatives to the Traditional Recipe

Craving a chocolate dessert martini but watching your calories? You’re in luck! Making a healthier version is easier than you think. With smart choices and creative swaps, you can have a guilt-free treat that’s still delicious.

  • Use low-fat milk or almond milk instead of cream
  • Replace sugar with stevia or monk fruit sweetener
  • Choose sugar-free chocolate syrup
  • Opt for vodka with lower alcohol content

Lower-Calorie Ingredient Alternatives

Transform your chocolate martini into a lighter drink with smart choices. Dark chocolate liqueur has fewer calories than milk chocolate. Pick premium brands for rich flavor with less sugar.

IngredientTraditional OptionLow-Calorie AlternativeCalorie Reduction
CreamHeavy creamAlmond milk50-70 calories
SweetenerSimple syrupStevia40-50 calories
ChocolateMilk chocolate liqueurDark chocolate liqueur20-30 calories

Alcohol-Free Options for Non-Drinkers

For those who prefer a non-alcoholic version, a mocktail is perfect. Mix chocolate syrup, milk, and vanilla extract for a classic taste. Top with cocoa powder or chocolate shavings for a real treat.

  • Blend chocolate syrup with cold milk
  • Add vanilla extract for depth
  • Serve in a chilled martini glass
  • Dust with cocoa powder

With these options, everyone can enjoy a tasty chocolate martini that fits their diet and taste.

Creative Garnishing Ideas

Turning your chocolate martini into a showstopper starts with the garnish. The right garnish can make your drink a feast for the eyes and taste buds.

Creating a stunning gourmet chocolate martini takes creativity and detail. The garnish is more than just a pretty face. It’s a key part of the drink’s experience.

Edible Decorations that Wow

  • Chocolate curls: Create elegant shavings using a vegetable peeler on high-quality dark chocolate
  • Cocoa powder stencils: Use intricate designs to dust delicate patterns on the martini surface
  • Candied fruit: Garnish with caramelized orange or lemon peels for a sophisticated touch
  • Chocolate-dipped rimming: Roll glass edges in melted chocolate and crushed nuts

Spicing Up with Unique Flavors

Your chocolate martini garnish can add exciting flavors. Experiment with unexpected ingredients like:

  • Edible gold leaf for luxurious presentation
  • Cinnamon sticks for warm, spicy undertones
  • Fresh mint leaves for a refreshing contrast
  • Espresso beans for an intense coffee accent

Remember, a great garnish does more than look good. It also adds depth to the flavor. Your guests will love these creative touches that turn a simple drink into a gourmet delight.

Frequently Asked Questions

Many people wonder about making the perfect chocolate martini. We’ve gathered answers to common questions. This will help you make an easy chocolate martini that will wow your guests.

Top Questions About Chocolate Martinis

  • Can I make a chocolate martini without chocolate liqueur?
  • What vodka works best for a chocolate martini recipe?
  • How do I prevent my martini from being too sweet?

Here are some expert answers to these questions:

Mixology Pro Tips for Beginners

  1. Ingredient Substitutions: You can use chocolate syrup or cocoa powder instead of chocolate liqueur in your martini.
  2. Vodka Selection: Pick a smooth, neutral vodka that won’t clash with the chocolate.
  3. Sweetness Balance: Use dark chocolate liqueur or add a splash of coffee liqueur to balance the sweetness.
Common ChallengeProfessional Solution
Thin MixtureAdd a touch of cream or chocolate syrup for thickness
Overly Sweet TasteIncorporate a bit of espresso or dark chocolate
Weak Chocolate FlavorUse high-quality chocolate liqueur

“The secret to a great chocolate martini is balance and quality ingredients.” – Professional Mixologist

With these tips, you’ll soon be making professional-level chocolate martinis. Remember, the more you practice, the better you’ll get!

Conclusion: Cheers to Your Chocolate Martini!

You’ve learned how to make the perfect chocolate vodka martini. You’ve gone from knowing its history to trying new recipes. Now, you have skills that will wow anyone at a party.

The chocolate martini is very flexible. You can stick to the classic or try vegan, white chocolate, or new flavors. You’re ready to make a drink that will impress everyone.

Mixology is all about learning and trying new things. Every time you make a chocolate vodka martini, you’re creating something special. Share your drinks with friends and add your own twist to this fancy cocktail.

Celebrating Success with Your Cocktail Creation

With time, you’ll be the top mixologist in your group. Enjoy the journey, and don’t forget to enjoy every sip of your chocolate martini.

Encouragement to Experiment and Enjoy

Your mixology adventure is just starting. Keep trying new things and improving your skills. Cheers to your success in mixology!

FAQ

What’s the difference between a regular martini and a chocolate martini?

A chocolate martini is different from a regular martini. It’s made with chocolate liqueurs, vodka, and sometimes chocolate garnishes. It’s sweeter and richer, focusing on chocolate flavors.

Can I make a chocolate martini without chocolate liqueur?

Yes, you can use crème de cacao, chocolate syrup, or melted chocolate instead. Each option changes the martini’s taste and texture.

Is a chocolate martini considered a strong cocktail?

Chocolate martinis are moderately strong. They usually have vodka and chocolate liqueur, with an alcohol content of 15-20%.

How can I make a non-alcoholic chocolate martini?

Use chocolate syrup, chocolate milk, or chocolate cream instead of alcohol. Add cold brew coffee or espresso for depth. Garnish with chocolate shavings or cocoa powder.

What’s the best type of chocolate to use in a chocolate martini?

Choose dark chocolate with at least 70% cocoa content. Use chocolate liqueurs, cocoa powder, or melted chocolate for the best flavor.

How do I prevent my chocolate martini from being too sweet?

Use dark chocolate liqueurs and add a splash of espresso. A bit of unsweetened cocoa powder helps too. You can also use less chocolate syrup or more vodka.

Can I prepare chocolate martinis in advance for a party?

Yes, mix the liquid ingredients ahead of time and refrigerate. But shake with ice and garnish just before serving for the best taste and look.

What are some creative garnish ideas for a chocolate martini?

Try chocolate shavings, a cocoa powder rim, or chocolate-covered espresso beans. Mini chocolate truffles or orange zest also add to the flavor and look.

Are there any dairy-free chocolate martini options?

Yes! Use almond milk, coconut cream, or vegan chocolate liqueurs. Brands like Baileys and Kahlúa offer dairy-free options that work great in chocolate martinis.

What’s the ideal serving temperature for a chocolate martini?

Serve it ice-cold, between 35-40°F. Chill your glass in the freezer before serving. Always shake with ice to get the perfect temperature.

0 comments
0 FacebookTwitterPinterestEmail
Crispy Baked Chicken Tenders

Crispy Baked Chicken Tenders: Easy Recipe

Serves: 4 Prep Time: Cooking Time:
Nutrition facts: 300 calories 15 grams fat
Rating: 5.0/5
( 1 voted )

Ingredients

  • 1 lb chicken tenders
  • 1 cup breadcrumbs
  • 1/2 cup grated Parmesan cheese
  • 1 teaspoon garlic powder
  • 1 teaspoon paprika
  • 1/2 teaspoon salt
  • 1/4 teaspoon black pepper
  • 2 eggs, beaten
  • 1 tablespoon olive oil

Instructions

Preheat your oven to 400°F (200°C). In a shallow dish, combine breadcrumbs, Parmesan cheese, garlic powder, paprika, salt, and pepper. Dip each chicken tender into the beaten eggs, then coat with the breadcrumb mixture. Place the chicken tenders on a baking sheet lined with parchment paper. Drizzle with olive oil. Bake for 18-20 minutes, flipping halfway through until golden brown and crispy. Serve with your favorite dipping sauce and enjoy!

Notes

You can substitute the breadcrumbs for panko crumbs for an extra crispy coating. Add a drizzle of honey mustard or ranch for dipping.

Crispy Baked Chicken Tenders

Ever wondered how to make crispy chicken tenders like restaurants at home? No need for greasy deep-frying or hard cooking methods. This recipe uses a simple baking method to bring out great flavor and crunch.

Crispy chicken tenders are more than just food. They’re a hit with everyone, combining tender meat with a crunchy outside. Perfect for pleasing kids or a casual dinner, this recipe boosts your cooking skills quickly.

Baking chicken tenders is not just easy. It’s also healthier, using less oil but keeping the taste and texture amazing. With some expert tips, you’ll make crispy chicken tenders that everyone will love.

Key Takeaways

  • Learn a foolproof method for crispy chicken tenders
  • Discover healthier baking techniques
  • Create restaurant-quality meals at home
  • Master simple coating and seasoning methods
  • Enjoy a versatile recipe adaptable to different diets

Introduction to Baked Chicken Tenders

Chicken tenders are loved by people of all ages. They offer a tasty and flexible meal choice. Baked chicken tenders are now a favorite, thanks to growing health-conscious cooking trends.

Healthy chicken tenders are more than just food. They’re a smart choice that combines good nutrition with great taste. These tender chicken pieces are a protein-rich option for families wanting quick, healthy meals.

  • Quick and easy to prepare
  • Appealing to both children and adults
  • Versatile for multiple meal types
  • Customizable with various seasonings

Baked chicken tenders are a great choice for a healthier meal. They keep the chicken tender while cutting down on oil and calories.

Benefits of Baking Over Frying

Baking MethodFrying Method
Lower calorie contentHigher fat absorption
Retains more nutrientsPotential nutrient loss
Less oil consumptionSignificant oil usage

Choosing to bake your chicken tenders makes for a crispy and delicious meal. It’s full of flavor and doesn’t lose out on nutrition. The right baking technique can make the outside golden and crispy, just like fried ones.

“Healthy eating doesn’t mean sacrificing flavor – it’s about making smarter cooking choices.” – Culinary Nutrition Expert

Ingredients You’ll Need

Making tasty breaded chicken tenders begins with picking the right ingredients. Your recipes will stand out with the right choices. Choose fresh, quality ingredients to elevate your meal.

Fresh Chicken Selects

Choosing the right chicken is key for your tenders. Look for:

  • Fresh, plump chicken tenderloins
  • Tender meat with minimal visible fat
  • Bright white or pale pink coloration
  • Firm texture without any sliminess

Coating Options for Crispy Perfection

Your coating is crucial for crispy tenders. Try these tasty options:

Coating TypeTextureFlavor Profile
Panko BreadcrumbsExtra CrispyNeutral, Light
Almond FlourCrunchyNutty, Low-Carb
Crushed CornflakesGolden CrispSlightly Sweet

Seasonings to Elevate Your Flavor

Add flavor to your tenders with these seasonings:

  1. Garlic Powder – Adds depth and aroma
  2. Paprika – Provides color and mild heat
  3. Dried Herbs – Thyme, oregano, or basil
  4. Salt and black pepper to taste

Pro tip: Always taste your seasoning mix before coating. This ensures the perfect flavor in your chicken tenderloin recipes.

Preparing the Chicken Tenders

Starting an easy chicken tender recipe means getting the chicken ready right. It’s important to handle raw chicken safely and correctly. Make sure your chicken is clean, cut right, and ready for marinating before cooking.

Here are key steps to make sure your chicken tenders are delicious and safe:

  • Wash your hands well before and after touching raw chicken
  • Use a clean cutting board only for raw meats
  • Rinse chicken tenders under cold water
  • Pat dry with paper towels to get rid of extra moisture

How to Properly Clean and Cut Chicken

When cleaning and cutting chicken for your recipe, be precise. Take off any fat or tough parts from the tenders. If there’s a white tendon, use kitchen tweezers to carefully remove it.

The Importance of Marinating

Marinating makes chicken tenders taste amazing. A good marinade not only adds flavor but also makes the meat tender. Here are some marinade ideas:

Marinade TypeKey IngredientsFlavor Profile
ButtermilkButtermilk, salt, pepperTangy, mild
Herb BlendOlive oil, rosemary, thymeAromatic, Mediterranean
Spicy KickHot sauce, garlic, paprikaBold, zesty

For the best taste, marinate chicken tenders for 30 minutes to 2 hours before cooking. This lets the flavors soak in and keeps the meat tender.

Making the Perfect Coating

Creating the perfect coating is key for deliciously crispy chicken tenders. The right breading can turn simple breaded chicken tenders into a dish everyone will enjoy.

Crafting the Ultimate Crunchy Breading

To achieve crispy chicken tenders, focus on a few important techniques:

  • Use panko breadcrumbs for maximum crunchiness
  • Season your breading mix generously with herbs and spices
  • Ensure a thick, even coating on each chicken tender
  • Press the breading firmly to help it stick

Eggs or Buttermilk: Choosing the Best Binding Agent

When making the perfect base for your breaded chicken tenders, you have two main choices:

  1. Eggs:
    • Creates a sticky surface for breading
    • Provides good adhesion
    • Works well with most breadcrumb types
  2. Buttermilk:
    • Adds extra flavor and tenderness
    • Helps tenderize the chicken
    • Creates a slightly tangy coating

Pro tip for crispy chicken tenders: Whichever binding agent you choose, let the chicken rest after coating. This helps the breading set properly, making your chicken tenders irresistibly crunchy.

Baking Methods

Making the best baked chicken tenders needs careful cooking. The right method can turn simple chicken into a crispy, tasty dish that everyone will enjoy.

The baking process is key to getting a crispy outside and juicy inside. Learning the best techniques will improve your cooking at home.

The best oven temperature for baking chicken tenders is between 400-425°F. This temperature gives a golden-brown crust and keeps the inside juicy.

  • Preheat your oven to 425°F for maximum crispiness
  • Use a baking sheet lined with parchment paper
  • Arrange chicken tenders in a single layer

Mastering Cooking Spray for Ultimate Crispiness

Cooking spray is a game-changer for baked chicken tenders. A light, even coat helps get that crispy outside without too much oil.

Spray TechniqueBenefit
Light MistingEnhances crispiness without adding calories
Even CoverageEnsures uniform browning
Pre-Spray BreadingHelps breading adhere better

Pro tip: For extra crunch, try using a light coating of olive oil cooking spray before baking your chicken tenders.

Trying different baking methods can help you find the best way to make homemade baked chicken tenders. Remember, every oven is a bit different. So, don’t be afraid to adjust and find what works best for you.

Cooking Time and Techniques

Getting the cooking time right for chicken strips is key to making them tasty and safe. The right method makes them crispy outside and juicy inside.

Crispy Baked Chicken Tenders

Cooking chicken strips needs careful attention. You want a golden-brown outside and a tender inside.

When to Check for Doneness

There are a few ways to check if your chicken strips are done:

  • Use a meat thermometer to ensure internal temperature reaches 165°F
  • Look for a consistent golden-brown color across the entire surface
  • Check that juices run clear when pierced

Signs Your Chicken Tenders Are Ready

Knowing when chicken strips are cooked involves a few signs:

IndicatorWhat to Look For
ColorUniform golden-brown exterior
TextureCrisp coating, moist interior
Temperature165°F at thickest point

Pro tip: Let your chicken strips rest for 3-5 minutes after cooking to lock in moisture and ensure even distribution of juices.

By following these tips, you’ll make chicken strips that are both safe and delicious. Remember, practice makes perfect with this recipe!

Serving Suggestions

Your easy chicken tender recipe needs the right sides to make it special. The perfect dipping sauces and side dishes can turn a simple meal into a family favorite. It’s all about the details that make a difference.

Delicious Dipping Sauces

Make your chicken tenders even more exciting with these tasty dips:

  • Classic Ranch: Creamy and tangy, loved by all ages
  • Spicy Sriracha Mayo: For those who like a little heat
  • Honey Mustard: A sweet and zesty mix
  • BBQ Sauce: Smoky and rich, perfect for outdoor meals

Complementary Side Dishes

Complete your meal with these tasty sides:

  1. Crispy Sweet Potato Fries
  2. Fresh Garden Salad
  3. Roasted Vegetable Medley
  4. Creamy Coleslaw

For the best chicken tenders, mix flavors and textures. Try different sauces and sides to find your favorite!

Storing Leftovers

Keeping your homemade chicken tenders tasty and crispy is key. You need to store and reheat them right. This way, you can enjoy them again and again.

Best Refrigeration Practices

Here’s how to store your crispy chicken tenders:

  • Cool the chicken tenders completely before storing
  • Place in an airtight container
  • Refrigerate within 2 hours of cooking
  • Store for no more than 3-4 days

Reheating for Maximum Crispiness

Don’t use the microwave to reheat. It can make your chicken tenders soggy. Try these methods instead:

  1. Oven method:
    • Preheat to 375°F
    • Place tenders on a wire rack
    • Bake for 10-12 minutes
  2. Air fryer method:
    • Set temperature to 350°F
    • Cook for 3-4 minutes
    • Shake basket midway

These methods will keep your chicken tenders crispy. They prevent them from becoming soggy or dry.

Pro tip: Add a light spray of olive oil before reheating to enhance crispiness.

Flavor Variations

Turning basic chicken tenderloin recipes into amazing dishes is simple. Just try out different flavors. This way, you can make a simple meal into something exciting that everyone loves.

Crispy Baked Chicken Tenders

Trying new flavors can make your chicken tenderloin recipes come alive. It’s all about knowing how different ingredients can change the taste.

Adding Cheese for a Rich Twist

Cheese can make your chicken tenders truly special. Here are some tasty cheese options for your chicken tenderloin recipes:

  • Parmesan crusted with garlic herb blend
  • Cheddar-coated tenders with a crispy exterior
  • Pecorino Romano with cracked black pepper

“The secret to great chicken tenders is creativity in your coating!” – Professional Chef

Incorporating Herbs and Spices

Herbs and spices are your secret tools for changing chicken tenderloin recipes. Each mix can take your taste buds on a new journey.

  • Mediterranean Style: Oregano, thyme, and rosemary
  • Southwestern Kick: Chili powder, cumin, and smoked paprika
  • Asian-Inspired: Ginger, garlic, and five-spice powder

Trying out these flavor changes will keep your chicken tenderloin recipes fresh and exciting. Don’t hesitate to mix and match – your taste buds will love it!

Nutritional Information

Making healthy chicken tenders doesn’t mean you have to give up taste. Knowing what’s in your homemade baked chicken tenders helps you make better food choices. This way, you can enjoy a tasty meal that’s also good for you.

Calorie Breakdown and Nutritional Insights

Baked chicken tenders are much better for you than fried ones. A serving of baked chicken tenders usually has:

  • Calories: 180-220 per serving
  • Protein: 20-25 grams
  • Total Fat: 5-8 grams
  • Carbohydrates: 10-15 grams

Smart Ingredient Alternatives

Make your chicken tenders even healthier with smart ingredient swaps:

  1. Whole Wheat Breadcrumbs: Use whole wheat breadcrumbs for more fiber
  2. Almond Flour: It’s lower in carbs and has more protein
  3. Greek Yogurt Marinade: It adds protein and cuts down on fat

Choosing the right ingredients can turn regular chicken tenders into a healthy meal. This way, you can reach your health goals without losing flavor.

Common Mistakes to Avoid

Making perfect chicken tenders needs focus and knowing common mistakes. Even skilled cooks can mess up, making the chicken dry and tasteless.

When you’re cooking chicken tenders, some mistakes can ruin them. Knowing these errors will help you make crispy, juicy chicken tenders every time.

Recognizing the Signs of Overbaking

Overbaking is a big problem that can mess up your chicken tenders. Look out for these signs:

  • Extremely dry and tough meat texture
  • Dark brown or blackened edges
  • Crumbly, hard breading
  • Significant shrinkage of the chicken

To avoid overbaking, use a meat thermometer. Chicken tenders should be 165°F (74°C) inside, but not over that.

Getting the Coating Thickness Just Right

The breading’s thickness is crucial for your chicken tenders. Too thin, and they won’t be crispy; too thick, and they cook unevenly.

  • Aim for a thin, even layer of coating
  • Use a light hand when applying breading
  • Shake off excess breading before baking
  • Consider using a wire rack for more even coating

Pro tip: Pat your chicken tenders dry before coating. This helps the breading stick better and makes the texture more even.

Tips for Customizing Your Recipe

Creating versatile healthy chicken tenders means adapting to different dietary needs. You can modify your favorite chicken tenderloin recipes to fit various nutritional requirements. This way, you don’t have to give up on flavor or texture.

Making Gluten-Free Chicken Tenders

It’s easy to turn traditional chicken tenders into a gluten-free option. Here are some alternative coating options:

  • Almond flour for a nutty, crisp texture
  • Coconut flour for a light, crunchy breading
  • Crushed gluten-free cornflakes for extra crispiness
  • Quinoa flour for added protein

Low-Sodium Flavor Boosters

Reducing sodium doesn’t mean you have to lose flavor in your healthy chicken tenders. Try these flavor-enhancing alternatives:

  • Fresh herb blends like rosemary, thyme, and parsley
  • Citrus zest for brightness
  • Garlic powder and onion powder
  • Smoked paprika for depth

Try these customization techniques to make chicken tenderloin recipes that fit your dietary needs. This way, you can keep meals delicious and nutritious.

Conclusion: Enjoying Your Homemade Chicken Tenders

Making the perfect chicken strips recipe is an art that gets better with time. Your kitchen adventures with air fryer chicken tenders can turn simple ingredients into tasty meals. Each time you cook these crispy delights, you’ll find new ways to make it enjoyable.

Trying out different seasonings and coatings can help you find your own cooking style. Whether you like classic breadcrumbs or want to try gluten-free options, the possibilities are endless. Your creativity can make a simple dish into a gourmet meal that shows off your taste.

Encouragement to Experiment with Flavors

Don’t be afraid to try new things with your chicken strips recipe. Experiment with international spice blends, herb-infused coatings, or unique marinades. Using an air fryer can help you get crispy results with less oil, making your cooking healthier and more fun.

Share Your Own Variations and Experiences

Cooking is a journey of learning and sharing. We encourage you to share your unique chicken tender creations with others. Your creative ideas and personal touches can inspire others to try new cooking techniques and flavors.

FAQ

How long do baked chicken tenders take to cook?

Baked chicken tenders usually take 15-20 minutes at 400°F (204°C). The exact time depends on their thickness. Always check they reach 165°F (74°C) for safety.

Can I make chicken tenders gluten-free?

Yes, you can! Use gluten-free coatings like almond flour or gluten-free breadcrumbs. They add crunch without gluten.

What’s the best way to keep chicken tenders crispy?

For crispiness, use a wire rack and spray with cooking spray. Preheat your oven well. Don’t overcrowd the baking sheet to avoid steam.

How do I store leftover chicken tenders?

Cool chicken tenders and store them in an airtight container for 3-4 days. Reheat in the oven or air fryer for crispiness. Avoid the microwave.

Can I use frozen chicken tenders for this recipe?

Yes, but thaw them first. Pat dry with paper towels for a crispier coating. Thawing in the fridge is safest.

What are some healthy dipping sauce alternatives?

Try Greek yogurt dips, homemade salsa, or avocado crema. They’re flavorful and lower in fat than traditional sauces.

How can I make the chicken tenders spicier?

Add cayenne pepper or hot paprika to your breading. Mix hot sauce with your egg wash for extra heat.

Are air fryer chicken tenders different from oven-baked?

Air fryer tenders cook faster and get crisper. They need 10-12 minutes and less oil than oven-baked.

0 comments
0 FacebookTwitterPinterestEmail
Chicken Tender Recipes

Chicken Tender Recipes for Delightful Meals

Serves: 4 Prep Time: Cooking Time:
Nutrition facts: 350 calories 15 grams fat
Rating: 5.0/5
( 1 voted )

Ingredients

  • 1 lb chicken tenders
  • 1 cup all-purpose flour
  • 1 teaspoon garlic powder
  • 1 teaspoon onion powder
  • 1 teaspoon paprika
  • 1/2 teaspoon salt
  • 1/2 teaspoon black pepper
  • 2 large eggs, beaten
  • 2 cups breadcrumbs (preferably panko)
  • 1/4 cup grated Parmesan cheese
  • Vegetable oil for frying

Instructions

In a shallow bowl, whisk together flour, garlic powder, onion powder, paprika, salt, and black pepper. In a separate shallow bowl, beat the eggs. In another shallow bowl, mix together the breadcrumbs and grated Parmesan cheese. Dip each chicken tender into the seasoned flour, then into the beaten eggs, and finally coat with the breadcrumb mixture, pressing lightly to ensure the breadcrumbs adhere. Heat vegetable oil in a large skillet over medium heat. Once the oil is hot, add the chicken tenders in batches, being careful not to overcrowd the pan. Cook the chicken tenders for 4-5 minutes per side, or until golden brown and cooked through with an internal temperature of 165°F. Remove the chicken tenders from the skillet and drain on paper towels. Serve hot with your favorite dipping sauce or as part of a meal.

Notes

These chicken tenders can be served with a variety of sides such as mashed potatoes, coleslaw, or a simple salad. If you want a healthier version, you can bake the tenders in the oven at 400°F for 15-20 minutes, flipping halfway through.

Chicken Tender Recipes for Delightful Meals. Ever thought about making chicken tenders into something truly special? They can go from ordinary to amazing, making everyone want more. Whether you’re always on the go or love cooking, learning to make great chicken tenders can make your meals unforgettable.

Homemade chicken tenders let you try out different cooking ways and flavors. You can make them crispy or bake them for a healthier option. They fit any cooking style or diet you prefer.

This guide will show you how to make chicken tenders that taste like they’re from a restaurant. We’ll cover cooking methods, how to season them, and fun ways to serve them. Your kitchen will become a place where everyone wants to eat.

Key Takeaways

  • Discover multiple cooking techniques for perfect chicken tenders
  • Learn how to create restaurant-quality meals at home
  • Explore diverse flavor profiles and international inspirations
  • Understand nutritional benefits of homemade chicken tenders
  • Master simple recipes suitable for all skill levels

Introduction to Chicken Tender Recipes

Chicken tenders are a culinary superstar that can make your meal planning amazing. These tender, juicy strips of meat are perfect for creating delicious chicken tender recipes. They appeal to everyone, from picky kids to adventurous adults.

What makes chicken tenders so special? Their versatility in the kitchen is unmatched. Easy chicken tender recipes can be made using different cooking methods, such as:

  • Frying for a crispy golden exterior
  • Baking for a healthier option
  • Grilling for a smoky summer flavor
  • Air frying for quick and convenient meals

The beauty of chicken tenders is their quick cooking time and ability to absorb diverse flavors. Whether you’re craving something spicy, sweet, or savory, these tender strips can be transformed to suit any taste. From classic American-style to international cuisine, chicken tenders are your ticket to culinary creativity.

Preparing chicken tenders is incredibly simple, making them perfect for busy home cooks. You’ll discover how these protein-packed morsels can become the star of breakfast, lunch, or dinner. The recipes we’ll explore will show you just how exciting and delicious easy chicken tender recipes can be.

Benefits of Cooking with Chicken Tenders

Chicken tenders are a nutritional powerhouse that can transform your meal planning. These lean protein strips offer incredible versatility for home cooks looking to create healthy chicken tender recipes that appeal to the entire family.

Discovering the advantages of chicken tenders goes beyond their delicious taste. Let’s explore why these protein-packed morsels deserve a special place in your kitchen.

Nutritional Advantages

Chicken tenders provide exceptional nutritional benefits that make them a smart choice for health-conscious families:

  • High protein content supporting muscle development
  • Low in fat when prepared using healthy cooking methods
  • Rich in essential vitamins and minerals

Versatility in Preparation

One of the greatest strengths of chicken tenders is their incredible adaptability. You can transform these proteins into numerous kid-friendly chicken tenders recipes that suit various culinary styles:

  1. Baked with herb coating
  2. Grilled with Mediterranean seasonings
  3. Air-fried for a crispy texture
  4. Stir-fried with vegetables

Kid-Friendly Appeal

Parents rejoice! Chicken tenders are a magical solution for picky eaters. Their mild flavor and easy-to-eat size make them perfect for introducing new flavors and encouraging children to explore different cuisines.

Chicken tenders can be the bridge between nutritious meals and children’s preferences.

By mastering creative preparation techniques, you can turn these simple protein strips into exciting, nutritious meals that both kids and adults will love.

Classic Fried Chicken Tenders

Crispy chicken tenders are a favorite comfort food. You can make them at home for a tasty treat. This way, you control the flavor and quality. Let’s make some golden, crunchy chicken tenders that everyone will love.

To make great homemade chicken tenders, you need the right techniques and ingredients. The secret to that perfect crunch is in how you prepare and cook them.

Ingredients You’ll Need

  • Fresh chicken tenderloins
  • All-purpose flour
  • Breadcrumbs
  • Eggs
  • Seasonings (salt, pepper, paprika)
  • Vegetable oil for frying

Step-by-Step Cooking Instructions

  1. Pat chicken tenders dry with paper towels
  2. Create a breading station with three shallow dishes
  3. Dredge tenders in flour, then egg wash, then seasoned breadcrumbs
  4. Heat oil to 350°F in a deep skillet
  5. Fry tenders until golden brown (about 3-4 minutes per side)

Tips for Perfectly Fried Tenders

Want to make the most crispy chicken tenders possible? Here are some pro tips:

  • Ensure oil is at the correct temperature before frying
  • Don’t overcrowd the pan
  • Use a meat thermometer to check internal temperature (165°F)
  • Let tenders rest on a wire rack to maintain crispiness

Pro tip: For extra crispy homemade chicken tenders, double-coat your tenders in the breading mixture!

Baked Chicken Tenders: A Healthier Option

Want tasty chicken tenders without the guilt? Baked chicken tenders are a healthier choice than fried ones. They taste great and have less oil, perfect for those watching their diet.

Irresistible Chicken Tender Recipes for Delightful Meals

Turning your favorite foods into healthy meals is simple. Healthy chicken tender recipes are tasty and easy to make.

Essential Ingredients for Perfect Baked Chicken Tenders

  • Boneless, skinless chicken tenders
  • Whole wheat breadcrumbs
  • Olive oil spray
  • Egg whites
  • Seasonings of your choice

Simple Baking Instructions

  1. Preheat your oven to 400°F
  2. Dip chicken tenders in egg whites
  3. Coat with seasoned breadcrumbs
  4. Place on a lined baking sheet
  5. Lightly spray with olive oil
  6. Bake for 15-20 minutes until golden

Seasoning Ideas for Maximum Flavor

Make your baked chicken tenders even better with these seasonings:

  • Herb Blend: Rosemary, thyme, and garlic powder
  • Spicy Kick: Paprika, cayenne, and black pepper
  • Italian Style: Dried basil, oregano, and parmesan cheese

“Healthy cooking doesn’t mean sacrificing taste – it’s about making smart ingredient choices!” – Nutrition Expert

Baked chicken tenders are great for everyone. With these easy steps, you’ll get crispy, tasty tenders that are also good for you.

Grilled Chicken Tenders for Summer BBQs

Summer barbecues need a standout chicken tender recipe. It should impress your guests and fill their plates. Grilled chicken tenders are a must-have, with the right marinade and cooking skills. Whether you’re a grill pro or a weekend cook, these recipes will make your summer meals unforgettable.

Choosing the Right Marinade

A great marinade turns chicken tenders into a flavorful treat. Here are some tasty options:

  • Citrus Herb Marinade: Mix lemon juice, olive oil, fresh herbs, and garlic
  • Honey Mustard Blend: Combine honey, Dijon mustard, and apple cider vinegar
  • Mediterranean-inspired Marinade: Blend yogurt, oregano, and lemon zest

Grilling Techniques for Tenderness

To grill chicken tenders perfectly, focus on temperature and timing. Heat your grill to medium-high and aim for 165°F inside. Marinate your tenders for at least 30 minutes to boost flavor and moisture.

Side Dishes to Complement Grilled Tenders

Match your grilled chicken tenders with refreshing sides:

  1. Grilled corn on the cob
  2. Fresh summer salad
  3. Roasted vegetable medley
  4. Garlic herb potato wedges

Pro tip: Always let your grilled chicken tenders rest for 5 minutes after cooking to lock in those delicious juices!

Spicy Chicken Tenders for Heat Lovers

Want a spicy twist on chicken tenders? Spicy chicken tenders are perfect for those who love bold flavors. They’re great for anyone, from mild spice fans to heat lovers. These recipes will make your meal exciting.

Spicy chicken tender recipes offer endless flavor options. The secret to great spicy tenders is the right marinades and cooking methods. These ensure both heat and tenderness.

Spicy Marinade Recipes to Elevate Your Chicken Tenders

  • Sriracha Lime Marinade: Combines tangy lime with fiery sriracha sauce
  • Cayenne Pepper Blend: Creates a classic spicy coating with deep heat
  • Habanero Garlic Infusion: Delivers an intense, complex flavor profile

Cooking Techniques for Maximum Spiciness

To make perfect spicy chicken tenders, you need to prepare carefully. Different cooking methods can change the heat level:

Cooking MethodSpice IntensityRecommended Heat Level
Deep FryingHighAdvanced Spice Lovers
BakingMediumModerate Heat Enthusiasts
Air FryingControlledBeginners to Intermediate

Chicken Tender Dipping Sauces to Cool and Complement

Every spicy chicken tender recipe needs the right dipping sauce. These sauces can cool and enhance the heat:

  1. Cool Ranch Dip
  2. Creamy Blue Cheese
  3. Cucumber Yogurt Sauce
  4. Honey Cilantro Blend

Try these spicy chicken tender recipes and find your ideal heat level. The best spicy dish is one that challenges and delights your taste buds!

Chicken Tenders with International Flavors

Try new things with chicken tender recipes from around the world. These flavors can turn simple chicken tenders into amazing meals. They will make your dinner table exciting and your taste buds happy.

Discover a world of chicken tender marinades with unique tastes. Each international style has its own special mix of spices, herbs, and cooking ways.

Asian-Inspired Chicken Tenders

Make delicious Asian-style chicken tenders with these ideas:

  • Teriyaki glaze with soy sauce and honey
  • Sweet and sour marinade using pineapple juice
  • Sesame ginger coating for crispy texture

Mexican-Style Chicken Tenders

Add bold Mexican flavors to your chicken tender recipes:

  • Chili lime marinade
  • Smoky chipotle seasoning
  • Cilantro and garlic rub

Italian Herb-Infused Chicken Tenders

Bring a taste of Italy to your kitchen with these Italian-style chicken tenders:

  • Herb blend with basil, oregano, and rosemary
  • Parmesan cheese coating
  • Balsamic vinegar marinade
CuisineKey IngredientsFlavor Profile
AsianSoy sauce, ginger, sesameSweet, tangy, umami
MexicanLime, chili, cilantroSpicy, zesty, bright
ItalianHerbs, olive oil, garlicAromatic, rich, herbaceous

Trying international chicken tender recipes lets you explore global foods at home. Each style is a new adventure that will wow your family and friends.

Air Fryer Chicken Tenders: Quick and Easy

Using an air fryer makes cooking chicken tenders a breeze. These modern tools change how we make healthy chicken recipes. They offer a tasty way to cook without deep-frying.

Irresistible Chicken Tender Recipes for Delightful Meals

Air fryer chicken tenders are great for those who want healthy, crispy meals. They use less oil than deep-frying. This way, you get a golden-brown outside and a juicy inside.

Benefits of Using an Air Fryer

  • Reduces oil consumption by up to 75%
  • Cooks food faster than traditional ovens
  • Easy to clean and maintain
  • Creates crispy texture without deep frying

Healthy Air Fryer Recipe

Start with good ingredients for tasty air fryer chicken tenders. Use lean chicken tenders, seasoned breadcrumbs, and olive oil. This mix makes a healthy, tasty meal.

Cooking Time and Temperature Tips

To cook perfect air fryer chicken tenders, know the right temperature and time. Cook at 400°F for 8-10 minutes. Flip them halfway for even crispiness.

  • Preheat your air fryer for 3-5 minutes
  • Arrange tenders in a single layer
  • Avoid overcrowding the basket
  • Check internal temperature reaches 165°F

Follow these tips to make healthy chicken tender recipes like a pro. You’ll enjoy delicious meals that are good for you.

Kid-Friendly Chicken Tender Recipes

Turning mealtime into an adventure can be tough for parents with picky eaters. Kid-friendly chicken tenders are a tasty way to make healthy meals fun for kids of all ages.

Simple Recipes for Picky Eaters

Easy chicken tender recipes can be your secret to keeping kids happy and fed. Here are some simple tips to make chicken tenders irresistible:

  • Create a crispy coating using crushed cornflakes
  • Use mild seasonings that aren’t too spicy
  • Cut tenders into fun shapes before cooking

Fun Ways to Serve Chicken Tenders

How you present meals to kids matters a lot. Try these creative ways to serve chicken tenders:

  1. Build a DIY dipping station with various sauces
  2. Arrange tenders in playful patterns on the plate
  3. Use colorful toothpicks for added excitement

Incorporating Vegetables into the Meal

Adding veggies to kid-friendly chicken tenders can be a nutritional win. Here’s a smart way to do it:

VegetableIncorporation Method
ZucchiniGrate into breading mixture
CarrotsPuree into dipping sauce
SpinachBlend into marinades

“Healthy eating can be delicious when you make food fun!”

By using these strategies, you’ll make meals that are both healthy and fun for your kids. Try different methods to find what your family likes best.

Preparing Chicken Tenders for Meal Prep

Meal prepping chicken tenders can change your weekly cooking routine. It makes cooking easy chicken tender recipes simple. By planning ahead, you save time and always have tasty meals ready.

Preparing chicken tenders in advance needs smart planning and techniques. Knowing the best marinade and storage methods can make meal prep easier.

Advanced Marinating Strategies

A good chicken tender marinade can boost your meal prep. Here are some marinating tips:

  • Use ziplock bags for even marinade distribution
  • Marinate for 2-4 hours for maximum flavor
  • Avoid acidic marinades longer than 12 hours to prevent meat breakdown

Optimal Storage Techniques

Storage MethodDurationBest Practices
Refrigerator1-2 daysStore in airtight containers
FreezerUp to 3 monthsWrap individually in plastic wrap

Reheating for Perfect Texture

Reheating chicken tenders needs careful attention. You want to keep them juicy inside and crispy outside. Here are ways to restore their deliciousness:

  1. Oven: Preheat to 375°F, bake for 10-12 minutes
  2. Air Fryer: Cook at 350°F for 3-4 minutes
  3. Skillet: Warm over medium heat for 2-3 minutes per side

Pro tip: Always check internal temperature reaches 165°F for food safety.

Dipping Sauces: Elevate Your Chicken Tenders

Chicken tender dipping sauces can turn a simple meal into a special treat. Finding the right sauce can make your homemade chicken tenders unforgettable. Whether you prefer classic tastes or bold new flavors, the right sauce can elevate your meal.

Trying out different sauces can make mealtime fun and exciting. The trick is to mix flavors well and add unique ingredients that match the crispy chicken.

Classic Sauces: BBQ and Honey Mustard

Some dipping sauces are timeless favorites. BBQ and honey mustard are top picks for chicken tender fans.

  • BBQ Sauce: A tangy, sweet classic that pairs perfectly with crispy chicken
  • Honey Mustard: Combines sweet and tangy flavors for a crowd-pleasing option

Unique Sauces to Try

Try these creative chicken tender dipping sauces to spice up your meals:

  1. Sriracha Lime Crema: A zesty, creamy option with a kick
  2. Garlic Parmesan Sauce: Rich and savory
  3. Spicy Mango Chutney: Sweet with a hint of heat

Easy Homemade Dipping Sauce Recipes

Homemade chicken tenders get even better with your own sauces. Here’s a quick guide:

Sauce NameKey IngredientsPreparation Time
Classic RanchButtermilk, sour cream, herbs5 minutes
Spicy BuffaloHot sauce, butter, vinegar3 minutes
Garlic AioliMayonnaise, garlic, lemon juice4 minutes

By making your own dipping sauces, you can choose what goes in them. This means less preservatives and flavors that you love. Try mixing things up to find your favorite chicken tender sauce.

Serving Suggestions for Chicken Tenders

Make your chicken tender recipes stand out with creative serving ideas. These ideas can turn a simple meal into a memorable experience. Whether it’s for family dinner or a game day feast, chicken tenders offer endless possibilities.

Finding the right sides can make your chicken tenders truly special. These versatile bites fit well with many meal styles and occasions.

Side Dishes to Enhance Your Meal

Choose sides that match the crispy texture and flavor of your chicken tenders. Here are some tasty options:

  • Crispy sweet potato fries
  • Creamy coleslaw
  • Roasted vegetable medley
  • Garlic parmesan mac and cheese

Creative Salad Ideas with Chicken Tenders

Turn your chicken tenders into a healthy meal by adding them to salads. Slice the tenders and arrange them over mixed greens. This makes for a protein-rich lunch that’s both filling and nutritious.

Chicken Tenders for Game Day Snacks

For game day, you need snacks that everyone will love. Your chicken tender recipes can be the hit of the party. Cut them into small pieces, serve with different dipping sauces, and watch them fly off the table!

  • Buffalo-style with blue cheese dressing
  • Honey mustard bite-sized tenders
  • Spicy ranch dipping platter

With these ideas, your chicken tender recipes will wow your guests and satisfy everyone at any event.

Cooking for a Crowd: Bulk Chicken Tender Recipes

Preparing homemade chicken tenders for large groups is a fun challenge. Whether it’s a family reunion, game day, or meal prep for the week, making bulk chicken tender recipes needs planning and smart cooking.

Large Batch Cooking Strategies

For cooking chicken tenders in big batches, get the right tools. A big baking sheet or several sheet pans can help you cook efficiently. Here are some key tips:

  • Use sheet pans with raised edges for even cooking
  • Line pans with parchment paper for easy cleanup
  • Cook in batches to maintain consistent temperature
  • Use a meat thermometer to ensure proper doneness

Smart Storage Solutions

Storing chicken tenders properly is key to keeping them fresh. Use airtight containers or heavy-duty freezer bags. Refrigerated chicken tenders last 3-4 days, and frozen ones up to 3 months.

Reheating Techniques

Reheating chicken tenders needs careful attention to keep them crispy. The oven method is the best:

  1. Preheat oven to 375°F
  2. Arrange tenders on a wire rack
  3. Heat for 10-12 minutes
  4. Avoid microwave reheating to prevent sogginess

With these tips, you’ll be able to make delicious meals for any crowd!

Gluten-Free Chicken Tender Recipes

Exploring gluten-free chicken tender recipes can be a big win for those with dietary needs. Healthy chicken tender recipes don’t have to lack in taste or texture. With the right ingredients and methods, you can make crispy, delicious tenders that everyone will enjoy.

Gluten-Free Breading Alternatives

For gluten-free chicken tender recipes, you have many great breading options:

  • Almond flour: Provides a rich, nutty coating
  • Crushed gluten-free cornflakes: Adds extra crunch
  • Crushed rice crackers: Creates a light, crispy texture
  • Gluten-free panko breadcrumbs: Mimics traditional breading

Essential Cooking Tips

To master gluten-free chicken tenders, follow these key tips. Pat your chicken tenders dry before breading to help the coating stick. Use eggs or buttermilk as a binding agent. Press your gluten-free coating firmly to make a solid crust that stays on during cooking.

Flavor Enhancements for Gluten-Free Tenders

Boost your healthy chicken tender recipes with these flavor ideas:

  • Spicy paprika and garlic powder seasoning
  • Herbs like rosemary and thyme
  • Zesty lemon pepper blend
  • Parmesan cheese mixed into the breading

Pro tip: Try different gluten-free coatings and seasonings to find your favorite. Chicken tenders are very versatile, making them perfect for creative cooking.

Vegetarian and Vegan Alternatives to Chicken Tenders

Plant-based eating has changed the game for chicken tender recipes. Now, vegetarians and vegans can enjoy tasty alternatives without giving up flavor or texture. These options are perfect for anyone looking to try new foods or follow a plant-based diet.

Plant-Based Options That Impress

Today’s vegetarian chicken tender recipes offer amazing choices that taste and feel like the real thing. Some top picks include:

  • Seitan-based tenders
  • Tofu strips
  • Cauliflower nuggets
  • Jackfruit preparations
  • Soy protein chunks

Preparing Tofu or Cauliflower Tenders

To make crispy vegetarian tenders, you need the right techniques. Tofu preparation involves removing excess moisture and using cornstarch for crispiness. Cauliflower tenders need a strong breading to keep flavors in.

Protein SourcePreparation TimeDifficulty LevelProtein Content
Tofu30 minutesMedium8g per serving
Cauliflower45 minutesEasy2g per serving
Seitan20 minutesAdvanced21g per serving

Delicious Sauces and Sides

Make your vegetarian chicken tender recipes even better with creative sauces and sides. Try:

  1. Spicy sriracha mayo
  2. Tangy barbecue sauce
  3. Herb-infused yogurt dip
  4. Crisp garden salads
  5. Roasted vegetable medleys

Try these healthy chicken tender recipes to turn your plant-based meals into exciting adventures.

Troubleshooting Common Chicken Tender Issues

Homemade chicken tenders can be tricky, even for experts. Knowing how to fix common problems ensures perfect results every time.

Irresistible Chicken Tender Recipes for Delightful Meals

Several issues can pop up when cooking chicken tenders. Spotting these early can save your dish and make it delicious.

Preventing Dry and Overcooked Tenders

Overcooked chicken tenders can be tough and taste bad. Here are some tips to avoid this:

  • Use a meat thermometer to check internal temperature
  • Cook chicken tenders until they reach 165°F
  • Remove tenders from heat immediately after reaching safe temperature
  • Let meat rest for 3-5 minutes before serving

Resolving Flavor and Texture Challenges

Bland or soggy chicken tenders can mess up your meal. Here are quick fixes for your homemade chicken tenders:

IssueSolution
Bland TasteAdd extra seasoning or marinate before cooking
Soggy BreadingUse high heat and pat chicken dry before breading
Uneven CookingEnsure uniform tender size and use consistent cooking temperature

Safe Storage and Handling

Food safety is key when making chicken tender recipes. Refrigerate leftovers within two hours and eat within 3-4 days. Reheat to 165°F to stay safe.

Pro tip: Store chicken tenders in airtight containers and separate from other foods to prevent cross-contamination.

Conclusion: Enjoying Your Chicken Tender Recipes

Your journey with chicken tender recipes has been full of flavor and creativity. You’ve tried everything from classic fried dishes to international flavors. These easy recipes can make your cooking at home exciting and versatile.

Mastering chicken tender recipes means being bold in the kitchen. Try new ingredients, marinades, and cooking methods. Whether you air fry, grill, or bake, each way adds something special to your food. Don’t hesitate to add unique spices or explore flavors from around the world.

Cooking is about finding joy and expressing yourself. Your kitchen is a place to make delicious memories with loved ones. Chicken tender recipes are a great starting point for creativity, letting you tailor each dish to your liking.

With time and enthusiasm, you’ll become skilled at making amazing chicken tenders. Keep trying new things, stay curious, and enjoy making meals that bring people together.

FAQ

Are chicken tenders healthy?

Chicken tenders can be healthy if made right. Baked or air-fried tenders are better than deep-fried ones. They’re full of protein and can be low in fat if you use lean chicken and don’t overdo the breading.

To make them healthier, use whole grain breadcrumbs and remove the skin. Pair them with veggies for a balanced meal.

What’s the best way to keep chicken tenders crispy?

For crispiness, use a double-coating method with flour, egg wash, and breadcrumbs. Baked tenders should be on a wire rack over a baking sheet for air circulation.

When air frying, don’t overcrowd and lightly spray with oil. For fried tenders, drain on a wire rack to avoid soggy bottoms.

How long can I store cooked chicken tenders?

Cooked chicken tenders can be stored in the fridge for 3-4 days in an airtight container. Reheat in an air fryer or oven for crispiness. If freezing, use a freezer-safe container with parchment between layers. Consume within 2-3 months.

Always cool them down before refrigerating or freezing.

Can I make chicken tenders gluten-free?

Yes! Make gluten-free chicken tenders with almond flour, crushed gluten-free cornflakes, or gluten-free breadcrumbs. Make sure all ingredients, including marinades and seasonings, are gluten-free. Rice flour and cornmeal are also good gluten-free coatings.

What are some kid-friendly dipping sauces for chicken tenders?

Kids love honey mustard, ranch, and barbecue sauce. Mild buffalo sauce, sweet and sour sauce, or ketchup are also great. For a healthier choice, try yogurt-based dips or pureed vegetable sauces.

How can I make spicy chicken tenders?

Add heat with cayenne pepper, hot sauce, or chili powder in your breading. For a milder option, use jalapeño-infused breadcrumbs or serve with spicy sauce on the side. Adjust the heat to your liking.

What’s the difference between chicken tenders and chicken strips?

Chicken tenders come from under the chicken breast, while chicken strips are from the breast meat. Tenders are more tender and have a unique shape. But, the terms are often used the same way in recipes and restaurants.

Can I prepare chicken tenders in advance?

Yes, you can prep chicken tenders ahead of time. Marinate up to 24 hours before cooking, or bread and refrigerate for a few hours before cooking. Cooked tenders can be stored in the fridge for 3-4 days. Reheat in an oven or air fryer for crispiness.

0 comments
0 FacebookTwitterPinterestEmail
Nestle Toll House Cookie Recipe

Nestle Toll House Cookie Recipe: Easy and Delight

Serves: 24 cookies Prep Time: Cooking Time:
Nutrition facts: 200 calories 12 grams fat
Rating: 5.0/5
( 1 voted )

Ingredients

  • 2 1/4 cups all-purpose flour
  • 1/2 teaspoon baking soda
  • 1 cup unsalted butter, room temperature
  • 1/2 cup granulated sugar
  • 1 cup packed brown sugar
  • 2 teaspoons vanilla extract
  • 2 large eggs
  • 2 cups Nestle Toll House semi-sweet chocolate chips
  • 1/2 teaspoon salt

Instructions

1. Preheat your oven to 375°F (190°C).
2. In a small bowl, whisk together the flour, baking soda, and salt.
3. In a large bowl, beat the butter, granulated sugar, and brown sugar together until creamy.
4. Add the vanilla extract and eggs, one at a time, beating well after each addition.
5. Gradually add the flour mixture to the butter mixture, mixing until combined.
6. Stir in the chocolate chips.
7. Drop rounded tablespoons of dough onto ungreased baking sheets, about 2 inches apart.
8. Bake for 9-11 minutes or until the edges are golden brown.
9. Cool on the baking sheet for 2 minutes before transferring to wire racks to cool completely.

Notes

For chewier cookies, remove them from the oven when they’re just lightly golden. You can also add nuts like walnuts or pecans for extra crunch.

Ever wondered why the Nestle Toll House cookie recipe is so beloved? These cookies are more than a sweet treat. They’re a tradition that brings families together in the kitchen.

The Nestle Toll House cookie recipe is special because of its simple ingredients and delicious taste. Every bite is a mix of comfort, nostalgia, and joy. Whether you’re an experienced baker or new to the kitchen, this recipe will give you warm, gooey cookies that fill your home with a wonderful smell.

These cookies are perfect for family gatherings and holiday celebrations. They have a unique way of making memories. Get ready to learn the secrets of making the most delicious Nestle Toll House cookies that have won hearts for years.

Key Takeaways

  • Discover the iconic Nestle Toll House cookie recipe
  • Learn about the rich history behind these classic cookies
  • Understand why these cookies are a beloved American treat
  • Explore the simple ingredients that make these cookies special
  • Prepare to create delicious memories in your own kitchen

Introduction to Nestle Toll House Cookies

The story of Nestle Toll House cookies is a delightful tale of culinary serendipity. It transformed American baking forever. Born in the 1930s, this iconic recipe has become a cherished tradition in kitchens across the United States.

At the heart of toll house cookie history stands Ruth Wakefield, an innovative cook. She accidentally created a legendary dessert. While running the Toll House Inn in Massachusetts, she discovered a game-changing baking technique. This technique would revolutionize chocolate chip cookies.

The Origin of the Recipe

Wakefield’s magical moment occurred when she decided to break up Nestle semi-sweet chocolate chips into her butter cookie dough. Instead of melting completely, the chocolate chips retained their shape. This created delicious pockets of chocolatey goodness.

  • The original recipe was created in 1938
  • Located at the Toll House Inn in Whitman, Massachusetts
  • Quickly gained popularity among home bakers

Why It’s a Family Favorite

Nestle Toll House cookies became an instant hit. Their irresistible combination of crisp edges and soft, chewy centers won hearts. The simple yet delectable recipe allows families to create memories together in the kitchen.

“A cookie that brings families together, one chocolate chip at a time.”

The versatility of these cookies means everyone can customize them with their favorite add-ins. This makes them a truly adaptable treat that continues to delight generations of bakers.

Ingredients You Need

To bake the perfect Nestle Toll House cookies, start by gathering the right ingredients. Whether you’re using a nestle cookie mix or making it from scratch, knowing each part is key to great taste.

Begin your baking journey by picking top-notch ingredients. They will turn your kitchen into a place filled with sweet smells.

Essential Ingredients for the Dough

  • All-purpose flour (2 1/4 cups)
  • Granulated sugar (3/4 cup)
  • Brown sugar (3/4 cup)
  • Butter (1 cup, softened)
  • Large eggs (2)
  • Vanilla extract (1 teaspoon)
  • Baking soda (1 teaspoon)
  • Salt (1/2 teaspoon)
  • Nestle Toll House chocolate chips (2 cups)

Optional Add-Ins for Extra Flavor

Make your nestle cookie mix even better with these creative extras:

  1. Chopped nuts (walnuts or pecans)
  2. Dried fruit (cranberries or raisins)
  3. Different chocolate varieties
  4. Coconut flakes
  5. Butterscotch chips

“The secret to great cookies is using fresh, high-quality ingredients and mixing them with love.” – Baking Enthusiast

Ingredient CategoryPurpose in RecipeRecommended Quantity
Dry IngredientsStructure and texturePrecise measurements
Wet IngredientsMoisture and bindingRoom temperature
Chocolate ChipsFlavor and sweetness2 cups recommended

Pro tip: Always use room temperature ingredients for the most consistent and delicious Nestle Toll House cookies.

The Tools You Will Use

Baking delicious Nestle Toll House cookies needs more than just good ingredients. The right tools can greatly improve your baking experience. Choosing the right equipment ensures consistent results and makes baking smoother and more fun.

Starting with the right tools is key to successful baking. Your nestle cookie baking tips toolkit should have several essential pieces. These tools will help you make perfect cookies every time.

Essential Baking Equipment

  • Large mixing bowl with sturdy construction
  • Electric mixer or stand mixer
  • Baking sheets with non-stick surface
  • Parchment paper or silicone baking mats
  • Cooling rack for finished cookies
  • Rubber spatula for scraping batter
  • Cookie scoop or tablespoon for portioning

Precision Measuring Tools

Accuracy is key in baking. Precise measurements are what make or break your Nestle Toll House cookies. Invest in high-quality measuring tools for consistent results:

  1. Liquid measuring cups with clear markings
  2. Dry measuring cups with flat edges
  3. Accurate kitchen scale for weight measurements
  4. Measuring spoons in various sizes

By choosing the right tools and understanding their importance, you’re on your way to baking success. Each tool is vital in making those perfectly golden, deliciously chewy chocolate chip cookies that everyone loves.

Making the perfect Nestle Toll House cookie dough needs precision and care. The right technique can make your baking amazing. Let’s explore the key steps for an incredible toll house cookie dough that will impress everyone.

Before mixing your nestle toll house cookie recipe, collect all your ingredients. Make sure they’re at room temperature. This helps them blend smoothly and gives your cookies a better texture.

Essential Mixing Techniques

Here are the main steps to create the ultimate toll house cookie dough:

  • Cream butter and sugars until light and fluffy
  • Beat in eggs one at a time
  • Gradually mix in dry ingredients
  • Fold chocolate chips gently into the dough

Pro Tips for Perfect Dough

Professional bakers know technique is crucial. Here are some insider tips:

  1. Don’t overmix – this can make cookies tough
  2. Use a spatula to fold ingredients gently
  3. Scrape down the bowl’s sides during mixing

“The secret to great cookies is in the details of preparation.” – Baking Experts

Creating the perfect Nestle Toll House cookie dough takes practice. Each mix brings you closer to cookie perfection!

Chilling the Dough: Is It Necessary?

Chilling your cookie dough is a key technique in baking Nestle cookies. It can make a big difference in how your cookies turn out. Many people wonder if this step is really necessary.

Chilling your dough is not just optional. It’s a crucial step that can take your Nestle Toll House cookies from good to amazing. It allows several important changes to happen in your dough.

Delicious Benefits of Chilling

  • Develops deeper, more complex flavor profiles
  • Prevents excessive spreading during baking
  • Creates a richer, more concentrated cookie texture
  • Allows butter to solidify, resulting in a more controlled spread

Experts say chilling your dough for at least 30 minutes is best. Aim for 1-2 hours in the fridge. Some bakers even chill it overnight for extra flavor.

Pro tip: Wrap your cookie dough tightly in plastic wrap to prevent it from absorbing other refrigerator odors.

When you’re ready to bake, take the dough out of the fridge. Let it sit at room temperature for about 10 minutes. This will make it easier to scoop and shape your cookies, keeping the chilling benefits.

Baking the Cookies

Getting your Nestle chocolate chip cookies just right takes focus and care. The baking step is key to turning simple ingredients into tasty treats.

Learning to bake Nestle cookies well starts with knowing the basics. Your oven’s temperature and how long you bake are key for that golden look.

Finding the Perfect Oven Temperature

The best temperature for baking Nestle chocolate chip cookies is 375°F (190°C). This temperature ensures:

  • Crispy edges
  • Soft, chewy centers
  • Even golden-brown color

Precise Baking Times for Perfect Cookies

Baking times depend on cookie size. Here are some general times:

  1. Small cookies (1-inch): 8-9 minutes
  2. Medium cookies (2-inch): 10-11 minutes
  3. Large cookies (3-inch): 12-13 minutes

“The secret to great cookies is watching them closely in the final minutes of baking.” – Baking Expert

Pro tip: Take cookies out when edges are lightly golden and centers look a bit underbaked. They’ll cook a bit more on the hot baking sheet after you take them out.

Common Baking Mistakes to Avoid

Mastering nestle cookie baking tips means knowing the common mistakes. These mistakes can ruin your cookie dreams. Even skilled bakers can mess up, affecting the taste and texture of their Nestle Toll House Cookies.

Cookie baking is an art that needs precision and detail. We’ll look at two big mistakes that can ruin your cookies.

The Danger of Overmixing

Overmixing your dough is a big mistake. It makes too much gluten in the flour. This results in:

  • Tough, dense cookies
  • Less softness and chewiness
  • A bad, bread-like texture

To avoid overmixing, stop mixing when ingredients just come together. Your dough should be a bit lumpy, not smooth.

Oven temperature is key in nestle cookie baking tips. If your oven is off, your cookies can burn or not cook right.

  • Use an oven thermometer to check the temperature
  • Preheat your oven fully before baking
  • Rotate baking sheets halfway for even cooking

Nestle Toll House Cookies usually bake best at 375°F (190°C). Always check your recipe for the right temperature.

“Baking is a science, and precision is key to delicious results.” – Professional Baker

Customizing Your Cookies

Exploring unique toll house cookie variations lets you make the classic Nestle chocolate chip cookies your own. You can add new flavors or meet dietary needs. These creative changes will make baking more fun.

Trying new things with your favorite Nestle chocolate chip cookies recipe is exciting. Your basic cookie dough is a great base for getting creative.

Exciting Add-Ins for Flavor Exploration

Make your nestle chocolate chip cookies even better with these tasty ingredients:

  • Chopped nuts (walnuts, pecans, almonds)
  • Dried fruits like cranberries or cherries
  • Different chocolate chip varieties
  • Coconut flakes
  • Sea salt sprinkles

Change your classic recipe to fit different diets with these smart swaps:

Dietary NeedIngredient Substitution
VeganUse plant-based butter, flax eggs, vegan chocolate chips
Gluten-FreeReplace wheat flour with almond or gluten-free flour blend
Low-SugarUse monk fruit sweetener or reduce sugar quantity

Small changes can lead to extraordinary cookie experiences. Being open to trying new things will result in amazing toll house cookie variations. They will surprise and please your taste buds.

Storing Your Cookies

Keeping your Nestle Toll House cookies fresh is key. Whether you’ve baked a batch or saved dough for later, the right storage is crucial. It helps keep their taste and texture just right.

Fresh cookies need extra care. After they cool, follow these tips for storing:

  • Use an airtight container with a tight-fitting lid
  • Place a piece of bread in the container to keep cookies soft
  • Store at room temperature for up to 5 days
  • Separate layers with parchment paper to prevent sticking

Freezing cookie dough is a big plus for quick baking. Pro tip: You can freeze raw dough for up to 3 months without losing quality.

Freezing Methods

  1. Roll dough into individual balls
  2. Place on a baking sheet lined with parchment paper
  3. Freeze until solid (about 1 hour)
  4. Transfer frozen dough balls to a freezer-safe container

“Freezing cookie dough allows you to enjoy fresh-baked cookies anytime!” – Baking Enthusiasts

Ready to bake? Just take out the dough balls you want. Let them thaw for 15-20 minutes. No need to reshape – they’ll be perfect!

Serving Suggestions

Make your nestle chocolate chip cookies special with creative serving ideas. These classic treats can be presented in many ways, making them a hit with family and friends.

Perfect Beverage Pairings

Pairing the right drink with your cookies can really bring out their flavor. Here are some great options:

  • Cold milk (classic choice)
  • Hot coffee
  • Vanilla almond milk
  • Herbal tea

Creative Presentation Ideas

Stand out with unique ways to serve your cookies. They’ll impress everyone:

  1. Create a cookie dessert platter with varied sizes
  2. Stack cookies in glass jars for gift-giving
  3. Serve warm with vanilla ice cream
  4. Arrange cookies in decorative patterns
OccasionPresentation Style
Family GatheringRustic wooden tray
Dinner PartyElegant china plate
Children’s EventColorful platter

Try out these serving ideas to make your nestle chocolate chip cookies unforgettable. They’ll turn a simple snack into a memorable treat.

Fun Variations of Nestle Toll House Cookies

Exploring different toll house cookie variations can turn your classic Nestle Toll House cookie recipe into exciting new treats. This beloved recipe is versatile, letting bakers get creative with flavors and textures.

Want to mix up your traditional Nestle Toll House cookie recipe? Try these delightful twists to keep your taste buds excited:

Peanut Butter Chocolate Chip Cookies

Add a nutty twist to your favorite cookie by mixing in creamy peanut butter. Here’s how to modify your classic recipe:

  • Add 1/2 cup of smooth peanut butter to the standard dough
  • Reduce butter quantity by 1/4 cup to maintain proper consistency
  • Mix in Nestle chocolate chips as usual
  • Bake at slightly lower temperature (325°F) for softer cookies

Oatmeal Chocolate Chip Cookies

Make your traditional Nestle Toll House cookie recipe into a hearty, wholesome treat by adding rolled oats. This variation adds extra texture and nutritional value:

  • Replace 1 cup of flour with 1 cup of rolled oats
  • Add a teaspoon of cinnamon for warmth
  • Ensure oats are old-fashioned, not quick-cooking
  • Extend baking time by 2-3 minutes for perfect crispness

These toll house cookie variations show that with a little creativity, you can make a classic recipe uniquely delicious. Experiment and find your family’s new favorite cookie!

Kid-Friendly Baking Tips

Baking Nestle Toll House cookies is a fun family activity. It brings everyone together in the kitchen. Making delicious treats is a special experience when kids help out. These tips will make baking a fun learning time for kids of all ages.

Getting kids involved in baking needs careful planning and watching. Safety is the most important thing when kids start baking.

Age-Appropriate Baking Roles

Children of different ages can do different things in the kitchen:

  • Toddlers (2-3 years): Mixing ingredients with adult help
  • Preschoolers (4-5 years): Measuring dry ingredients
  • Elementary kids (6-10 years): Helping crack eggs, rolling dough
  • Tweens (11-12 years): Using mixer, following recipe steps

Kitchen Safety Essentials

These tips make baking safe and fun:

  1. Always watch children near hot surfaces
  2. Use oven mitts when handling baking sheets
  3. Teach proper hand-washing techniques
  4. Keep sharp utensils out of children’s reach

Learning Opportunities While Baking

Baking is a great way for kids to learn. They can learn:

  • Math skills through measuring ingredients
  • Science concepts about ingredient interactions
  • Following instructions by reading recipe steps
  • Teamwork during the baking process

With patience and guidance, baking Nestle Toll House cookies is more than just making treats. It’s creating lasting family memories.

History of Chocolate Chips

The story of nestle semi-sweet chocolate chips is a delightful journey through American culinary innovation. These small morsels transformed home baking forever, creating a sweet revolution in kitchens across the United States.

Toll house cookie history began in the 1930s at the Toll House Inn in Massachusetts. Ruth Wakefield accidentally created a groundbreaking recipe. She found that chopped chocolate pieces could make delicious cookies with melted chocolate throughout the dough.

The Birth of Nestle Chocolate Chips

Nestle quickly saw the potential of Wakefield’s invention. They made a remarkable deal with her. This allowed them to print her recipe on their chocolate packaging. This partnership led to the development of nestle semi-sweet chocolate chips specifically designed for baking.

  • 1939: First packaged chocolate chips introduced
  • 1940: Widespread commercial production begins
  • 1950s: Chocolate chips become a pantry staple

Impact on American Baking Culture

The introduction of pre-made chocolate chips revolutionized home baking. Bakers no longer needed to chop chocolate bars manually. This made cookie preparation faster and more consistent.

YearBaking Innovation
1930sChocolate chips invented
1940sWidespread recipe adoption
1960sChocolate chips become global phenomenon

Today, nestle semi-sweet chocolate chips remain a beloved ingredient in kitchens worldwide. They continue the legacy of that original toll house cookie recipe.

Healthier Alternatives to Traditional Ingredients

Turning your classic Nestle Toll House cookie recipe into a healthier treat is easy. You can make delicious cookies that are good for you. Just try using healthier ingredients.

Looking for healthier options for your Nestle Toll House cookie recipe? Focus on swapping ingredients. This way, you keep the cookie’s great taste and texture.

Smart Sugar Substitutions

Less sugar doesn’t mean no sweetness. Here are some sweetener alternatives:

  • Coconut sugar
  • Stevia
  • Monk fruit sweetener
  • Applesauce

Whole Wheat Flour Options

Switching to whole wheat flour can make your cookies healthier. White whole wheat flour tastes similar but has more fiber and nutrients.

IngredientNutritional BenefitRecommended Ratio
White Whole Wheat FlourHigher fiber, more nutrients1:1 replacement
Almond FlourProtein-rich, lower carb3/4 cup per 1 cup wheat flour
Oat FlourGluten-free option1:1 replacement

“Baking healthier doesn’t mean baking less delicious.” – Nutritionist Sarah Thompson

Remember, changing ingredients might change how your cookies taste and feel. Try different combinations to find the perfect mix of health and taste in your Nestle Toll House cookie recipe.

Conclusion and Final Thoughts

Baking the classic Nestle Toll House cookie recipe is more than just making a sweet treat. It’s about making memories and connecting with loved ones. Each batch brings a warm, nostalgic experience that bridges generations through the simple joy of homemade cookies.

Your journey through mastering the Nestle Toll House cookie recipe is a delightful mix of tradition and creativity. While enjoying these treats, remember to be mindful of toll house cookie nutrition facts. A balanced approach means savoring each bite without guilt, understanding that occasional indulgence can be part of a healthy lifestyle.

Sharing the Sweet Legacy

The magic of this recipe lies in its ability to inspire bakers of all skill levels. Whether you’re a seasoned baker or a kitchen novice, the Nestle Toll House cookie recipe provides an accessible and rewarding experience. Share your freshly baked cookies with friends, family, and neighbors—spreading happiness one delicious bite at a time.

Continuing the Baking Tradition

As you perfect your skills, consider passing down this cherished recipe to younger generations. Baking together creates lasting bonds and teaches valuable culinary skills. Your passion for creating these beloved cookies can spark joy and create cherished family moments for years to come.

FAQ

What makes Nestle Toll House Cookies so special?

Nestle Toll House Cookies are loved for their sweet chocolate chips and buttery dough. They started in the 1930s by Ruth Wakefield. Now, they’re a classic American treat that brings families together.

How do I ensure my Toll House Cookies turn out perfectly?

To get perfect cookies, use room temperature ingredients and measure right. Don’t overmix the dough. Take them out of the oven when the edges are golden and the center is soft.

Can I make Toll House Cookies if I have dietary restrictions?

Yes! You can make them for different diets. For gluten-free, use gluten-free flour. For vegan, use plant-based margarine and vegan chocolate chips. There are many ways to keep the cookies delicious while meeting dietary needs.

How long can I store Nestle Toll House Cookies?

Keep them in an airtight container at room temperature for 3-5 days. For longer, freeze baked cookies for up to 3 months or the dough for up to 3 weeks. This way, you can bake fresh cookies anytime.

Try adding chopped nuts or different chocolate chips. You can also use dried fruits or make oatmeal chocolate chip cookies. Experiment with peanut butter chips or a sprinkle of sea salt for extra taste.

Are Toll House Cookies nutritionally balanced?

While tasty, they’re a treat to enjoy in moderation. They have sugar, butter, and chocolate, making them high in calories. For a healthier version, reduce sugar, use whole wheat flour, or add nuts or seeds.

Can children help make Toll House Cookies?

Yes! Baking them is a fun family activity. Kids can measure, mix, and shape cookies. Always watch young children in the kitchen and give them tasks that are safe and fun.

Chilling the dough makes the cookies taste better and prevents them from spreading too much. Chill for 30 minutes to 24 hours. This lets the flour hydrate and the fats solidify, enhancing the flavor.

0 comments
0 FacebookTwitterPinterestEmail
Hot Chocolate Recipe

The Best Hot Chocolate Recipe: Rich and Easy

Serves: 2 Prep Time: Cooking Time:
Nutrition facts: 250 calories 12 grams fat
Rating: 5.0/5
( 1 voted )

Ingredients

  • 2 cups whole milk
  • 2 tablespoons unsweetened cocoa powder
  • 2 tablespoons sugar (or to taste)
  • 1/4 teaspoon vanilla extract
  • Pinch of salt
  • 1/4 cup heavy cream
  • Whipped cream or marshmallows for topping (optional)

Instructions

1. In a medium saucepan, combine the milk, cocoa powder, sugar, and salt over medium heat.
2. Whisk constantly until the mixture is heated through and the cocoa powder is completely dissolved.
3. Stir in the vanilla extract and heavy cream. Heat for another minute, but do not let it boil.
4. Pour the hot chocolate into two mugs and top with whipped cream or marshmallows if desired.
5. Serve immediately and enjoy your rich, creamy hot chocolate!

Notes

For a richer flavor, add a few extra tablespoons of heavy cream or use a higher percentage dark chocolate in place of cocoa powder.

Ever wondered how to make hot chocolate truly special? It’s not just about mixing cocoa and milk. It’s an art that warms your soul and delights your taste buds.

Your search for the perfect hot chocolate recipe ends here. This guide will show you how to make a rich, smooth hot chocolate that outshines any store-bought mix. Whether you love chocolate or just want a cozy drink, our easy steps will help you make a delicious treat.

From picking the best ingredients to mastering techniques, you’ll learn secrets from professional chocolatiers. Get ready to make your winter nights cozy and impress everyone with your hot chocolate skills.

Key Takeaways

  • Learn the secrets to creating a rich, smooth hot chocolate recipe
  • Discover how to select the best ingredients for homemade hot chocolate
  • Understand techniques that make your hot chocolate stand out
  • Explore ways to customize your chocolate drink
  • Master the art of creating the perfect warm beverage

Introduction to Hot Chocolate

Hot chocolate is more than a warm drink. It’s a comforting experience that brings people together. It connects us across cultures and generations. Your journey into the world of hot chocolate recipes starts here.

The magic of a perfect hot chocolate recipe begins with its core elements. Quality cocoa powder is key. It makes the drink rich and luxurious, warming both body and soul.

What Makes a Great Hot Chocolate?

A truly exceptional hot chocolate has several key traits:

  • Intense chocolate flavor
  • Smooth, creamy texture
  • Perfect balance of sweetness
  • Depth of chocolate intensity

“Great hot chocolate is an art form that transforms simple ingredients into liquid comfort.” – Chocolate Enthusiast

Brief History of Hot Chocolate

Hot chocolate’s journey spans thousands of years. It began with ancient Mesoamerican civilizations. The Mayans and Aztecs first discovered cacao’s potential.

CivilizationHot Chocolate Characteristics
MayansRitual drink, bitter, mixed with chili peppers
AztecsSacred beverage, believed to have divine properties
EuropeansSweetened version, added milk and sugar

European explorers brought cocoa powder to the world. They changed it from a sacred drink to a beloved beverage. Each culture added its own twist, creating diverse traditions that still grow today.

Essential Ingredients for Hot Chocolate

Making the perfect hot chocolate needs the right ingredients. The mix of chocolate, milk, and sweeteners turns a simple drink into a luxury. It warms your heart and pleases your taste buds.

Start your hot chocolate adventure by knowing the key ingredients. These elements make this winter drink truly special.

Types of Chocolate to Use

Choosing the right chocolate is key for a rich hot chocolate. Here are some options:

  • Dark chocolate (60-70% cocoa) for intense flavor
  • Milk chocolate for a sweeter, creamier taste
  • White chocolate for a unique, smooth experience
  • Chocolate shavings as a luxurious garnish

“The quality of chocolate determines the depth of your hot chocolate experience.”

Milk Choices for Creaminess

Milk is crucial for a velvety hot chocolate. Different milks change the drink’s character:

  • Whole milk for maximum richness
  • Skim milk for a lighter version
  • Almond milk for a nutty undertone
  • Oat milk for a creamy plant-based alternative

Sweeteners: Options and Recommendations

The right sweetener makes your hot chocolate amazing. While sugar is classic, try these alternatives:

  • Granulated sugar for traditional sweetness
  • Honey for a natural, floral note
  • Maple syrup for depth of flavor
  • Stevia for a low-calorie option

Pro tip: Start with less sweetener and adjust to taste. Remember, you can always add more sugar, but you can’t take it away!

The Basic Hot Chocolate Recipe

Making the perfect homemade hot chocolate is simple. Just a few ingredients and some tips can make a warm drink that delights your senses.

A classic hot chocolate recipe needs just a few key parts. The magic comes from using high-quality ingredients and careful preparation.

Essential Ingredients for Your Hot Chocolate

  • Unsweetened cocoa powder
  • Granulated sugar
  • Whole milk or your preferred milk alternative
  • Pinch of salt
  • Vanilla extract (optional)

Step-by-Step Preparation

  1. Whisk cocoa powder and sugar in a saucepan
  2. Gradually add milk while stirring
  3. Heat over medium heat, stirring constantly
  4. Remove from heat before boiling
  5. Add vanilla extract if desired

Adjusting Thickness and Creaminess

The secret to great hot chocolate is its consistency. For a thicker drink, use less milk or add heavy cream. For a lighter drink, add more milk.

ConsistencyMilk RatioTexture
Light4 parts milkSmooth, drinkable
Medium3 parts milkCreamy, balanced
Rich2 parts milkThick, indulgent

You can make your hot chocolate your own. Try different milks and chocolate levels to find your favorite.

Flavor Enhancements to Brighten Your Hot Chocolate

Turn your hot chocolate into a special treat by trying new flavors and toppings. The right mix can make your drink amazing, making every sip a fun journey.

Spices can add a lot to your hot chocolate. A little cinnamon can make it feel cozy and smell great. Try different spice mixes to find your favorite.

Spice Recommendations for Hot Chocolate

  • Cinnamon: Adds warm, sweet undertones
  • Nutmeg: Provides a subtle, earthy complexity
  • Cardamom: Introduces an exotic, slightly spicy note
  • Cayenne: Creates a subtle heat for adventurous drinkers

Flavor Extracts for Unique Taste

Vanilla extract can change your hot chocolate. Just a few drops can make it smooth and rich. Try peppermint or almond extracts for something new.

Irresistible Toppings

Get creative with your hot chocolate toppings. Marshmallows add sweetness, and whipped cream makes it creamy.

ToppingFlavor ImpactTexture
MarshmallowsSweet, vanilla-likeSoft, fluffy
Whipped CreamRich, creamyLight, airy
Chocolate ShavingsIntense chocolateCrisp, melting
Caramel DrizzleButtery, sweetSmooth, sticky

Your hot chocolate is a blank canvas for creativity. Feel free to mix and match flavors to make it your own.

Making Hot Chocolate from Scratch

Making homemade hot chocolate is an art. It starts with understanding the foundation of great flavor. When you make it from scratch, you get a rich, personalized taste that store-bought mixes can’t match. The secret is in choosing high-quality ingredients and mastering the technique.

Choosing the Right Cocoa Powder

Not all cocoa powders are the same. Your choice can change the depth and richness of your homemade hot chocolate. Here are key things to consider when picking cocoa powder:

  • Natural cocoa powder: Offers a bright, intense chocolate flavor
  • Dutch-processed cocoa powder: Provides a smoother, less acidic taste
  • Raw cacao powder: Delivers maximum nutritional benefits

Creating a Rich Base from Chocolate Bars

For an ultra-luxurious homemade hot chocolate, chocolate bars are key. High-quality dark chocolate can turn an ordinary drink into a gourmet treat.

Chocolate TypeFlavor ProfileBest For
Dark Chocolate (70% cocoa)Intense, slightly bitterRich, sophisticated hot chocolate
Milk ChocolateSweet, creamyMild, kid-friendly drinks
Semisweet ChocolateBalanced sweetnessVersatile, crowd-pleasing option

“The beauty of homemade hot chocolate is that you control every element of flavor.” – Artisan Chocolatier

When making your hot chocolate from scratch, remember that quality ingredients matter. Try different cocoa powders and chocolate bars to find your perfect blend.

Using a Hot Chocolate Mix

Store-bought hot chocolate mixes are quick and easy. They let you enjoy a warm drink without much work. They’re perfect for when you’re in a hurry and want something comforting.

Choosing the right hot chocolate mix can make a big difference. Not all mixes are the same. Knowing what makes each one special can help you find the one you like best.

Advantages of Store-Bought Mixes

  • Instant preparation with minimal effort
  • Consistent flavor profile
  • Long shelf life
  • Variety of flavor options
  • Budget-friendly alternative to scratch-made recipes

When picking a hot chocolate mix, look for brands known for great taste and quality. Here are some top picks:

  1. Ghirardelli Hot Chocolate Mix – Known for intense chocolate flavor
  2. Swiss Miss – Classic and widely available
  3. Lake Champlain Chocolates – Premium, artisan-style mix
  4. Godiva Hot Chocolate Mix – Luxurious chocolate experience

To make your hot chocolate mix even better, try different milks. Whole milk makes it creamier, while plant-based milks add unique tastes. Adding vanilla or cinnamon can take it to the next level.

Vegan Hot Chocolate Alternatives

Making delicious homemade hot chocolate without dairy is simple. Vegan options are now popular, offering creamy and rich choices. They are perfect for those who can’t have dairy or follow a plant-based diet. These alternatives will make your hot chocolate better than ever.

Choosing plant-based milk can change your hot chocolate’s taste and feel. Each milk type adds something special to your drink:

  • Almond milk: Light and nutty, with a sweet taste
  • Oat milk: Creamy and thick, feels like regular milk
  • Coconut milk: Rich and tropical, makes chocolate taste deeper
  • Soy milk: Full of protein and tastes neutral

Selecting Dairy-Free Chocolate

Not all chocolate is good for vegan hot chocolate. Here’s what to look for:

Chocolate TypeVegan CompatibilityFlavor Profile
Dark Chocolate (70%+)Typically VeganIntense, slightly bitter
Vegan Chocolate ChipsSpecifically DesignedSmooth, sweet
Cocoa PowderNaturally VeganPure chocolate essence

Pro Tips for Creamy Vegan Hot Chocolate

To get creamy hot chocolate without dairy, try these tips:

  1. Use full-fat plant milks for the creamiest texture
  2. Add a pinch of salt to make chocolate taste better
  3. Blend in a bit of coconut cream for extra richness
  4. Try different chocolates to find your favorite mix

Pro tip: Always check chocolate labels to ensure they are truly dairy-free!

Hot Chocolate Variations Around the World

Hot chocolate is more than just a drink. It’s a journey across cultures and continents. Each place adds its own special touch, making it a unique experience.

In Mexico, hot chocolate is spicy and full of flavor. In Switzerland, it’s elegant and simple. These differences show how hot chocolate reflects local tastes and traditions.

Mexican Hot Chocolate: A Spicy Cinnamon Delight

Mexican hot chocolate is known for its bold taste. It combines:

  • Rich dark chocolate
  • Ground cinnamon
  • A hint of chili pepper
  • Piloncillo (unrefined cane sugar)

The cinnamon gives it a warm, rich flavor. Making it is special, using a molinillo whisk for a creamy texture.

Swiss and Belgian Chocolate Traditions

In Europe, hot chocolate is made with care. Swiss and Belgian styles focus on:

  • High-quality chocolate with high cocoa content
  • Incredibly smooth, thick consistency
  • Minimal additional ingredients
  • Emphasis on pure chocolate flavor

These places value chocolate above all. Their hot chocolate is like liquid chocolate, a true indulgence.

Preparing Hot Chocolate for a Crowd

Hosting a winter gathering means you need a great hot chocolate recipe. It should please many guests and keep everyone warm. Scaling your favorite recipe takes planning and creative ways to serve.

  • Use a large slow cooker or industrial-sized pot to keep the temperature steady
  • Make the base mixture ahead of time to avoid last-minute rush
  • Set up a DIY hot chocolate bar with lots of toppings

Scaling Your Hot Chocolate Recipe

To scale your hot chocolate recipe, multiply the main ingredients. For every 4-6 more servings, add more chocolate and milk. Keep the same ratio of cocoa powder, sweeteners, and flavorings to keep the taste the same.

Presentation Ideas for Serving

Make serving hot chocolate a fun experience. Create a festive station with marshmallows, whipped cream, and fancy toppings. Use decorative mugs, cinnamon sticks, and chocolate shavings to let guests make their own special cup.

  • Offer mini marshmallows and large marshmallow varieties
  • Include flavored whipped cream options
  • Provide chocolate stirring spoons for extra indulgence

With these ideas, your hot chocolate gathering will be a hit. It will be a winter celebration that everyone will remember.

Sipping Chocolate: A Richer Option

If you want to make your homemade hot chocolate special, try sipping chocolate. It’s a richer, more intense drink that chocolate fans love. It changes how you enjoy hot chocolate.

Sipping chocolate is different from regular hot chocolate. It has a thick, velvety texture and a strong flavor. This is because it’s made with more chocolate, making it a more indulgent drink.

Understanding Sipping Chocolate

Making great sipping chocolate needs careful attention and top-notch ingredients. Here’s what makes it special:

  • Extremely thick consistency
  • Higher chocolate-to-liquid ratio
  • Intense chocolate flavor
  • Served in smaller portions

Creating Your Own Homemade Hot Chocolate Sipping Experience

To make amazing sipping chocolate at home, follow these steps:

  1. Select premium dark chocolate (60-70% cocoa)
  2. Chop chocolate into small pieces
  3. Heat milk or cream slowly
  4. Whisk chocolate until smooth
  5. Garnish with chocolate shavings

Pro tip: Use a double boiler to prevent chocolate from burning and achieve a silky smooth texture. Top your sipping chocolate with delicate chocolate shavings for an extra touch of elegance.

The secret to great sipping chocolate is patience and quality ingredients.

Looking for a fancy dessert drink or a luxurious treat? Sipping chocolate gives you an unparalleled chocolate experience that will wow your taste buds.

Cold Weather Hot Chocolate Pairings

When winter hits, nothing beats a warm mug of hot chocolate. Your favorite hot chocolate recipe is even better with the right snacks. Enjoy it during the most magical seasons.

Cold weather makes hot chocolate a special ritual. A well-made hot chocolate can brighten your day and bring joy.

Best Snacks to Complement Your Hot Chocolate

Make your hot chocolate even better with these treats:

  • Cinnamon-dusted shortbread cookies
  • Marshmallow-topped graham crackers
  • Chocolate biscotti for dipping
  • Buttery croissants with a sprinkle of cinnamon

“A perfect hot chocolate is not just a drink, it’s a warm embrace on a cold day.”

Perfect Seasons for Your Warm Treat

Hot chocolate is not just for winter. Its cinnamon warmth can brighten your mood from autumn to winter.

Here are the best times to enjoy your hot chocolate:

  1. Snowy weekend mornings
  2. After outdoor winter activities
  3. During holiday gatherings
  4. Cozy evening wind-downs

The best hot chocolate is about making memories and finding warmth in every sip.

Healthier Hot Chocolate Options

Enjoying hot chocolate doesn’t have to mean giving up on health. By making smart choices, you can make this treat both tasty and good for you. It’s a way to satisfy your sweet cravings while staying on track with your health goals.

Start by picking the right ingredients for your hot chocolate. High-quality cocoa powder gives a deep flavor without too much sugar. It’s a great choice for a healthier drink.

Reducing Sugar Smartly

It’s possible to cut down on sugar without losing flavor. Here are some tips:

  • Use natural sweeteners like stevia or monk fruit
  • Select dark cocoa powder with intense flavor
  • Leverage the natural sweetness of milk alternatives

Nutritious Ingredient Boosters

Make your hot chocolate even healthier with these ingredients:

IngredientNutritional Benefit
Collagen powderSupports skin and joint health
Plant-based proteinIncreases protein content
CinnamonHelps regulate blood sugar

By adding these nutrient-rich ingredients, you can turn your hot chocolate into a drink that’s both indulgent and healthy. It’s a treat that’s good for you too.

Making Hot Chocolate in Different Appliances

Exploring new ways to make your favorite homemade hot chocolate can change your winter drink game. Kitchen appliances offer creative solutions for making the perfect hot chocolate with ease and great taste.

Different kitchen tools can help you make delicious hot chocolate with special textures and ease. From slow cookers to blenders, you’ll find many ways to improve your hot chocolate.

Slow Cooker Hot Chocolate Magic

A slow cooker is great for making hot chocolate, especially for big groups. Your homemade hot chocolate recipe can simmer gently, keeping it warm and flavorful.

  • Perfect for family gatherings
  • Keeps hot chocolate warm for hours
  • Allows hands-off preparation

Blender Hot Chocolate Techniques

Blenders make quick and smooth hot chocolate. They help you get a creamy texture that’s as good as coffee shop hot chocolate.

  1. Combine chocolate and milk
  2. Blend until smooth and frothy
  3. Heat briefly if needed

Try these methods to find your favorite way to make hot chocolate. Each appliance adds its own special touch to this winter favorite.

Hot Chocolate as a Winter Tradition

Winter is more than just cold—it’s a time to make warm memories with loved ones. A steaming mug of hot chocolate is more than a drink. It’s a family ritual that brings generations together.

Creating a special hot chocolate night can become a cherished winter tradition. It’s something everyone looks forward to. It turns a simple pleasure into a moment that strengthens family bonds.

Crafting Family Hot Chocolate Moments

Make your hot chocolate recipe a memorable experience with these ideas:

  • Designate a weekly hot chocolate night during winter months
  • Prepare a hot chocolate bar with various toppings
  • Invest in special mugs for each family member
  • Add playful marshmallows as a delightful topping

Making Your Hot Chocolate Night Special

Make your hot chocolate gathering a meaningful family tradition. Choose cozy blankets and dim the lights for a warm atmosphere. Encourage storytelling, play board games, or enjoy quiet conversation with your hot chocolate.

“Traditions are the heartbeat of family connection, and a simple hot chocolate night can create memories that last a lifetime.”

Your winter evenings can become magical moments of togetherness. All centered around a comforting mug of hot chocolate.

Conclusion: Your Perfect Cup Awaits

Hot chocolate is more than a drink; it’s a canvas for creativity and comfort. Your homemade hot chocolate journey is unique, with endless possibilities. Whether you add vanilla extract or try exotic spices, each cup has a story.

The magic of making homemade hot chocolate is exploring your culinary curiosity. Start with basic recipes and then add your own twist. The most memorable drinks often come from unexpected ingredients that show your personal taste and imagination.

Encouragement to Experiment

Don’t be afraid to try new things in your hot chocolate making. Experiment with different chocolate types, milk alternatives, and unique flavor enhancers. A little vanilla extract can make a big difference. Your kitchen is a place for delicious discoveries.

Sharing Your Hot Chocolate Experience

Every great recipe has a story. Share your hot chocolate creations with friends and family. Let them taste your unique blends and get their feedback. The joy of hot chocolate is not just in the drink but in the memories and connections it brings.

FAQ

How long can I store homemade hot chocolate?

You can keep homemade hot chocolate in the fridge for 3-4 days. Use an airtight container. When you’re ready, heat it gently on the stovetop or in the microwave. Stir often to keep it smooth.

Can I make hot chocolate without milk?

Yes, you can use water, plant-based milk, or even coffee. Each choice will change the taste and creaminess. Try different options to find your favorite.

What’s the best cocoa powder for hot chocolate?

Dutch-processed cocoa powder is best for hot chocolate. It has a smooth, less acidic taste. Choose high-quality brands for the best flavor.

How can I make my hot chocolate more creamy?

Use whole milk or add heavy cream for creaminess. Melted chocolate, a milk frother, or blending can also make it smoother. This makes it more luxurious.

Are there any healthy hot chocolate alternatives?

Yes, you can make healthier hot chocolate. Use unsweetened cocoa powder and less sugar. Choose plant-based milks and add protein powder, cinnamon, or vanilla for extra nutrition.

Can I make hot chocolate in advance?

Absolutely! You can make hot chocolate mix ahead and store it. For a liquid version, make it ahead and reheat. Just store it in the fridge and use within 3-4 days.

What are some unique hot chocolate toppings?

Try chocolate shavings, caramel drizzle, or crushed peppermint. Toasted coconut or sea salt can also add a special touch. These toppings can make your hot chocolate extra special.

Is hot chocolate suitable for vegans?

Yes, you can make vegan hot chocolate. Use plant-based milk, dairy-free chocolate, and natural sweeteners. Many dark chocolates are vegan, making it easy to make a delicious plant-based version.

How can I make hot chocolate for a large group?

Use a slow cooker to keep hot chocolate warm for a crowd. Make a big batch ahead, set it low, and offer toppings for everyone to customize their hot chocolate.

What’s the difference between hot chocolate and sipping chocolate?

Sipping chocolate is thicker and richer than regular hot chocolate. It has a higher chocolate ratio and uses better chocolate. This makes it more decadent, almost like a pudding.

0 comments
0 FacebookTwitterPinterestEmail
Mouth-Watering Chipotle Chicken Recipe

Mouth-Watering Chipotle Chicken Recipe You'll Love

Serves: 4 Prep Time: Cooking Time:
Nutrition facts: 300 calories 18 grams fat
Rating: 5.0/5
( 1 voted )

Ingredients

  • 4 boneless, skinless chicken breasts
  • 2 tablespoons chipotle peppers in adobo sauce, minced
  • 2 cloves garlic, minced
  • 1 tablespoon olive oil
  • 1 teaspoon smoked paprika
  • 1 teaspoon ground cumin
  • 1 teaspoon onion powder
  • Salt and pepper to taste
  • Juice of 1 lime
  • Fresh cilantro for garnish (optional)

Instructions

1. In a small bowl, mix together the minced chipotle peppers, garlic, olive oil, smoked paprika, cumin, onion powder, lime juice, salt, and pepper.
2. Rub the spice mixture evenly over the chicken breasts. Allow the chicken to marinate for 10-15 minutes.
3. Heat a skillet or grill pan over medium-high heat. Once hot, cook the chicken for 6-7 minutes per side, or until the internal temperature reaches 165°F (74°C).
4. Remove the chicken from the pan and let it rest for 5 minutes before slicing.
5. Garnish with fresh cilantro and serve with your choice of sides, such as rice, vegetables, or tortillas.

Notes

For added flavor, you can marinate the chicken for up to 2 hours. Serve with a side of salsa or a drizzle of sour cream for a creamy contrast to the spice.

Mouth-Watering Chipotle Chicken Recipe You’ll Love. Ever wondered how to turn a simple chicken dinner into a feast fit for a restaurant? The secret is in the ultimate chipotle chicken recipe. It brings bold, smoky flavors right to your kitchen.

This easy chicken recipe is more than just a weeknight meal. It’s a culinary journey that mixes the spicy essence of chipotle peppers with tender chicken. Whether you’re new to cooking or a pro, this recipe will make your dinner stand out with little effort and lots of flavor.

Imagine making a dish that’s full of smoky, spicy goodness. This recipe is so versatile, it can turn tacos, salads, and bowls into amazing meals. Get ready to learn how easy it is to make restaurant-quality chipotle chicken at home.

Key Takeaways

  • Discover an incredibly easy chipotle chicken recipe
  • Learn how to infuse bold, smoky flavors into your cooking
  • Create versatile dishes with minimal preparation time
  • Unlock professional-level cooking techniques at home
  • Impress family and friends with restaurant-quality meals

What is Chipotle Chicken?

Chipotle chicken is a mix of Mexican flavors and American cooking. It turns regular chicken into a special dish. The smoky chipotle flavor makes it stand out.

At its heart, chipotle chicken is full of life and taste. It honors Mexican cooking traditions. The chipotle pepper, a smoked jalapeño, adds depth and complexity.

The Origins of Chipotle Chicken

Chipotle chicken comes from Mexico’s cooking history. Indigenous people smoked jalapeños to preserve them. This created the chipotle pepper, a key ingredient in Mexican dishes.

Key Ingredients of Chipotle Chicken

  • Chipotle peppers in adobo sauce
  • Chicken (typically boneless, skinless)
  • Spices like cumin and garlic
  • Lime juice
  • Olive oil

Flavor Profile

The smoky chipotle flavor is a mix of tastes. It has:

  1. Smokiness from roasted peppers
  2. Heat from jalapeño peppers
  3. Subtle sweetness from adobo sauce
  4. Tangy undertones from citrus ingredients

When made right, chipotle chicken is a feast for the taste buds. It makes any meal special.

Essential Cooking Techniques

Learning the right cooking techniques can make your easy chicken recipes stand out. Whether it’s for a weeknight dinner or a special occasion, knowing key methods can take your chipotle chicken to the next level. It will taste like it’s from a restaurant.

Marinating the Chicken

Marinating is key to making chicken dishes flavorful. The right marinade tenderizes the meat and adds deep flavors. For your chipotle chicken, marinate for at least 30 minutes but no more than 24 hours.

  • Use a resealable plastic bag for even coating
  • Refrigerate while marinating
  • Turn the chicken occasionally to ensure full flavor absorption

Grilling vs. Baking

Grilling and baking both have their perks for chipotle chicken. Grilling adds a smoky flavor and a crispy exterior. Baking, on the other hand, ensures even cooking, perfect for weeknight dinners.

GrillingBaking
Adds smoky flavorMore consistent cooking
Creates crispy exteriorLess hands-on preparation
Requires direct heat managementEasier temperature control

Perfecting the Searing Technique

Searing seals in juices and gives your chicken a golden-brown crust. For the best results, use a hot pan and don’t overcrowd it. Pat the chicken dry before searing for that crispy exterior.

  • Use a cast-iron skillet for best results
  • Heat pan until it’s smoking hot
  • Cook for 3-4 minutes per side

Choosing the Right Chicken

Choosing the perfect chicken is key for tasty and healthy chicken breast recipes. The right chicken can make your dish unforgettable, especially with a flavorful chipotle recipe.

Understanding different chicken cuts is vital for finding healthy protein sources. Each cut has its own special qualities that can enhance your cooking.

Types of Chicken Cuts for Your Recipe

  • Chicken Breasts: The leanest and most popular cut for healthy protein sources
  • Chicken Thighs: More flavorful with slightly higher fat content
  • Chicken Tenderloins: Smaller, softer meat perfect for quick cooking

Fresh vs. Frozen Chicken

Choosing between fresh and frozen chicken affects your recipes. Fresh chicken gives better texture, while frozen is more convenient.

CharacteristicFresh ChickenFrozen Chicken
TextureMore tenderPotentially slightly tougher
ConvenienceMust be used quicklyLonger storage time
CostGenerally more expensiveOften more budget-friendly

Pro tip: Always thaw frozen chicken in the fridge for safety and better texture.

Ingredients You’ll Need

Starting with the right ingredients is key to making delicious spicy chicken dishes. Your chipotle chicken recipe will come to life with a list of components. These add bold flavor and exciting texture to your meal.

Creating authentic chipotle chicken requires some essential elements. These turn ordinary poultry into a mouth-watering masterpiece. The star ingredient? Chipotle peppers in adobo sauce. This condiment adds smoky, spicy complexity.

Chicken Marinade Components

Your marinade foundation will include:

  • Boneless, skinless chicken breasts or thighs
  • 2-3 chipotle peppers in adobo sauce, finely chopped
  • Fresh lime juice
  • Olive oil
  • Minced garlic

Additional Flavor Boosters

Elevate your spicy chicken dishes with these ingredients:

  • Cumin
  • Smoked paprika
  • Oregano
  • Sea salt
  • Freshly ground black pepper

Optional Add-Ins

For customization, consider these optional ingredients:

  • Honey for subtle sweetness
  • Cilantro for fresh herbs
  • Red pepper flakes for extra heat
  • Tequila for depth of flavor

“The secret to great chipotle chicken is balancing smoky, spicy, and tangy flavors.” – Chef Martinez

Quality ingredients are crucial for an unforgettable chipotle chicken experience.

Preparing the Marinade

Starting a chipotle chicken recipe with a great marinade is key. It gives your chicken a smoky flavor that wows everyone. This marinade turns simple chicken into a dish that’s a hit with family and friends.

Marinades break down meat fibers and add rich flavors. To make a top-notch chipotle chicken, mix ingredients that work well together. This ensures the flavors get deep into the meat.

Essential Marinade Ingredients

  • Chipotle peppers in adobo sauce
  • Olive oil
  • Fresh lime juice
  • Garlic
  • Honey or brown sugar
  • Salt and pepper

Flavor Absorption Techniques

To get the most smoky chipotle flavor, follow these tips:

  1. Use a resealable plastic bag for even coating
  2. Marinate in the refrigerator for 2-4 hours
  3. Turn the chicken occasionally to ensure full flavor coverage
  4. Never marinate at room temperature

Blending the Perfect Marinade

Blend your ingredients until smooth. This ensures the marinade coats the chicken evenly. For more smoky flavor, add tequila or smoked paprika.

Pro Tip: Always discard the used marinade and never reuse it to prevent bacterial contamination.

Cooking Chipotle Chicken

Making tasty chicken recipes for weeknight dinners is easy. Cooking chipotle chicken needs care for great flavor and texture. You aim to turn simple ingredients into a delicious meal that wows everyone.

Cooking Time and Temperature Basics

Understanding cooking techniques is key for chipotle chicken. For boneless, skinless chicken breasts, follow these tips:

  • Grill: 165°F internal temperature
  • Oven baking: 375°F for 25-30 minutes
  • Pan-searing: Medium-high heat, 6-8 minutes per side

Checking for Doneness

Ensuring your chicken is cooked right is more than timing. Use these methods for safe and tasty results:

  1. Use a meat thermometer to check internal temperature
  2. Look for clear juices when pierced
  3. Check that meat is white throughout, with no pink areas

Tips for Juicy Chicken

Make your chicken recipes amazing with these tips:

  • Let chicken rest for 5-10 minutes after cooking
  • Avoid overcooking by monitoring temperature closely
  • Consider brining chicken before cooking for extra moisture
Cooking MethodApproximate TimeTarget Temperature
Grilling10-12 minutes165°F
Baking25-30 minutes375°F
Pan-Searing12-15 minutesMedium-High Heat

By using these methods, you’ll make chipotle chicken like a pro. It’s perfect for weeknight dinners. Don’t be shy to try new things and find your own cooking style!

Serving Suggestions

Turning spicy chicken dishes into tasty mexican-inspired meals is an art. Your chipotle chicken can be the main attraction in many dishes. These dishes will wow your family and friends.

Think about these flexible serving ideas to show off your chipotle chicken’s rich flavors:

Perfect Side Dish Pairings

  • Mexican street corn (elote)
  • Cilantro-lime rice
  • Black bean salad
  • Roasted sweet potato wedges
  • Fresh avocado slaw

Creative Taco and Burrito Ideas

Make your spicy chicken into delicious mexican-inspired meals with these ideas:

  1. Classic soft flour tortilla tacos
  2. Loaded burrito bowls with fresh salsa
  3. Chipotle chicken quesadillas
  4. Stuffed bell peppers with chicken filling
  5. Crispy taquitos with lime crema

Tip: To balance the heat, add cool elements like sour cream or guacamole. These will make your meal even better and add a nice contrast to the spicy chicken.

Storing Leftovers

Turning your chipotle chicken into meal prep ideas is easy with the right storage. Keeping it fresh helps keep the flavor and makes quick meals all week long.

Refrigeration Strategies

Keep your cooked chipotle chicken in airtight containers for freshness. Here are some storage tips:

  • Cool chicken completely before storing
  • Use shallow containers for even cooling
  • Refrigerate within two hours of cooking
  • Consume within 3-4 days for optimal taste

Freezing for Long-Term Preservation

Freezing is great for keeping your meal prep ideas fresh longer. Wrap the chicken tightly in freezer-safe packaging to keep flavor and moisture in.

  • Separate chicken into portion-sized containers
  • Label with date and contents
  • Freeze for up to 3 months

Reheating Without Losing Moisture

Keep your chipotle chicken juicy when reheating. Here’s how:

  1. Thaw frozen chicken in the refrigerator overnight
  2. Use microwave with a damp paper towel to retain moisture
  3. Add a splash of chicken broth when reheating
  4. Heat to an internal temperature of 165°F

These tips help your chipotle chicken stay tasty and convenient for many meals.

Meal Prep with Chipotle Chicken

Make your weeknights easier with meal prep using chipotle chicken. It saves time, cuts down stress, and keeps your meals healthy and tasty.

Using chipotle chicken for meal prep can change your cooking routine. Spend a few hours on the weekend to prep meals for the week. This way, dinner becomes a breeze.

Preparing Chipotle Chicken in Advance

Cooking big batches of chipotle chicken gives you protein for many meals. Here’s how to do it right:

  • Grill or bake 3-4 pounds of chicken at once
  • Cool chicken completely before storing
  • Use airtight containers for maximum freshness

Smart Portioning Techniques

Divide your chipotle chicken into portions for easy meal planning. Here are some tips:

  1. Separate 4-6 ounce portions for easy grabbing
  2. Store in single-serving containers
  3. Label with date and contents

Having pre-cooked chipotle chicken makes weeknights simple. Pro tip: Chicken stays good in the fridge for 3-4 days. Frozen portions can last up to 3 months.

Meal prep isn’t just about saving time—it’s about enjoying delicious, home-cooked meals without daily cooking stress.

Variations of Chipotle Chicken

Exploring different chipotle chicken variations can make your meals exciting. Whether you want to spice up your meal prep or find new healthy protein sources, these ideas will keep you eager for more.

Spicing up your chipotle chicken needs creativity and bold flavors. Each variation adds something special to this classic dish. This makes it great for many different diets.

Spicy Chipotle Chicken Additions

To make your spicy chicken dishes even better, try these intense flavor boosters:

  • Ghost pepper sauce for extreme heat lovers
  • Sriracha-infused marinade
  • Habanero pepper blend
  • Carolina Reaper powder for daring palates

Chipotle Chicken for Different Diets

Make your healthy protein sources fit various nutritional needs:

Diet TypeModificationKey Ingredients
KetoUse almond flour coatingAvocado oil, chipotle peppers
Low-CarbReplace marinade sugarsStevia, apple cider vinegar
PaleoEliminate dairyCoconut milk, fresh herbs

Try these variations to keep your meals exciting and healthy. Your taste buds will love the delicious journey!

Turning your easy chicken recipes into exciting mexican-inspired meals is easier than you think. Chipotle chicken is super versatile. It lets you make tasty dishes beyond the usual.

Boost your cooking skills by trying different ways to use chipotle chicken. It’s perfect for both light lunches and big dinners. Chipotle chicken can make your meals truly special.

Salad Sensations

Make your salads exciting with chipotle chicken. Here are some tasty ideas:

  • Southwest-style mixed greens with grilled chipotle chicken
  • Romaine topped with sliced chipotle chicken and avocado
  • Quinoa salad featuring diced chipotle chicken

Wrap and Bowl Creations

Make quick mexican-inspired meals with chipotle chicken in wraps and bowls. These recipes are great for busy days:

  • Chipotle chicken burrito bowl with black beans
  • Whole wheat wrap stuffed with spicy chicken
  • Rice bowl with chipotle chicken and roasted vegetables

Pizza with a Twist

Be creative with your pizza nights by adding chipotle chicken. Mix mexican flavors with pizza for a memorable meal.

  • BBQ chipotle chicken pizza
  • Southwestern-style pizza with corn and chicken
  • Thin-crust pizza featuring spicy chipotle chicken

These ideas turn simple chipotle chicken into a fun culinary journey. They’ll wow your family and friends.

Garnishes and Toppings

Turning your mexican-inspired meals into something special is all about the right garnishes and toppings. The perfect additions can make the smoky chipotle flavor pop. They also make your dish look amazing, pleasing both your eyes and taste buds.

Creating a memorable chipotle chicken experience is more than just the main dish. The right garnishes can take your dish to the next level. They add texture and complexity that match the bold flavors.

Must-Have Garnishes for Presentation

  • Fresh cilantro leaves
  • Thinly sliced green onions
  • Lime wedges for squeezing
  • Pickled red onions
  • Crispy fried garlic chips

Top Sauces and Dips

Choosing the right sauce for your chipotle chicken can change the whole dining experience. These sauces bring out the smoky chipotle flavor and add depth to your meal.

  • Avocado Crema: Creamy and smooth
  • Pico de gallo
  • Roasted salsa verde
  • Chipotle aioli
  • Queso fresco

“The right garnish is like the perfect accessory – it completes the entire culinary outfit.” – Chef Maria Rodriguez

Try out these ideas to make a presentation that will wow your guests. It will take your chipotle chicken to the next level, making it restaurant-quality.

Frequently Asked Questions

Getting your chipotle chicken recipe just right can be tricky. This section answers common questions. It helps you make a tasty and healthy meal full of protein.

Common Mistakes to Avoid

When cooking chipotle chicken, pay close attention. Here are some mistakes to avoid:

  • Overcooking the chicken, which makes it dry
  • Skipping the marination step
  • Using low-quality chicken cuts
  • Not handling spicy ingredients carefully

Health Benefits of Chipotle Chicken

Your chipotle chicken recipe is not only tasty—it’s also very nutritious. It’s a great source of healthy protein. This dish offers many health benefits:

NutrientBenefitAmount per Serving
ProteinMuscle growth and repair25-30g
CapsaicinBoosts metabolismVaries by spice level
Vitamin B6Helps produce energy0.5-0.7mg

When making your chipotle chicken, choose lean chicken breast. This boosts protein and cuts down on fat. The spices add flavor and extra health perks.

Pro tip: Always use a meat thermometer. This ensures your chicken is cooked to a safe 165°F.

Pairing Beverages with Chipotle Chicken

Finding the right drink to go with spicy chicken dishes is key. The perfect drink can make your meal even better. It’s all about matching flavors with the smoky taste of chipotle chicken.

Your drink choice can either match or contrast the bold flavors of chipotle chicken. This makes for a memorable dining experience.

Best Alcoholic Beverages

For those who like drinks with alcohol, here are some great picks:

  • Mexican Lager: Light and crisp, perfect for cutting through rich flavors
  • Margarita: Classic citrus notes balance the smoky chipotle
  • Pale Ale: Hoppy undertones that complement the chicken’s spiciness

Non-alcoholic drinks can also be wonderful with Mexican meals:

BeverageFlavor ProfilePairing Strength
HorchataCreamy, sweet rice drinkExcellent
Agua FrescaRefreshing fruit-infused waterVery Good
Lime SodaCitrusy and lightGood

Pro tip: Always think about what you like when picking a drink. The goal is to make a flavor experience that goes well with your chipotle chicken.

Conclusion: Enjoy Your Chipotle Chicken Recipe!

Starting your cooking journey with this chipotle chicken recipe opens up a world of flavors. You’ve learned to turn simple ingredients into a delicious meal that will wow everyone. Easy chicken recipes like this show that you can make gourmet food at home.

Your kitchen is now a place to explore new tastes. The techniques you’ve learned are just the start. They let you create many different versions of chipotle chicken that fit your taste. Whether you’re new to cooking or have been doing it for years, this recipe is a great starting point for creativity.

Final Thoughts on Flavor Exploration

Cooking is a way to express yourself. Every time you make this chipotle chicken, you’ll find new ways to make it even better. Feel free to try new ingredients, change the spice, or try different cooking methods. The best meals often come from trying new things in the kitchen.

Encouragement to Experiment

As you get better at making easy chicken recipes, you’ll grow more confident. Enjoy the process of cooking, trust your taste, and let your senses guide you. This chipotle chicken recipe is just the start of your culinary adventures. Have fun and enjoy the delicious path ahead!

FAQ

How spicy is chipotle chicken?

Chipotle chicken’s heat level depends on the chipotle peppers used. It usually has a medium heat. This gives a smoky, warm taste without being too hot. You can change the spiciness by adjusting the chipotle peppers in your marinade.

Can I make chipotle chicken if I’m following a specific diet?

Yes! Chipotle chicken fits many diets. For low-carb diets, pair it with cauliflower rice. Keto followers can add avocado for extra fat. Gluten-free diners can enjoy it with corn tortillas. Paleo followers can have it with veggies.

How long should I marinate the chicken?

Marinate for at least 30 minutes but no more than 24 hours. Even 15-20 minutes can add flavor. But, don’t marinate too long to avoid mushy chicken.

What are the best cuts of chicken to use?

Chicken breasts are popular for their lean protein and ease of cooking. Chicken thighs offer more flavor and tenderness. Use boneless, skinless cuts for even cooking and flavor.

How do I prevent the chicken from drying out?

To keep the chicken juicy, don’t overcook it. Use a meat thermometer to check for 165°F (74°C). Let it rest for 5-10 minutes after cooking. Marinating helps keep it moist.

Can I freeze chipotle chicken?

Yes, you can freeze chipotle chicken! Store it in an airtight container or freezer bag for up to 3 months. Thaw it in the fridge overnight and reheat gently. It’s perfect for meal prep.

What are the health benefits of chipotle chicken?

Chipotle chicken is full of lean protein, good for muscles. Chipotle peppers have vitamins A and C and capsaicin, which may boost metabolism and fight inflammation. It’s a healthy and tasty meal.

What are some common mistakes to avoid when making chipotle chicken?

Avoid not removing chipotle seeds (which adds too much heat), over-marinating, overcooking, and not resting the chicken. Taste your marinade and adjust. Use a meat thermometer for perfect doneness.

0 comments
0 FacebookTwitterPinterestEmail
Newer Posts
Verified by MonsterInsights