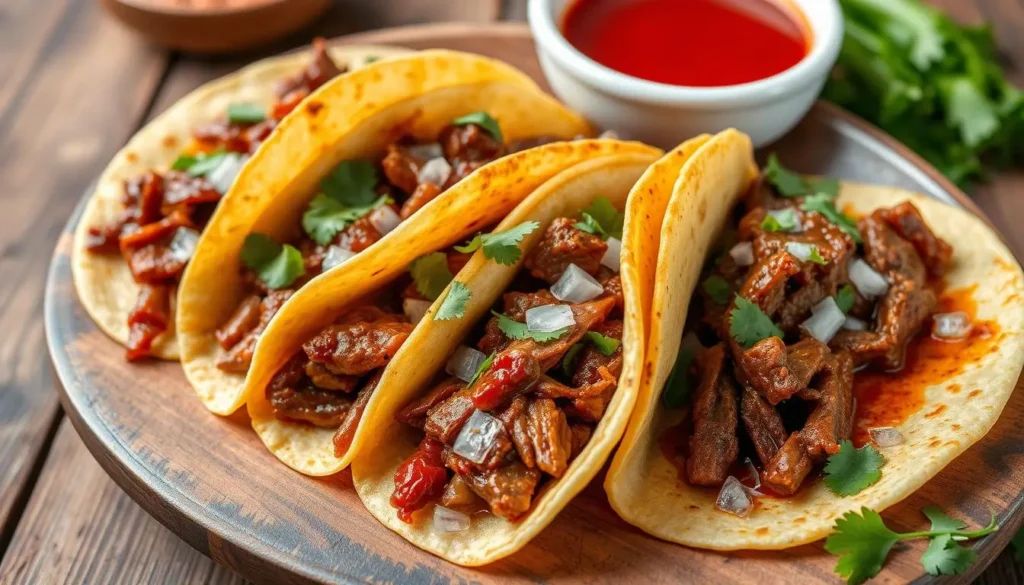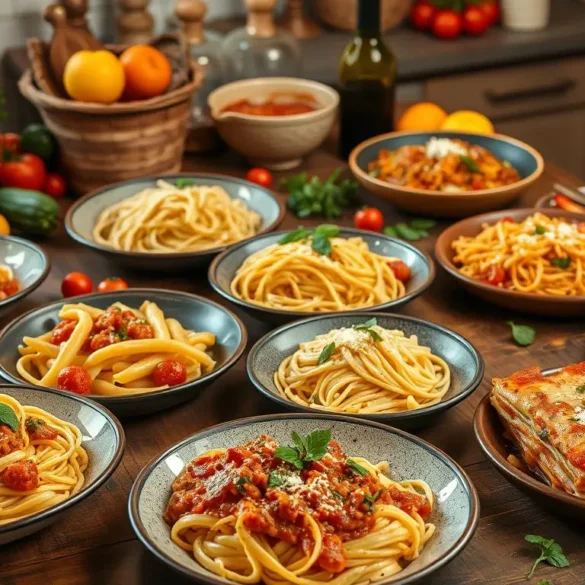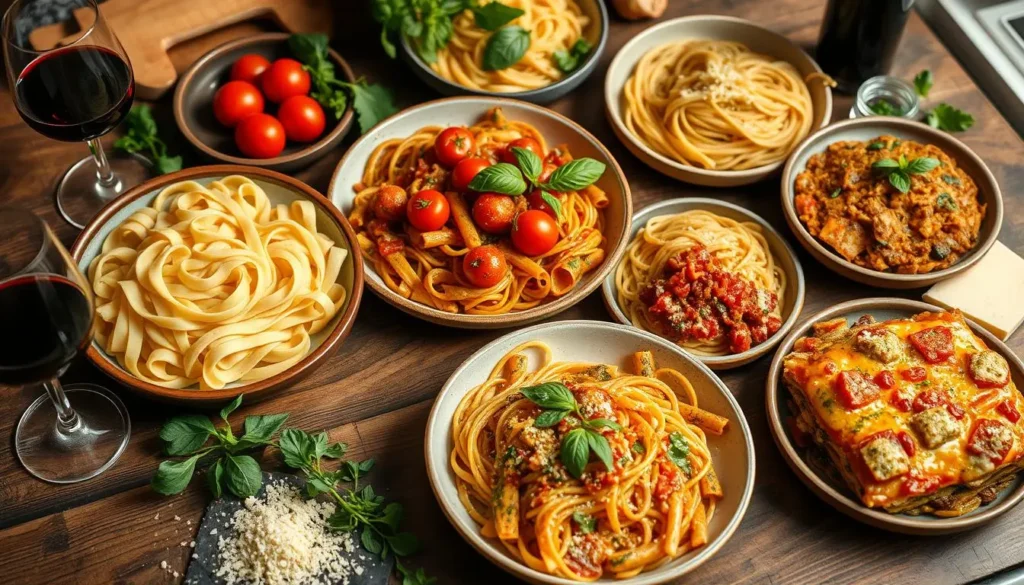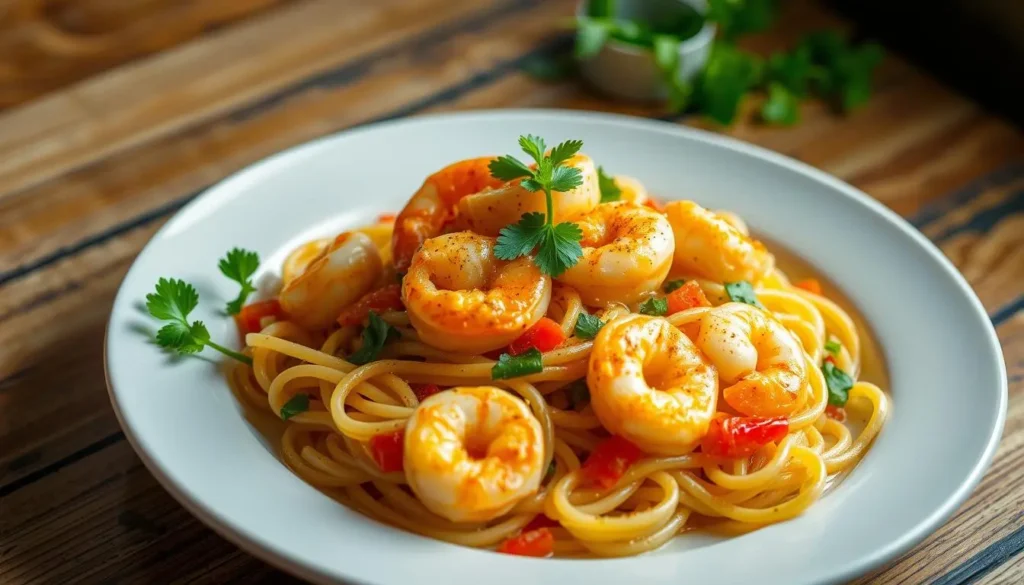
Home Cuisine
Category:

Cuisine

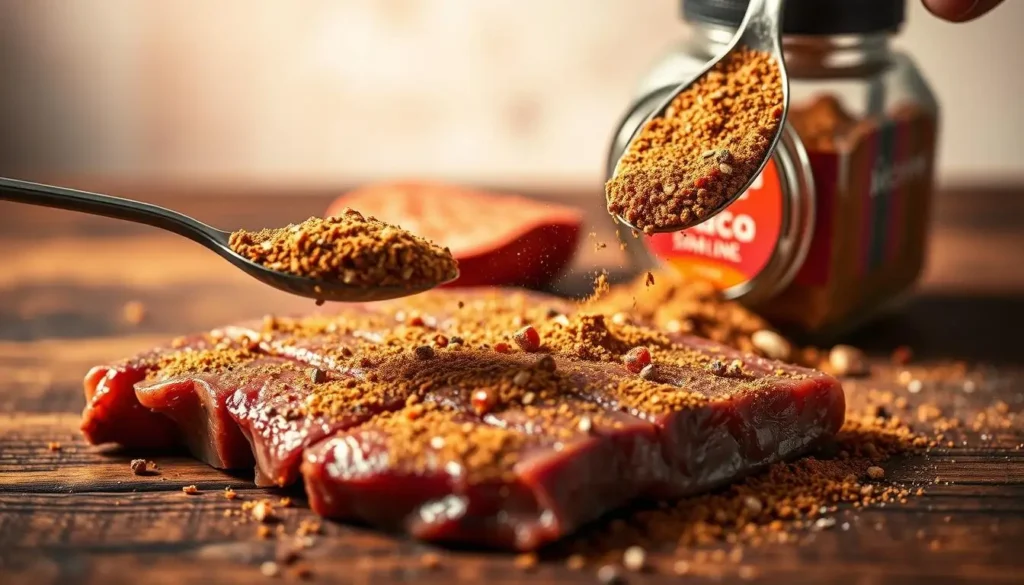
Fajita Seasoning
Fajita Seasoning

How to Make Fajita Seasoning Recipe for Bold Flavor

Prep Time: Cooking Time:
Nutrition facts: 10 calories 0 grams fat
Rating: 5.0/5
( 1 voted )

Ingredients

  • 1 tablespoon chili powder
  • 1 teaspoon paprika
  • 1 teaspoon ground cumin
  • 1/2 teaspoon garlic powder
  • 1/2 teaspoon onion powder
  • 1/2 teaspoon ground coriander
  • 1/2 teaspoon dried oregano
  • 1/4 teaspoon cayenne pepper (optional for heat)
  • Salt and pepper to taste

Instructions

1. In a small bowl, combine all the ingredients.
2. Mix well until evenly combined.
3. Store the seasoning mix in an airtight container or spice jar for up to 6 months.
4. Use 1-2 tablespoons of the seasoning per pound of meat or vegetables for fajitas, tacos, or any dish that could use a flavorful kick.

Notes

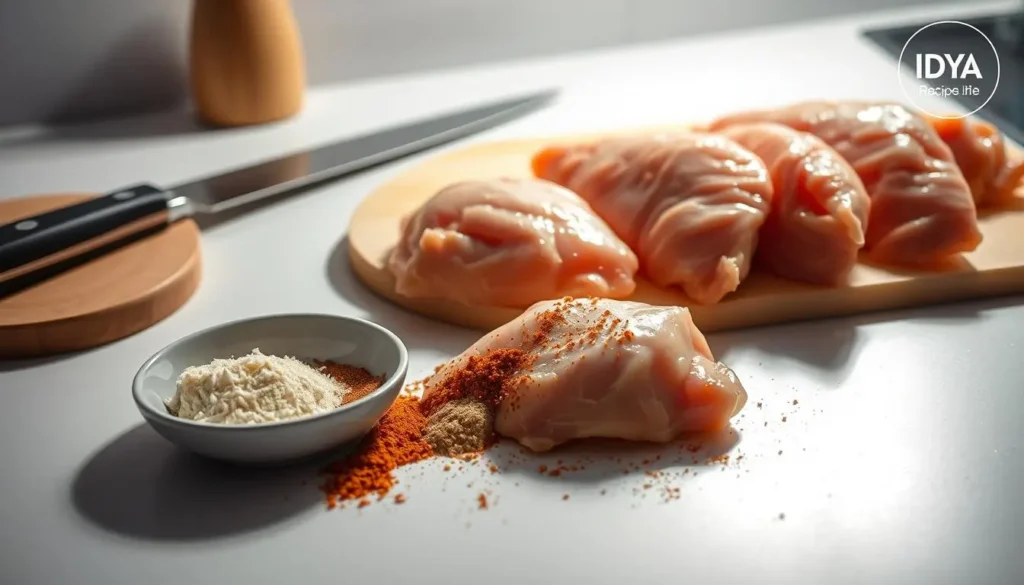
For extra heat, adjust the cayenne pepper to your preference. This seasoning mix can also be used for grilling vegetables or as a flavor boost for roasted potatoes.

Are you tired of bland, boring fajitas? Do you crave the authentic Mexican kick? What if you could make every meal special with a simple homemade fajita seasoning recipe?

Making your own fajita seasoning is surprisingly easy. This special mix of spices can turn plain chicken, beef, or veggies into a dish fit for a restaurant. With homemade seasoning, you control the flavor, heat, and quality.

Forget the store-bought packets full of preservatives. With a few basic pantry items, you can make a fajita seasoning that’s fresher and more vibrant. You can make it just the way you like it.

Key Takeaways

  • Create authentic Mexican flavors at home
  • Control ingredients and spice levels
  • Save money compared to store-bought seasonings
  • Customize your fajita seasoning blend
  • Enhance meals with fresh, homemade spice mix

What is Fajita Seasoning?

Fajita seasoning is a vibrant Tex-Mex spice mix that adds explosive flavor to your favorite dishes. It turns ordinary proteins and vegetables into a culinary experience. This experience takes your taste buds straight to the heart of Southwest cuisine.

A chili powder blend is at the heart of authentic fajita seasoning. This mix combines multiple spices to create a complex flavor. It makes any meal go from simple to spectacular.

Overview of Fajita Seasoning

A classic fajita seasoning has a balanced mix of dried spices. The goal is to create a blend that adds warmth, depth, and excitement to your cooking.

  • Provides instant flavor enhancement
  • Works with multiple protein types
  • Creates authentic Tex-Mex taste experience

Common Ingredients

Knowing the key components of a Tex-Mex spice mix helps you appreciate fajita seasoning. Let’s look at the typical ingredients that make this blend special:

IngredientFlavor ProfilePurpose
Chili PowderWarm, slightly spicyPrimary heat source
CuminEarthy, smokyDepth and complexity
PaprikaSweet, mild pepperColor and subtle sweetness
Garlic PowderPungent, savoryAromatic base

Each ingredient in a chili powder blend is crucial for the perfect fajita seasoning. By knowing these components, you can make a mix that fits your taste.

Why Make Your Own Fajita Seasoning?

Creating your own homemade fajita seasoning makes cooking special. It lets you control flavors and be creative in the kitchen.

There are many reasons to make your own seasoning. Store-bought options just can’t compare:

  • Complete ingredient transparency
  • Zero artificial preservatives
  • Customizable spice levels
  • Fresh, vibrant flavor profiles

Benefits of Homemade Seasoning

Homemade fajita seasoning lets you tweak flavors to your liking. You can add more heat, reduce salt, or try new spice mixes. This is something store-bought blends can’t do.

Cost-Effectiveness Compared to Store-Bought

Homemade seasoning is not only tastier but also cheaper. Buying spices in bulk saves money. You can make lots of seasoning for less than store-bought.

Control your ingredients, control your flavor!

Essential Ingredients for Fajita Seasoning

Making the perfect fajita seasoning means knowing the key ingredients. These ingredients add bold, vibrant flavors to your dish. Your homemade blend will turn simple meals into amazing culinary experiences.
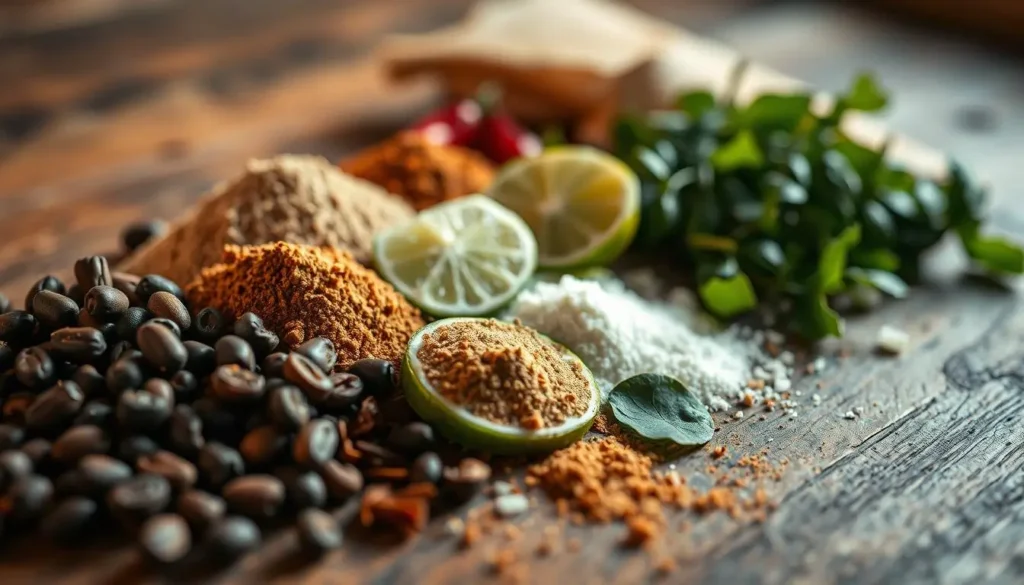
The base of great cumin seasoning is choosing top-notch spices. These spices should work well together. Let’s look at the must-haves for your fajita seasoning.

Chili Powder: The Flavor Backbone

Chili powder is the main flavor in your seasoning. It adds a warm, rich heat that’s key to fajita taste. Pick a high-quality chili powder for the best flavor.

Cumin: The Aromatic Cornerstone

Cumin seasoning adds an earthy, warm taste to your fajita mix. It’s essential for authentic Mexican dishes. It gives a unique aroma that makes the flavor better.

Garlic Powder: Intense Flavor Enhancer

A good garlic powder blend adds strong flavor without fresh garlic’s moisture. It gives a consistent taste that mixes well with other spices.

Optional Ingredients to Customize Your Blend

  • Smoked paprika for added depth
  • Dried oregano for herbaceous notes
  • Cayenne pepper for extra heat
  • Black pepper for additional warmth
IngredientFlavor ProfileIntensity
Chili PowderWarm, SpicyMedium-High
CuminEarthy, NuttyMedium
Garlic PowderSharp, PungentMedium

Trying out these ingredients lets you make a garlic powder blend that’s just right for you. The trick is to find the right balance of flavors for a perfect seasoning mix.

Step-by-Step Fajita Seasoning Recipe

Making your own Mexican spice rub for fajitas is simple. A homemade fajita seasoning recipe lets you control the flavor. It also saves money compared to buying it.

To make a tasty fajita seasoning, you need just a few ingredients. You also need minimal time to prepare. The secret is using fresh, quality spices for authentic Mexican flavors.

Measuring the Ingredients

For the best Mexican spice rub, you need the right amounts. Here are the ingredients you’ll need:

  • 2 tablespoons chili powder
  • 1 tablespoon ground cumin
  • 1 tablespoon garlic powder
  • 1 teaspoon paprika
  • 1 teaspoon dried oregano
  • 1 teaspoon salt
  • 1/2 teaspoon black pepper

Mixing Your Seasoning

Making your fajita seasoning is easy. Just follow these steps:

  1. Grab a small mixing bowl
  2. Add all measured spices
  3. Whisk the ingredients together
  4. Make sure the spices are evenly mixed

“The secret to a great Mexican spice rub is in the balance of flavors.” – Culinary Expert

Keep your homemade fajita seasoning in an airtight container. It will stay flavorful for up to 3 months. Store it in a cool, dark place.

How to Use Fajita Seasoning

Your homemade Mexican spice rub is a treasure in your kitchen. It can turn simple meals into amazing dishes. Use your Tex-Mex spice mix on chicken, beef, and veggies to boost their flavors.

Learning to use fajita seasoning is key. It’s about coating and infusing your food with deep flavors. Whether it’s a quick dinner or a weekend party, these tips will make your fajitas taste great.

Marinating Chicken or Beef

Marinating proteins is a must. Here’s how to do it right:

  • Coat meat evenly with your Mexican spice rub
  • Let chicken or beef marinate for 30 minutes to 2 hours
  • Keep it in the fridge while marinating
  • Pat dry before cooking for better browning

The secret to a great marinade is even coverage and enough time. Your spice mix will soak into the meat, adding rich flavors.

Seasoning Vegetables for Fajitas

Don’t forget to season your veggies for fajitas. Toss sliced bell peppers, onions, and more in the spice rub before cooking. This way, your veggies will be crisp and flavorful, matching your protein perfectly.

  • Cut vegetables into even slices
  • Spread Tex-Mex spice mix over them
  • Cook on high heat for caramelization
  • Stir often to avoid burning

Storage Tips for Fajita Seasoning

Keeping your homemade fajita seasoning fresh is key. The right storage can make it last months. This way, your chili powder blend stays full of flavor and aroma.
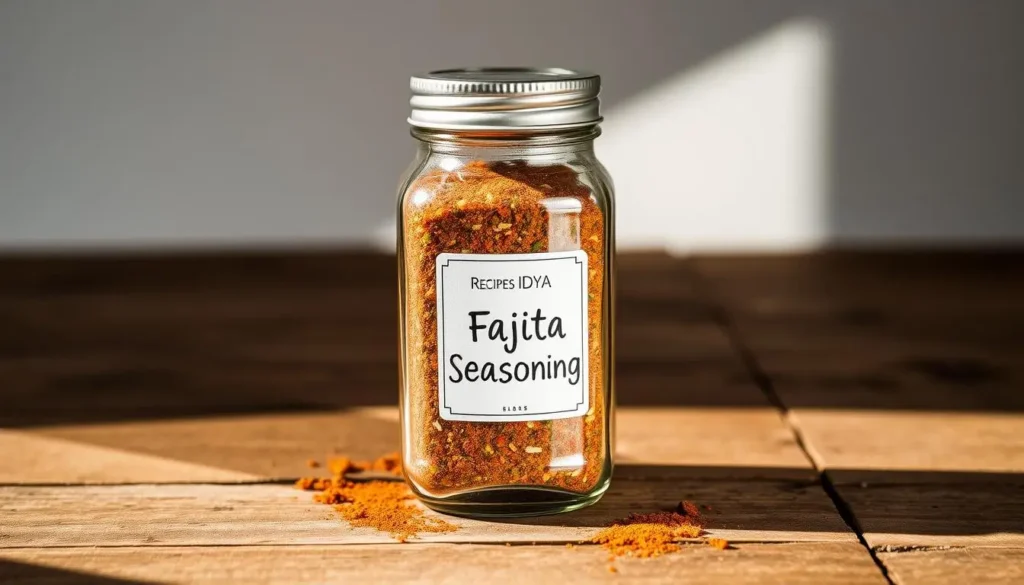
Give your homemade fajita seasoning the care it needs. The right storage can greatly improve its quality. This ensures your spices stay delicious for a long time.

Perfect Storage Containers

Choosing the right container is crucial:

  • Airtight glass jars with tight-fitting lids
  • Ceramic containers with sealed tops
  • Stainless steel spice containers

Optimal Storage Conditions

Keep your chili powder blend safe from harm:

  1. Store in a cool, dark place
  2. Avoid direct sunlight
  3. Keep away from heat sources
  4. Maintain low humidity

Shelf Life of Homemade Seasoning

Your homemade fajita seasoning stays fresh for 3-6 months. Look out for these signs of spoilage:

  • Loss of vibrant color
  • Reduced aroma
  • Clumping or moisture buildup

Follow these tips to keep your seasoning fresh. This way, it will always be ready to add flavor to your meals.

Variations on the Classic Fajita Seasoning

Trying out different fajita seasoning recipes can make cooking more fun. The classic recipe is a great start, but adding spicy or smoky twists can take your dishes to the next level.

Spicing up your paprika blend lets you control the heat and flavor of your fajitas. Here are some fun variations to try:

Spicy Fajita Seasoning Twist

If you like a little heat, this spicy recipe is for you. It adds a fiery kick to your fajitas. Here are some ingredients to add more heat:

  • Cayenne pepper for intense heat
  • Crushed red pepper flakes
  • Extra ground chipotle powder

Smoky Fajita Seasoning Delight

A smoky seasoning can make your dishes richer and more complex. For a smoky flavor, try these ingredients:

  • Smoked paprika
  • Ground chipotle pepper
  • A touch of ground cumin

When making your fajita seasoning, remember to balance the flavors. Start with small amounts of spices and adjust to your liking.

Pro tip: Always taste and adjust your seasoning blend before using it on your entire dish.

Cooking Tips for Perfect Fajitas

Making delicious fajitas is more than just using a good Tex-Mex spice mix. The right protein and cooking method make a big difference. Let’s explore how to make your fajitas taste like they came from a restaurant.

Selecting Your Protein

Choosing the right protein is key for tasty fajitas. Your Mexican spice rub will shine with these top picks:

  • Skirt Steak: The traditional choice for authentic flavor
  • Chicken Breast: Lean and versatile
  • Shrimp: A lighter seafood alternative
  • Portobello Mushrooms: Perfect for vegetarian options

Mastering Cooking Methods

The secret to perfect fajitas is in the cooking technique. Each method brings out unique flavors in your Tex-Mex spice mix:

  1. Grilling: High heat creates delicious char marks
  2. Skillet Cooking: Quick and even heat distribution
  3. Oven Roasting: Consistent temperature for tender meat

Pro tip: Slice your protein against the grain for maximum tenderness. Marinate with your Mexican spice rub for at least 30 minutes before cooking to enhance flavor penetration.

The secret to great fajitas is allowing your proteins to rest after cooking, letting the juices redistribute for maximum flavor.

Gluten-Free and Dietary Considerations

Creating a delicious fajita experience doesn’t mean you have to give up on dietary needs. Whether you’re managing gluten sensitivities or exploring vegetarian options, your taco seasoning blend can be both flexible and flavorful.

Gluten-Free Fajita Seasoning Alternatives

Many commercial seasoning blends contain hidden gluten sources. When preparing your onion powder seasoning at home, you can ensure a completely gluten-free mix by carefully selecting ingredients.

  • Use pure spices without anti-caking agents
  • Check individual spice labels for gluten-free certification
  • Avoid pre-mixed seasoning packets
  • Verify each ingredient’s manufacturing process

Vegetarian Fajita Options

Vegetarian fajitas can be just as exciting and satisfying as meat-based versions. Protein-rich alternatives like tofu, tempeh, and seitan provide excellent texture and absorb seasonings beautifully.

Vegetarian ProteinPreparation TipFlavor Intensity
Firm TofuPress and marinate before grillingMild
TempehSlice thin, season generouslyStrong
Portobello MushroomsSlice and grill with seasoningRich

Remember that a well-crafted taco seasoning blend can transform any plant-based protein into a mouthwatering meal. Experiment with different ingredients to find your perfect vegetarian fajita combination.

Pairing Your Fajitas with Sides

Make your fajita meal even better with the right sides and drinks. These can turn a simple dish into a flavorful adventure. Your taste buds will thank you.

Choosing the perfect sides can really boost your fajita experience. Here are some tasty choices:

  • Mexican Rice: A classic choice with fluffy, seasoned grains
  • Refried Beans: Creamy and rich, great for scooping
  • Guacamole: Fresh and zesty avocado dip
  • Pico de Gallo: Bright, fresh salsa with chopped tomatoes
  • Roasted Corn Salad: Sweet and tangy side dish

Beverage Pairings

Drinks can also make your meal better. Choose ones that match and enhance the flavors:

Beverage TypeRecommended Options
AlcoholicMargarita, Mexican Beer, Sangria
Non-AlcoholicHorchata, Agua Fresca, Lime Soda

Pro tip: Pick drinks that balance the spicy flavors of your fajitas. A citrusy drink is perfect for cutting through the spice.

Making delicious fajitas at home is easier than you think. With a homemade fajita seasoning recipe, your dinner will taste like a restaurant meal. Everyone will love it.

Your homemade fajita seasoning is the key to these tasty recipes. Whether you want chicken or beef, these dishes bring authentic Mexican flavors to your kitchen.

Classic Chicken Fajitas

Impress your family with this simple yet delicious chicken fajita recipe!

  • Ingredients:
    • 2 lbs boneless chicken breasts
    • 3 tablespoons homemade fajita seasoning
    • 2 bell peppers, sliced
    • 1 large onion, sliced
    • 2 tablespoons olive oil
  • Instructions:
    1. Cut chicken into thin strips
    2. Coat chicken with fajita seasoning
    3. Sauté chicken and vegetables in hot skillet
    4. Cook until chicken is golden and vegetables are tender

Sizzling Beef Fajitas

Beef lovers will love this robust and flavorful fajita seasoning recipe. It turns ordinary steak into an extraordinary meal.

  • Ingredients:
    • 2 lbs flank steak
    • 4 tablespoons homemade fajita seasoning
    • 2 colored bell peppers
    • 1 red onion
    • Lime wedges for serving
  • Cooking Tips:
    1. Slice beef against the grain
    2. Marinate with fajita seasoning for 30 minutes
    3. Grill or pan-sear on high heat
    4. Rest meat for 5 minutes before serving

“The key to perfect fajitas is a balanced homemade fajita seasoning and high-heat cooking!” – Chef Maria Rodriguez

Pro tip: Always have your homemade fajita seasoning ready. It will elevate any protein or vegetable dish. These recipes are just the start of your culinary adventure!

Fajita Seasoning for Other Dishes

Your homemade taco seasoning blend isn’t just for fajitas. It can make many dishes more exciting. Find out how to use it in new ways.

Elevating Tacos with Flavor

Tacos get amazing when you add your homemade fajita seasoning. It’s great for:

  • Ground beef tacos
  • Shredded chicken tacos
  • Fish tacos
  • Vegetarian taco fillings

Creative Marinades for Diverse Dishes

Your Mexican spice rub makes awesome marinades for proteins and veggies. Here’s how to use it best:

Protein/VegetableMarinating TimeRecommended Cooking Method
Chicken Breasts2-4 hoursGrilling
Shrimp30 minutesSautéing
Tofu1-2 hoursBaking
Portobello Mushrooms1 hourRoasting

Try your taco seasoning blend in different ways. Add it to salad dressings, sprinkle on roasted veggies, or use as a dry rub for grilling. The fun never stops!

Frequently Asked Questions

Many home cooks wonder about making their own fajita seasoning. Knowing how to use your chili powder blend can enhance flavor and storage. It’s all about understanding the details.

How Long Can I Keep Fajita Seasoning?

Your homemade fajita seasoning stays fresh for 3-6 months if stored right. Keeping it in an airtight container is key. This helps keep the chili powder blend’s flavor strong.

  • Store in an airtight container
  • Keep away from direct sunlight
  • Maintain a cool, dry environment
  • Use clean, dry measuring spoons when handling

Can I Adjust the Spice Level?

Yes, you can! Making your own fajita seasoning lets you tailor the spice to your liking. You can tweak the chili powder blend to fit your taste.

Spice LevelIngredient Adjustment
MildReduce cayenne pepper, increase paprika
MediumBalance cayenne with equal parts paprika
HotIncrease cayenne, add crushed red pepper flakes

Playing with your homemade fajita seasoning lets you craft a blend that’s just right for you. Begin with small batches and tweak it until it’s perfect. This way, you can enjoy your favorite flavor every time.

Nutritional Information for Fajita Seasoning

Knowing what’s in your fajita seasoning can help you eat better. Making your own cumin seasoning blend is not just tasty. It also has health benefits and nutritional perks.

The main ingredients in fajita seasoning add nutritional value to your meals. Cumin seasoning, a key part, has health benefits.

Breakdown of Key Ingredients

  • Cumin: Rich in antioxidants and may support digestive health
  • Garlic powder blend: Contains potential immune-boosting compounds
  • Chili powder: Provides metabolism-supporting capsaicin
  • Paprika: Offers vitamin A and antioxidant properties

Tips for Healthier Fajitas

To make nutritious fajitas, it’s not just about the seasoning. Here are some tips to make your meal healthier:

  1. Choose lean proteins like chicken or turkey
  2. Load up on colorful vegetables
  3. Use whole wheat tortillas
  4. Control portion sizes

By making your own garlic powder blend and cumin seasoning, you can control sodium. You also avoid additives found in store-bought mixes.

Conclusion: Enjoying Flavorful Fajitas

Making your own fajita seasoning recipe turns simple meals into amazing dishes. It opens up a world of flavors that store-bought mixes can’t offer. Your kitchen becomes a place to play with spices and make your seasoning just right.

Homemade fajita seasoning is easy and flexible. With a few pantry spices, you can make a mix that makes chicken, beef, or veggies taste better. You can adjust the heat and flavors to make each meal special.

Final Thoughts on Homemade Fajita Seasoning

Creating your own seasoning is more than just taste. It’s about controlling your cooking. A homemade fajita seasoning can change how you cook. Start with a basic recipe and tweak it to make it your own.

Encouragement to Experiment with Recipes

Don’t be shy to try new things with your fajita seasoning. Add smoked paprika for a deeper flavor or more cumin for a richer taste. Every batch is a chance to get better and impress your loved ones.

FAQ

How long can I store homemade fajita seasoning?

You can keep homemade fajita seasoning in an airtight container for up to 6 months. For the best taste, use it within 3-4 months. Always check for any signs of spoilage like color changes, clumps, or bad smells.

Can I adjust the spice level of the fajita seasoning?

Yes, you can! Adjust the heat by changing the chili powder or adding cayenne pepper. Start with a little and add more until it’s just right. For less heat, use less chili powder or choose a milder type.

Is homemade fajita seasoning gluten-free?

Most homemade fajita seasoning is gluten-free. But, always check your spice ingredients. If using pre-mixed spices, make sure they are gluten-free to avoid contamination.

How much seasoning should I use per pound of meat?

Use 2-3 tablespoons of seasoning for one pound of meat. For veggies, 1-2 tablespoons is enough, depending on how much you have and your taste. You can always add more seasoning if needed.

Can I use fajita seasoning for other dishes?

Yes! Fajita seasoning is great for many dishes. Try it on tacos, roasted veggies, eggs, rice, or as a rub for grilled meats. It’s a versatile seasoning that can enhance many dishes.

How do I prevent my seasoning from becoming clumpy?

Keep your seasoning in an airtight container, away from moisture and heat. A small food-grade silica gel packet can help keep it dry. If it’s humid, store it in the fridge to keep it dry.

Can I make a large batch of fajita seasoning to save time?

Definitely! Making a big batch saves time and ensures you always have seasoning ready. Just keep the spice ratios the same and store it well. Aim to make enough for 3-4 months for the best flavor.

0 comments
0 FacebookTwitterPinterestEmail
Chicken Quesadillas
Chicken Quesadillas

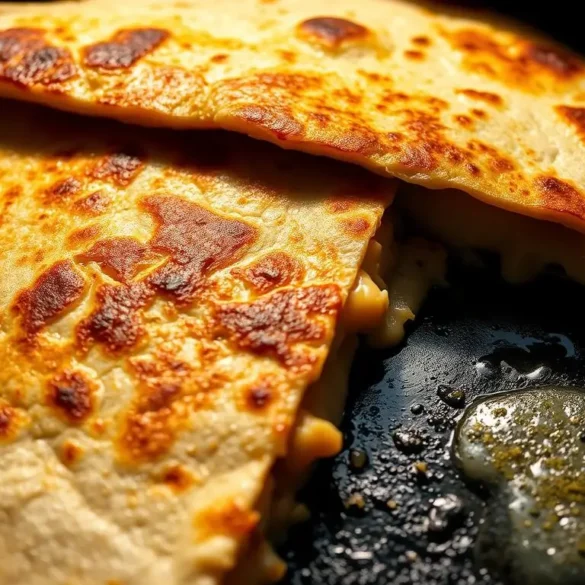
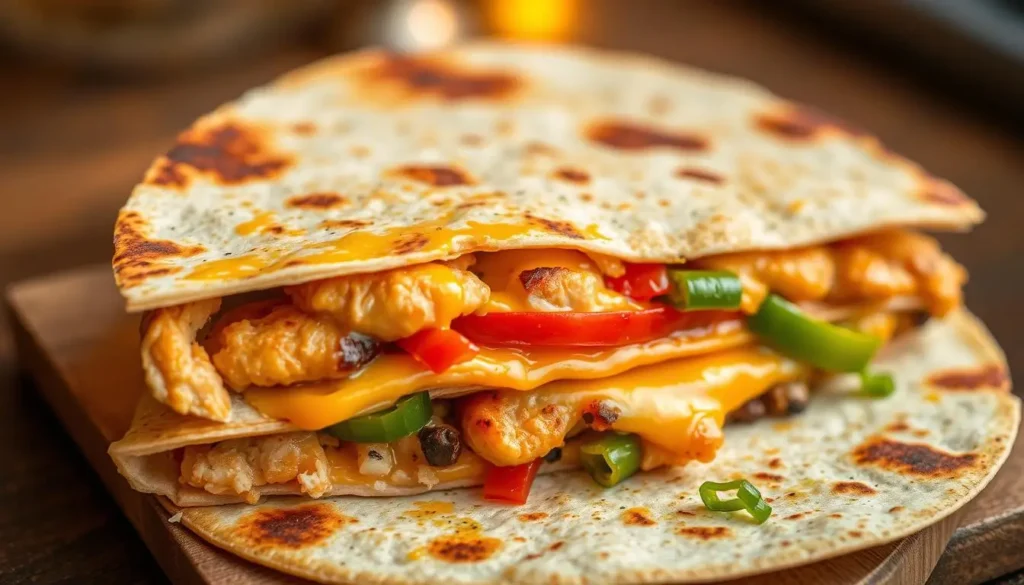
How to Make Chicken Quesadillas: A Tasty 30-Minute Meal

Serves: 4 Prep Time: Cooking Time:
Nutrition facts: 400 calories 20 grams fat
Rating: 5.0/5
( 1 voted )

Ingredients

  • 2 boneless, skinless chicken breasts
  • 1 tablespoon olive oil
  • 1 teaspoon cumin
  • 1 teaspoon chili powder
  • 1/2 teaspoon garlic powder
  • Salt and pepper to taste
  • 4 flour tortillas
  • 1 1/2 cups shredded cheddar cheese
  • 1/2 cup diced onion
  • 1/2 cup diced bell pepper
  • 1/2 cup salsa
  • Sour cream (optional, for serving)
  • Guacamole (optional, for serving)

Instructions

1. Heat olive oil in a skillet over medium heat. Season the chicken breasts with cumin, chili powder, garlic powder, salt, and pepper.
2. Cook the chicken in the skillet for about 6-7 minutes per side or until fully cooked and no longer pink in the center. Remove from heat and slice into thin strips.
3. In the same skillet, sauté the diced onion and bell pepper for about 2-3 minutes until softened.
4. Place a tortilla in the skillet and sprinkle with 1/4 cup of shredded cheese. Add a few slices of chicken, sautéed onions, and peppers. Top with another 1/4 cup of cheese and another tortilla.
5. Cook for 2-3 minutes on each side, or until the cheese is melted and the tortillas are golden brown and crispy.
6. Remove from the skillet, slice into wedges, and serve with salsa, sour cream, and guacamole if desired.

Notes

You can customize the fillings by adding ingredients like jalapeños, corn, or black beans. For a healthier version, use whole wheat tortillas or reduce the amount of cheese.

Ever wondered how to make a meal like a restaurant in just 30 minutes? Your search for the best easy chicken quesadilla recipe ends here. You can turn simple ingredients into a dish that will wow your family with little effort.

The chicken quesadilla recipe is a lifesaver for busy cooks. It’s full of flavor and easy to make. This Mexican dish is a quick fix for dinner. You’ll learn to make a meal that looks and tastes like it’s from a pro kitchen.

Whether you’re new to cooking or have years of experience, this recipe is perfect for quick meals. Get ready to make the most delicious chicken quesadillas in just 30 minutes.

Key Takeaways

  • Create a restaurant-quality meal in just 30 minutes
  • Perfect for busy home cooks and families
  • Simple ingredients, maximum flavor
  • Versatile dish that can be customized easily
  • No advanced cooking skills required

Introduction to Chicken Quesadillas

Chicken quesadillas are a favorite in Mexican food that many in the U.S. love. It’s more than just a meal; it’s a way to share good times with others.

There are several reasons why Mexican quesadillas are so loved:

  • They’re quick and easy to make.
  • You can add your favorite ingredients.
  • They taste amazing.
  • They’re also affordable.

Making a chicken quesadilla is simple. It’s perfect for families and students who are always on the go.

The Versatility of This Dish

Chicken quesadillas are amazing because you can change them up to fit what you like. Vegetarians can use beans instead of chicken. If you like it spicy, add jalapeños or hot sauce.

They’re great for any time, whether it’s a quick dinner or a party snack. The mix of crispy tortilla, melted cheese, and tasty fillings is unbeatable.

“A great quesadilla is like a blank canvas – limited only by your imagination!” – Mexican Cuisine Expert

Essential Ingredients for Your Quesadilla

Making the perfect chicken quesadilla starts with picking the right ingredients. You’ll learn about the key parts that turn a simple tortilla into a delicious meal.

Chicken Options: Cooked, Grilled, or Shredded?

Chicken is very versatile in quesadillas. You can choose from three main ways to prepare it:

  • Cooked Chicken: Quick and easy, using pre-cooked or rotisserie chicken
  • Grilled Chicken: Adds a smoky taste and beautiful char marks
  • Shredded Chicken: Makes a tender, easy-to-distribute filling

Cheese Choices: The Best Melting Cheeses

Choosing the right cheese is key to a great quesadilla. Your cheese should melt well and taste rich.

  • Monterey Jack
  • Cheddar
  • Oaxaca cheese
  • Queso Quesadilla

Flavor Enhancers: Spices and Herbs to Use

Spices can turn simple quesadilla ingredients into a masterpiece. Here are some flavor boosters:

  • Cumin
  • Chili powder
  • Garlic powder
  • Fresh cilantro
  • Smoked paprika

Try these ingredients to make your own perfect chicken quesadilla. You’ll find a world of tasty possibilities!

Preparing the Chicken for Your Quesadilla

Starting with delicious, flavorful chicken is key to a great chicken quesadilla recipe. The right preparation can turn an ordinary quesadilla into a memorable meal. It will impress your family and friends.

Choosing the right chicken is important for your quesadilla. You want tender, juicy meat that goes well with your other ingredients.

Marinating Chicken: Flavor Boosting Techniques

Marinating chicken makes your quesadilla amazing. Here are some tips for marinating:

  • Use acidic bases like lime juice or vinegar
  • Add strong spices like cumin and chili powder
  • Marinate for 30 minutes to 2 hours for the best flavor

Cooking Methods: Comparing Techniques

There are different ways to cook your chicken quesadilla recipe. Let’s look at grilling and stovetop methods:

Cooking MethodProsCons
GrillingSmoky flavor, nice char marksNeeds an outdoor grill, weather dependent
StovetopConvenient, quick cookingLess smoky flavor

Choose your cooking method wisely. Make sure your chicken is at least 165°F for safety. Slice or shred the chicken thinly for easy quesadilla assembly.

Choosing the Right Tortillas

Choosing the perfect tortillas is key to making great quesadillas. The right tortilla can make your dish amazing. It’s important to know the differences between types.

Tortillas are mainly corn or flour. Each type changes how your quesadilla tastes and feels.

Corn vs. Flour Tortillas: Flavor and Functionality

Think about these differences when picking tortillas:

  • Corn Tortillas
    • Traditional Mexican flavor
    • Thicker texture
    • Less calories
    • Great for real quesadilla taste
  • Flour Tortillas
    • Softer and easier to fold
    • Milder taste
    • Good for more filling
    • Easier to seal

Storing and Preparing Tortillas

To keep tortillas fresh, follow these tips:

  1. Store in a sealed bag
  2. Keep in the fridge for longer life
  3. Let them warm up before cooking
  4. Warm them on a skillet for better taste and texture

Tip for easy quesadillas: Toast tortillas lightly before filling. It helps prevent them from getting soggy and makes them crispy.

Assembly of the Chicken Quesadilla

Making a cheesy quesadilla is all about layering ingredients right and folding them just so. It turns simple parts into a dish that’s both tasty and satisfying.

Learning about quesadilla toppings means knowing how to layer them for the best flavor and melting. You want a mix of textures and tastes that will stand out in every bite.

Layering Ingredients for Optimal Melting

To make the perfect cheesy quesadilla, follow these steps:

  • Start with a light layer of shredded cheese on the bottom tortilla
  • Distribute cooked chicken evenly across the surface
  • Add additional quesadilla toppings like diced peppers or onions
  • Sprinkle another generous layer of cheese on top

Tips for Folding the Tortilla

Folding the tortilla right is key to a great quesadilla. Here are some tips:

  1. Use a flat, warm tortilla as your base
  2. Place ingredients on one half of the tortilla
  3. Fold the empty half over the ingredients
  4. Press down gently to seal the edges

Pro tip: A well-folded quesadilla keeps all the delicious ingredients inside while creating a crispy exterior.

The secret to a perfect quesadilla is finding the right balance. Not too many toppings so it can’t melt right, but enough to make it flavorful.

Cooking Your Quesadilla to Perfection

Learning to cook chicken quesadillas is easier than you think. With the right tips, you can make a crispy, cheesy dish everyone will enjoy.

Making the perfect quesadilla is simple. A few cooking methods can ensure delicious results every time.

Achieving the Perfect Crispiness

To get that golden-brown look, follow these tips:

  • Use a well-seasoned cast-iron skillet or non-stick pan
  • Cook on medium-low heat to prevent burning
  • Press down gently with a spatula while cooking
  • Aim for 3-4 minutes per side

Time-Saving Cooking Techniques

Make your quesadilla prep faster with these tips:

  1. Prep ingredients in advance
  2. Use pre-cooked or rotisserie chicken
  3. Cook multiple quesadillas simultaneously on a large griddle
  4. Keep finished quesadillas warm in a low-temperature oven

Pro tip: Let the quesadilla rest for 1-2 minutes after cooking. This helps the cheese set and makes cutting easier. With these tips, you’ll make quesadillas as good as a restaurant’s.

Serving Suggestions for Chicken Quesadillas

Make your Mexican quesadilla experience better by trying new serving options. These can turn a simple meal into a fun adventure. The right sides can make your chicken quesadilla unforgettable.

Choosing the right toppings can really boost your dish’s flavor. Pick sides that match well with your chicken quesadilla.

Dipping Sauces: Flavor Explosion

Dipping sauces are key to a great quesadilla. Here are some tasty options:

  • Fresh Salsa: Adds a bright, tangy kick
  • Creamy Guacamole: Provides rich, smooth texture
  • Sour Cream: Offers a cool, refreshing contrast
  • Chipotle Mayo: Brings smoky heat

Perfect Accompaniments

Pair your chicken quesadilla with sides that make a complete meal. These options match the flavors well:

  1. Mexican Rice: Adds substance and traditional flavor
  2. Black Beans: Provides protein and texture
  3. Corn Salad: Brings fresh, sweet notes
  4. Cilantro-Lime Slaw: Offers a zesty crunch

Try these ideas to make a top-notch Mexican quesadilla at home. Your taste buds will love it!

Variations on the Classic Chicken Quesadilla

Exploring quesadilla variations can turn your classic chicken quesadilla into a fun culinary journey. This dish is very versatile. You can try different fillings and make unique flavors that you love.

Quesadilla variations are great for both meat lovers and vegetarians. By changing ingredients and techniques, you can make this traditional Mexican dish exciting again.

Vegetarian Options: How to Make It Meatless

Plant-based quesadilla fillings can be just as tasty as chicken. Here are some exciting vegetarian options:

  • Roasted portobello mushrooms
  • Black beans and corn
  • Grilled zucchini and bell peppers
  • Spiced tofu crumbles
  • Quinoa and sweet potato mixture

These options are full of protein and taste great. The secret is to season your veggies well and pick ingredients with good texture.

Spicy Kick: Adding Heat to Your Quesadilla

If you like a little heat, spicing up your quesadilla can make it even better. Try different peppers and spices to find your ideal spice level.

  • Jalapeños for mild heat
  • Serrano peppers for medium spiciness
  • Habanero peppers for extreme heat
  • Chipotle powder for smoky flavor
  • Hot sauce drizzled inside the quesadilla

Remember, balance is key when adding spice. Start with a little and adjust to your liking.

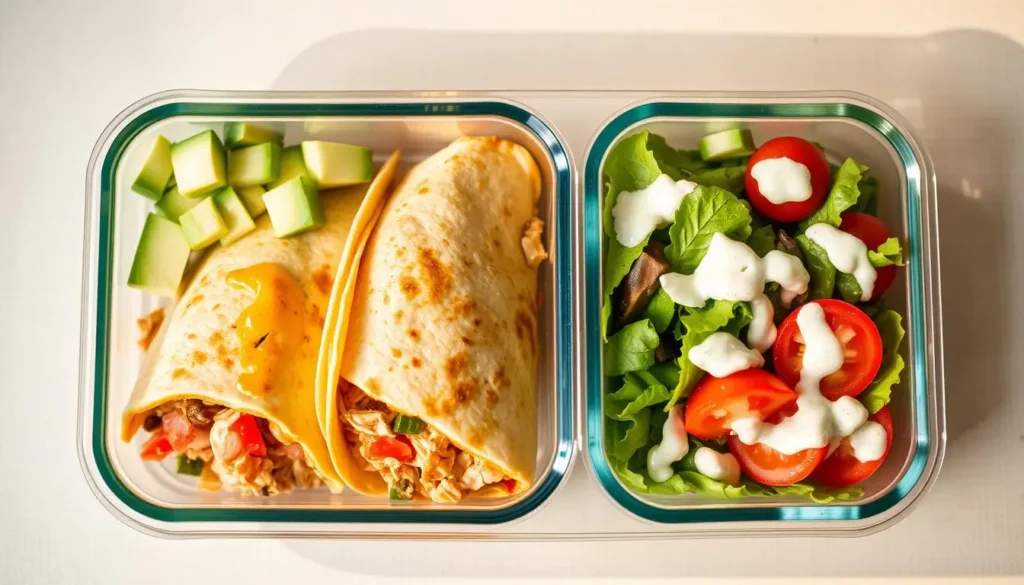
Meal Prep Tips for Chicken Quesadillas

Preparing chicken quesadillas ahead of time saves you a lot of time. It makes mealtime easy and stress-free. Here are some tips to make your chicken quesadilla recipe quicker and easier.

Smart Preparation Techniques

Start with a plan to make meal prep efficient. For your chicken quesadilla recipe, try these tips:

  • Pre-cook chicken in batches on weekends
  • Shred chicken and store in portioned containers
  • Chop vegetables and store in sealed containers
  • Grate cheese in advance and refrigerate

Storing Leftovers Safely

Storing leftovers right is key to keeping your quesadillas fresh. Here’s how to do it:

Storage MethodDurationRecommended Technique
Refrigerator3-4 daysUse airtight containers
Freezer2-3 monthsWrap individually in plastic wrap

Reheating Strategies

To keep your quesadillas crispy, don’t microwave them. Instead, use a skillet or oven for best results. Heat them at medium for 2-3 minutes on each side. This way, the cheese melts and the tortilla stays crispy.

“Meal prep is the secret weapon of home cooks who want delicious, homemade meals without daily cooking stress.” – Professional Chef

Healthier Alternatives for Quesadilla Ingredients

Creating delicious quesadilla ingredients doesn’t mean sacrificing nutrition. With smart ingredient swaps and creative additions, you can transform this classic dish into a powerhouse of health and flavor.

Reimagining quesadilla variations starts with making strategic choices about your core ingredients. Nutrition-conscious cooks can easily upgrade their favorite recipe without compromising taste.

Smart Ingredient Substitutions

  • Replace white tortillas with whole wheat or spinach tortillas
  • Swap full-fat cheese for low-fat or reduced-fat options
  • Choose lean protein like grilled chicken breast or turkey
  • Use Greek yogurt instead of sour cream

Vegetable-Packed Quesadilla Options

Boosting vegetable content transforms quesadilla ingredients from simple to spectacular. Consider these nutrient-dense additions:

  1. Roasted bell peppers
  2. Sautéed spinach
  3. Grilled zucchini
  4. Caramelized onions
  5. Black beans for protein

“Eating healthy doesn’t mean eating boring – it means eating smart!” – Nutritionist Sarah Miller

Your quesadilla can become a balanced meal by incorporating colorful vegetables and lean proteins. Experiment with different combinations to find your perfect healthy quesadilla.

Kid-Friendly Chicken Quesadilla Ideas

Making a tasty quesadilla recipe for kids can make mealtime fun. Kids might be picky, but the right quesadilla can win their hearts. It’s a dish that both parents and kids will love.

To make quesadillas for kids, think creatively. Make the meal fun and pretty. Keep the flavors mild and the ingredients simple.

Tailoring Flavors for Young Taste Buds

Here are tips for making quesadillas for kids:

  • Use mild cheeses like monterey jack or mild cheddar
  • Avoid spicy seasonings
  • Cut chicken into small, bite-sized pieces
  • Include familiar quesadilla toppings like diced tomatoes or corn

Creative Presentation Techniques

Make quesadillas look exciting to get kids to try new things. Here are some ideas:

  1. Cut quesadillas into fun shapes using cookie cutters
  2. Create a DIY quesadilla bar with various toppings
  3. Use colorful plates or arrange ingredients in smiley faces
  4. Let kids help assemble their own quesadillas

By making chicken quesadillas fun and pretty, you turn a simple meal into a fun adventure for kids.

Frequently Asked Questions

Cooking chicken quesadillas can sometimes present challenges. Whether you’re a beginner or an experienced home cook, you might encounter some common issues while preparing this delicious meal. This section addresses the most frequently asked questions to help you master your quesadilla cooking tips.

Common Challenges in Quesadilla Preparation

Making the perfect chicken quesadilla isn’t always straightforward. Here are some typical problems and their solutions:

  • Tortilla Tearing: Use room temperature tortillas and handle them gently
  • Uneven Heating: Cook on medium-low heat and flip carefully
  • Filling Spillage: Don’t overstuff your quesadilla
  • Soggy Texture: Pat chicken dry before adding to tortilla

Freezing and Reheating Guidelines

Preserving your chicken quesadilla for later enjoyment requires proper technique. Check out these storage recommendations:

Storage MethodRecommended ApproachBest Practices
RefrigerationUp to 3 daysStore in airtight container
FreezingUp to 2 monthsWrap individually in foil
ReheatingOven or skilletAvoid microwave to maintain crispiness

Pro Tips for Perfect Quesadillas

When reheating frozen chicken quesadillas, follow these expert tips:

  1. Thaw in refrigerator overnight
  2. Preheat oven to 350°F
  3. Unwrap and place on baking sheet
  4. Bake for 10-15 minutes until crispy

Remember, practice makes perfect when it comes to creating delicious chicken quesadillas!

Conclusion: Enjoying Your Homemade Chicken Quesadilla

Making the perfect chicken quesadilla is a fun journey. You get to try new things and show off your cooking skills. You’ve learned how to pick the best chicken and tortillas, and how to fold and cook them just right.

There’s no end to the fun you can have with quesadillas. You can change up the recipe every time you make it. Try new proteins, cheeses, or spices to make it your own. The best part is, you can make it just how you like it.

Recap of Key Steps in the Recipe

Great quesadillas start with quality ingredients and careful cooking. Choose fresh ingredients and marinate your chicken for extra flavor. And don’t forget to cook them until they’re golden and crispy.

Encouragement to Experiment with Ingredients

Don’t be shy to try new things with your quesadillas. Add fresh veggies, mix up the cheese, or add some spice. Your kitchen is where you can create something truly special.

FAQ

How long do chicken quesadillas take to make?

Chicken quesadillas are quick to make, ready in about 30 minutes. You cook the chicken, prepare the filling, and then assemble and cook the quesadillas.

Can I make quesadillas ahead of time?

Yes, you can make quesadillas ahead. Cook the chicken and chop ingredients early. Then, assemble and cook them when you’re ready to eat. You can keep them wrapped in the fridge for up to 24 hours before cooking.

What are the best cheeses for quesadillas?

Use cheeses that melt well, like Monterey Jack, cheddar, Oaxaca, and queso fresco. Mixing two or more cheeses adds depth to your quesadillas.

How do I prevent my quesadillas from getting soggy?

Keep your ingredients dry and pat the chicken dry. Don’t overload the tortilla. Cook on medium-high heat for a crispy exterior. Use a non-stick pan or griddle for the best results.

Are quesadillas healthy?

Quesadillas can be healthy if made with lean proteins, whole wheat tortillas, and lots of veggies. Use low-fat cheese, add more veggies, and control portion sizes to make them healthier.

Can I make vegetarian quesadillas?

Yes! Use plant-based proteins like black beans, grilled veggies, tofu, or meat substitutes. You can make tasty vegetarian quesadillas with a variety of veggies and protein sources.

What are the best dipping sauces for quesadillas?

Try salsa, guacamole, sour cream, pico de gallo, and hot sauce. You can also mix these sauces or add your favorite seasonings for unique dips.

How do I store leftover quesadillas?

Keep leftover quesadillas in an airtight container in the fridge for 3-4 days. Reheat them in a skillet or oven to stay crispy. Avoid the microwave to prevent sogginess.

What type of tortilla is best for quesadillas?

Corn and flour tortillas both work well. Flour tortillas are softer, while corn tortillas are more traditional and slightly crispier. Choose based on your preference and the type of quesadilla you’re making.

How can I make my quesadillas spicier?

Add jalapeños, cayenne pepper, chipotle powder, or hot sauce for more heat. You can also use spicy peppers like serrano or habanero in your filling for an extra kick.

0 comments
0 FacebookTwitterPinterestEmail
Birria Tacos Recipe
Birria Tacos Recipe

Delicious Birria Tacos Recipe: Easy to Make at Home!

Serves: 4 Prep Time: Cooking Time:
Nutrition facts: 350 calories 20 grams fat
Rating: 5.0/5
( 1 voted )

Ingredients

  • 2 lbs beef chuck roast
  • 3 dried guajillo chiles
  • 2 dried ancho chiles
  • 1 onion, quartered
  • 4 cloves garlic
  • 1 tsp cumin
  • 1 tsp oregano
  • 1 tbsp apple cider vinegar
  • 4 cups beef broth
  • 12 small corn tortillas
  • Fresh cilantro, chopped
  • Lime wedges
  • Salsa

Instructions

1. Start by removing the stems and seeds from the dried chiles. Toast them lightly in a pan for a minute or two.
2. Soak the chiles in hot water for 10 minutes until softened.
3. Blend the softened chiles with onion, garlic, cumin, oregano, and apple cider vinegar until smooth.
4. In a large pot, sear the beef chuck roast on all sides until browned.
5. Add the blended sauce and beef broth to the pot with the beef.
6. Cover and slow cook on low heat for 3 hours or until the beef is tender and shreds easily.
7. Shred the beef with two forks, discarding any fat and bones.
8. To assemble the tacos, heat the tortillas and dip them in the birria broth before filling with the shredded beef.
9. Top with fresh cilantro, squeeze lime, and serve with salsa.

Notes

For added flavor, dip the tacos in the broth before serving, and enjoy with your favorite salsa. You can also use this birria to make quesabirria by adding cheese inside the tortilla before folding.

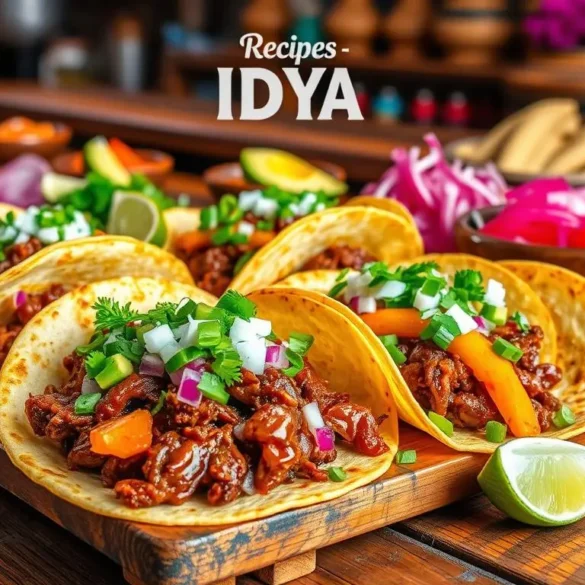
Ever thought of turning a simple dinner into a flavor blast that takes you to Mexico? The birria tacos recipe is your ticket to a culinary journey!

Birria tacos have become a hit, loved by both home cooks and restaurant fans. This recipe will teach you to make tender meat in crispy tortillas that are irresistible.

Whether you’re an expert in the kitchen or just starting, this recipe will help you make a dish that wows everyone. Get ready to learn the secrets of Mexican cooking in your own kitchen!

Key Takeaways

  • Learn an authentic birria tacos recipe that’s simple to make
  • Discover the rich flavors of traditional Mexican cuisine
  • Master the art of creating tender, flavorful meat
  • Impress family and friends with restaurant-quality tacos
  • Explore a versatile recipe that can be customized to your taste

Introduction to Birria Tacos

Birria tacos have become a hit in the food world. They’re loved by many in the United States. These tacos are more than food; they’re a way to connect with Mexican culture.

What Are Birria Tacos?

Birria tacos are a tasty dish with tender meat, often goat or beef. The meat is slow-cooked in a mix of chili peppers and spices. This makes the filling very flavorful, making these tacos stand out.

  • Meat is slow-cooked until extremely tender
  • Tortillas are often dipped in the meat’s consomé
  • Served with fresh cilantro and onions

The Origins of Birria

Birria comes from Jalisco, Mexico, with a deep history. It was once a dish for special events, showing off Mexican cooking skills.

“Birria is not just food, it’s a celebration of tradition and flavor” – Mexican Culinary Experts

Birria tacos are loved for their amazing taste and how good they look on social media. People enjoy the vibrant, red tortillas and the rich meat.

FeatureAppeal
Flavor ProfileIntense, spicy, complex
Cooking MethodSlow-cooking creates tender meat
Visual AestheticInstagram-worthy presentation

If you love food or want to try Mexican dishes, birria tacos are a must-try. They offer a unique and memorable experience that’s winning hearts everywhere.

Ingredients Needed for Birria Tacos

Making authentic birria tacos at home needs the right ingredients. Whether you’re experienced or new to cooking, knowing the right parts is key. It helps you make delicious homemade birria tacos, just like those from Mexican restaurants.

Essential Ingredients for Birria

The base of great birria tacos is the meat and spices. Here’s what you’ll need:

  • Meat Selection: Traditionally, goat or beef chuck roast work best
  • Dried chilies (guajillo, ancho, and pasilla)
  • Garlic and white onions
  • Cumin and oregano
  • Apple cider vinegar
  • Corn tortillas

Optional Ingredients for Extra Flavor

For even more flavor, try these extra ingredients:

  1. Fresh cilantro
  2. Lime wedges
  3. Diced white onions
  4. Queso fresco
  5. Pickled jalapeños

“The secret to authentic birria tacos lies not just in the ingredients, but in the love and tradition you bring to cooking.” – Mexican Culinary Expert

When making authentic birria tacos, remember quality matters. Fresh, authentic spices and the right meats will make your homemade birria tacos full of traditional Mexican flavors.

Preparing the Birria: Step-by-Step Guide

Making birria tacos takes patience and detail. It turns simple meat into a delicious treat that will wow everyone.

Selecting the Perfect Meat

Choosing the right meat is key for birria tacos. Beef chuck roast or goat meat are best. They have enough fat for tender, tasty results.

  • Beef chuck roast (4-5 pounds)
  • Dried guajillo chilies
  • Spices like cumin and oregano
  • Garlic and onions

Meat Preparation Techniques

Begin by cleaning and trimming the meat. Season it well with salt, pepper, and Mexican spices. This step is crucial for deep flavors.

Cooking MethodTemperatureCooking Time
Slow CookerLow (225°F)6-8 hours
Oven Braising325°F4-5 hours
Pressure CookerHigh Pressure60-90 minutes

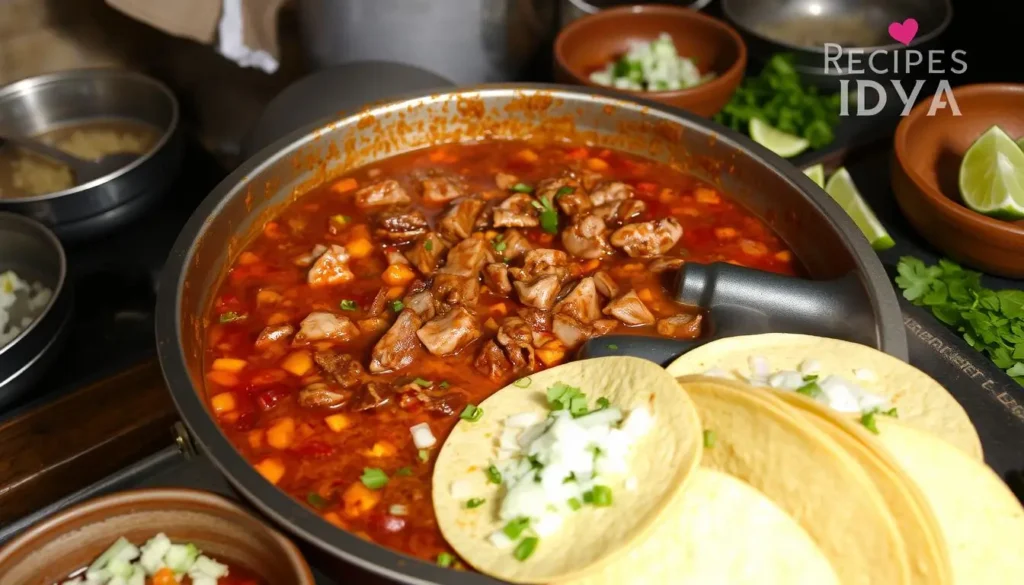
Creating the Signature Consomme

The consomme makes birria tacos special. Mix dried chilies, tomatoes, and spices for a rich broth. It makes your tacos irresistible.

“The secret to great birria is in the depth of its consomme” – Traditional Mexican Cooking Wisdom

Focus on tender meat and a flavorful consomme. With practice and passion, you’ll get it right.

Making the Tacos: A How-To

Making the perfect homemade birria tacos needs focus and skill. It’s not just about the meat. It’s about how you prepare everything to make a delicious meal.

Preparing the Tortillas

Getting your tortillas right is key for real birria tacos. Start with top-notch corn tortillas. To add flavor, follow these steps:

  • Warm tortillas on a comal or cast-iron skillet
  • Dip each tortilla briefly in the warm birria broth
  • Make sure tortillas are soft but not too fragile

Assembling the Tacos

Putting together birria tacos is an art. Here’s how to do it right:

  1. Place the broth-dipped tortilla on a clean surface
  2. Add a big helping of shredded birria meat
  3. Fold the tortilla in half for a classic taco look

Tips for Garnishing Your Tacos

Adding garnishes can make your birria tacos amazing. Try these classic toppings:

GarnishFlavor Profile
Chopped cilantroFresh, herbal
Diced white onionsSharp, crisp
Lime wedgesTangy, bright

“The secret to great birria tacos is in the details of preparation and presentation.” – Mexican Culinary Tradition

Remember, the best birria tacos recipe is yours to make. Feel free to try new garnishes and methods to find your favorite taco.

Variations of Birria Tacos

Traditional birria tacos have evolved beautifully, offering exciting culinary twists. These twists keep the authentic birria tacos spirit alive. Exploring different variations allows you to experiment with flavors while respecting the dish’s rich heritage.

Vegetarian Birria Options

Plant-based food lovers can still enjoy the robust flavors of birria. They can use creative protein alternatives. Consider these vegetarian substitutes:

  • Jackfruit (mimics pulled meat texture)
  • Portobello mushrooms
  • Seitan with robust spice blend
  • Cauliflower “meat” chunks

Fusion Birria Creations

Innovative chefs are transforming traditional birria tacos into exciting fusion dishes. They blend cultural culinary traditions.

Fusion StyleUnique Ingredients
Korean Birria TacosGochujang sauce, kimchi
Japanese-Inspired BirriaWasabi crema, pickled ginger
Mediterranean BirriaTzatziki, za’atar spices

Alternative Meat Selections

While beef remains the classic choice, authentic birria tacos can be prepared with various protein options:

  1. Goat (traditional method)
  2. Chicken for lighter flavor
  3. Pork for rich, tender texture
  4. Lamb for gamey undertones

“Birria is not just a dish, it’s a canvas for culinary creativity!” – Mexican Food Expert

Each variation maintains the soul of traditional birria tacos while offering unique taste experiences. Your kitchen becomes a playground for exploring these delicious adaptations.

Serving Suggestions for Birria Tacos

Birria tacos are more than just food. They’re a full experience. Learning how to serve them can make your meal unforgettable.

Perfect Side Dishes to Complement Birria Tacos

Choosing the right sides can make your birria tacos special. Here are some great options:

  • Mexican lime-cilantro rice
  • Creamy refried beans
  • Fresh green salad
  • Grilled street-style corn

Traditional Salsas and Condiments

Authentic birria tacos need the right salsas. Your choice of condiments can really boost the taste.

Salsa TypeFlavor ProfileHeat Level
Salsa RojaSmoky and spicyMedium
Pico de GalloFresh and tangyMild
Salsa VerdeTart and herbalHot

“The secret to great birria tacos is in the details – especially the consomme and condiments!” – Mexican Chef Rodriguez

Don’t forget to serve warm consomme on the side. It’s perfect for dipping. This adds a rich flavor that makes the tacos truly stand out.

Storing and Reheating Leftover Birria

After enjoying your homemade birria tacos, it’s important to store them right. This keeps their flavor and quality top-notch. Learning how to store and reheat your birria tacos can make every meal a delight.

Best Practices for Storing Birria

To keep your birria tasting great, follow these tips:

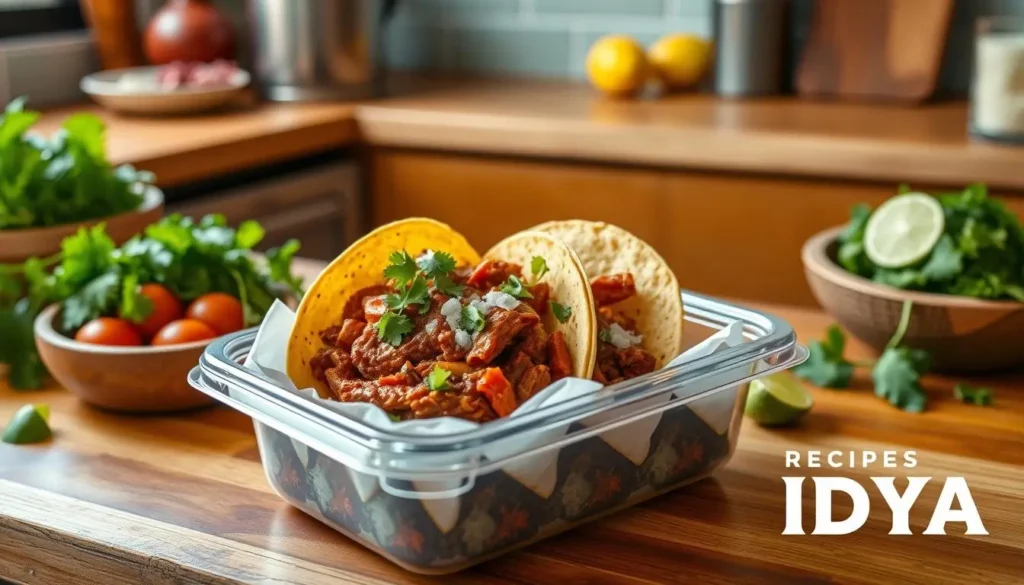
  • Separate the meat from the broth before refrigerating
  • Use airtight containers to prevent moisture loss
  • Refrigerate within two hours of cooking
  • Store meat and broth separately for up to 4 days

Effective Reheating Methods

To bring back your birria tacos’ original taste and texture, pay close attention. Here’s a detailed guide on reheating:

Reheating MethodBest ForInstructions
StovetopMaintaining MoistureWarm in a skillet with a bit of broth
OvenCrispy TextureWrap in foil, heat at 350°F for 10-15 minutes
MicrowaveQuick HeatingAdd broth, cover, heat in 30-second intervals

“The secret to great reheated birria is keeping the meat moist and the tortillas crisp!” – Professional Chef

By using these storage and reheating tips, you can enjoy your birria tacos many times. Each bite will be as tasty as the first.

Common Mistakes to Avoid When Making Birria

Making the best birria tacos recipe needs careful attention. Even skilled cooks can make mistakes that ruin the dish. Knowing these common errors will help you make a truly great birria.

Overcooking the Meat: A Crucial Error

The key to a great birria tacos recipe is perfectly cooked meat. Overcooking can make the meat dry and tough. To avoid this:

  • Use low and slow cooking methods
  • Check meat tenderness with a fork
  • Aim for meat that pulls apart easily

Never Skimp on Broth Preparation

The broth is the heart of birria tacos. Skipping or rushing this step can ruin the dish’s rich flavors. Professional chefs know that making broth takes time and patience.

“A great birria is about the depth of flavor, not cutting corners.” – Mexican Culinary Experts

Additional Mistakes to Watch For

  1. Using wrong chili types – Select authentic Mexican chilies
  2. Neglecting to toast spices before cooking
  3. Failing to balance flavor profiles

By avoiding these common mistakes, you’ll be on your way to making amazing birria tacos at home. Remember, practice makes perfect. Don’t get discouraged if your first try isn’t perfect.

Frequently Asked Questions About Birria Tacos

Birria tacos have become a big hit in the culinary world. Many people want to make this tasty dish at home. Knowing the details of your birria tacos recipe can help you make a delicious meal.

Can I Make Birria Tacos Ahead of Time?

Yes, you can make birria tacos ahead of time. This can save you time and make the flavors better. The meat gets even tastier when it sits overnight, soaking up all the spices.

  • Prepare the meat 1-2 days before serving
  • Store cooked meat in an airtight container
  • Refrigerate for up to 4 days
  • Reheat gently to maintain moisture

What to Serve with Birria Tacos?

Learning how to make birria tacos means knowing what sides to serve. The right sides can make your meal even better. Traditional sides really highlight the dish’s rich flavors.

Side DishFlavor Profile
Mexican RiceComplementary starch
Lime WedgesBright, citrusy contrast
Cilantro-Onion GarnishFresh, aromatic topping
Consommé for DippingAuthentic serving style

Pro tip: Always serve your birria tacos with extra dipping broth. It adds to the authentic street food feel!

“Great birria tacos are about balancing flavors and embracing tradition.” – Mexican Culinary Expert

Conclusion: Enjoying Birria Tacos at Home

Learning to make popular Mexican birria tacos at home is a fun journey. It brings real flavors right to your table. This journey turns simple cooking into a special experience of culture and tasty creativity.

Homemade birria tacos let you add your own touch while honoring Mexican cooking traditions. Whether for a family dinner or a weekend party, each batch is a chance to try new things and get better at cooking.

Sharing Your Birria Experience

Invite friends and family to your birria taco night. Share your tasty dishes on social media. The bright colors and smells of these tacos will start conversations and make great memories.

Final Tips for a Perfect Birria Meal

Keep trying to get better at making popular Mexican birria tacos. Start with simple recipes and then try new ingredients and methods. With each try, you’ll become more confident and soon make amazing birria tacos at home that will wow everyone.

FAQ

Can I make birria tacos ahead of time?

Yes, you can prepare birria tacos ahead of time. Cook the meat and store it in the fridge for up to 3-4 days. You can also make the consomme separately. Just reheat the meat and assemble your tacos when you’re ready. This is great for meal prep or parties.

What type of meat is best for birria tacos?

Traditional birria uses goat or beef. Chuck roast is a popular choice for its flavor and tenderness. You can also use lamb or chicken as alternatives.

How spicy are birria tacos?

You can adjust the spice level by changing the chili peppers. For less heat, use fewer chilis or remove seeds. For more heat, add more guajillo or ancho chilis.

Can I make vegetarian birria tacos?

Absolutely! Use jackfruit, mushrooms, or plant-based meat for vegetarian birria. Use similar spices and cooking methods to get the rich flavors of traditional birria. Portobello mushrooms are a great meat substitute.

How do I prevent my tortillas from getting soggy?

To avoid soggy tortillas, dip them briefly in the consomme and then cook them until crispy. This method, called “quesabirria”, keeps the tortillas crispy while adding flavor.

How long can I store leftover birria?

Cooked birria meat can be stored in the fridge for 3-4 days. You can freeze it for up to 3 months. Always cool and store it properly to keep it safe and fresh.

What sides go well with birria tacos?

Serve birria tacos with Mexican rice, refried beans, pico de gallo, lime wedges, and consomme for dipping. A garnish of fresh cilantro and onion adds a bright touch.

Can I use store-bought tortillas?

Store-bought tortillas are okay, but corn tortillas are best for authenticity. If possible, use fresh, locally-made corn tortillas. Warm them on a griddle and dip in consomme before assembling your tacos.

Are birria tacos typically very greasy?

Authentic birria can be rich, but a good recipe balances flavors. To reduce greasiness, skim excess fat and choose leaner meat. Serve with fresh lime and a light salsa to balance the richness.

What’s the difference between birria tacos and traditional tacos?

Birria tacos are known for their slow-cooked, spiced meat and the method of dipping tortillas in consomme. They have a deeper flavor profile than standard tacos and are served with consomme for dipping.

0 comments
0 FacebookTwitterPinterestEmail
Pasta Recipes

Explore Easy Pasta Recipes 4 Dinner

by IDYA
Pasta Recipes

Explore Easy Pasta Recipes 4 Dinner

Serves: 4 Prep Time: Cooking Time:
Nutrition facts: 350 calories 15 grams fat
Rating: 5.0/5
( 1 voted )

Ingredients

  • 200g pasta
  • 1 cup tomato sauce
  • 1 tablespoon olive oil
  • 1/4 cup grated Parmesan
  • 1 garlic clove, minced
  • Fresh basil leaves, chopped
  • Salt and pepper to taste

Instructions

Boil water in a large pot and cook pasta according to package instructions. In a separate pan, heat olive oil over medium heat and sauté garlic until fragrant. Add tomato sauce to the pan and simmer for 5 minutes. Once pasta is cooked, drain it and add it to the sauce. Toss to combine, then sprinkle with Parmesan and fresh basil. Season with salt and pepper to taste. Serve warm.

Notes

Feel free to customize the pasta by adding vegetables, chicken, or shrimp. Adjust seasonings to your preference.

Pasta recipes are perfect for quick and tasty dinners. They’re great for busy people or anyone wanting to impress. From creamy Alfredo to zesty marinara, pasta lets you explore endless flavors.

Trying new pasta recipes brings excitement to your kitchen. Each dish shares a story of culture and creativity. You’ll enjoy both classic Italian dishes and fresh global twists.

Cooking pasta is more than just food—it’s about making memories. With simple ingredients and techniques, you can make meals that rival restaurants. These recipes will encourage you to try new flavors and cooking methods.

Key Takeaways

  • Pasta recipes offer versatile dinner solutions
  • Minimal ingredients create maximum flavor
  • Cooking techniques determine pasta quality
  • Global cuisines inspire unique pasta dishes
  • Home cooking can match restaurant standards

Quick and Easy Classic Pasta Recipes

Finding tasty pasta recipes is easy. Whether you’re new to cooking or have lots of experience, learning to make pasta can change your dinner plans. Let’s look at some classic ways to make your pasta dishes stand out.

Pasta recipes are all about mastering basic techniques that make Italian cooking special. The key is using simple, high-quality ingredients and precise cooking methods.

Traditional Italian Pasta Techniques

Italian chefs have perfected pasta cooking over generations. Here are some key techniques to remember:

  • Always use a large pot with plenty of water
  • Salt the water generously before adding pasta
  • Stir pasta immediately after adding to prevent sticking
  • Cook until al dente – firm to the bite

Essential Pasta Cooking Tips

Cooking perfect pasta needs attention to detail. Follow these crucial tips for restaurant-quality results:

  1. Use about 1 tablespoon of salt per pound of pasta
  2. Reserve some pasta water for sauce consistency
  3. Drain pasta quickly to stop the cooking process

Basic Sauce Foundations

Knowing basic sauce techniques can make your pasta recipes better. Here’s a quick guide to classic sauce types:

Sauce TypeKey IngredientsFlavor Profile
MarinaraTomatoes, garlic, basilFresh and tangy
AlfredoButter, cream, parmesanRich and creamy
PestoBasil, pine nuts, olive oilHerbaceous and bright

“Cooking is love made visible” – Chef Unknown

With these techniques and tips, you’re ready to make delicious pasta recipes. These will impress your family and friends. Remember, the more you practice, the better you’ll get!

Creamy Cajun Pasta with Shrimp

Explore the lively world of Cajun cooking with this delicious cajun pasta recipe. It adds a southern twist to your dinner. The dish is full of bold flavors and a creamy texture, making it a standout meal.

To make the perfect cajun pasta, you need to know about spice and balance. Start by picking top-notch ingredients that go well together.

“Cajun cooking is all about layers of flavor and respecting each ingredient’s unique character.” – Southern Cooking Expert

Essential Ingredients for Cajun Pasta

  • Large, fresh shrimp
  • Heavy cream
  • Authentic Cajun seasoning
  • Pasta of choice (fettuccine works best)
  • Butter and olive oil

Spice Level Guide

Spice ToleranceSeasoning Amount
Mild1-2 teaspoons
Medium2-3 teaspoons
Hot3-4 teaspoons

When making your cajun pasta, start by cooking shrimp in butter and olive oil. Then, add Cajun seasoning to create a deep, rich flavor.

The secret to a creamy sauce is to slowly add heavy cream. Let it simmer until it thickens, coating the pasta beautifully.

Zesty Lemon Garlic Pasta with Fresh Herbs

Make your dinner special with a zesty lemon pasta recipe. It’s full of bright flavors and fresh herbs. This dish is like a restaurant meal, but you make it at home.

Creating a great lemon pasta recipe is all about citrus. It’s about finding the right balance of zesty and other flavors.

Choosing the Right Pasta Shape

The pasta shape is crucial for a lemon pasta recipe. Some shapes hold sauce better than others:

  • Linguine: Ideal for light, silky sauces
  • Fettuccine: Provides excellent sauce coverage
  • Angel hair: Perfect for delicate lemon garlic preparations

Herb Pairing Guide

Fresh herbs make a simple lemon pasta recipe amazing. Try these classic pairings:

HerbFlavor ProfileBest Paired With
BasilSweet and pepperySeafood lemon pasta
ParsleyFresh and mildChicken or vegetable dishes
ThymeEarthy and subtleGarlic-based lemon sauces

Lemon Sauce Variations

Try different lemon pasta recipe styles to keep things interesting:

  1. Light Citrus Sauce: Olive oil, lemon juice, garlic
  2. Creamy Lemon Variation: Add mascarpone or cream cheese
  3. Spicy Twist: Incorporate red pepper flakes

“Great cooking is about ingredients and how you combine them.” – Wolfgang Puck

Getting good at lemon pasta takes time. Start simple, taste as you go, and adjust seasonings to your liking.

Mexican-Inspired Taco Pasta Skillet

Looking for a tasty mix of Mexican flavors and pasta? The taco pasta recipe is your go-to for a quick weeknight dinner. It’s a one-skillet dish that combines the zest of tacos with pasta’s comfort, making it a hit with families.

The taco pasta recipe uses essential ingredients for authentic Mexican flavors. Ground beef is the main protein, and taco seasonings turn a simple pasta dish into a flavorful masterpiece.

  • Quick 30-minute preparation
  • Single skillet cooking
  • Customizable spice levels
  • Kid-friendly and adult-approved

Choose your favorite pasta shape for the ultimate taco pasta recipe. Rotini or shells are great, as they hold onto the sauce and meat. Cook your ground beef with chili powder, cumin, and garlic for that taco flavor.

“A great meal brings people together, and this taco pasta skillet does just that!” – Home Cooking Enthusiast

Finish your skillet with shredded cheese, fresh cilantro, and sour cream. Add sliced jalapeños or hot sauce for more heat. You can adjust the spice level to your liking.

Meal prep tip: This dish reheats well, making it perfect for lunch the next day. Enjoy your Mexican-inspired pasta creation!

Perfect Penne Pasta Recipes for Every Occasion

Penne pasta recipes are a blank canvas for creativity. These tube-shaped noodles are great for holding onto sauces and ingredients. They’re perfect for quick dinners or special meals.

Sauce Combinations for Penne

Choosing the right sauce can make your penne pasta recipes stand out. Here are some tasty options:

  • Creamy Alfredo: Rich and velvety, perfect for classic comfort food
  • Robust Marinara: Traditional tomato-based sauce that clings beautifully to penne
  • Spicy Arrabbiata: Adds a fiery kick to your pasta experience
  • Pesto: Fresh and herbaceous, bringing bright flavors to your dish

Vegetarian Penne Options

Vegetarian penne pasta recipes are both healthy and flavorful. Here are some plant-based options:

  1. Roasted Vegetable Penne with Mediterranean Herbs
  2. Spinach and Ricotta Stuffed Penne
  3. Mushroom Truffle Penne
  4. Eggplant Parmesan Penne Bake

“Penne pasta is like a blank canvas waiting for your culinary imagination to paint delicious masterpieces.” – Chef Maria Rodriguez

With these penne pasta recipes, you’ll always have new meal ideas. The secret is to try different ingredients and techniques to make your own perfect pasta dish.

Elegant Salmon Pasta in White Wine Sauce

Take your dinner to the next level with a salmon pasta recipe. It combines tender fish with a creamy white wine sauce. This dish turns a simple meal into a fancy feast that will wow your guests and delight your taste buds.

“Cooking is an art, and salmon pasta is a masterpiece of culinary elegance.” – Chef Marco Rossi

Choosing the right salmon is key for your dish. Opt for wild-caught Alaskan salmon for its great taste and health benefits. Fresh salmon should be vibrant in color and firm, with no strong smell.

  • Choose wild-caught Alaskan salmon
  • Ensure fish is fresh and firm
  • Select high-quality pasta like fettuccine or linguine

The white wine sauce is the dish’s secret ingredient. Use a crisp white wine like Pinot Grigio or Sauvignon Blanc. It adds a light, fragrant flavor that pairs well with the salmon.

IngredientQuantityPurpose
Fresh Salmon1 poundMain protein
White Wine1/2 cupSauce base
Heavy Cream1 cupSauce richness
Fresh Herbs2 tablespoonsAdded flavor

To make your salmon pasta, focus on cooking methods that keep the fish tender. Pan-sear the salmon gently to get a crispy outside and a soft inside. Serve it with perfectly cooked pasta for a memorable meal.

Hearty Ground Beef Pasta Combinations

Ground beef pasta recipes are the ultimate comfort food for busy families and pasta lovers. These delicious meals combine the rich flavor of ground beef with satisfying pasta shapes. They create quick and nutritious dinners that everyone will enjoy.

Transforming simple ingredients into mouthwatering meals requires understanding the art of ground beef pasta combinations. The key is selecting the right meat and pasta. This creates a harmonious dish that tantalizes your taste buds.

Mastering Meat Sauce Techniques

Creating the perfect ground beef pasta sauce involves several crucial steps:

  • Select high-quality ground beef with 80/20 fat content
  • Brown the meat thoroughly to develop deep flavor
  • Drain excess fat for a cleaner, more concentrated sauce
  • Season generously with herbs and spices

Pasta and Beef Pairings

Different pasta shapes work better with specific ground beef sauce styles. Check out these recommended pairings:

Pasta ShapeRecommended Sauce StyleFlavor Profile
PenneChunky Meat SauceRobust and Hearty
RotiniCreamy Beef SauceSmooth and Comforting
SpaghettiClassic BologneseTraditional Italian
RigatoniSpicy Beef RagùBold and Zesty

“The secret to great ground beef pasta recipes is balancing meat, sauce, and pasta textures.” – Chef Mario Rossi

Pro tip: Always cook ground beef until it reaches an internal temperature of 160°F. This ensures food safety while maintaining maximum flavor in your pasta dishes.

Italian Sausage and Pasta Favorites

Discover the deep flavors of sausage and pasta recipes that turn simple meals into unforgettable dishes. Italian sausage adds a rich taste to pasta, making meals both cozy and thrilling.

When picking Italian sausage for your pasta, you have two main options:

  • Sweet Italian Sausage: Mild and slightly herbal
  • Spicy Italian Sausage: Full of red pepper flakes and bold taste

Experts suggest a few tips for making the best sausage and pasta:

  1. Take the sausage out of its casings before cooking
  2. Cook the meat until it’s well browned for a deep flavor
  3. Use the sausage fat to make a tasty sauce base

“The secret to an amazing pasta dish is letting each ingredient tell its own story.” – Chef Marco Rossi

Adding roasted bell peppers, fresh basil, or a bit of white wine can elevate your pasta. The trick is to balance the sausage’s strong taste with other ingredients.

Looking for a quick dinner or a special meal? Sausage and pasta recipes are both versatile and delicious. They’re sure to wow your family and guests.

Luxurious Seafood Pasta Dishes

Making the perfect seafood pasta is all about balance. It’s about using fresh ingredients and mastering cooking techniques. This turns home cooking into a dining experience that wows everyone.

Discover how to make seafood pasta that feels like a trip to Italy. The secret is choosing top-notch seafood and knowing how to enhance its flavors.

Shellfish Selection Guide

  • Fresh mussels with robust shells
  • Succulent shrimp with bright coloration
  • Sweet and tender scallops
  • Briny clams for authentic flavor

Ideal Seafood Pasta Combinations

Pasta TypeRecommended SeafoodSauce Pairing
LinguineClamsWhite wine garlic sauce
SpaghettiShrimpSpicy tomato sauce
FettuccineScallopsCreamy herb sauce

Wine Pairing Recommendations

Enhance your seafood pasta with the right wine. Try crisp white wines like Pinot Grigio or Sauvignon Blanc. They pair well with seafood’s light flavors.

“Great seafood pasta is about respecting the ocean’s bounty and treating ingredients with care.” – Chef Marco Rossi

Turn your seafood pasta into a memorable dish with these tips. Keep practicing, trying new things, and enjoy making amazing meals at home.

Delicate Angel Hair Pasta Preparations

Angel hair pasta is a true culinary gem, needing careful cooking to bring out its best. These thin strands require special care to get the perfect texture and taste.

Timing is key when making angel hair pasta dishes. It cooks fast, usually in 2-3 minutes. You want it to be tender but still firm, showing off its delicate nature.

“The secret to perfect angel hair pasta is respecting its delicate nature and understanding its unique cooking requirements.” – Culinary Expert

  • Use a large pot with plenty of salted water
  • Stir gently to prevent sticking
  • Drain immediately to stop cooking process
  • Rinse with cold water to prevent overcooking

Great angel hair pasta recipes use light, elegant sauces. These enhance the pasta without overpowering it. Here are some tasty options:

  1. Fresh tomato and basil
  2. Garlic and olive oil
  3. Lemon and herb-infused broth
  4. Delicate seafood sauces

How you present the pasta is just as important as how you cook it. Twirl the pasta gently to make it look beautiful. Use light sauces like olive oil or a white wine reduction to highlight its delicate texture.

Rustic Pasta Fagioli for Cozy Evenings

Find the ultimate comfort food that warms your heart and body. Pasta fagioli is a classic Italian dish. It turns simple ingredients into a hearty meal perfect for cold nights. This rustic soup has tender pasta, creamy beans, and rich flavors that feel like a trip to the Italian countryside.

“A bowl of pasta fagioli is like a warm hug from an Italian grandmother” – Traditional Italian Cooking Wisdom

The secret to a great pasta fagioli recipe is in its ingredients and cooking methods. Your journey to making an authentic dish begins with knowing the key ingredients.

Selecting the Perfect Beans

Choosing the right beans is crucial for your pasta fagioli recipe. Here are some top bean options:

  • Cannellini beans – traditional and creamy
  • Great Northern beans – mild and smooth
  • Borlotti beans – authentic Italian variety

Mastering Broth-Making Techniques

A rich, flavorful broth is key to a great pasta fagioli recipe. Here’s a quick guide to making the perfect base:

IngredientPurposeRecommended Quantity
Vegetable StockBase Liquid4-6 cups
PancettaDepth of Flavor2-3 oz, diced
Fresh HerbsAromatic Enhancement2 sprigs rosemary/thyme

Pro tip: Let your broth simmer slowly. This develops rich, complex flavors that make your pasta fagioli recipe unforgettable.

Try different regional variations to make this classic dish your own. Whether you like it thick like a stew or light like a soup, pasta fagioli is a canvas for your culinary creativity.

Mediterranean-Style Pasta Recipes

Explore the world of Mediterranean pasta recipes that add sunshine and health to your meals. These dishes capture the essence of coastal cuisine. They mix fresh ingredients with simple cooking to make meals special.

Mediterranean pasta is known for its light, nutritious approach. These recipes use ingredients that are both tasty and good for your heart:

  • Extra virgin olive oil
  • Fresh herbs like basil and oregano
  • Lean proteins such as grilled fish and chicken
  • Colorful vegetables like tomatoes, zucchini, and eggplant
  • Bright citrus flavors

“Mediterranean cuisine is not just food, it’s a celebration of freshness and simplicity.” – Mediterranean Cooking Expert

You can easily make your pasta recipes Mediterranean-style. Start with whole wheat pasta for more nutrition. Try recipes with grilled seafood, roasted veggies, and olive oil-based sauces. Greek pasta salads and Spanish seafood dishes add variety to your meals.

Each Mediterranean pasta recipe shares a story of regional traditions. It brings the tastes of Greece, Italy, and Spain to your kitchen. By embracing these traditions, you can turn weeknight dinners into a Mediterranean feast.

One-Pot Pasta Solutions

Busy home cooks look for easy pasta recipes that clean up quickly and taste great. One-pot pasta solutions are a big help. They make quick, tasty meals that save time and cut down on dishes.

It’s possible to keep your pasta recipes simple without losing flavor. These new cooking ways let you make top-notch dishes easily. You’ll enjoy making and eating them.

Time-Saving Techniques

  • Cook pasta directly in the sauce for enhanced flavor absorption
  • Use single-pan methods to reduce total cooking time
  • Select ingredients that cook simultaneously
  • Prep components in advance for faster meal preparation

“One-pot pasta recipes are the ultimate weeknight dinner solution for home chefs looking to simplify their cooking process.”

Equipment Recommendations

  1. Large, deep skillet with high sides
  2. Non-stick Dutch oven
  3. Heavy-bottomed stainless steel pot
  4. Cast iron cooking vessel

Choosing the right cookware can make your pasta recipes stand out. Get versatile kitchen tools that heat evenly. They make one-pot cooking easy.

With these tips and tools, you’ll make tasty pasta dishes quickly. They’ll save you time, reduce cleanup, and impress your family with little effort.

Gluten-Free Pasta Alternatives

Looking for pasta recipes doesn’t mean you have to skip out on tasty meals if you’re gluten-free. Today, there are many gluten-free pasta options that make cooking easier for those with dietary needs.

Now, you have more choices than ever for gluten-free pasta. These special pastas taste great and feel just like the real thing.

  • Rice-based pasta: Light and neutral flavor
  • Quinoa pasta: High in protein and nutrients
  • Legume pastas: Made from chickpeas, lentils, and beans
  • Corn pasta: Familiar texture for traditional pasta lovers

Pro tip: When cooking gluten-free pasta recipes, watch cooking times carefully. These alternatives can become mushy if overcooked.

“Gluten-free doesn’t mean flavor-free. The right pasta can transform your meal!” – Professional Chef

Each gluten-free pasta recipe needs a special touch. Chickpea pasta is great with meat sauces, while rice noodles are perfect for light dishes.

Every gluten-free pasta has its own health benefits. Legume-based options are high in protein, making them a smart choice for those watching their diet.

Cooking Techniques for Perfect Gluten-Free Pasta

  1. Salt water generously
  2. Stir frequently during cooking
  3. Test for doneness earlier than traditional pasta
  4. Rinse with cold water to stop cooking process

Follow these tips, and your gluten-free pasta dishes will be both delicious and satisfying.

Seasonal Fresh Pasta Inspirations

Make your pasta dishes special by using fresh ingredients all year. Each season offers unique tastes and textures. This can turn your pasta into something amazing. Cooking with local, seasonal produce makes your meals more vibrant and tasty.

Using seasonal ingredients in your pasta lets you try new things. It also helps local farmers and lets you enjoy food at its best.

Spring and Summer Pasta Delights

In warmer months, your pasta can be light and fresh. It captures the season’s essence:

  • Asparagus and lemon pasta with fresh basil
  • Cherry tomato and herb linguine
  • Zucchini blossom and ricotta spaghetti

Fall and Winter Pasta Comforts

When it gets cold, make your pasta warm and comforting:

  • Butternut squash ravioli with sage butter
  • Roasted root vegetable penne
  • Mushroom and truffle fettuccine
SeasonKey IngredientsRecommended Pasta Type
SpringAsparagus, peas, artichokesAngel hair, linguine
SummerTomatoes, zucchini, herbsSpaghetti, farfalle
FallSquash, mushrooms, kalePenne, rigatoni
WinterRoot vegetables, truffle, hearty greensFettuccine, lasagna

“Seasonal cooking isn’t just about ingredients—it’s about connecting with nature’s rhythms and enjoying food at its absolute best.” – Chef Maria Rodriguez

Try these seasonal pasta recipes. You’ll see how changing ingredients can make your meals unforgettable all year.

Conclusion

Exploring pasta recipes has been a thrilling journey. You’ve seen how pasta can be both quick and elegant. Each recipe shows how simple things can become amazing dishes that please everyone.

Your pasta journey doesn’t stop here. You’ve learned a lot, from choosing the right pasta to mixing sauces. Now, you can make your own versions of Cajun shrimp pasta or Mediterranean dishes. You have the skills to make any recipe your own.

Cooking is all about having fun and expressing yourself. Feel free to mix ingredients, try new pasta, and make each dish unique. With these recipes, you’ll soon be making meals that show off your growing skills.

The secret to amazing pasta is to keep practicing, be passionate, and be open to trying new things. Don’t be afraid to experiment and trust your taste. Most importantly, enjoy the process. Your pasta adventure is just starting!

FAQ

What are some essential tips for cooking perfect pasta?

To cook perfect pasta, start with a large pot and plenty of salted water. Stir occasionally to prevent sticking. Cook until it’s al dente.

Always save some pasta water to help bind your sauce. Rinse pasta only for cold salad recipes. The key is to follow package instructions and taste test for the ideal texture.

How can I make a quick pasta sauce at home?

You can make a simple pasta sauce in minutes. Use olive oil, garlic, fresh herbs, and tomatoes. A classic marinara is made by sautéing garlic, adding canned crushed tomatoes, and seasoning with basil, salt, and pepper.

For a creamy option, combine heavy cream, Parmesan cheese, and your favorite herbs.

What are the best pasta shapes for different sauces?

Pasta shape matters! Thick, ridged pasta like penne works well with chunky sauces. Long, thin pasta like spaghetti is perfect for lighter olive oil-based sauces.

Delicate angel hair pairs best with light, herb-infused sauces. Wide noodles like pappardelle are ideal for rich, meaty ragouts.

How can I make my pasta dishes more nutritious?

Add vegetables directly to your pasta. Use whole grain pasta options. Incorporate lean proteins like chicken or fish.

Experiment with vegetable-based sauces. You can also mix in legumes, add spinach or kale, or use zucchini noodles as a lower-carb alternative.

What are some gluten-free pasta alternatives?

Explore gluten-free pasta made from chickpea flour, rice, quinoa, or lentils. These alternatives offer different nutritional profiles and textures. When cooking, pay attention to specific preparation instructions, as gluten-free pastas can cook differently than traditional wheat pasta.

How do I prevent pasta from becoming sticky or clumpy?

Use a large pot with plenty of water. Stir occasionally while cooking. Avoid adding oil to the water.

The most important tip is to cook pasta just until al dente. Immediately mix it with sauce after draining. If needed, reserve some pasta water to help separate the noodles.

Can I prepare pasta dishes in advance?

Yes! Many pasta dishes can be prepared ahead of time. Cook pasta slightly underdone, rinse with cold water, and store separately from the sauce.

When ready to serve, reheat the sauce and quickly warm the pasta. Some baked pasta dishes can be assembled in advance and refrigerated before baking.

What are some budget-friendly pasta recipe ideas?

Create delicious, affordable pasta dishes using pantry staples like canned tomatoes, garlic, olive oil, and dried herbs. Simple recipes like aglio e olio (garlic and oil pasta), pasta with breadcrumbs, or pasta with beans can be nutritious and inexpensive.

Buy pasta in bulk and use seasonal vegetables to keep costs down.

0 comments
0 FacebookTwitterPinterestEmail
Beef Stir Fry
Beef Stir Fry

Beef Stir Fry: A Tasty and Healthy Dinner Option

Serves: 4 Prep Time: Cooking Time:
Nutrition facts: 400 calories 18 grams fat
Rating: 5.0/5
( 1 voted )

Ingredients

  • 1 lb (450g) beef (sirloin or flank steak), thinly sliced
  • 1 tablespoon vegetable oil
  • 1 bell pepper, thinly sliced
  • 1 carrot, julienned
  • 1/2 onion, thinly sliced
  • 2 cloves garlic, minced
  • 1 tablespoon soy sauce
  • 1 tablespoon oyster sauce
  • 1 teaspoon sesame oil
  • 1/2 cup broccoli florets
  • 1 tablespoon fresh ginger, grated
  • Salt and pepper to taste

Instructions

Heat vegetable oil in a large pan or wok over medium-high heat. Add the beef and stir-fry for 3-4 minutes until browned and cooked through. Remove the beef and set aside. In the same pan, add garlic, ginger, onion, bell pepper, carrot, and broccoli. Stir-fry for 4-5 minutes until vegetables are tender but crisp. Return the beef to the pan and stir in soy sauce, oyster sauce, and sesame oil. Cook for another 2-3 minutes, mixing well. Season with salt and pepper to taste, then serve immediately.

Notes

Serve with steamed rice or noodles for a complete meal. Adjust the amount of soy sauce or sesame oil based on personal preference.

Looking for a quick and healthy meal? A beef stir fry recipe is perfect. It mixes tender beef, fresh veggies, and strong flavors in one pan. It’s great for busy cooks who want to make meals like restaurants.

Stir fry turns simple ingredients into a fun dish. You can make your steak stir fry your own, fitting your taste and diet. It’s a fast, protein-rich meal that’s full of flavor. With some practice, you can make dishes that wow your family.

This guide will teach you how to make a top-notch stir fry. It covers choosing the right beef and mastering wok cooking. Whether you’re new to cooking or experienced, you’ll find tips to improve your stir fry skills.

Key Takeaways

  • Stir fry offers a quick and nutritious meal solution
  • Versatile cooking method adaptable to various dietary preferences
  • Requires minimal cooking time and equipment
  • Retains nutrients through high-heat, fast cooking
  • Easy to customize with different proteins and vegetables

Understanding the Art of Perfect Stir Frying

Mastering beef stir fry recipes is more than just tossing ingredients. It’s a skill that needs precision, skill, and a grasp of cooking basics. Stir frying turns simple ingredients into amazing meals with great flavors and textures.

Professional chefs say successful stir frying is about technique, not just ingredients. Your beef stir fry recipes will get better by learning these key skills.

Essential Wok Techniques

Choosing the right cooking vessel is key for authentic beef stir fry recipes. A traditional carbon steel wok gives the best heat distribution and that restaurant-style sear.

  • Choose a flat-bottomed wok for home stovetops
  • Season your wok before first use
  • Keep wok surface well-maintained

Temperature Control Basics

Heat management is what sets amateur cooks apart from pros. High, consistent heat cooks ingredients quickly and prevents them from getting soggy in your beef stir fry recipes.

Heat LevelCooking PurposeIdeal Temperature
High HeatSearing Beef425-450°F
Medium-High HeatVegetable Cooking375-400°F

Timing and Movement Methods

Proper ingredient sequencing and constant movement prevent burning and ensure even cooking. Quick, deliberate motions are key to perfect beef stir fry recipes.

“Stir frying is dance between heat, ingredients, and timing.” – Professional Chef

  • Cook meat first, remove from wok
  • Stir-fry vegetables in same wok
  • Combine ingredients quickly at end

Essential Equipment for Making Restaurant-Quality Stir Fry

To make a tasty shrimp stir fry, you need the right tools. Professional chefs say quality equipment makes a big difference. Whether it’s a beef stir fry or a shrimp one, the right tools are key.

  • Wok: The cornerstone of any great stir fry
  • Sharp chef’s knife for precise ingredient preparation
  • Wok spatula for efficient cooking
  • High-heat resistant cooking surface

“The right tools can elevate your cooking from good to exceptional” – Professional Chef

Choosing a wok for your shrimp stir fry is important. Look for these features:

Wok TypeProsBest For
Carbon SteelExcellent heat distributionTraditional stir frying
Non-StickEasy cleaningLow-fat cooking techniques
Cast IronSuperior heat retentionHigh-temperature cooking

Pro tip: Get a quality wok ring for your gas stove. A stable cooking surface ensures even heat distribution and prevents potential accidents.

  • Recommended additional tools:
  • Splatter screen
  • Meat thermometer
  • Cutting board with non-slip surface

You don’t have to spend a lot to get started. Begin with basic tools and add more as you get better. Remember, great cooking is about technique and passion, not just equipment.

Best Cuts of Beef for Stir Frying

Choosing the right meat is key for a tasty stir fry. The cut affects tenderness, flavor, and how it cooks.

For a great pork stir fry, picking the right meat is essential. Chefs say go for lean, tender cuts. They cook fast and soak up marinades well.

Flank Steak: A Flavorful Choice

Flank steak is a top pick for stir-frying. It has:

  • Rich, robust flavor
  • Lean protein profile
  • Quick cooking time
  • Excellent marinade absorption

Sirloin: The Versatile Cut

Sirloin is another great choice for stir fry. It has:

  • Moderate fat content
  • Tender texture
  • Reasonable pricing
  • Easy to slice thin

Tenderloin: Premium Preparation

Tenderloin offers a luxurious stir-fry experience. Remember to slice against the grain for maximum tenderness.

“The secret to perfect stir-fry is not just the recipe, but the quality of your meat.” – Professional Chef

Whichever cut you pick, slice it thinly and evenly. This ensures even cooking and the best texture in your stir-fry.

Classic Beef Stir Fry Recipe

Making the perfect beef stir fry recipe needs care and some special techniques. This classic steak stir fry recipe will turn your weeknight dinner into a top-notch meal. It’s fast and tastes amazing.

Before starting, get these key ingredients for your beef stir fry:

  • 1 pound flank steak, thinly sliced
  • 2 cups mixed vegetables (bell peppers, broccoli, carrots)
  • 3 cloves garlic, minced
  • 2 tablespoons vegetable oil
  • Salt and pepper to taste

To start your steak stir fry, prepare your meat right. Always slice your beef against the grain for the best tenderness. Cut the meat into thin, even strips, about 1/4 inch thick.

“The secret to a great stir fry is high heat and quick cooking” – Professional Chef

Here’s how to cook your beef stir fry:

  1. Heat oil in a wok or large skillet over high heat
  2. Stir fry beef for 2-3 minutes until browned
  3. Remove beef and set aside
  4. Stir fry vegetables for 3-4 minutes
  5. Return beef to pan and add sauce
  6. Cook for additional 1-2 minutes

Your homemade steak stir fry is now ready to eat! Serve it over steamed rice or noodles for a full meal.

Marinading Techniques for Tender Beef

Marinades are the secret to making ordinary beef into a delicious stir fry. They work for both classic beef dishes and shrimp stir fry recipes. Knowing how to use marinades can really improve your cooking.

Marinating is more than just soaking meat in sauce. It’s a science that makes meat tender and flavorful. For both shrimp and beef, the right marinade can be a game-changer.

Core Components of an Exceptional Marinade

  • Acid (vinegar, citrus juice) to tenderize
  • Oil for moisture retention
  • Seasonings for depth of flavor
  • Salt to enhance taste

Asian-Style Marinade Essentials

Traditional Asian marinades include:

  1. Soy sauce for umami
  2. Ginger for warmth
  3. Garlic for intensity
  4. Sesame oil for richness

Optimal Marinating Times

Timing is key in marinading. Beef needs 30 minutes to 2 hours. Shrimp, being delicate, should marinate for just 15-20 minutes to keep it tender.

“The perfect marinade transforms good cooking into great cuisine.” – Professional Chef

Remember, always marinate in the fridge. This keeps food safe and prevents bacterial growth.

Choosing and Preparing Fresh Vegetables

Choosing the right vegetables can make your beef stir fry recipes amazing. Fresh, crisp veggies are key to a vibrant and tasty dish. They make your meal exciting.

  • Choose vegetables with similar cooking times
  • Mix colors for visual appeal
  • Select produce at peak freshness
  • Cut vegetables uniformly for even cooking

Here are some top veggies for beef stir fry recipes:

VegetableCooking TimeFlavor Profile
Bell Peppers3-4 minutesSweet, crisp
Broccoli4-5 minutesSlightly bitter, crunchy
Snap Peas2-3 minutesFresh, mild
Carrots3-4 minutesSweet, tender

Pro tip: Blanch harder veggies like broccoli briefly before stir-frying. This makes them tender without overcooking.

“The key to a great stir fry is balancing flavors and textures with your vegetable selection.” – Professional Chef

Try different veggie mixes to make your beef stir fry recipes unique and healthy. This keeps your meals interesting and full of flavor.

Mastering Stir Fry Sauce Combinations

Creating the perfect sauce is key to a great shrimp stir fry. Sauces turn simple ingredients into amazing meals. They add depth and excitement to your dishes.

Stir fry sauces mix flavors that enhance your dishes. Your sauce can make or break a shrimp stir fry.

Traditional Sauce Foundation

Classic Asian sauces have essential ingredients:

  • Soy sauce for saltiness
  • Rice vinegar for tanginess
  • Sesame oil for depth
  • Ginger and garlic for aromatics

Fusion Flavor Innovations

Modern cooking lets you mix traditional and new ingredients. A shrimp stir fry can include:

  • Sriracha for heat
  • Honey for sweetness
  • Lime juice for brightness
  • Coconut aminos as a soy sauce alternative

“The right sauce turns a simple meal into a culinary adventure.” – Chef Marcus Wong

Try different sauces to find your favorite. It will wow your family and friends.

Common Mistakes to Avoid When Stir Frying

Getting a perfect pork stir fry recipe is all about avoiding common mistakes. Many home cooks face challenges in making their dishes taste like restaurant food. This is because they often make errors that affect the dish’s texture and flavor.

When you’re making your pork stir fry, be careful of these big mistakes:

  • Overcrowding the Wok: Too many ingredients can block heat from spreading evenly
  • Choosing the wrong cooking oil with a low smoke point
  • Not prepping ingredients before starting to cook
  • Not cooking at the right temperature

“The secret to great stir frying is preparation and precision” – Professional Chef

Keeping the right temperature is key for your pork stir fry. High heat cooks food fast and keeps it tender. Always heat your wok well and have all your ingredients cut and ready before cooking.

Also, watch out for these mistakes:

  1. Adding sauce too early, which can make meat tough
  2. Marinating proteins for too long
  3. Stirring ingredients too much
  4. Not using sharp knives for cutting

By knowing and using these tips, you’ll improve your stir fry skills. You’ll make tasty, restaurant-quality meals every time.

Healthy Adaptations of Traditional Stir Fry

Turning beef stir fry recipes into healthier options doesn’t mean losing flavor. Modern cooking lets you make nutritious meals that please your taste buds and body.

Low-Carb Stir Fry Alternatives

It’s easy to cut carbs with creative beef stir fry recipes. Try these tasty swaps:

  • Replace rice with cauliflower rice
  • Use spiralized zucchini instead of noodles
  • Swap traditional soy sauce for coconut aminos

Protein-Rich Modifications

Make your beef stir fry more nutritious by adding protein. Protein-packed ingredients can make your meal healthier:

  1. Add cubed tofu for extra protein
  2. Mix in scrambled eggs
  3. Include edamame beans

“Healthy eating is about making smart ingredient choices that don’t compromise taste.” – Nutrition Expert

Trying out different beef stir fry recipes lets you make meals that are tasty and healthy. Remember, small changes can make a big difference in a dish’s health benefits.

Meal Prep Tips for Stir Fry Components

Starting a tasty steak stir fry recipe begins with meal prep. Making your cooking easier can turn weeknight dinners into a breeze. Organize your ingredients and techniques ahead of time for quick, high-quality meals.

For a smart stir fry meal prep, plan and organize well. Here are some tips to boost your cooking efficiency:

  • Slice beef for steak stir fry in advance and store in portioned containers
  • Chop vegetables up to 3 days before cooking
  • Prepare marinades and sauces in batch
  • Use airtight containers to maintain ingredient freshness

Storing ingredients right is key to keeping them fresh. Here’s a quick guide for storage times:

IngredientRefrigerator StorageFreezer Storage
Sliced Beef2-3 days3-4 months
Chopped Vegetables3-5 days6-8 months
Marinades5-7 days2-3 months

“Preparation is the secret ingredient to stress-free cooking” – Professional Chef’s Wisdom

Freezing parts of your steak stir fry recipe? Use these expert tips: label containers with dates, remove air to avoid freezer burn, and thaw safely in the fridge overnight.

With these meal prep tips, you’ll save time, cut down on stress, and always have tasty stir fry meals ready.

Pairing Suggestions and Side Dishes

Creating the perfect meal is more than just making shrimp stir fry. The right side dishes and pairings can make your meal unforgettable. Whether it’s beef or shrimp stir fry, choosing the right sides is crucial for a great meal.

Rice is a classic choice for stir fry dishes. Here are some tasty options:

  • Jasmine rice with a light, fragrant profile
  • Brown rice for added nutrition
  • Coconut rice for a tropical twist
  • Cauliflower rice for low-carb alternatives

There are also noodle-based sides that go well with shrimp stir fry:

  1. Chilled soba noodles
  2. Garlic sesame egg noodles
  3. Glass noodle salad

“The right side dish transforms a simple stir fry into a memorable culinary experience.” – Chef Mark Chen

Choosing the right drink can also enhance your meal. Light, crisp wines like Riesling or Sauvignon Blanc pair well with seafood stir fries. For non-alcoholic drinks, try green tea or sparkling water with citrus to refresh your palate.

When making shrimp stir fry, consider adding veggie sides for color and nutrition. Pickled vegetables, cucumber salad, or steamed edamame can offer a nice contrast to the rich flavors of the main dish.

Storage and Reheating Guidelines

Keeping your beef stir fry recipe tasty means you need to store and reheat it right. This way, your meal stays safe, delicious, and appealing, even after you’ve cooked it.

Optimal Storage Strategies

Here are the best ways to store your beef stir fry:

  • Cool the stir fry to room temperature within 2 hours of cooking
  • Use airtight containers with secure lids
  • Refrigerate promptly at 40°F or below
  • Consume refrigerated stir fry within 3-4 days

Smart Reheating Techniques

Reheating your beef stir fry needs attention to keep it tasty and fresh. Different ways can help bring back the dish’s original flavor.

Reheating MethodTechniqueCooking Time
Skillet/WokHigh heat, constant stirring3-4 minutes
MicrowaveMedium power, stirring halfway1-2 minutes
OvenCovered, low temperature10-15 minutes

Pro tip: Always reheat stir fry until it reaches an internal temperature of 165°F to ensure food safety.

By sticking to these storage and reheating tips, your beef stir fry will stay fresh and tasty. It will taste just as good as when you first made it.

Conclusion

Your journey through beef stir fry recipes doesn’t end here. You’ve learned skills that go beyond one dish. These skills are useful whether you’re making classic beef stir fry or trying shrimp stir fry recipes.

Every time you cook, you’ll get better at it. Stir frying is all about mastering heat, timing, and how to prepare ingredients. Start with simple recipes and then try more complex ones. Your kitchen can become a place where you can be creative and make tasty, healthy meals.

Stir fries are not just tasty; they’re also good for you. They cook quickly, keeping nutrients in. You can mix proteins like beef with veggies for a balanced meal. Keep learning and trying new things. Experiment with different ingredients and sauces, and find your own style.

Now you can make quick, tasty meals that everyone will love. Stir frying is versatile and will help you grow as a cook. Enjoy making new dishes and watch your confidence grow.

FAQ

What is the best cut of beef for stir fry?

Flank steak, sirloin, and tenderloin are great for stir fry. Flank steak has rich flavor. Sirloin is tender and affordable. Tenderloin is the tenderest but most expensive.

Always cut the meat against the grain for tenderness.

How do I prevent my stir fry from becoming soggy?

To avoid soggy stir fry, heat your wok well before adding ingredients. Don’t overcrowd the pan. Cook veggies quickly to keep them crisp.

Pat meat and veggies dry before cooking. Add sauces at the end.

What type of oil should I use for stir frying?

Use oils like peanut, vegetable, or canola oil. They can handle high temperatures without breaking down or creating bad flavors.

How long should I marinate beef for stir fry?

Marinate beef for 15-30 minutes for flavor and tenderness. Don’t marinate too long. Acidic marinades can break down the meat’s texture in 2 hours or more.

Can I make a stir fry without a wok?

Yes, use a large, deep skillet or sauté pan instead of a wok. Use high heat and cook quickly, moving ingredients in the pan.

How do I slice beef for stir fry?

Slice beef against the grain into thin, uniform pieces (about 1/4 inch thick). Freezing the meat for 15-20 minutes helps cut thin, consistent slices.

What are some low-carb alternatives to rice in stir fry?

Try cauliflower rice, zucchini noodles, or shirataki noodles as low-carb options. They add volume and nutrition without high carbs.

How can I store leftover stir fry?

Store leftover stir fry in an airtight container in the fridge for 3-4 days. Reheat in a skillet or wok to restore texture. Add a bit of oil to prevent sticking.

What vegetables work best in a beef stir fry?

Bell peppers, broccoli, snap peas, carrots, and onions are great choices. Choose quick-cooking veggies that stay crisp. Cut them evenly for even cooking.

Can I make a stir fry sauce in advance?

Absolutely! You can make stir fry sauces ahead and store them in the fridge for up to a week. Keep them sealed and shake well before using.

0 comments
0 FacebookTwitterPinterestEmail
Rice Cakes

Easy Rice Cakes: Step-by-Step Guide

by IDYA
Rice Cakes

Easy Rice Cakes: Step-by-Step Guide

Serves: 4 Prep Time: Cooking Time:
Nutrition facts: 150 calories 5 grams fat
Rating: 5.0/5
( 1 voted )

Ingredients

  • 2 cups cooked white rice
  • 1 egg, beaten
  • 1/4 cup all-purpose flour
  • 1/4 cup grated cheese (optional)
  • 1 tablespoon soy sauce
  • 1/4 teaspoon salt
  • 1/4 teaspoon pepper
  • 2 tablespoons vegetable oil (for frying)

Instructions

In a large bowl, combine the cooked rice, egg, flour, soy sauce, salt, and pepper. Mix until the ingredients are well incorporated. Add grated cheese if desired and mix it in. Heat a pan over medium heat and add vegetable oil. Form the rice mixture into small patties, about 3 inches in diameter. Place the rice patties into the hot oil and cook each side for about 3-4 minutes or until golden brown and crispy. Remove from the pan and place on a paper towel to drain excess oil. Serve warm and enjoy! 

Notes

Feel free to add your favorite seasonings or toppings like sesame seeds or chili flakes for extra flavor.

Rice cakes are a hit in the U.S. They’re a healthy snack for those who care about their diet. Making rice cakes at home can boost your cooking skills and offer a tasty snack choice.

If you’re wondering about rice cakes or want to learn how to make them, this guide is for you. It covers everything from understanding rice cakes to making your own tasty treats. You’ll learn the secrets to making perfect rice cakes at home.

Rice cakes are a great snack for many diets. By trying different methods and ingredients, you can create rice cakes that are just as good as store-bought ones. It’s a fun way to explore your culinary creativity.

Key Takeaways

  • Rice cakes offer a healthy, gluten-free snack option
  • Homemade rice cakes allow for complete ingredient control
  • Multiple varieties exist across different culinary traditions
  • Basic techniques can be mastered with practice
  • Rice cakes can be customized with various flavors and seasonings

Understanding Rice Cakes: Traditional vs Modern Varieties

Rice cakes are tasty treats found in many cultures. They range from Asian street foods to Western health snacks. Knowing what they’re made of helps us enjoy their rich flavors and health benefits.

The world of rice cakes is full of variety and tradition. Each type has its own special taste and cultural value.

Asian Rice Cake Varieties

Asian rice cakes have a long history of innovation. Each region has its own flavors and ways of making them:

  • Japanese mochi: Soft, chewy rice cakes made from pounded glutinous rice
  • Korean tteok: Steamed rice cakes with sweet and savory flavors
  • Chinese nian gao: New Year’s rice cakes that bring good luck

Western-Style Rice Cakes

Western rice cakes are now popular health snacks. They focus on being healthy and easy to eat:

  • Low-calorie alternative to traditional crackers
  • Available in flavors like caramel, chocolate, and sea salt
  • Gluten-free and often organic options

Health Benefits and Nutritional Value

Rice cakes are good for you, depending on what they’re made of:

VarietyCaloriesProteinCarbohydrates
Plain Rice Cake35-501g8g
Whole Grain Rice Cake60-802g12g

“Rice cakes represent a beautiful intersection of tradition and modern nutrition.” – Culinary Experts

Whether you love traditional Asian dishes or prefer healthy Western snacks, rice cakes have something for everyone.

Essential Ingredients and Equipment for Rice Cake Making

Making delicious rice cakes is all about the right ingredients and tools. Whether you’re new to cooking or have experience, knowing what you need is key. This will help you make perfect rice cookies, just like the ones from Quaker.

Choosing the right ingredients is very important for making great rice cakes. Here’s what you’ll need to start:

  • Rice varieties: Short-grain white rice or sweet rice (glutinous rice)
  • Water
  • Salt
  • Optional binding agents like rice flour

You’ll also need some basic kitchen tools:

  1. Rice cooker or heavy-bottomed pot
  2. Mixing bowl
  3. Wooden spoon or rice paddle
  4. Parchment paper
  5. Baking sheet

“The secret to perfect rice cakes lies in selecting quality ingredients and using the right techniques.” – Traditional Rice Cake Maker

If you’re into modern rice cake making, think about getting a rice cake machine. This tool makes the process easier and helps you make professional-quality rice cookies at home.

Pro tip: Always use fresh, high-quality rice. Make sure your tools are clean and dry before you start. The quality of your ingredients affects the taste and texture of your homemade rice cakes.

How to Make Rice Cakes: Basic Recipe Foundation

Making rice cakes is all about mastering basic techniques. It’s about turning simple ingredients into a tasty treat. You need precision, patience, and the right steps to get it right.

To make the best rice cakes, start with quality ingredients. Learn the key steps to impress your loved ones.

Selecting the Right Type of Rice

Choosing the right rice is crucial. Not all rice is good for making rice cakes.

  • Short-grain white rice: Best for traditional rice cakes
  • Glutinous rice: Provides excellent stickiness
  • Sweet rice: Offers a unique texture and flavor

Proper Rice Preparation Techniques

Getting your rice ready is important. Your rice prep can affect the final result.

  1. Rinse rice thoroughly to remove excess starch
  2. Soak rice for 30 minutes to improve texture
  3. Drain completely before processing

Creating the Perfect Rice Mixture

The secret to great rice cakes is a balanced mixture.

IngredientProportionPurpose
Rice2 cupsPrimary base
Water1.5 cupsMoisture and binding
Salt1/2 teaspoonFlavor enhancement

“The art of making rice cakes is about understanding the delicate balance between ingredients and technique.” – Culinary Expert

Pro tip: Use a food processor for a smooth, consistent mix. It helps make perfect rice cakes every time.

Preparing Your Rice for Cake Making

Learning to make rice cakes begins with the right rice preparation. The secret to tasty rice cookies and Quaker-style rice cakes is in choosing and preparing your rice. The type of rice and how you prepare it greatly affects the taste and texture of your rice cakes.

  • Choose short-grain or medium-grain rice for best results
  • Rinse rice thoroughly to remove excess starch
  • Soak rice for 30-60 minutes before cooking
  • Use precise water-to-rice ratios

Rice selection is crucial for achieving the perfect consistency in your homemade rice cakes. Different types of rice will give you different textures. So, try different ones to find your favorite.

Rice TypeTextureBest For
Japanese Short-GrainSticky and CompactTraditional Rice Cakes
Glutinous RiceExtra StickyChewy Rice Cookies
Medium-Grain RiceSlightly FirmWestern-Style Rice Cakes

“The secret to great rice cakes is in the preparation.” – Professional Rice Cake Maker

After cooking, let your rice cool a bit before shaping. This helps keep the right moisture and prevents your rice cakes from falling apart when you press them.

Pressing and Shaping Techniques for Perfect Rice Cakes

Learning to make rice cakes needs careful pressing and shaping. The right way can turn your rice mix into tasty, professional-looking treats. They look great and taste even better.

Knowing what rice cakes are means they must have the right texture and shape. There are different ways to make the perfect rice cake every time.

Manual Pressing Methods

When making rice cakes by hand, follow these essential techniques:

  • Use a clean, flat surface for pressing
  • Apply consistent pressure with a wooden mold or flat utensil
  • Dust surfaces with rice flour to prevent sticking

Using a Rice Cake Machine

Modern technology offers efficient alternatives for making rice cakes:

Machine TypeAdvantagesBest For
Electric Rice Cake MakerConsistent shape and sizeLarge batches
Manual Press MachineMore control over textureSmall home batches

Common Shaping Mistakes to Avoid

Prevent these common errors when crafting rice cakes:

  1. Overmixing the rice paste
  2. Using wet hands without flour
  3. Pressing too hard or too softly

“The art of making rice cakes is about patience and precision.” – Traditional Asian Cooking Wisdom

Pro tip: Always let your rice cakes rest after shaping. This helps them keep their shape and get the perfect texture.

Drying and Storage Methods for Homemade Rice Cakes

Learning how to make rice cakes means knowing how to dry and store them right. This keeps them fresh and tasty for longer. It starts right after you make them.

Drying rice cakes right is key. What they’re made of affects how they dry. They must be handled carefully to avoid getting soggy or spoiled.

  • Air Drying: Spread rice cakes on a clean, dry rack
  • Room Temperature Drying: Place on parchment paper in a well-ventilated area
  • Dehydrator Method: Use low heat settings for consistent drying

Storing rice cakes properly is also vital. Here are some tips:

  1. Use airtight containers to prevent moisture
  2. Store in cool, dry places away from direct sunlight
  3. Refrigerate for extended preservation

“The secret to perfect rice cakes is not just in making them, but in preserving their delicate texture.” – Culinary Experts

Pro tip: Always let rice cakes cool down before storing. Wrap each one in parchment paper to stop them from sticking and keep their shape.

Storage MethodShelf LifeRecommended Conditions
Room Temperature2-3 daysCool, dry place
Refrigerated1-2 weeksAirtight container
FrozenUp to 2 monthsSealed freezer bag

Remember, proper drying and storage are key to enjoying your homemade rice cakes at their best quality.

Flavoring Options and Creative Variations

Rice cakes are a blank canvas for creativity. Learning to make them opens up a world of flavors. You can turn a simple snack into a gourmet delight. Whether you like sweet or savory, there are endless ways to make your rice cakes special.

Sweet Rice Cake Options

Try these sweet rice cake flavors for a dessert fix:

  • Vanilla Bean and Honey
  • Chocolate Chip
  • Cinnamon Apple
  • Strawberry Cream
  • Coconut Caramel

Savory Seasoning Ideas

For those who love bold flavors, here are some savory options:

  • Garlic and Herb
  • Spicy Sriracha
  • Everything Bagel Seasoning
  • Pesto Parmesan
  • Barbecue Spice Blend

Natural Coloring Techniques

Make your rice cakes look as good as they taste with these natural colors:

ColorNatural IngredientPreparation Method
PinkBeetroot PowderMix powder into rice mixture
GreenMatcha PowderBlend powder with rice base
YellowTurmericSprinkle ground turmeric
PurpleButterfly Pea FlowerSteep and mix flower extract

“The secret to great rice cake flavors is experimenting and finding your unique combination.” – Culinary Expert

Start with small batches to get the hang of it. Your creativity can turn these simple snacks into amazing dishes.

Troubleshooting Common Rice Cake Problems

Learning to make rice cakes can be tricky. You might run into problems that affect the taste and texture. Knowing how to fix these issues will help you make perfect rice cakes every time.

Texture Troubles

The texture of rice cakes is key to a great taste. You might face a few common texture problems:

  • Dry and crumbly texture
  • Too sticky or mushy consistency
  • Uneven density throughout the cake

To fix texture issues, choose the right rice and control moisture. The right rice variety and proper hydration are crucial when learning what are rice cakes all about.

Common Preparation Challenges

ProblemPotential CauseSolution
Cakes falling apartInsufficient bindingAdd more sticky rice flour or egg
Uneven cookingIncorrect temperatureUse consistent, moderate heat
Bland flavorLack of seasoningExperiment with herbs and spices

“Perfecting rice cakes is an art that requires patience and practice.” – Culinary Expert

By learning these troubleshooting tips, you’ll get better at making rice cakes. You’ll create delicious, professional-quality treats every time.

Serving Suggestions and Pairing Ideas

Rice cakes are great for creative meal planning. They’re perfect for a quick breakfast or a tasty snack. Knowing about different rice cake flavors can make them even better in your diet.

Quaker rice cookies and homemade rice cakes are great for many tasty combinations. Let’s look at some fun ways to enjoy them.

Breakfast Combinations

Start your day with tasty rice cake combinations that give you energy and satisfaction:

  • Spread almond butter and sliced bananas on plain rice cakes
  • Top with scrambled eggs and fresh herbs
  • Create a sweet option with honey and cinnamon
  • Layer with cream cheese and smoked salmon

Snack Time Pairings

Smart pairing can make rice cake flavors even better:

  • Hummus and cucumber slices
  • Avocado and everything bagel seasoning
  • Tuna salad with fresh dill
  • Chocolate spread for a sweet treat

“Rice cakes are like culinary canvases – simple, yet ready to be transformed with creative toppings!” – Culinary Expert

Try different rice cake flavors to find your favorites. The trick is to mix textures and ingredients that go well together. This way, you can enjoy the rice cake’s lightness even more.

Conclusion

Learning to make rice cakes is a fun journey into the world of food. You can try traditional Asian styles or modern Western ones. Rice cakes are a great choice for anyone who loves to cook, as they are both tasty and healthy.

Rice cakes are more than just food; they’re a blank canvas for your creativity. You can make them sweet or savory, depending on what you like. By trying different types of rice and flavors, you can create your own special rice cake recipes.

Success comes with practice and patience. Start with simple recipes and then try more complex ones. Remember, every batch you make will help you get better. Making rice cakes at home means you can choose what goes into them, making them healthier.

Your rice cake-making journey is just starting. Enjoy the process and share your creations with others. As you keep trying new things, you’ll become more confident in your rice cake-making skills. Soon, you’ll be making delicious rice cakes that will impress everyone.

FAQ

What are rice cakes made out of?

Rice cakes are made from puffed rice grains. They are compressed into shapes. You can use white, brown, or other rice types, with little extra stuff. The making process is simple: cook rice, shape it, and dry or bake it to get a crisp texture.

Are rice cakes healthy?

Rice cakes can be a healthy snack, especially whole grain ones. They’re low in calories and fat-free. But, they lack nutrients, so add protein or healthy toppings for a better snack.

How do I make homemade rice cakes?

To make rice cakes at home, you need cooked rice, a binder like egg or flour, and seasonings if you want. Mix the rice with the binder, shape it, and bake or air-dry until crispy. Try different rice types and flavors for unique snacks.

Favorite rice cake flavors include plain, salt, caramel, chocolate, and savory ones like cheese or herbs. Asian flavors like seaweed, sesame, or soy sauce are also popular. You can also make your own flavors by adding spices or sweet toppings.

Are rice cakes gluten-free?

Many rice cakes are gluten-free, especially those made from pure rice. But, always check the packaging for a gluten-free label. Some brands might process in facilities with gluten.

How long do homemade rice cakes last?

Homemade rice cakes last 3-5 days in an airtight container at room temperature. Store them in the fridge for up to a week or freeze for a month. Make sure they’re cool and dry before storing to avoid moisture.

Can I make rice cakes without special equipment?

Yes, you can make rice cakes with basic kitchen tools. Use a baking sheet, parchment paper, and your hands to shape them. A rice cake machine helps, but it’s not necessary for tasty homemade rice cakes.

What are the best toppings for rice cakes?

Good toppings for rice cakes include nut butters, avocado, hummus, cream cheese, and fresh fruits. You can also use honey, jam, or savory toppings like smoked salmon, eggs, or cheese. Choose toppings that add flavor and nutrition for a satisfying snack or light meal.

0 comments
0 FacebookTwitterPinterestEmail
German Lebkuchen recipe

German Lebkuchen Perfect and Easy Recipe

by IDYA
German Lebkuchen recipe

German Lebkuchen Easy Recipe

Serves: 24 Prep Time: Cooking Time:
Nutrition facts: 150 calories 7 grams fat
Rating: 5.0/5
( 1 voted )

Ingredients

  • 1 ½ cups all-purpose flour
  • 1 ½ teaspoons ground ginger
  • 1 teaspoon ground cinnamon
  • ½ teaspoon ground cloves
  • ½ teaspoon ground nutmeg
  • 1 teaspoon baking soda
  • ½ teaspoon salt
  • ½ cup honey
  • ½ cup sugar
  • 1 egg
  • ¼ cup unsalted butter, melted
  • ¼ cup candied orange peel, finely chopped (optional)
  • ¼ cup chopped almonds (optional)
  • ¼ cup dark rum (optional, can be substituted with apple juice or water)
  • ½ teaspoon vanilla extract
  • Icing sugar (for glazing, optional)

Instructions

Preheat the oven to 350°F (175°C). Line a baking sheet with parchment paper. In a large mixing bowl, combine the flour, ground ginger, cinnamon, cloves, nutmeg, baking soda, and salt. In a separate bowl, whisk together the honey, sugar, egg, melted butter, rum (or juice), and vanilla extract until smooth. Gradually add the wet ingredients into the dry ingredients, stirring until well combined. If using candied orange peel and almonds, fold them in at this point. The dough will be sticky. Using a spoon or your hands, form small balls of dough (about the size of a walnut) and place them on the prepared baking sheet, spacing them about 2 inches apart. Flatten each ball slightly with the back of a spoon or your fingers. Bake for 15-18 minutes, or until the cookies are golden brown on the edges. Remove the cookies from the oven and allow them to cool on the baking sheet for 5 minutes before transferring them to a wire rack to cool completely.

Notes

Lebkuchen can be stored in an airtight container at room temperature for up to 1 week. If you prefer a more traditional look, you can ice the cookies with a simple sugar glaze made from powdered sugar and water. Letting the dough rest in the fridge for 30 minutes before baking helps the flavors to meld and the dough to firm up. Feel free to adjust the spices to suit your taste, or add a bit of finely grated lemon zest for a citrusy twist.

Discover the joy of baking authentic German Lebkuchen cookies this holiday season. These traditional spiced treats have been a beloved part of Christmas festivities in Germany for centuries. Now, you can recreate the magic in your own kitchen.

With a few simple ingredients and easy-to-follow instructions, you’ll be able to whip up a batch of these fragrant, chewy Lebkuchen. They will transport your taste buds straight to a cozy Bavarian Christmas market.

Key Takeaways

  • Lebkuchen are traditional German Christmas cookies with a rich history dating back to the Middle Ages
  • The recipe is easy to follow and uses simple, wholesome ingredients
  • Baking Lebkuchen at home allows you to enjoy the authentic flavors of the holiday season
  • These spiced cookies make a wonderful homemade gift or festive addition to your holiday spread
  • With a few tips, you can achieve the perfect chewy texture and complex flavors of traditional Lebkuchen

The Rich History Behind Traditional German Lebkuchen

German Christmas biscuits, known as lebkuchen, have a rich history. It goes back to the medieval era. This beloved treat is deeply rooted in Germany’s cultural heritage, especially in Nuremberg.

Origins in Medieval Nuremberg

The story of lebkuchen starts in the 13th century. Franciscan monks in Nuremberg made a gingerbread-like dough. They added aromatic spices to it.

These early cookies were valued for their health benefits. They were often given as offerings in religious ceremonies.

Evolution Through Centuries

Over time, the lebkuchen recipe got better. Bakers improved the ingredients and techniques. By the 16th century, it became a favorite holiday treat.

People from all walks of life enjoyed it. It was a beloved holiday staple in the region.

Religious Significance

Lebkuchen has deep religious meaning, especially at Christmas. The spices, like cinnamon and nutmeg, were thought to purify. They were seen as a symbol during religious celebrations.

Today, lebkuchen’s rich history and cultural importance are still celebrated. It’s loved in Germany and around the world.

“The aroma of freshly baked lebkuchen is a cherished part of the Christmas tradition in Germany, evoking memories of family gatherings and the warmth of the holiday season.”

Essential Ingredients for Perfect Lebkuchen Cookies

Lebkuchen, a beloved German Christmas cookie, has a few key ingredients. These ingredients create its unique flavor and texture. Whether you’re a seasoned baker or new to German baking, knowing these ingredients is crucial.

The heart of lebkuchen is its blend of spices. This includes cinnamon, cloves, and nutmeg. It also has candied citrus peel and ground almonds. These flavors make lebkuchen stand out from other holiday treats.

Honey is another vital ingredient. It makes the cookies chewy and helps the dough stick together. Using high-quality honey is essential for authentic lebkuchen.

Eggs and flour are also key. Eggs make the cookies tender, while flour gives them shape. A mix of all-purpose and almond flour is often used.

With these ingredients, you can make perfect lebkuchen cookies. They’ll take you straight to a cozy German Christmas market. Let’s explore the rich history and spices behind these treats.

Traditional Spices That Give Lebkuchen Its Distinctive Flavor

The secret to lebkuchen cookies’ taste is the mix of spices. These authentic German Christmas cookies are known for their warm, aromatic flavors. They remind you of Nuremberg’s festive markets.

The Perfect Lebkuchen Spice Blend

The lebkuchen spice mix is a mix of cinnamon, nutmeg, cloves, and sometimes ginger. These spices create a complex, comforting taste. It’s what makes this German treat so beloved.

  • Cinnamon adds a sweet, woody flavor, making the cookies inviting.
  • Nutmeg brings a subtle, aromatic depth that complements the other spices.
  • Cloves add a unique, slightly peppery flavor, adding complexity.
  • A bit of ginger can be added, bringing a subtle heat and zest.

Where to Source Authentic Spices

To get the true taste of German lebkuchen spices, find high-quality, authentic spices. Look for specialty spice shops, online retailers, or international grocery stores with a wide variety of spices.

Making Your Own Spice Mix

For the ultimate lebkuchen experience, make your own spice blend. This lets you adjust the spice ratios for the perfect flavor. Try different mixes to find your favorite.

Mastering the lebkuchen spice blend will help you bake these delightful German Christmas cookies. They’ll delight your senses and bring the holiday season to life.

German Lebkuchen Recipe: Step-by-Step Instructions

Make traditional German lebkuchen cookies at home with this simple recipe. It’s a fun process that fills your house with holiday scents. You’ll learn how to make homemade lebkuchen cookies that are chewy and full of flavor.

  1. Gather your ingredients: flour, baking powder, ground cinnamon, ground ginger, ground cloves, ground nutmeg, salt, eggs, granulated sugar, honey, and chopped nuts (such as almonds or hazelnuts).
  2. In a medium bowl, whisk together the flour, baking powder, cinnamon, ginger, cloves, nutmeg, and a pinch of salt.
  3. In a separate large bowl, beat the eggs and granulated sugar until light and fluffy. Gradually stir in the honey until well combined.
  4. Slowly add the dry ingredients to the wet ingredients, mixing until a soft dough forms. Fold in the chopped nuts.
  5. Cover the dough and refrigerate for at least 2 hours, or up to 3 days. This resting period allows the flavors to develop and the dough to become easier to work with.
  6. Preheat your oven to 350°F (180°C) and line baking sheets with parchment paper.
  7. Scoop the dough by the tablespoonful and roll it into balls, placing them about 2 inches apart on the prepared baking sheets.
  8. Bake the lebkuchen cookies for 12-15 minutes, or until they are lightly golden around the edges.
  9. Allow the cookies to cool on the baking sheets for 5 minutes before transferring them to a wire rack to cool completely.

Enjoy your freshly baked German lebkuchen cookies, either plain or with a dusting of powdered sugar or a drizzle of glaze. These delightful treats are perfect for sharing with family and friends during the holiday season.

Preparing the Classic Lebkuchen Dough

Making the perfect lebkuchen dough is the first step to delicious German Christmas biscuits. It doesn’t matter if you’re new to baking or have years of experience. Getting the dough right is crucial for the chewy texture and rich taste of these treats.

Proper Mixing Techniques

The secret to a great lebkuchen dough is in how you mix it. Start by mixing the dry ingredients like flour, spices, and baking powder in a big bowl. Then, add the wet ingredients like eggs, honey, and other liquids. Use a wooden spoon or a stand mixer with a paddle to mix until just combined.

Be careful not to overmix. This can make the dough tough and dense.

Dough Consistency Tips

  • Aim for a soft, pliable dough that’s slightly sticky. This ensures the perfect texture for your German Christmas biscuits.
  • If the dough feels too dry, add a little water or milk until it’s right.
  • On the other hand, if it’s too wet, add flour slowly until it’s just right.
  • After mixing, cover the dough and chill it in the fridge for at least 30 minutes. This lets the flavors blend and the gluten relax.

Remember, making great lebkuchen dough takes patience and care. By following these tips, you’ll be on your way to baking delicious German Christmas biscuits that everyone will love.

Decorating and Glazing Your Lebkuchen

Decorating and glazing your homemade lebkuchen cookies is the final step. It makes these German Christmas treats even more special. You can use traditional glazes or add modern touches to make them look great.

Classic Lebkuchen Glaze

The traditional lebkuchen glaze is a simple sugar-based coating. It adds a shiny, sweet layer to the cookies. To make it, mix powdered sugar, water, and a bit of lemon juice in a bowl. Stir until it’s smooth and pourable, then coat the cookies evenly.

Chocolate Lebkuchen Glaze

For a richer taste, try a chocolate glaze. Melt dark chocolate in a double boiler. Add a bit of heavy cream or milk until it’s smooth. Dip the cookies in the chocolate or drizzle it over for a decorative look.

Embellishing with Toppings

  • Sliced almonds or chopped toasted nuts
  • Candied citrus peel or dried fruit
  • Sprinkles or sanding sugar
  • Edible flowers or herbs

After glazing, add more toppings for a festive look. You can use many things to decorate these traditional German Christmas cookies.

With a bit of detail and creativity, your lebkuchen can become elegant holiday cookies. They’ll impress your guests. Have fun decorating!

Baking Tips for Perfect German Christmas Biscuits

Learning to bake German lebkuchen, or traditional German Christmas cookies, needs focus on temperature and timing. Here are some expert tips to make your homemade lebkuchen perfect every time.

Temperature Control Essentials

Lebkuchen are delicate cookies that need a specific oven temperature for the right texture and color. The best baking temperature is between 325°F and 350°F. Baking too hot can make the cookies dry and overbrown, while too low can leave them doughy.

Use an oven thermometer to check your oven’s temperature. Don’t change the temperature while baking. Even heat is crucial for lebkuchen that are soft inside and lightly crisp outside.

Timing Your Bake

Lebkuchen cookies usually bake for 12 to 15 minutes. The exact time depends on your oven and cookie size. Watch the cookies closely in the last few minutes to prevent over-browning.

The cookies are done when they’re lightly golden and can be lifted from the baking sheet without breaking. Let them cool completely on the baking sheet before decorating or storing.

Mastering temperature and baking time will help you make authentic German Christmas cookies that impress all your holiday guests.

Storage and Shelf Life of Lebkuchen Cookies

Storing your homemade German lebkuchen cookies right is key to keeping their taste and texture great. Here are some tips to help your German Christmas cookies stay fresh longer:

First, let the lebkuchen cool down completely before you store it. This stops moisture from making them soggy. Then, put them in an airtight container or tin. This keeps moisture in and prevents drying out.

To keep them fresh, store the lebkuchen at room temperature, away from sunlight or heat. Stored right, these German treats can last up to 4 weeks. If you want to keep them longer, refrigeration can extend their life to 6 weeks.

In Germany, many people use a special lebkuchen shelf for storing Christmas cookies. These shelves have slats for good air flow, which keeps the lebkuchen fresh. If you don’t have a lebkuchen shelf, an airtight container or tin works just fine.

“The key to keeping lebkuchen cookies fresh is controlling the environment they’re stored in. With the right storage techniques, you can enjoy the flavors of Germany’s beloved Christmas treat for weeks to come.”

Remember, the right storage and knowing about shelf life are crucial. They help your homemade German Christmas cookies stay tasty and soft all holiday season.

Common Mistakes to Avoid When Making Lebkuchen

Making the perfect German lebkuchen is a fun challenge. But, you might run into some common problems. Knowing these issues and how to avoid them will help you make delicious German Christmas biscuits every time.

Texture Troubleshooting

Many people struggle with lebkuchen texture issues. It can be too hard or too soft. To get the right chewy-yet-firm texture, baking technique is key. Make sure your oven is at the right temperature and watch the cookies closely during baking.

Underbaking can make them gummy. So, let them bake a bit longer if they’re not done yet.

Flavor Balance Solutions

  • Spice blend woes: An unbalanced spice mix can ruin the lebkuchen taste. Measure your spices carefully and create your own blend for the perfect flavor.
  • Sweetness struggles: Too much sugar makes lebkuchen too sweet. Not enough sugar makes it taste flat. Find the right sugar balance in your recipe.
  • Citrus conundrums: Lemon or orange zest is essential for lebkuchen. But, too much citrus can overpower the other flavors. Use it wisely.

With practice and attention to detail, you’ll soon make lebkuchen that’s perfect for a German Christmas. It will be textured just right and full of flavor.

Modern Variations of Traditional Lebkuchen

Modern bakers are adding their own twist to the classic German lebkuchen recipe. They’ve created gluten-free and vegan versions to meet different dietary needs. This shows how versatile and beloved this Christmas cookie is.

The lebkuchen-inspired blondie is a creative spin on the traditional cookie. It has a softer, chewier texture like a brownie. Yet, it still captures the classic lebkuchen flavors. You can find bold flavor combinations like orange zest and dark chocolate, or cardamom and pistachios.

For a lighter option, gluten-free lebkuchen are gaining popularity. They use almond flour or oat flour instead of wheat. This makes them perfect for those with gluten sensitivities. Vegan bakers have also joined in, making dairy-free and egg-free versions that are just as tasty.

Whether you love the classic taste or want to try something new, there’s a lebkuchen for everyone. The tradition and cultural importance of lebkuchen are still at the core of these modern creations.

Serving Suggestions and Pairings

Serving freshly baked German lebkuchen cookies is a beloved holiday tradition. These treats pair well with festive items to make your Christmas celebrations special. Here are some creative ways to enjoy these German Christmas cookies.

Holiday Presentation Ideas

Lebkuchen cookies are a thoughtful gift during the holidays. You can package them in boxes or tins with seasonal decorations. Add a personal touch with a handwritten note.

Arrange the cookies on a wooden platter or elegant tray. Decorate with evergreen, dried fruit, or edible flowers for a beautiful centerpiece.

Beverage Combinations

The flavors of serving lebkuchen go well with warm drinks. Mulled wine or spiced cider are classic choices. They match the cookie’s flavors perfectly.

For a non-alcoholic option, try chai tea or hot chocolate. These drinks add to the festive atmosphere.

Lebkuchen PairingBeverageFlavor Profile
Nutty LebkuchenMulled WineThe warm, spiced notes of the wine enhance the nutty, caramelized flavors of the cookies.
Gingerbread LebkuchenSpiced CiderThe cinnamon, clove, and ginger in the cider perfectly complement the bold spices in the gingerbread cookies.
Citrus-Infused LebkuchenChai TeaThe fragrant blend of black tea, spices, and citrus notes creates a harmonious pairing with the bright, zesty flavors of the cookies.

By presenting your serving lebkuchen with the right drinks, you can make your Christmas celebration even more special. Your guests will love the authentic German flavors.

Conclusion

Creating authentic German lebkuchen cookies is a fun tradition. It brings the spirit of a German Christmas into your home. You’ve learned about the rich history and the special spices that make them unique.

This guide has helped you start making lebkuchen. You can stick to the classic recipe or try new ones. The joy of baking and sharing these treats will fill your home with holiday cheer.

Now, it’s time to bake! Preheat your oven and get your ingredients ready. Let the smell of lebkuchen fill your kitchen. Enjoy making memories with your loved ones as you taste the authentic flavors of German lebkuchen.

FAQ

What are lebkuchen cookies?

Lebkuchen are traditional German Christmas cookies from Nuremberg. They are loved for their warm flavors and chewy texture. These spiced biscuits are a holiday favorite in Germany.

What are the key ingredients in authentic German lebkuchen?

Honey, ground nuts, and candied citrus peel are key in traditional lebkuchen. Spices like cinnamon, cloves, and nutmeg add to the flavor. Sometimes, ginger or anise is added too.

How do you make the perfect lebkuchen dough?

The dough should be sticky and easy to shape. It’s important to mix the ingredients right. This ensures the dough is perfect for making lebkuchen.

What are some traditional methods for decorating lebkuchen?

Traditional decorations include sugar or honey glazes. You can also sprinkle them with almonds or candied citrus peel. Melted chocolate is another popular choice.

How do you store lebkuchen to keep them fresh?

Store lebkuchen in an airtight container at room temperature for up to two weeks. Some families store them for months in a cool, dry place. The flavor gets better over time.

What are some common mistakes to avoid when making lebkuchen?

Avoid overbaking, which makes the cookies hard. Also, make sure the spices are balanced. Proper baking time and temperature are key to perfect lebkuchen.

Can you make modern variations of traditional lebkuchen?

Yes! You can make modern versions of lebkuchen. Try gluten-free, vegan, or fusion flavors like chocolate-dipped or espresso-infused. There are endless possibilities.

0 comments
0 FacebookTwitterPinterestEmail
Ground-Beef-Bulgogi

Ground Beef Bulgogi Easy and Classic Recipe

by IDYA
Ground-Beef-Bulgogi

Easy Ground Beef Bulgogi Recipe

Serves: 4 Prep Time: Cooking Time:
Nutrition facts: 300 calories 18 grams fat
Rating: 5.0/5
( 1 voted )

Ingredients

  • 1 lb ground beef
  • 2 tbsp soy sauce
  • 1 tbsp brown sugar
  • 2 tbsp sesame oil
  • 2 cloves garlic, minced
  • 1 tbsp grated ginger
  • 2 tbsp gochujang (Korean chili paste)
  • 1/4 cup sliced green onions
  • 1 tbsp rice vinegar
  • 1/2 tbsp sesame seeds
  • 1/4 tsp black pepper
  • 1/4 tsp red pepper flakes (optional)
  • 1/4 cup water
  • 1 tbsp vegetable oil (for frying)

Instructions

1. In a large bowl, combine the ground beef, soy sauce, brown sugar, sesame oil, minced garlic, grated ginger, gochujang, green onions, rice vinegar, sesame seeds, black pepper, and red pepper flakes. 2. Mix everything together until the beef is well-coated with the marinade. Let it sit for 10-15 minutes for the flavors to meld. 3. Heat vegetable oil in a skillet over medium heat. 4. Add the marinated beef mixture to the skillet and cook, breaking it up into small crumbles, until browned and fully cooked, about 8-10 minutes. 5. Add water to the skillet to create a bit of sauce and stir everything together. Cook for an additional 1-2 minutes. 6. Serve the bulgogi over rice, and garnish with additional green onions and sesame seeds if desired.

Notes

You can adjust the spice level by adding more or less gochujang or red pepper flakes.

If you prefer a sweeter flavor, increase the amount of brown sugar in the marinade.

Serve with steamed rice or in lettuce wraps for a low-carb option.

Discover the perfect weeknight meal with ground beef bulgogi. It brings the rich flavors of Korean bulgogi to your table, but with ground beef. This makes it quicker and easier to make, perfect for when you’re in a hurry. It’s a delicious way to enjoy a taste of Seoul without the fuss.

Key Takeaways

  • Ground beef bulgogi is a quick and easy twist on the classic Korean barbecue dish
  • Using ground beef instead of sliced steak makes this recipe more accessible for busy weeknights
  • The signature bulgogi marinade infuses the ground beef with incredible Korean flavors
  • Serve ground beef bulgogi with traditional Korean side dishes for a complete and authentic dining experience
  • Leftover ground beef bulgogi can be easily repurposed in various recipes

Understanding Ground Beef Bulgogi: A Korean Classic Made Simple

Bulgogi, a favorite Korean dish, has a long history. It was once made with thinly sliced, marinated beef, grilled over an open fire. Now, home cooks use ground beef to make this tasty dish easier to prepare.

Origins of Traditional Bulgogi

The history of bulgogi goes back to the Goguryeo kingdom, where it was called “Maekjeok.” Over time, it evolved with unique Korean ingredients and techniques. The traditional way involves slicing beef thinly and marinating it in soy sauce, sugar, and spices.

Benefits of Using Ground Beef

Using ground bulgogi recipe ground beef makes bulgogi quicker to cook. It’s perfect for busy weeknights. The small pieces of beef soak up the korean beef recipe with ground beef flavors well, making the dish tasty and satisfying.

Essential Korean Flavors and Ingredients

  • Gochujang: A fermented Korean chili paste that adds depth and heat to the marinade.
  • Sesame oil: Imparts a nutty, aromatic flavor that complements the other ingredients.
  • Soy sauce: Provides the essential saltiness and umami notes that are characteristic of Korean cuisine.
  • Brown sugar: Balances the savory flavors with a touch of sweetness.
  • Garlic and ginger: These aromatic ingredients lend their distinctive flavors to the marinade.

By using these key Korean flavors and ingredients, you can make a delicious ground beef bulgogi. It’s both authentic and satisfying.

Essential Ingredients for Perfect Ground Beef Bulgogi

Making the perfect ground beef bulgogi needs a mix of key ingredients. Each one adds to the Korean flavor we love. Soy sauce and brown sugar are key, making the dish savory and sweet.

The heart of how to make bulgogi is top-notch ground beef. It’s the base, ready for the marinade to enhance its flavor. Soy sauce adds depth, while brown sugar balances the flavors with sweetness.

Garlic and ginger are crucial for the marinade’s depth. They give the beef bulgogi recipe a unique Korean taste. Sesame oil adds a nutty flavor, bringing everything together.

IngredientRole in Bulgogi
Ground BeefProvides the base for the dish, imparting tenderness and flavor
Soy SauceAdds a savory, umami depth to the marinade
Brown SugarBalances the saltiness of the soy sauce with a touch of sweetness
GarlicContributes aromatic, pungent notes to the marinade
GingerLends a warm, spicy-sweet flavor that complements the other ingredients
Sesame OilProvides a nutty, toasted undertone that ties the flavors together

Choosing and mixing these key ingredients makes a ground beef bulgogi that’s both true to its roots and full of flavor. The secret is finding the right mix of savory, sweet, and aromatic. This lets each ingredient’s unique taste shine.

Kitchen Tools and Equipment You’ll Need

To make delicious ground beef bulgogi, you need the right kitchen tools. From cooking utensils to serving items, the right gear makes a big difference. Let’s look at the must-have items for your ground beef bulgogi cooking journey.

Basic Cooking Equipment

Start with a few key pieces for ground beef bulgogi. A large skillet or wok is crucial for searing and sautéing the seasoned ground beef. You’ll also need mixing bowls for marinating the meat and measuring spoons for accurate seasoning.

Optional but Helpful Tools

  • A food processor or blender for effortlessly mincing garlic and ginger
  • A set of kitchen shears for snipping scallions and other garnishes
  • A digital kitchen scale for precisely weighing ingredients

Serving Essentials

To enhance the authentic Korean dining experience, consider the following serving essentials:

  1. Rice bowls or plates to present the ground beef bulgogi
  2. Chopsticks for a traditional hand-held eating experience
  3. Small dipping dishes for sauces and condiments

With these essential kitchen tools and serving pieces, you’ll be ready to explore ground beef how to make bulgogi. You’ll create a delicious ground beef bulgogi dish that truly captures Korean flavors.

Preparing the Signature Bulgogi Marinade

Starting a beef bulgogi recipe or korean beef recipe with ground beef means making a great marinade. This step is key for the bold flavors that make bulgogi special. Let’s explore how to make the signature bulgogi marinade, so your dish tastes like true Korean food.

To make a great bulgogi marinade, you need to balance sweet, savory, and umami flavors. Start by mixing soy sauce, brown sugar, and toasted sesame oil in a bowl. These ingredients give you a mix of salty, sweet, and nutty tastes.

  • 1/2 cup soy sauce
  • 1/4 cup brown sugar
  • 2 tablespoons toasted sesame oil

Then, add minced garlic and ginger to the mix. These add a strong, earthy flavor that goes well with the other tastes. Use plenty of garlic and ginger for a more authentic taste.

  1. 3 cloves garlic, minced
  2. 1-inch piece of ginger, grated

Finally, add some ground black pepper and a bit of gochujang (Korean chili paste) for a spicy touch. Mix everything well to make a thick, flavorful marinade. This marinade will turn your ground beef bulgogi into a true Korean dish.

“The secret to an unforgettable korean beef recipe with ground beef lies in the marinade. Get it right, and the rest is easy!”

Now that you have the marinade ready, you’re close to making a dish that will take you to Seoul’s lively streets. Keep reading to learn more about making ground beef bulgogi.

How to Season Ground Beef Bulgogi

Seasoning your ground beef bulgogi is key to getting that authentic Korean taste. By mixing the marinade well and adjusting the seasoning, you can make a dish that’s both balanced and delicious.

Proper Mixing Techniques

To mix the marinade evenly into the ground beef, use a gentle but thorough method. Fold the marinade into the beef carefully, avoiding overmixing. This helps keep the meat tender. Use your hands or a fork to mix the flavors well, so every bite is full of bulgogi taste.

Marination Time Guidelines

  • For the best taste, marinate the ground beef for at least 30 minutes. Or, marinate it for up to 4 hours in the fridge.
  • The longer it marinates, the stronger the flavors will be. But, don’t marinate too long, as the meat might get too soft.
  • A good marination time is 1-2 hours. This balances tenderness with bold bulgogi taste.

Seasoning Adjustments

Before cooking, taste the marinated ground beef. If the seasoning isn’t right, add a bit more soy sauce, brown sugar, or garlic. The secret to a great bulgogi recipe ground beef is finding the perfect mix of sweet, savory, and umami.

By seasoning and marinating your ground beef bulgogi right, you’ll make a dish that’s both flavorful and authentic. It’s sure to impress your family and friends.

Cooking Techniques for Perfectly Browned Ground Beef

To get the perfect sear on your ground beef bulgogi, you need to know a few tricks. These techniques will help you achieve that golden crust. Let’s explore how to turn your ground beef bulgogi into a dish that’s sure to impress.

High Heat for Maximum Browning

High heat is the secret to a beautifully browned ground beef bulgogi. Heat your pan or skillet to medium-high to high before adding the meat. This heat will caramelize the sugars in the marinade, giving you a rich, flavorful crust.

Maintaining Proper Cooking Time

  • Don’t overcrowd the pan – Cook the beef bulgogi in batches for even browning.
  • Let the meat sear for 3-5 minutes per side without disturbing it too much.
  • Adjust the heat as needed to prevent burning while still achieving that desired caramelization.

Seasoning Techniques

Seasoning is key for beef bulgogi to taste its best. Make sure to season the ground beef well with the bulgogi marinade. But don’t overdo it, as too much seasoning can make it taste salty or overpowering.

Cooking MethodProsCons
StovetopAchieves a nice sear and caramelizationQuick and easy cooking processRequires more constant attentionSmaller batches can be cooked at a time
Oven BroilingHands-off cooking methodCan cook larger batches at onceMay not achieve as deep a searRequires close monitoring to prevent burning

By using these techniques, you’ll make perfectly browned and flavorful ground beef bulgogi. Your family and friends will love it. Enjoy the fruits of your labor!

Traditional Side Dishes and Serving Suggestions

Make your korean beef recipe with ground beef even better by adding classic Korean sides and garnishes. These tasty additions will match the savory bulgogi perfectly. They’ll make your meal balanced and true to Korean tradition.

Rice and Noodle Pairings

Steamed white rice is a great choice to go with your ground beef bulgogi. For a fuller meal, try it with:

  • Japchae: Sweet potato glass noodles with veggies and beef
  • Japgokbap: A mix of rice, barley, and millet
  • Mandu: Delicious Korean dumplings, steamed or pan-fried

Vegetable Accompaniments

Balance the richness of the ground beef bulgogi with fresh, crunchy veggies:

  • Kimchi: Spicy fermented cabbage or radish, a Korean favorite
  • Pickled Radish: Thin slices in a sweet-and-sour dressing
  • Sautéed Spinach: Quick-cooked with garlic and sesame oil

Garnishing Options

Enhance your ground beef bulgogi’s look and taste with these garnishes:

  • Toasted Sesame Seeds: Add crunch and look
  • Sliced Green Onions: Fresh and aromatic
  • Gochujang (Korean Chili Paste): For more heat and flavor

Adding these traditional Korean sides and garnishes will make your korean beef recipe with ground beef complete. It will show off the true spirit of how to make bulgogi.

Storage Tips and Leftover Management

Storing your ground beef bulgogi right and handling leftovers is key. It keeps the taste fresh and food safe. Here’s how to keep your bulgogi recipe ground beef perfect:

Refrigerating Leftovers

  • Put leftover ground beef bulgogi in an airtight container or bag.
  • Put it in the fridge within 2 hours of cooking for the best taste and safety.
  • Eat the bulgogi recipe ground beef in the fridge within 3-4 days for the best flavor.
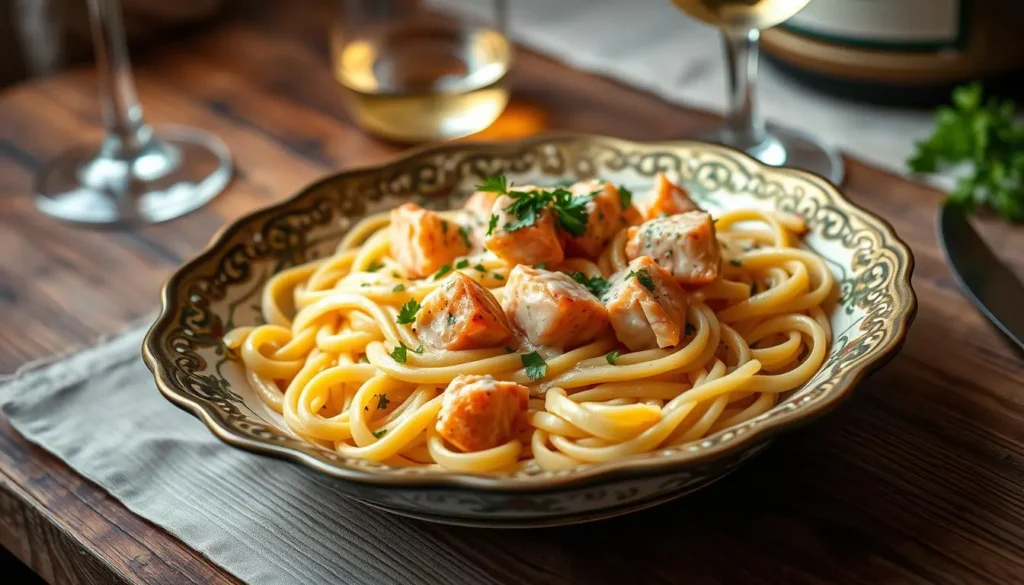
Freezing for Later

  1. Let the ground beef bulgogi cool down before freezing.
  2. Divide it into portions in airtight containers or bags for freezing.
  3. Label the containers with the date and what’s inside, then freeze for up to 3 months.
  4. Thaw frozen ground beef bulgogi in the fridge overnight before heating it up.

Reheating and Repurposing

When you’re ready to eat your leftover bulgogi recipe ground beef, reheat it. You can use the microwave or stovetop. For a quick meal, try using the ground beef bulgogi in:

  • Rice bowls or bibimbap
  • Fried rice or stir-fries
  • Stuffed into lettuce wraps or ssam
  • Served over noodles or in soups

By following these tips, you can enjoy your homemade ground beef bulgogi for a long time.

Conclusion

Congratulations on mastering the art of ground beef bulgogi! This Korean classic is loved for its bold flavors and simplicity. You’ve learned to make an authentic bulgogi with ground beef, thanks to our guide.

The secret is the marinade. It adds Korean flavors like soy sauce, brown sugar, and sesame to the meat. This makes every bite full of umami. Serve it over rice, in lettuce cups, or with Korean sides for a hit.

Feel free to make this korean beef recipe with ground beef your own. Change the seasoning, try different beef, or add new sides. Ground beef bulgogi is easy to customize. Add it to your meals often and enjoy Korea’s flavors at home.

FAQ

What is ground beef bulgogi?

Ground beef bulgogi is a Korean dish made with ground beef. It’s seasoned with soy sauce, brown sugar, garlic, ginger, and sesame oil. It’s a quick and easy version of Korean barbecue, great for weeknights.

What are the benefits of using ground beef for bulgogi?

Ground beef bulgogi is faster to cook than traditional bulgogi. It also absorbs Korean flavors better. This makes it a convenient choice for busy weeknights.
What are the essential ingredients for ground beef bulgogi?

You’ll need ground beef, soy sauce, brown sugar, garlic, ginger, and sesame oil. These ingredients create the sweet, savory, and umami flavors of traditional bulgogi.

What kitchen tools are needed to make ground beef bulgogi?

You’ll need a large skillet or wok, mixing bowls, and measuring spoons. A food processor helps with garlic and ginger. Serve with rice bowls and chopsticks.

How do I prepare the bulgogi marinade?

Mix soy sauce, brown sugar, garlic, ginger, and sesame oil in a bowl. Whisk until the sugar dissolves. Add the ground beef and mix well to coat evenly.

How long should I marinate the ground beef?

Marinate for at least 30 minutes or up to 24 hours in the fridge. Longer marinating makes the beef more flavorful. Always refrigerate to keep it safe.

What’s the best way to cook ground beef bulgogi?

Cook in a large skillet or wok over high heat. Cook in batches if needed, stirring often. This method develops the dish’s flavor and texture.

What are some traditional side dishes to serve with ground beef bulgogi?

Serve with steamed rice, kimchi, pickled radishes, and stir-fried veggies. Garnish with sesame seeds, green onions, or herbs for extra flavor and look.

How should I store and reheat leftover ground beef bulgogi?

Store in an airtight container in the fridge for up to 4 days. Reheat in a skillet or microwave, stirring often. Use leftovers in dishes like fried rice or bulgogi-stuffed lettuce wraps.

0 comments
0 FacebookTwitterPinterestEmail
Older Posts