Home Cuisine
Category:

Cuisine

Italian Chicken Recipes

The Best Italian Chicken Recipes for Dinner

Serves: 4 Prep Time: Cooking Time:
Nutrition facts: 350 calories 15 grams fat
Rating: 5.0/5
( 1 voted )

Ingredients

  • 4 boneless, skinless chicken breasts
  • 2 tablespoons olive oil
  • 2 cloves garlic, minced
  • 1/2 cup Italian seasoning
  • 1/4 cup grated Parmesan cheese
  • 1 cup marinara sauce
  • 1/2 cup mozzarella cheese, shredded
  • Salt and pepper to taste

Instructions

Preheat the oven to 375°F (190°C).
Heat olive oil in a large oven-safe skillet over medium heat.
Season chicken breasts with salt, pepper, and Italian seasoning.
Cook chicken for 5-7 minutes on each side until golden brown.
Top each chicken breast with marinara sauce and grated Parmesan.
Sprinkle shredded mozzarella cheese on top.
Transfer the skillet to the oven and bake for 15-20 minutes until the chicken is fully cooked.
Serve hot with your choice of side dish.

Notes

For a healthier version, you can use low-fat cheese and serve with steamed vegetables.

Are you tired of the same old dinner routine? Craving something extraordinary? Imagine turning your kitchen into a Mediterranean paradise with delicious Italian chicken recipes.

Italian cuisine is full of tasty chicken dishes. They mix bold flavors, fresh ingredients, and simple cooking. These recipes will make your dinner amazing, taking you straight to Italy with every bite.

Whether you’re a home cook or looking to improve your skills, these recipes are for you. From classic Chicken Parmesan to Chicken Cacciatore, you’ll find new ways to spice up your dinner.

Key Takeaways

  • Discover authentic Italian chicken recipe techniques
  • Learn how to create restaurant-quality meals at home
  • Explore diverse flavor profiles from different Italian regions
  • Master simple yet delicious cooking methods
  • Impress family and friends with gourmet chicken dishes

Introduction to Italian Chicken Dishes

Italian cuisine is a world of flavors that turns simple chicken into amazing meals. Authentic Italian chicken recipes show the art of cooking. They turn basic ingredients into culinary wonders. These dishes reflect Italy’s rich cultural heritage and diverse regional cuisines.

Italian cooking values fresh ingredients and simple methods. These bring out the chicken’s natural flavors. The magic is in combining basic parts to create something amazing.

Why Italian Chicken Recipes Are Special

Italian chicken dishes are special for many reasons:

  • They focus on fresh, high-quality ingredients
  • They use simple yet sophisticated cooking techniques
  • They offer vibrant regional flavors
  • They can be adapted to different cooking styles

Essential Ingredients in Italian Chicken Cooking

The secret to authentic Italian chicken recipes is their core ingredients. Let’s look at the key elements that make these dishes stand out:

IngredientPurpose in CookingFlavor Profile
Extra Virgin Olive OilBase for sautéingRich, fruity undertones
Fresh GarlicAromatic basePungent and warming
Fresh HerbsSeasoning and garnishBright, fresh notes
San Marzano TomatoesSauce foundationSweet and tangy

Understanding these basic ingredients unlocks the essence of traditional Italian chicken recipes. Each ingredient is crucial in making dishes that are both comforting and sophisticated.

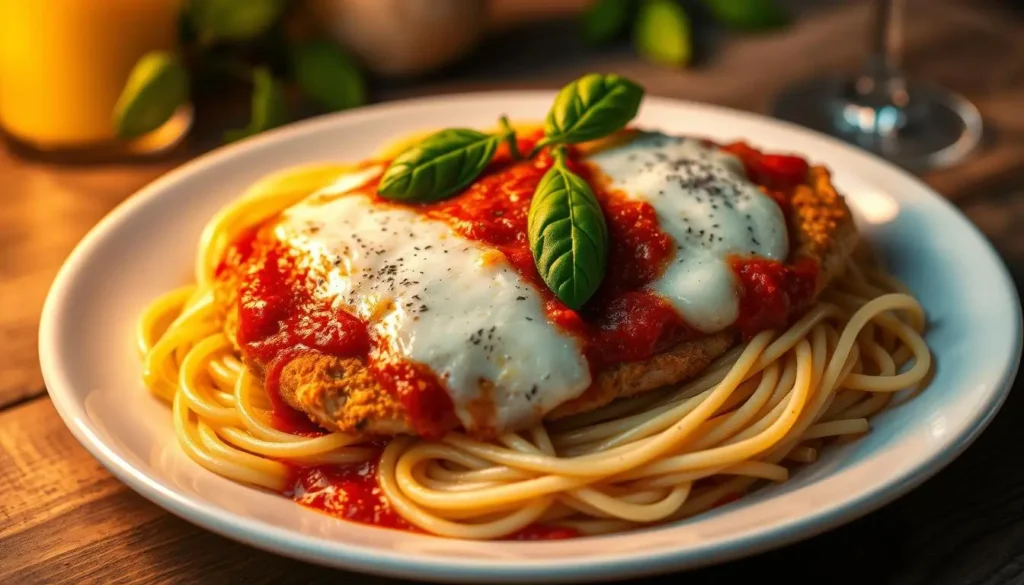
Classic Italian Chicken Parmesan

Chicken Parmesan is a top pick among Italian chicken recipes. It mixes crispy chicken, tomato sauce, and melted cheese for a delicious meal. It turns a simple dinner into a special event.
The Best Italian Chicken Recipes for Dinner Tonight

Chicken Parmesan is great for those looking for easy Italian chicken recipes. It’s all about combining simple steps with amazing flavors. The secret is to perfect each part for a standout dish.

Essential Ingredients for Success

  • Boneless chicken breasts
  • Breadcrumbs (preferably Italian-style)
  • Fresh parmesan cheese
  • High-quality marinara sauce
  • Fresh mozzarella
  • Fresh basil leaves
  • Extra virgin olive oil

Cooking Technique

To make this classic dish, follow these important steps:

  1. Pound chicken breasts to even thickness
  2. Dredge chicken in seasoned breadcrumbs
  3. Pan-fry until golden brown
  4. Top with marinara sauce
  5. Sprinkle generously with cheeses
  6. Bake until cheese melts perfectly

Serving Recommendations

Serve Chicken Parmesan over al dente pasta or with a crisp green salad. Garlic bread on the side adds to the meal, making it a hit with everyone.

Pro tip: Use freshly grated parmesan for the most authentic flavor!

Flavorful Chicken Piccata

Explore simple italian chicken recipes with Chicken Piccata. This dish brings vibrant flavors to your dinner. It turns ordinary chicken into a culinary masterpiece that will wow your family and friends.

Chicken Piccata is known for its tangy and bright taste. It features tender chicken cutlets in a zesty lemon-caper sauce. This creates a perfect balance of flavors.

Unique Characteristics of Chicken Piccata

What makes this dish special are its key ingredients and how it’s prepared:

  • Thin, tender chicken cutlets pounded for even cooking
  • Bright, acidic lemon sauce
  • Briny capers that add depth and complexity
  • Quick cooking time of approximately 15 minutes

Mastering the Cooking Technique

To make perfect Chicken Piccata, follow these steps:

  1. Pound chicken cutlets to uniform thickness
  2. Lightly dredge in seasoned flour
  3. Quickly sauté in butter and olive oil
  4. Create a luxurious sauce by deglazing the pan

With these simple steps, you can make a restaurant-quality meal. Your family will be amazed by your cooking skills and the delicious dish you’ve made.

Rustic Chicken Cacciatore

Explore authentic Italian chicken recipes with Chicken Cacciatore. It’s a rustic dish that shows the heart of Italian cooking. This classic hunter-style chicken recipe brings the rich flavors of Italy to your dinner table.

Essential Ingredients for Perfect Cacciatore

To make an authentic Italian chicken recipe, you’ll need these key ingredients:

  • Bone-in chicken pieces
  • Fresh bell peppers
  • Ripe tomatoes
  • Onions and garlic
  • Fresh herbs like basil and oregano
  • High-quality olive oil
  • Dry white wine

Cooking Tips for Authentic Flavor

Master the art of traditional Italian chicken recipes with these expert cooking techniques:

  1. Brown the chicken thoroughly to develop deep flavor
  2. Slow-simmer the sauce to enhance taste complexity
  3. Use San Marzano tomatoes for authentic Italian flavor
  4. Let the dish rest for 15 minutes before serving

Perfect Side Dishes to Complement Cacciatore

Elevate your authentic Italian chicken recipes with these delicious side dishes:

  • Creamy polenta
  • Crusty Italian bread
  • Simple green salad
  • Roasted seasonal vegetables

Chicken Cacciatore is the soul of Italian home cooking. It’s about simple ingredients turned into a satisfying meal that brings families together.

Tender Lemon Garlic Chicken

Discover the perfect blend of zesty and savory with this incredible lemon garlic chicken recipe. These easy Italian chicken recipes bring the vibrant flavors of Mediterranean cuisine directly to your dinner table. Packed with bright citrus notes and rich garlic undertones, this dish transforms a simple chicken meal into a restaurant-worthy experience.

Creating delicious Italian chicken recipes requires understanding a few key techniques that elevate your cooking from ordinary to extraordinary. The secret lies in balancing flavors and ensuring maximum tenderness.

Key Ingredients for Fresh Flavor

  • Fresh lemon zest
  • Minced garlic cloves
  • Extra virgin olive oil
  • Fresh herbs like rosemary and thyme
  • Kosher salt and cracked black pepper

Cooking Techniques for Juiciness

To guarantee succulent results in your easy Italian chicken recipes, follow these essential tips:

  1. Marinate chicken for at least 30 minutes
  2. Use room temperature chicken before cooking
  3. Pat chicken dry to ensure crispy exterior
  4. Cook at consistent medium-high heat
  5. Let chicken rest for 5 minutes after cooking

Pro tip: The key to perfect lemon garlic chicken is not overcooking. Use a meat thermometer to check that internal temperature reaches 165°F for safe and juicy results.

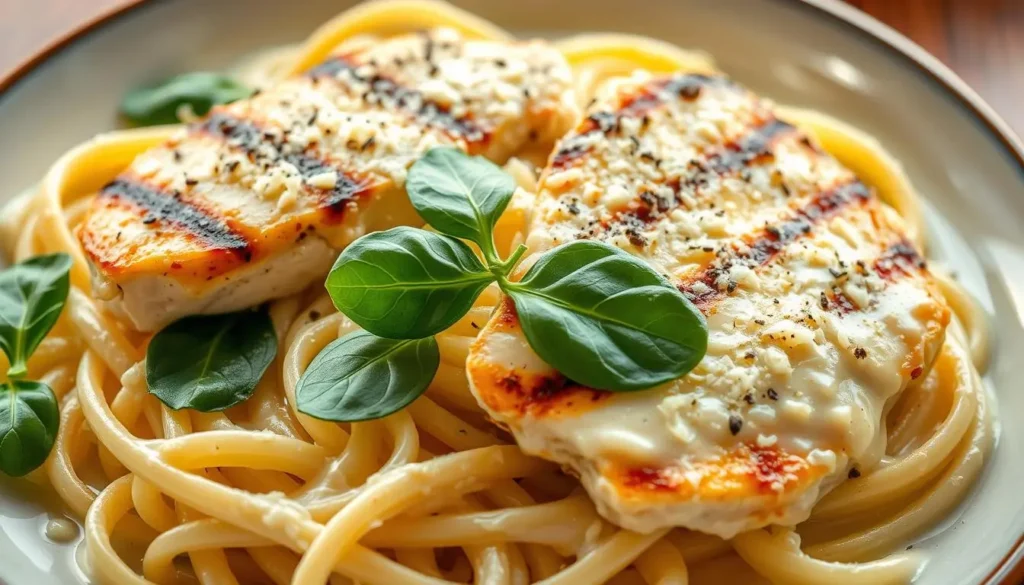
Creamy Chicken Alfredo
The Best Italian Chicken Recipes for Dinner Tonight

Discover a top Italian chicken recipe that will make your dinner special. Chicken Alfredo is a standout dish. It mixes creamy sauce, tender chicken, and cooked pasta perfectly.

Making a great Alfredo sauce is key. Start with top-notch ingredients for real Italian taste.

  • Fresh garlic, minced finely
  • Heavy cream for luxurious texture
  • Freshly grated Parmesan cheese
  • Boneless, skinless chicken breasts

Cooking techniques are crucial for Chicken Alfredo. Sear the chicken until golden brown. This ensures it’s juicy and fully cooked. Keep the heat high and don’t overcrowd the pan.

Want to try something new? Here are some ideas:

  1. Add roasted veggies like spinach or sun-dried tomatoes
  2. Try different pasta shapes
  3. Sprinkle red pepper flakes for a spicy twist

Your homemade Chicken Alfredo will be a hit with your family. It shows how simple yet delicious Italian cooking can be.

Easy Chicken Marsala

Discover the magic of authentic Italian chicken recipes with a classic Chicken Marsala. It brings restaurant-quality flavor to your home kitchen. This simple Italian chicken recipe transforms ordinary ingredients into an extraordinary dining experience. It will impress your family and friends.

Chicken Marsala is a perfect mix of Italian culinary tradition and elegant simplicity. It combines tender chicken breasts with a rich, flavorful sauce. The sauce showcases the distinctive character of Marsala wine.

A Twist on a Traditional Recipe

Traditional Chicken Marsala gets a modern update with these creative variations:

  • Use portobello mushrooms for a deeper, earthier flavor
  • Add fresh thyme to enhance the sauce’s complexity
  • Try whole wheat flour for a healthier breading option
  • Experiment with different cuts of chicken for varied textures

Wine Pairing Tips

Selecting the right wine can elevate your Chicken Marsala from good to exceptional. Consider these perfect pairings:

Wine TypeFlavor ProfileRecommended Pairing
Dry MarsalaNutty, CrispBest with lighter chicken preparations
Sweet MarsalaRich, Caramel NotesIdeal for cream-based Marsala sauces
Pinot NoirLight, FruityComplements mushroom-heavy dishes

Your homemade Chicken Marsala will transport you straight to the heart of Italy. It proves that simple Italian chicken recipes can create truly memorable meals.

Healthier Options: Italian Chicken Salads

Looking for tasty Italian chicken recipes that are good for you? Italian chicken salads are perfect for those who love authentic flavors but want to keep it light. They mix fresh ingredients with juicy chicken for a meal that’s both healthy and filling.
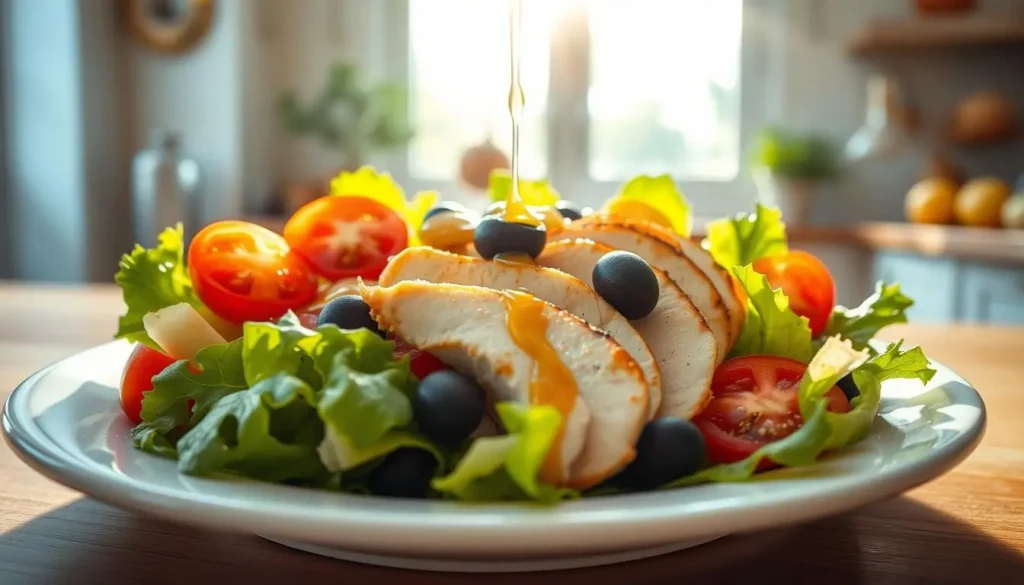
The Best Italian Chicken Recipes for Dinner Tonight

To make a great Italian chicken salad, start with top-notch proteins and crisp veggies. The secret to amazing italian chicken recipes is finding the right mix of flavors and textures.

Essential Salad Ingredients

  • Grilled or roasted chicken breast
  • Mixed spring greens
  • Cherry tomatoes
  • Kalamata olives
  • Fresh mozzarella
  • Artichoke hearts

Delightful Dressing Options

The dressing can turn a simple salad into a memorable dish. For authentic Italian chicken recipes, try these homemade dressings:

  1. Classic Balsamic Vinaigrette: Mixes olive oil, aged balsamic vinegar, minced garlic, and herbs
  2. Lemon Herb Dressing: Combines fresh lemon juice, extra virgin olive oil, basil, and oregano
  3. Creamy Parmesan Dressing: Blends Greek yogurt, grated Parmesan, and Italian seasonings

“A great salad is a canvas of flavor, color, and nutrition.” – Italian Culinary Tradition

These easy Italian chicken recipes can turn simple salads into gourmet meals at home. Always slice your chicken thinly and season well for the best taste.

Conclusion: Enjoying Italian Chicken at Home

Learning to make the best Italian chicken recipes is more than just following steps. It turns your kitchen into a lively Italian trattoria. Each recipe you try is a piece of Italy’s rich food tradition, ready to be made your own.

Now, you can make delicious Italian chicken at home. The secret is to practice, be passionate, and try new things. Using top-notch ingredients is key to making simple dishes unforgettable. Choose fresh herbs, high-quality olive oils, and real cheeses for authentic Italian tastes.

Tips for Perfecting Your Recipes

First, learn the basics of each recipe. Pay close attention to seasoning, cooking temperatures, and timing. Italian food is all about keeping it simple, so let each ingredient stand out. Feel free to tweak recipes to fit your taste while keeping the dish’s essence.

Invite Family and Friends for a Feast

Italian cooking is all about sharing and making memories. Invite your family and friends to enjoy these dishes together. Set up a beautiful table, pour some wine, and enjoy the joy of good food and company. Your skills in making authentic Italian chicken will surely impress and bring everyone closer.

FAQ

What makes Italian chicken recipes unique?

Italian chicken recipes stand out because they use fresh, top-notch ingredients. Think olive oil, garlic, herbs, and tomatoes. They’re known for bold flavors and simple cooking that lets the chicken shine.

Are Italian chicken recipes difficult to prepare at home?

No, Italian chicken recipes are easy to make, even for beginners. Dishes like Chicken Piccata or Lemon Garlic Chicken can be ready in 30 minutes. They use simple methods and ingredients you can find easily.

What are some essential ingredients for authentic Italian chicken dishes?

You’ll need extra virgin olive oil, garlic, basil, oregano, and rosemary. Also, white wine, tomatoes, capers, Parmesan, and mozzarella are key. These ingredients are the heart of many Italian chicken recipes.

Can I make Italian chicken recipes healthier?

Yes! To make them healthier, try grilling chicken instead of frying. Use less cheese and add more veggies. Baking or roasting are also great options. Italian cooking loves fresh ingredients and balanced meals.

Favorites include Chicken Parmesan, Chicken Piccata, and Chicken Cacciatore. Chicken Marsala and Lemon Garlic Chicken are also loved. Each dish brings a unique taste and cooking style from Italy.

How can I pair side dishes with Italian chicken recipes?

Pair with pasta, risotto, polenta, or fresh salads. Roasted veggies and crusty bread are also great. The goal is to enhance the chicken’s flavors and make a complete meal.

Are these recipes suitable for meal prep?

Yes, many Italian chicken recipes are perfect for meal prep. Chicken Cacciatore and Marsala dishes get even better the next day. The flavors blend beautifully.

Can I substitute ingredients in Italian chicken recipes?

Most recipes can be adjusted to your liking. Swap herbs, change proteins, or tweak seasonings. Just keep the core flavors that make it Italian.

What wines pair well with Italian chicken dishes?

Pinot Grigio, Vermentino, and Soave are great with chicken. For richer dishes like Marsala, Chianti or Barbera is perfect.

How can I make my Italian chicken recipes more authentic?

Use fresh, quality ingredients and cook with passion. Choose fresh herbs and good olive oil. Take time to season and cook properly to bring out the flavors.

0 comments
1 FacebookTwitterPinterestEmail
Italian Bread

Delicious Italian Bread – Bake at Home

by IDYA
Italian Bread

Delicious Italian Bread - Bake at Home

Serves: 1 Prep Time: Cooking Time:
Nutrition facts: 120 calories 2 grams fat
Rating: 5.0/5
( 1 voted )

Ingredients

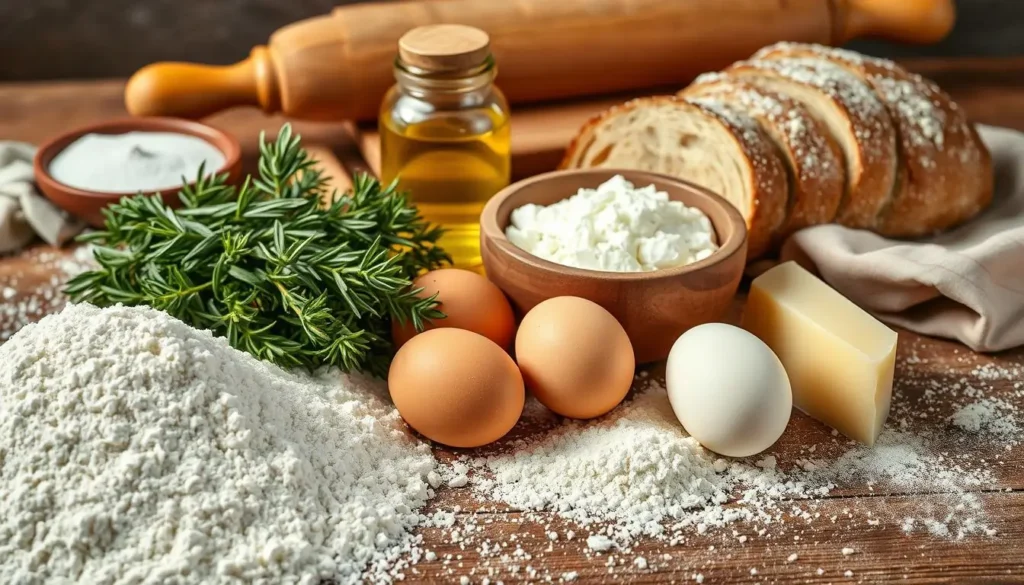
  • 3 cups all-purpose flour
  • 1 tablespoon olive oil
  • 1 teaspoon sugar
  • 1 teaspoon salt
  • 1 packet active dry yeast (2 1/4 teaspoons)
  • 1 cup warm water (110°F/43°C)
  • 1 tablespoon honey (optional, for sweetness)
  • 1 tablespoon cornmeal (for dusting)

Instructions

In a small bowl, combine the warm water, sugar, and yeast. Stir and let sit for 5-10 minutes until the yeast becomes frothy. In a large mixing bowl, combine the flour and salt. Add the olive oil and the frothy yeast mixture. Stir until the dough begins to come together. Turn it out onto a floured surface and knead for about 8-10 minutes, until the dough is smooth and elastic. Place the dough in a lightly greased bowl, cover with a damp towel, and let rise in a warm place for about 1 hour, or until doubled in size. Preheat your oven to 375°F (190°C). Punch down the dough and shape it into a loaf. Place it onto a greased or parchment-lined baking sheet dusted with cornmeal. Cover the dough with a towel and let it rise for another 20 minutes. Bake for 25-30 minutes or until the bread is golden brown and sounds hollow when tapped on the bottom. Let the bread cool on a wire rack before slicing. Serve and enjoy!

Notes

For a softer crust, brush the loaf with olive oil or butter as soon as it comes out of the oven. You can also add herbs such as rosemary or garlic for extra flavor. If you prefer a sweeter bread, feel free to add more honey to the dough.

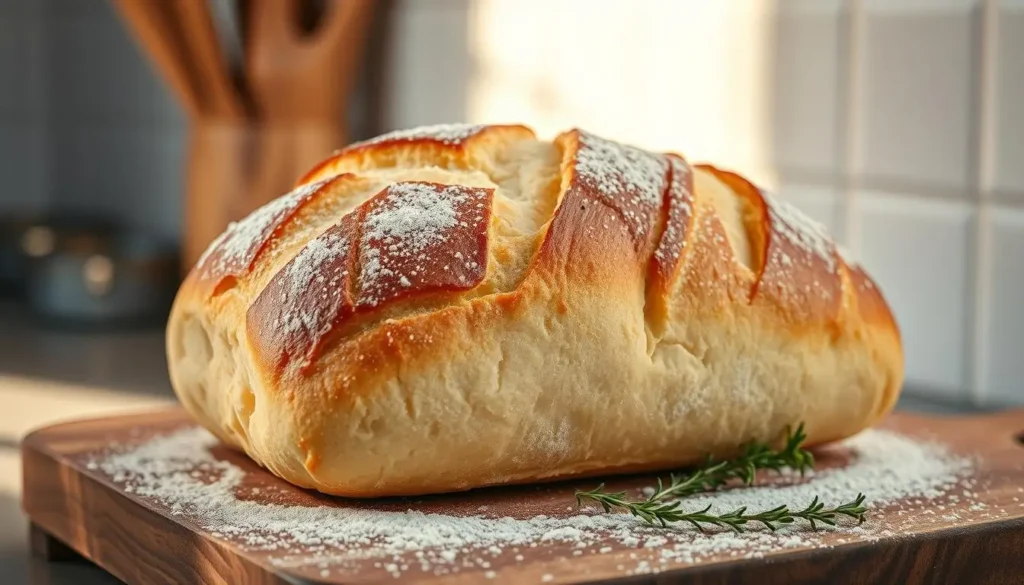
Ever wondered why homemade Italian bread tastes better than store-bought? Making your own Italian bread is a journey that connects you to the past. It’s a way to bring traditional cooking into your kitchen.

Baking Italian bread is more than just making food. It’s about embracing a cultural tradition that adds warmth and comfort to your home. With simple ingredients and easy steps, you’ll enjoy making a perfect loaf. Your home will fill with a delicious aroma.

Whether you’re new to baking or have experience, this recipe will help you make a crusty, flavorful bread. It’s sure to impress your loved ones. Get ready for a tasty adventure into Italian baking.

Key Takeaways

  • Learn an authentic Italian bread recipe from scratch
  • Discover the secrets to perfect bread texture
  • Create delicious homemade bread with minimal ingredients
  • Understand traditional Italian baking techniques
  • Impress your family with professional-quality bread

Introduction to Italian Bread

Italian bread is a true treasure in the world of food. It’s not just a mix of ingredients. It’s a way to share generations of baking and local traditions.

To truly understand Italian bread, we must look at its rich history and special qualities. These make it stand out from other breads worldwide.

What Makes Italian Bread Unique?

Italian bread is special for several reasons:

  • Crispy outside with a soft, airy inside
  • Uses simple ingredients that are top-notch
  • Has unique flavors from different regions
  • Values traditional baking methods

The bread’s texture is truly unique. Unlike thick breads from other places, Italian bread is light and soft. It feels like it melts in your mouth.

Common Ingredients in Italian Bread

A traditional Italian bread recipe usually has:

  1. High-quality wheat flour
  2. Fresh yeast
  3. Pure water
  4. Sea salt
  5. And sometimes olive oil

The bread’s ingredients are simple but high-quality. This lets each part of the bread show its true taste. Bakers are proud to use the best ingredients to highlight the bread’s natural flavors.

Types of Italian Bread

Italy is famous for its bread-making tradition. It has many types of bread, each with its own taste and method. These breads get their crispy texture from old baking ways.

Let’s look at three famous Italian breads that will change your baking:

Ciabatta: The Slipper-Shaped Bread

Ciabatta comes from the Veneto region. It has a soft inside and a crunchy outside. Its shape looks like a slipper, which is why it’s called that. Ciabatta is great for sandwiches because of its holes and chewy feel.

  • Large, irregular air pockets
  • Crispy crust with soft interior
  • Best served fresh and warm

Focaccia: The Versatile Flatbread

Focaccia is another classic Italian bread. It’s simple but full of flavor. You can top it with herbs, veggies, or enjoy it plain. Its dimples hold olive oil, making it crispy and tasty.

  • Dimpled surface for oil retention
  • Can be served as appetizer or side dish
  • Endless topping possibilities

Pane Toscano: Tuscan Bread Tradition

Pane Toscano, or Tuscan bread, is special because it’s saltless. It goes well with strong flavors. The Tuscan method makes a strong loaf with a great crust, perfect for local dishes.

“In Tuscany, bread is not just food; it’s a cultural expression.” – Italian Culinary Experts

These breads tell a part of Italy’s rich bread history. They invite you to try traditional flavors and methods.

Essential Tools for Baking

To make homemade italian bread, you need the right tools. Both pros and home cooks agree that the right tools make a big difference. They make bread-making easier and help you get authentic results.

  • Precision measuring tools
  • Quality mixing bowls
  • Professional baking surfaces
  • Scoring instruments

Baking Stone or Steel: The Secret to Perfect Crust

A baking stone or steel is key for a crispy crust. They spread heat evenly, like a brick oven. Professional bakers say to preheat the stone at high temperatures for a golden, crackling crust.

ToolPurposeRecommended Material
Baking StoneCreate crispy crustCordierite ceramic
Baking SteelRapid heat transferHigh-grade steel

Mixing Bowls and Measuring Tools

Getting your measurements right is crucial. Invest in:

  1. Stainless steel mixing bowls
  2. Digital kitchen scale
  3. Measuring cups and spoons

Bread Lame: Your Scoring Companion

A bread lame or sharp knife is great for designs on your bread. It lets you score the bread precisely. This helps control how it expands while baking and adds beauty to your homemade italian bread.

Ingredients You’ll Need

To make perfect italian bread dough, you need the right ingredients. Start your baking journey by knowing the key ingredients. They turn simple items into a tasty treat.

Making great bread takes skill and knowing each ingredient’s role. Let’s look at the main parts that make your bread stand out.

Flour Types for Authentic Flavor

The base of excellent italian bread dough is the flour. Bakers suggest using:

  • 00 Flour: Ultra-fine Italian wheat flour with great texture
  • Bread flour with high protein content
  • Semolina flour for extra flavor

Choosing the Right Yeast

The yeast you pick affects the bread’s rise and taste. Here are your options:

  • Fresh yeast: Gives a rich, traditional taste
  • Instant yeast: Easy to use and reliable

Olive Oil: The Secret Ingredient

Extra virgin olive oil is essential for authentic italian bread. It adds richness, moisture, and flavor. This turns a simple recipe into a Mediterranean delight.

“Great bread begins with great ingredients” – Italian Baking Tradition

Step-by-Step Instructions

Making an easy Italian bread recipe needs patience and care. The process starts with preparation and knowing each step well. Let’s explore the key techniques that turn simple ingredients into a tasty homemade loaf.

Mixing the Dough: Creating the Perfect Foundation

To mix your dough for real Italian bread, follow these steps:

  • Combine dry ingredients in a large mixing bowl
  • Create a well in the center for wet ingredients
  • Gradually add flour and liquid
  • Mix until a shaggy dough forms

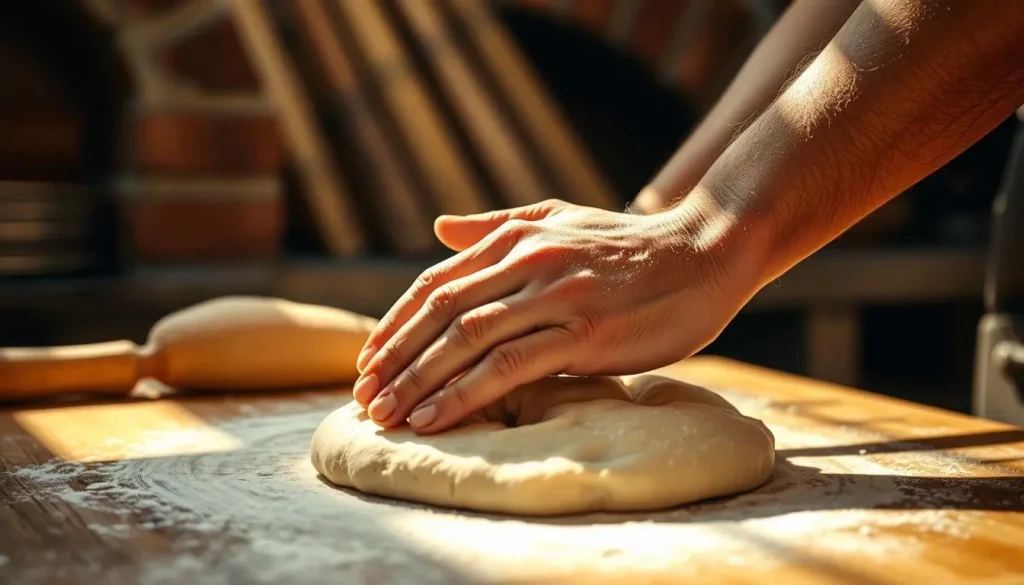
Kneading Techniques: Developing Gluten Structure

Kneading is key in making Italian bread. You aim for a smooth, elastic dough. This texture makes the bread chewy.

Kneading MethodDurationTechnique
Hand Kneading10-12 minutesPush, fold, and rotate dough
Stand Mixer6-8 minutesUse dough hook attachment

First Rise: Understanding Fermentation

The first rise turns your dough into a living thing. Expect the dough to nearly double in size during this stage. To help, create a warm, draft-free spot by:

  1. Covering the dough with a damp cloth
  2. Placing in a warm, draft-free area
  3. Allowing 1-2 hours for fermentation

“Bread is the king of the table and all else is merely an accompaniment.” – Chef Peter Reinhart

Look for these signs of a good first rise: the dough should be soft, puffy, and spring back when pressed.

Shaping Your Bread

Mastering the art of shaping is key in making traditional Italian bread. The way you shape your bread greatly affects its texture, look, and quality. Proper shaping builds gluten structure and gives that classic Italian bread look everyone adores.

When working with your dough, handle it gently but firmly. You aim to create surface tension. This helps the bread keep its shape while baking.

Traditional Shaping Methods

Italian bread shaping uses several classic techniques:

  • Round loaf (Pagnotta) technique
  • Long baguette-style formation
  • Oval country bread shape

Using Baskets for Unique Shapes

Proofing baskets, known as bannetons, can change your homemade Italian bread. These baskets create beautiful patterns and consistent shapes:

  1. Choose a basket with a textured interior
  2. Dust the basket with rice flour
  3. Gently place shaped dough into the basket
  4. Let the dough rise, absorbing basket’s unique pattern

Each shaping method brings out different qualities in your traditional Italian bread. This lets you experiment and find your favorite style.

The Second Rise and Proofing

Getting the second rise right is key to making the best Italian bread. Your dough needs careful attention at this stage. It’s where it gets its special texture and taste.

The second rise turns your bread into a tasty masterpiece. It’s when the dough gets complex flavors and the right structure. This is before it goes into the oven.

Understanding the Proofing Process

Proofing is more than just waiting. It’s about creating the perfect setting for your dough to grow. The right conditions are crucial for your bread’s quality.

  • Maintain consistent temperature (around 75-80°F)
  • Control humidity levels
  • Use a draft-free area
  • Cover dough with a damp cloth

Key Proofing Tips for Perfect Rising

Professional bakers know proofing needs patience and precision. Here are key tips for the best Italian bread:

Proofing TechniqueExpected Result
Poke TestDough springs back slowly, leaving a slight indentation
Volume IncreaseDough should roughly double in size
Finger IndentationMarks should remain visible but not collapse

“Proofing is where bread transforms from potential to perfection.” – Italian Baking Master

Keep a close eye on your dough during the second rise. The right environment will help you make a delicious, authentic Italian loaf.

Baking Your Italian Bread

Making perfect crispy Italian bread needs careful steps in the baking process. It’s all about the right temperature, steam, and cooling. These steps turn simple ingredients into a tasty treat.

Mastering Oven Temperature for Perfect Bread

Your oven is key in making authentic crispy Italian bread. Bakers suggest certain temperatures for the best results:

  • Preheat your oven to 450-475°F (232-246°C)
  • Use a baking stone for even heat
  • Put the rack in the oven’s middle

Steam Technique for Irresistible Crust

Steam is vital for a crispy crust. Here are some pro tips:

  1. Put a metal pan with water on the bottom rack
  2. Mist the oven walls with water before baking
  3. Use a spray bottle for direct steam
Baking MethodTemperatureSteam TechniqueEstimated Baking Time
Traditional Loaf450°FWater Pan35-40 minutes
Rustic Ciabatta475°FDirect Misting25-30 minutes

Cooling for Optimal Texture

After baking, patience is key. Let your crispy Italian bread cool on a wire rack for at least 1 hour. This step helps the bread set its texture, making it crunchy and delicious.

Flavor Variations to Try

Don’t let your homemade Italian bread recipe be boring! Try new flavors to turn a simple loaf into a masterpiece. You can add herbs, spices, cheese, or olives to make it your own. This way, your bread can match your taste and go well with different meals.

Herb-Infused Bread Delights

Make your Italian bread recipe special by adding fresh herbs. Here are some great choices:

  • Rosemary: Adds an earthy, aromatic flavor
  • Basil: Brings a fresh, sweet taste
  • Garlic: Creates a robust, savory profile
  • Thyme: Provides a subtle, slightly minty undertone

Cheese and Olive Additions

Cheese and olives can elevate your homemade Italian bread. Try these tasty additions:

  • Parmesan: Sprinkle grated cheese on top before baking
  • Kalamata olives: Chop and fold into the dough
  • Feta: Crumble for a tangy Mediterranean twist

“The secret to great bread is not just in the technique, but in the creativity of its flavors.” – Italian Baking Artisan

When adding ingredients, watch out for moisture. Wet items like olives might change your recipe. Start small and experiment to find your favorite mix.

Tips for Storing and Enjoying

After making your best Italian bread, keeping it fresh is crucial. Store it at room temperature in a paper or cloth bag. Plastic bags can make the crust soggy because of moisture.

If you have more bread than you can eat in two days, freeze it. This way, you can enjoy it later without losing its quality.

There are many ways to make your bread special. Try making bruschetta by toasting slices and topping them with tomatoes, garlic, and basil. You can also serve it with olive oil and balsamic vinegar for a tasty appetizer.

Your bread is great with soups, pasta, and stews too. It adds a nice touch to any meal.

To freeze your bread, wrap it in aluminum foil or plastic wrap, then put it in a freezer bag. Thaw it at room temperature and warm the crust in the oven for a few minutes. Freshly baked bread is best enjoyed within two days. Share it with friends and family to enjoy every bite.

FAQ

How long does it take to make authentic Italian bread?

Making authentic Italian bread takes about 3-4 hours. This includes preparation, rising, and baking. Most of this time is spent waiting for the dough to rise, so you’ll only work for 30-45 minutes.

What type of flour is best for Italian bread?

Tipo 00 or bread flour are the top choices for Italian bread. They have high protein content. This makes the bread chewy and the crust crispy, just like traditional Italian bread.

Can I make Italian bread without a stand mixer?

Yes, you can make Italian bread by hand. Traditional bakers have been doing this for centuries. They use their hands and a bit of effort to make the dough.

How do I know when my bread is fully proofed?

Use the poke test: gently press your finger into the dough. If it springs back but leaves a mark, it’s ready. If it springs back too fast, it needs more time. If it doesn’t spring back, it’s over-proofed.

How long can I store homemade Italian bread?

Enjoy your Italian bread within 2-3 days. Store it in a paper bag or bread box at room temperature. For longer storage, freeze it for up to a month. Wrap it tightly in plastic wrap and foil.

Do I need a special baking stone to make great Italian bread?

A baking stone helps with a crispy crust, but it’s not necessary. You can use a heavy baking sheet or cast-iron skillet instead. The goal is to have a hot surface for a crusty exterior.

Can I add herbs or cheese to my Italian bread?

Yes! Italian bread loves herbs like rosemary, basil, or oregano. You can mix them into the dough or sprinkle them on top before baking. Parmesan or pecorino cheese can also add great flavor.

What’s the best way to get a crispy crust?

To get a crispy crust, create steam in your oven. Place a pan of hot water on the bottom rack or mist the oven walls when baking. This helps make the crust golden and crispy, just like authentic Italian bread.

0 comments
0 FacebookTwitterPinterestEmail
Italian Seasoning
Italian Seasoning

How to Make Italian Seasoning Delicious Flavor

Serves: 1/2 cup Prep Time: Cooking Time:
Nutrition facts: 6 calories 0 grams fat
Rating: 5.0/5
( 1 voted )

Ingredients

  • 1 tablespoon dried basil
  • 1 tablespoon dried oregano
  • 1 tablespoon dried thyme
  • 1 teaspoon garlic powder
  • 1 teaspoon onion powder
  • 1 teaspoon dried rosemary
  • 1/2 teaspoon crushed red pepper flakes (optional)

Instructions

In a small bowl, combine all the dried herbs and spices: basil, oregano, thyme, garlic powder, onion powder, rosemary, and crushed red pepper flakes (if using).
Stir well until all the ingredients are evenly mixed.
Store the seasoning blend in an airtight jar or container.
Use as needed to season your favorite Italian dishes like pasta, pizza, or roasted vegetables.

Notes

Feel free to adjust the quantities of the herbs and spices based on your personal taste preferences. For a stronger flavor, increase the amount of garlic powder or red pepper flakes. This seasoning can be stored for several months in a cool, dry place.

Are you tired of bland dishes that lack excitement? What if a simple homemade italian seasoning recipe could transform your cooking from ordinary to extraordinary?

Making your own italian seasoning is easier than you might think. This blend can make pasta dishes and grilled meats taste better with just a sprinkle. Home cooks find that a custom seasoning mix gives deeper flavors and more control over ingredients than store-bought options.

By making your own italian seasoning, you can try fresh herbs and adjust the mix to your liking. You’ll save money, improve your cooking skills, and wow your family and friends with flavors from a restaurant in your kitchen.

Key Takeaways

  • Create a personalized italian seasoning recipe in minutes
  • Control ingredient quality and freshness
  • Save money compared to pre-packaged seasonings
  • Enhance the flavor profile of multiple dishes
  • Customize spice levels to your preference

What is Italian Seasoning?

Italian seasoning is a mix of dried herbs that makes simple dishes taste amazing. It brings the taste of the Mediterranean to your kitchen. Use it on pasta, pizza, or veggies to add depth and authenticity.

Knowing what’s in Italian seasoning helps you understand its rich taste. It’s a mix of herbs that captures the essence of Italian cooking.

Origins of Italian Seasoning

Italian seasoning has its roots in Mediterranean cooking. It’s not an ancient recipe but a blend that American cooks created. Immigrants brought their cooking traditions, and this mix became popular in the U.S.

Common Ingredients Found in Italian Seasoning

  • Basil: A sweet and peppery herb fundamental to Italian cooking
  • Oregano: Provides a robust, slightly bitter flavor
  • Thyme: Adds earthy and minty undertones
  • Rosemary: Brings a piney and aromatic quality
  • Marjoram: Offers a delicate, sweet flavor
  • Sage: Contributes a warm and slightly peppery taste

Each herb in the mix is important for a balanced flavor. It makes your cooking go from good to great.

The Benefits of Homemade Seasoning

Making your own Italian seasoning is more than just cooking. It’s a smart way to make your dishes better. By making an easy Italian seasoning blend at home, you open up a world of flavors that store-bought options can’t offer.

Let’s look at why making your own Italian seasoning is a big deal for home cooks:

Freshness That Transforms Your Dishes

Freshly ground herbs add a flavor that pre-packaged seasonings can’t match. Your homemade Italian seasoning blend will bring:

  • Vibrant, intense flavors
  • Aromatic qualities that make every dish better
  • Maximum nutritional benefits from fresh herbs

Complete Ingredient Control

When you make homemade Italian seasoning, you decide what goes into it. This means:

  1. No unwanted preservatives
  2. Customizing for dietary needs
  3. Adjusting salt and spice levels

Budget-Friendly Cooking Solution

Making your own seasoning blend is not only tasty—it’s also economical. Buying whole herbs and mixing them yourself saves a lot of money. This is compared to buying pre-made seasonings over and over again.

Pro tip: Buy herbs in bulk and store them properly to maximize savings and flavor!

Simple Italian Seasoning Recipe

Making your own italian seasoning is simple. Just a few ingredients can make your cooking taste fresher and more flavorful. This homemade blend brings authentic Mediterranean tastes to your dishes.

For the best italian seasoning, use top-quality dried herbs. Choose your ingredients with care for the best flavor and aroma.

Essential Ingredients

  • 2 tablespoons dried oregano
  • 2 tablespoons dried basil
  • 1 tablespoon dried thyme
  • 1 tablespoon dried rosemary
  • 1 teaspoon dried sage
  • 1 teaspoon dried marjoram
  • 1/2 teaspoon garlic powder (optional)

Step-by-Step Instructions

  1. Make sure all herbs are dry and crisp
  2. Use measuring spoons to measure each herb precisely
  3. Put all herbs in a medium bowl
  4. Gently crush herbs with the back of a spoon to release oils
  5. Mix well until everything is well combined
  6. Put the mix in an airtight glass container

Pro tip: Keep your homemade seasoning in a cool, dark spot. This way, it will stay fresh for up to six months.

Perfect Uses for Italian Seasoning

Your homemade italian seasoning spice mix is a culinary powerhouse. It can turn ordinary dishes into extraordinary meals. This versatile blend brings vibrant flavors to a wide range of recipes, making it a must-have in any kitchen.

Discovering the best italian seasoning recipe means unlocking countless cooking possibilities. Let’s explore how this magical spice blend can elevate your favorite dishes.

Pasta Dishes That Sing with Flavor

Italian seasoning is a game-changer for pasta lovers. Sprinkle it over:

  • Homemade pasta sauces
  • Baked ziti
  • Pasta salads
  • Lasagna

Grilling with Zest

Grilled meats and vegetables become irresistible when seasoned with your homemade blend. Try rubbing it on:

  • Chicken breasts
  • Roasted vegetables
  • Grilled seafood
  • Kebabs

Warming Soups and Stews

Your italian seasoning spice mix can add depth to hearty soups and stews. Experiment with adding it to:

  • Minestrone
  • Tomato soup
  • Vegetable stews
  • Beef ragout

“A pinch of Italian seasoning can turn a simple dish into a culinary masterpiece.” – Professional Chef

Remember, the key is to start with a small amount and adjust to your taste. Your homemade seasoning blend is a personal culinary signature that can make every meal memorable.

Customizing Your Italian Seasoning

Making your own Italian seasoning lets you create unique flavors. You can change a simple mix into something special by trying out different herbs and spice levels.
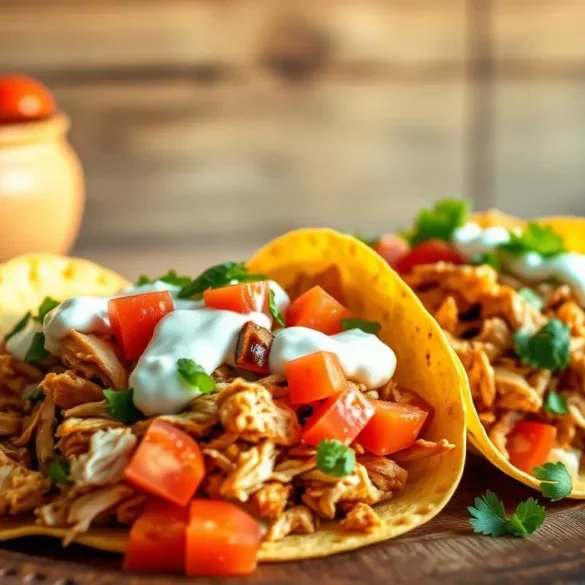
Creating the best Italian seasoning means knowing how herbs work together. Your personal touch can make a homemade seasoning truly stand out.

Adjusting Spice Levels to Suit Your Taste

Changing spice levels can really change your seasoning’s taste. Here are some tips for making it your own:

  • Start with a mild base and gradually increase heat
  • Use red pepper flakes for subtle warmth
  • Add cayenne pepper for more intense spiciness
  • Balance hot elements with milder herbs

Exploring Unique Herb Combinations

Trying new herbs can make your Italian seasoning unique. It shows off your cooking style:

HerbFlavor ProfileRecommended Quantity
LavenderFloral, delicate1/2 teaspoon
Lemon ThymeCitrusy, bright1 teaspoon
Fennel SeedsAnise-like, sweet3/4 teaspoon

The secret to great homemade Italian seasoning is finding the right balance. Don’t be shy to try new things and find your favorite mix!

Storage Tips for Homemade Seasoning

Keeping your homemade italian herb mix fresh is key. The right storage keeps your seasoning blend tasty for months. It’s all about preserving those vibrant flavors.
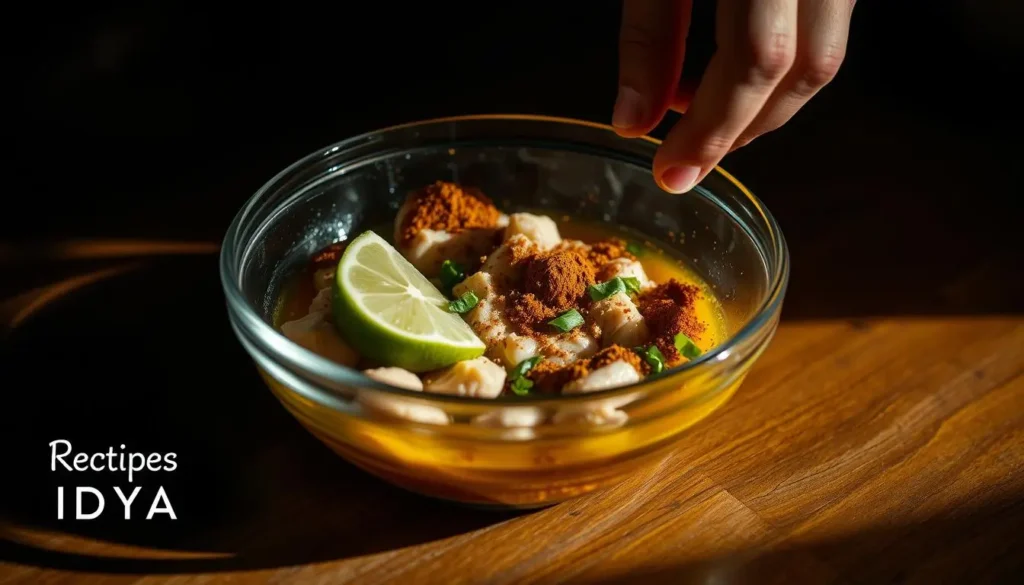
Choosing the Right Storage Containers

Your homemade italian seasoning blend needs the best storage. Look for containers that keep moisture, light, and air out:

  • Airtight glass jars with tight-fitting lids
  • Ceramic spice containers with sealed tops
  • Dark-colored glass containers to block light exposure

Maximizing Shelf Life

The life of your italian herb mix depends on how you store it. Keep it in a cool, dark pantry. This way, your seasoning stays flavorful for up to six months.

Storage Best Practices

Here are some tips to keep your seasoning blend fresh:

  1. Always use clean, dry utensils when handling
  2. Avoid storing near stove or other heat-generating appliances
  3. Label containers with the creation date
  4. Check for moisture or clumping periodically

By following these tips, your homemade italian herb mix will stay fresh. It will be ready to make your dishes even better.

Pairing Italian Seasoning with Other Flavors

Improving your cooking means knowing how to mix and balance flavors. Your homemade Italian seasoning is very versatile. It’s great for more than just Italian dishes. The right Italian seasoning recipe can make your dishes stand out when you try new flavor combinations.
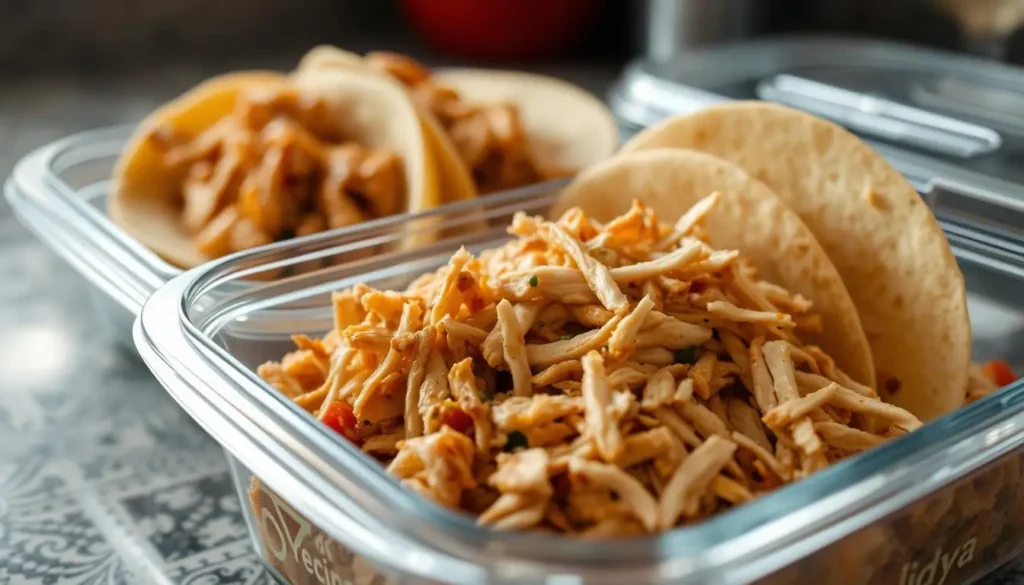
Exploring herbs and spices can take your cooking to the next level. It’s all about knowing how different flavors work together. This way, you can make your dishes truly special.

Complementary Herbs and Spices

Here are some exciting pairings for your Italian seasoning:

  • Rosemary: Adds deep, woody notes to roasted meats
  • Thyme: Provides earthy undertones for chicken dishes
  • Smoked paprika: Introduces a subtle smoky warmth
  • Fennel seeds: Brings a delicate anise-like sweetness

Pairing with Different Cuisines

Your Italian seasoning recipe isn’t just for Italian food. Try it in dishes from around the world. It’s great for:

  • Mediterranean grilled vegetables
  • American-style barbecue rubs
  • Middle Eastern roasted meats
  • Latin American marinades

Italian seasoning is very versatile. It lets you make dishes that are both unique and delicious. Be creative in the kitchen and let your homemade blend surprise your guests.

FAQs About Italian Seasoning

Many home cooks wonder about making the perfect italian seasoning spice mix. Knowing the details of this blend can enhance your cooking.

Can I Substitute Fresh Herbs?

When making italian seasoning, some ask about using fresh herbs instead. Fresh herbs can be used, but you need to make some changes:

  • Use three times more fresh herbs compared to dried herbs
  • Add fresh herbs later in cooking to prevent flavor loss
  • Chop fresh herbs finely for better integration

Fresh herbs add a bright, green taste that’s different from dried herbs. They’re best in dishes cooked for a short time.

How to Revive Stale Seasoning?

Dried herbs lose their strength over time. To make your Italian seasoning spice mix fresh again:

  1. Toast herbs gently in a dry skillet for 30-60 seconds
  2. Crush herbs between your fingers to release essential oils
  3. Store in an airtight container away from direct sunlight

If your seasoning blend smells weak or looks dull, it’s time to make a new batch of homemade italian seasoning.

Trying Italian Seasoning in Unique Recipes

Your homemade Italian seasoning recipe opens up a world of culinary creativity. It can turn ordinary dishes into extraordinary culinary experiences. With the right Italian seasoning ingredients, you can take your cooking to new heights.

Pizza lovers will find a new twist by adding the seasoning to pizza dough and as a sprinkle over toppings. The herbs infuse the crust with rich, savory flavors. This complements traditional mozzarella and tomato sauce perfectly. Imagine making a restaurant-quality pizza at home with just a few dashes of your custom blend.
Crafting Vibrant Italian Dressings

Salad enthusiasts can make basic vinaigrettes into gourmet experiences with the Italian seasoning recipe. Mix it with olive oil, vinegar, and lemon juice for a zesty dressing. Your homemade seasoning turns simple ingredients into a memorable culinary moment that will impress family and friends.

Experimenting with your Italian seasoning ingredients unlocks endless recipe possibilities. Whether drizzling over roasted vegetables or mixing into marinades, this versatile blend shows that creativity in the kitchen has no bounds.

FAQ

Can I substitute fresh herbs for dried herbs in my Italian seasoning?

Yes, you can use fresh herbs instead of dried ones. But remember, you’ll need three times more fresh herbs than dried. Fresh herbs have more moisture, which can change your seasoning’s texture. It’s best to make small batches and use them quickly for the best flavor.

How long can I store homemade Italian seasoning?

Homemade Italian seasoning can last up to 6 months if stored right. Keep it in an airtight container, away from heat and sunlight. For the best taste, use it within 3-4 months. Always check for any signs of spoilage before using.

Is Italian seasoning gluten-free?

Pure Italian seasoning is naturally gluten-free. But, always check the labels of pre-mixed blends. If you’re making your own, you can be sure it’s gluten-free.

Can I use Italian seasoning in non-Italian dishes?

Yes! Italian seasoning is very versatile. It can add flavor to dishes from many cuisines. Try it on roasted veggies, in marinades, or even on popcorn for a tasty twist.

How can I revive stale Italian seasoning?

To revive stale Italian seasoning, lightly toast it in a dry skillet for a minute. This can help release its oils and restore flavor. But, making a fresh batch every 3-4 months is best for the best taste.

What if I don’t have all the herbs for Italian seasoning?

No worries! You can still make a great blend with what you have. Oregano, basil, and thyme are key. Adjust the amounts of what you have to get a balanced flavor.

Are there any low-sodium options for Italian seasoning?

Making Italian seasoning at home lets you control the salt. You can make a salt-free version by using only herbs and no salt. This is great for those watching their sodium intake.

0 comments
1 FacebookTwitterPinterestEmail
German Pancake Recipe

Fluffy German Pancake Recipe for Breakfast

Serves: 4 Prep Time: Cooking Time:
Nutrition facts: 350 calories 18 grams fat
Rating: 5.0/5
( 1 voted )

Ingredients

  • 3 large eggs
  • 1 cup all-purpose flour
  • 1 cup milk
  • 1/4 cup melted butter
  • 1 tablespoon sugar
  • 1/2 teaspoon vanilla extract
  • 1/4 teaspoon salt
  • Powdered sugar for dusting
  • Fresh fruit (optional)

Instructions

Preheat the oven to 425°F (220°C). Grease a 9x13-inch baking dish with butter or cooking spray.
In a large bowl, whisk together eggs, milk, melted butter, sugar, vanilla extract, and salt until smooth.
Gradually add flour to the egg mixture, whisking until combined and no lumps remain.
Pour the pancake batter into the prepared baking dish and spread it out evenly.
Bake in the preheated oven for 20 minutes, or until the pancake is puffed and golden brown.
Remove from the oven and dust with powdered sugar. Serve with fresh fruit or syrup, if desired.

Notes

For an extra touch, top your German pancake with berries, whipped cream, or a drizzle of maple syrup. You can also experiment with adding cinnamon or nutmeg for a warm spice flavor.

Ever wondered what makes breakfast truly magical? The German pancake recipe might just be your culinary discovery. This fluffy German pancake is more than a recipe. It’s an experience that turns mornings into special moments.

The German pancake rises dramatically in the oven, creating a puffy, golden masterpiece. It impresses everyone with its unique preparation. It combines simple ingredients with professional baking techniques.

Imagine serving a pancake that looks like it came from a fancy restaurant. Yet, it’s easy to make. This breakfast recipe makes your morning meal special with its impressive look and rich flavor.

Key Takeaways

  • Easy to prepare with basic kitchen ingredients
  • Dramatic oven-baked rising technique
  • Versatile dish for sweet and savory preferences
  • Impressive presentation for breakfast or brunch
  • Quick cooking time under 30 minutes

What is a German Pancake?

A german pancake, also known as a dutch baby pancake, is a special breakfast dish. It’s unlike regular pancakes because it puffs up in the oven. This makes it a showstopper at any breakfast table.

This pancake is light and eggy, with golden edges and a soft center. It’s made in a cast-iron skillet or baking dish. This sets it apart from pancakes cooked on the stovetop.

Culinary Origins

The history of german pancakes is interesting. Even though it’s called a German pancake, it might have started in Germany but became famous in the U.S. by German immigrants. Some say “dutch baby” comes from “Deutsch” (German), not Dutch.

  • Originated in German-American communities
  • Became popular in early 20th-century America
  • Adapted from traditional European pancake recipes

Distinctive Characteristics

This pancake is special because of how it’s made. It rises in the oven, turning into a bowl-like shape with crispy edges. Its texture is like a soufflé, crepe, and pancake all mixed together.

FeatureDescription
TextureLight, puffy, custard-like
Cooking MethodBaked in oven, not on stovetop
Primary IngredientsEggs, flour, milk, butter

Ingredients Needed for German Pancakes

To make the perfect German pancake, you need to pick the right ingredients. Your dutch baby pancake recipe works best with quality items in your kitchen.

The key to a tasty German pancake is a few basic ingredients. They turn into a fluffy, impressive breakfast dish.

Key Components

  • Eggs: The main binder and leavening agent
  • All-purpose flour: Builds the pancake’s structure
  • Whole milk: Adds richness and a smooth texture
  • Unsalted butter: Brings flavor and helps with browning
  • Pinch of salt: Boosts the taste

Optional Add-Ins for German Pancake Variations

Trying different german pancake variations lets you make it your own. Here are some fun additions:

  • Vanilla extract for sweetness
  • Cinnamon for a warm spice
  • Lemon zest for a bright flavor
  • Fresh berries for natural sweetness
  • Chopped nuts for crunch

The beauty of a dutch baby pancake recipe is its simplicity and flexibility. It’s great for both sweet and savory dishes. These ingredients let you get creative in the kitchen.

The Equipment You Will Need

To make tasty German pancakes, you need the right tools. Choosing the best german pancake pan and mixing tools is key. Knowing what you need helps you make perfect pancakes every time.

Both pros and home cooks say the right gear makes a big difference. The right dutch baby skillet and tools are crucial for that fluffy texture.

Baking Dish Options

When picking baking gear for German pancakes, consider these:

  • Cast iron skillet (10-12 inches recommended)
  • Ceramic baking dish
  • Oven-safe stainless steel pan
  • Specialized dutch baby skillet

Pro tip: Cast iron skillets are best for that crispy edge and even heat.

Mixing Tools

Here’s what you need for mixing:

  1. Large mixing bowl
  2. Whisk or electric mixer
  3. Measuring cups and spoons
  4. Spatula for batter prep

“The right tools transform good cooking into great cooking.” – Professional Chef

Equipment TypeRecommended MaterialBest Use
SkilletCast IronEven heat distribution
Mixing BowlStainless SteelEasy batter mixing
WhiskStainless SteelSmooth batter consistency

Quality baking equipment for German pancakes means tasty results every time.

Step-by-Step Instructions

Learning to make German pancakes is a fun journey. It turns simple ingredients into a tasty breakfast treat. This guide will help you bake German pancakes with ease and confidence.

Mastering German pancake cooking takes focus and a few key steps. It might seem hard at first, but with practice, you’ll make beautiful puffy pancakes. They’ll wow your family and friends.

Preparing the Batter

Getting the batter right is key for that light and airy texture. Here’s what to do:

  • Gather all ingredients at room temperature
  • Whisk eggs until they become light and frothy
  • Gradually add flour and milk
  • Mix until smooth with no lumps
  • Let the batter rest for 10-15 minutes

Baking the Pancakes

The right baking technique is essential. Preheat your oven to 425°F and follow these steps:

  1. Place a cast-iron skillet or baking dish in the oven while preheating
  2. Add butter to create a non-stick surface
  3. Pour batter into the hot pan
  4. Bake for 15-20 minutes until edges are golden and puffy

Cooling and Serving

The last steps are cooling and serving. Let the pancake rest for a few minutes after baking. The puff will deflate, creating beautiful folds. Dust with powdered sugar, add fresh berries, or drizzle with maple syrup for a delicious breakfast.

Tips for the Perfect German Pancake

Mastering German pancakes takes some special techniques and tips. Whether you’re new to cooking or have lots of experience, these tips will make your breakfast dish a hit.

Making perfect dutch baby pancakes is easier than you think. It’s all about the small details that make a big difference.

Smart Ingredient Substitutions

Being flexible with ingredients can solve many problems. Here are some substitutions to try:

  • Gluten-free flour for traditional wheat flour
  • Almond milk instead of regular milk
  • Coconut oil as a butter replacement
  • Egg alternatives like flax eggs for vegan versions

Avoiding Common Pancake Pitfalls

To avoid flat or soggy pancakes, follow these tips:

  1. Make sure ingredients are at room temperature
  2. Whisk the batter until it’s smooth but not overmixed
  3. Preheat your baking dish for crispy edges
  4. Use a cast-iron skillet for even heat

Pro tip: The secret to a puffy German pancake is high heat and the right mix of ingredients. Your batter should be thin but strong. This will give you those amazing rises and golden edges.

Flavor Variations

German pancakes, also known as dutch baby pancakes, are a blank canvas for creativity. They can be sweet or savory, making breakfast exciting with just a few ingredients.

Exploring german pancake flavors lets you tailor your meal to your liking. These puffy pancakes are incredibly adaptable.

Sweet Dutch Baby Recipes

For sweet dutch baby recipes, you have many tasty choices:

  • Classic powdered sugar with fresh lemon juice
  • Mixed berry compote
  • Caramelized banana slices
  • Nutella and whipped cream
  • Maple syrup with toasted nuts

Savory German Pancake Ideas

For savory german pancake ideas, try these delicious options:

  • Herb-infused with fresh chives
  • Crispy bacon and cheddar cheese
  • Spinach and feta cheese
  • Smoked salmon with dill
  • Roasted vegetable medley

“The secret to an amazing German pancake is experimenting with flavors!” – Professional Chef

Flavor CategoryTop RecommendationPreparation Time
SweetMixed Berry Compote15 minutes
SavoryBacon and Cheddar20 minutes
GourmetSmoked Salmon with Dill25 minutes

Pro tip: Always serve your German pancake immediately after baking to maintain its signature puffy texture and maximum flavor impact.

Serving Suggestions

Learning how to serve German pancakes can turn a simple breakfast into a special treat. These fluffy Dutch baby pancakes are great with many different toppings and ways to present them.

Ideal Accompaniments

There are many tasty options for dutch baby accompaniments to make your breakfast unforgettable:

  • Fresh seasonal berries
  • Crispy bacon strips
  • Maple-glazed breakfast sausages
  • Whipped cream
  • Powdered sugar dusting
  • Fruit compotes

Beverage Pairings

Choosing the right drink can make your German pancake breakfast even better. Here are some great drink options:

  1. Classic Coffee: A strong coffee goes well with the pancake’s softness
  2. Fresh-squeezed orange juice
  3. Chai latte
  4. Herbal tea
  5. Sparkling mimosa (for weekend brunches)

Try different combinations to find your favorite German pancake breakfast. The goal is to mix flavors and make a plate that looks and tastes great.

Storage and Reheating

Enjoying your German pancakes doesn’t stop after the first bite. Learning how to store and reheat them can make them last longer. It also helps reduce food waste.

Proper Storage Techniques

Storing German pancakes right is key to keeping them tasty. Here’s how to store them:

  • Let pancakes cool down completely before storing
  • Wrap each pancake in plastic wrap or aluminum foil
  • Put the wrapped pancakes in an airtight container
  • Keep them in the fridge for 2-3 days

Reheating Dutch Baby Pancakes

To reheat Dutch baby pancakes, aim for their crispy edges and fluffy center. Here’s how:

  1. Oven Method:
    • Heat your oven to 350°F
    • Put pancakes on a baking sheet
    • Warm them for 5-7 minutes
  2. Skillet Method:
    • Heat a non-stick skillet over medium heat
    • Warm pancakes for 1-2 minutes on each side
    • Add a bit of butter for extra taste

Creative Leftover Ideas

Turn leftover German pancakes into new dishes. Here are some ideas:

  • Roll them up with sweet fillings
  • Cut into strips for a crispy salad topping
  • Use as a base for savory breakfast wraps
  • Make pancake French toast by dipping in egg

With these tips, you can enjoy your German pancakes again and again. They’ll stay delicious.

Nutritional Information

Understanding german pancake nutrition is key for health-focused food lovers. These treats are not just tasty but also offer a surprising nutritional profile. They can fit into many dietary plans.

A typical german pancake, or dutch baby, has about 250-300 calories per serving. The nutritional breakdown shows a mix of macronutrients. This mix can be adjusted for healthier eating.

Caloric Breakdown

Here’s a look at the typical nutritional components of a standard german pancake:

  • Calories: 275-300
  • Protein: 8-10 grams
  • Carbohydrates: 25-30 grams
  • Fat: 15-18 grams

Healthy Dutch Baby Recipe Alternatives

For those looking for low-calorie german pancakes, smart substitutions can make this dish nutritious:

  1. Use whole wheat flour to boost fiber
  2. Replace whole milk with almond or skim milk
  3. Add egg whites to lower cholesterol
  4. Top with fresh berries instead of powdered sugar

By making smart ingredient swaps, you can enjoy a tasty german pancake while keeping your diet balanced. The trick is to eat in moderation and make smart nutritional choices.

German pancake recipes come in many flavors for all tastes and diets. Whether you want a traditional breakfast or something new, these recipes will spark your creativity.

Recipes for Special Diets

Even with dietary limits, you can still enjoy tasty pancakes. Here are some great options:

  • Gluten-free dutch baby: Use almond or rice flour instead of wheat for those with gluten intolerance
  • Vegan german pancakes: Choose plant-based milk and egg replacers like flaxseed or aquafaba
  • Keto-friendly version: Try coconut or cauliflower flour instead of regular flour

Seasonal Variations

Make your German pancakes special with seasonal ingredients. They add unique tastes to your breakfast:

SeasonIngredient SuggestionFlavor Profile
SpringFresh strawberriesLight and fruity
SummerBlueberries and lavenderRefreshing and aromatic
AutumnPumpkin puree and cinnamonWarm and comforting
WinterSpiced apple compoteRich and hearty

Try these german pancake recipe variations to find new favorites. From gluten-free to vegan, there’s something for everyone to love.

Frequently Asked Questions

German pancake FAQs are key for home cooks aiming to perfect this tasty breakfast dish. Whether you’re new to baking or have experience, knowing how to fix Dutch baby issues can lead to success every time.

German pancakes can be tricky to master. We’ve gathered the most common questions to help you get crispy pancakes and solve cooking problems.

Exploring Pan Options for Your German Pancake

Finding the right pan is vital for a perfect German pancake. While a cast-iron skillet is best, you have other options:

  • Ceramic baking dishes are great for even heat
  • Heavy-bottom metal pans can also work well
  • Avoid thin or lightweight pans for even cooking

Achieving the Crispiest German Pancake

For crispy german pancakes, follow these tips to elevate your breakfast:

  1. Preheat your pan with butter until it’s hot
  2. Use room temperature eggs for better batter
  3. Make sure your oven is preheated before adding batter
  4. Don’t overmix the batter to keep it light

Pro tip: The secret to a crispy exterior is high heat and minimal handling.

Dutch baby troubleshooting is simple with these tips. You’ll soon be making restaurant-quality German pancakes at home.

Reader Reviews and Experiences

Our German pancake recipe has brought joy to many home cooks in the United States. People are sharing their own dutch baby recipe feedback. They show how they’ve made this dish their own with unique twists.

Sarah from Seattle loves making these pancakes for her family every weekend. She adds fresh berries and powdered sugar, inspiring others to try new things. This shows how versatile and loved this classic breakfast dish is.

What Our Readers Are Saying

Cooking fans have shared many success stories and photos. Both professional chefs and weekend bakers love this recipe. They say mastering it is very rewarding.

The recipe is easy to follow and can be changed in many ways. This makes it a hit with both new and seasoned cooks.

Share Your Own Recipe!

We want you to join our cooking community! Do you have a special German pancake recipe? We’re eager to hear about it. Share your recipe, tips, and experiences to inspire others and grow our cooking knowledge together.

FAQ

What makes an authentic Italian bread different from other bread types?

Authentic Italian bread is known for its crispy crust and soft inside. It’s made with simple ingredients like flour, water, yeast, and salt. Unlike other breads, it doesn’t have eggs or sugar.

The bread is chewy and has a light crumb. It’s great for dipping in olive oil or with meals.

How long does it take to make homemade Italian bread?

Making homemade Italian bread takes 3 to 4 hours. This includes prep, rising, and baking. You’ll spend about 30-45 minutes actually working on it.

The rest of the time is for the dough to rise and get flavorful. Baking takes 25-30 minutes in a hot oven.

Can I make Italian bread without a stand mixer?

Yes, you can make Italian bread by hand. Traditional bakers have done it for centuries without mixers. Kneading the dough manually takes 10-15 minutes.

This develops the gluten for the right texture.

What are the best flour types for Italian bread?

Use bread flour or 00 flour for authentic Italian bread. Bread flour’s high protein content makes it chewy. If you can’t find 00 flour, mix bread flour with all-purpose flour.

Some bakers mix flours for a richer flavor.

How do I get a crispy crust on my homemade Italian bread?

For a crispy crust, use a few tricks. Create steam in the oven with a pan of hot water or spray water in. Preheat your baking stone or sheet for a crisp bottom.

A hot oven (425-450°F) is key for a golden crust.

How long will homemade Italian bread stay fresh?

Enjoy homemade Italian bread within 1-2 days. Store it in a paper bag at room temperature. Avoid plastic bags to keep the crust crisp.

To freeze, wrap the bread tightly. Thaw at room temperature and warm briefly in the oven for a crispy crust.

Are there gluten-free options for Italian bread?

Yes, you can make gluten-free Italian bread. Use almond flour, rice flour, or gluten-free blends. The texture will differ from wheat bread.

Adding xanthan gum can improve the bread’s structure with gluten-free flours.

What are some common mistakes to avoid when making Italian bread?

Avoid using too hot water, which can kill the yeast. Don’t knead too little or let it rise too short. Too much flour makes the bread dense.

Use fresh yeast and let the dough rise in a warm, draft-free place. Be patient for the best results.

0 comments
1 FacebookTwitterPinterestEmail
German Chocolate Cake Recipe

German Chocolate Cake Recipe Indulgent

by IDYA
German Chocolate Cake Recipe

German Chocolate Cake Recipe Indulgent

Serves: 12 Prep Time: Cooking Time:
Nutrition facts: 450 calories 22 grams fat
Rating: 5.0/5
( 1 voted )

Ever wondered why homemade German chocolate cake is so irresistible? It’s a classic dessert that turns baking into a special experience. Its rich, velvety layers and creamy coconut-pecan frosting are unmatched.

German chocolate cake is more than a treat. It’s a journey of flavors that will excite your taste buds. It combines traditional baking with luxurious tastes that impress everyone.

Whether you’re an experienced baker or new to the kitchen, this guide will help you. You’ll learn to make a homemade German chocolate cake that rivals any bakery.

Key Takeaways

  • Learn the secrets to a perfectly moist German chocolate cake
  • Discover professional baking techniques
  • Master the art of making coconut-pecan frosting
  • Create a bakery-quality dessert at home
  • Understand the unique history behind this classic cake

What is German Chocolate Cake?

Many think German chocolate cake comes from Germany. But, it actually has an American origin. It’s named after Samuel German, who created a dark chocolate for Baker’s Chocolate Company in 1852.

This cake is special because of its rich, moist layers and a unique frosting. The frosting is a mix of coconut and pecans, making it different from other chocolate cakes.

A Delicious Culinary Journey

The cake’s story began in American baking traditions. It became famous in the 1950s after a recipe was shared in a Dallas newspaper. Soon, it became a favorite dessert in the United States.

  • Originated in the United States, not Germany
  • Named after baker Samuel German
  • Distinctive coconut-pecan frosting
  • Became popular in the 1950s

Unique Characteristics of German Chocolate Cake

The cake’s frosting is what makes it stand out. It’s a caramel-like mix of coconut and pecans. This frosting gives the cake a rich, textured taste. The cake itself is also lighter and less dense than others, making it a unique treat.

To make an authentic German chocolate cake, use high-quality ingredients. The signature frosting is key to its unforgettable taste.

Key Ingredients for the Perfect Cake

To make the best german chocolate cake, start with top-notch ingredients. This will make your baking journey special. Each part of the cake, from the chocolate to the coconut, adds to its rich taste.

High-Quality Chocolate Selection

The core of your german chocolate cake is the chocolate. Opt for sweet baking chocolate with at least 50% cocoa. Dark chocolate adds a deeper flavor, making your cake truly special.

  • Sweet baking chocolate
  • Dark chocolate (50-70% cocoa)
  • Unsweetened cocoa powder
  • Premium chocolate bars

Understanding Coconut and Pecans

German chocolate cake is known for its toasted coconut and pecans. These add a unique texture and a nutty sweetness. They make your cake stand out from other chocolate treats.

IngredientPurposeRecommended Quantity
Shredded CoconutAdds Texture1 cup
Chopped PecansProvides Crunch3/4 cup

Essential Baking Supplies

Before you start, make sure you have these baking essentials. They’ll help you prepare smoothly:

  1. 9-inch round cake pans
  2. Electric mixer
  3. Parchment paper
  4. Cooling rack
  5. Offset spatula

“Baking is about precision and passion – quality ingredients make all the difference.”

With these ingredients and tools, you’re set to make an amazing german chocolate cake. It will surely wow your family and friends.

Preparing the Cake Batter

Making the perfect easy German chocolate cake recipe begins with the cake batter. The right mixing technique can make your baking go from good to great. To make a delicious German chocolate cake, you need to mix ingredients carefully.

Before mixing your German chocolate cake recipe, make sure all ingredients are at room temperature. This makes blending smoother and helps mix everything well together.

Essential Mixing Steps

  1. Cream butter and sugar until light and fluffy
  2. Add eggs one at a time, mixing thoroughly
  3. Sift dry ingredients separately
  4. Gradually incorporate dry ingredients into wet mixture

Pro Mixing Techniques

Professional bakers suggest these key mixing tips for an easy German chocolate cake:

  • Use room-temperature ingredients for smoother blending
  • Avoid overmixing to prevent tough cake texture
  • Scrape bowl sides consistently during mixing
  • Mix on medium speed for optimal aeration

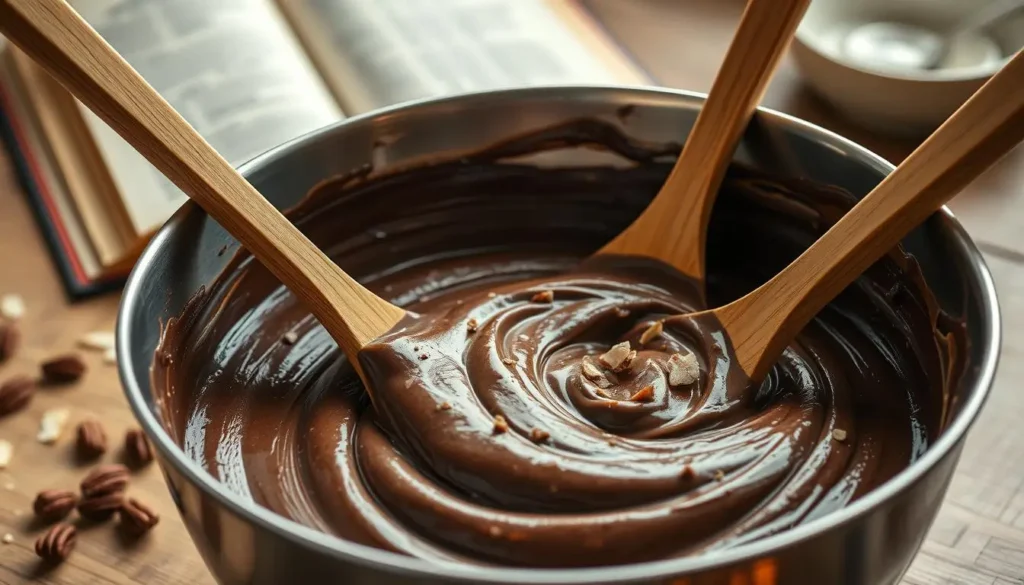
Your batter should be smooth and silky, without lumps. When mixed right, it will look shiny and hold its shape well.

Baking the Cake

Making a homemade German chocolate cake from scratch needs careful baking. The right steps can make your cake amazing. Knowing how to bake will help you get perfect layers every time.

Selecting the Perfect Baking Pans

The pans you choose can greatly affect your cake. Professional bakers suggest a few things:

  • Use light-colored aluminum cake pans
  • Choose 9-inch round pans with 2-inch depth
  • Opt for non-stick surfaces or line with parchment paper
  • Ensure pans have straight sides for even cake layers

Mastering Baking Temperature and Time

When baking a German chocolate cake, precision is key. Here are important temperature tips:

Cake TypeOven TemperatureBaking Time
Layer Cake350°F (175°C)30-35 minutes
Cupcakes350°F (175°C)18-22 minutes

To see if your cake is done, use a toothpick. If it comes out clean with a few moist crumbs, it’s ready. Remember, ovens vary, so start checking a few minutes before the recommended baking time.

Pro tip: Rotate your cake pans halfway through baking. This ensures even heat and prevents uneven baking. It helps make your German chocolate cake layers delicious and consistent.

Cooling and Storing the Cake

After baking the best German chocolate cake, it’s important to cool and store it right. This keeps its flavor and texture perfect. Your hard work in baking deserves the best care after it’s done.

Cooling your cake right stops moisture buildup and keeps it just right. Here are the key steps to keep your dessert fresh:

  • Remove the cake from the oven and let it rest in the pan for 10-15 minutes
  • Gently transfer the cake to a wire cooling rack
  • Allow complete cooling at room temperature before frosting

Proper Cooling Techniques

Cooling your German chocolate cake is key. Patience is key. If you rush, your cake might turn soggy or fall apart. Wait until it’s fully cooled before frosting, which takes about 1-2 hours.

“A perfectly cooled cake is the foundation of a spectacular dessert” – Baking Experts

Best Storage Practices for Freshness

To keep your cake moist and flavorful, follow these storage tips:

  • Store at room temperature in an airtight container
  • Use plastic wrap to cover unfrosted layers
  • Refrigerate if using cream-based frostings
  • Consume within 3-4 days for optimal taste

To store longer, freeze cake layers wrapped in plastic wrap and foil. Thaw at room temperature for the best German chocolate cake.

Making the Classic Coconut-Pecan Frosting

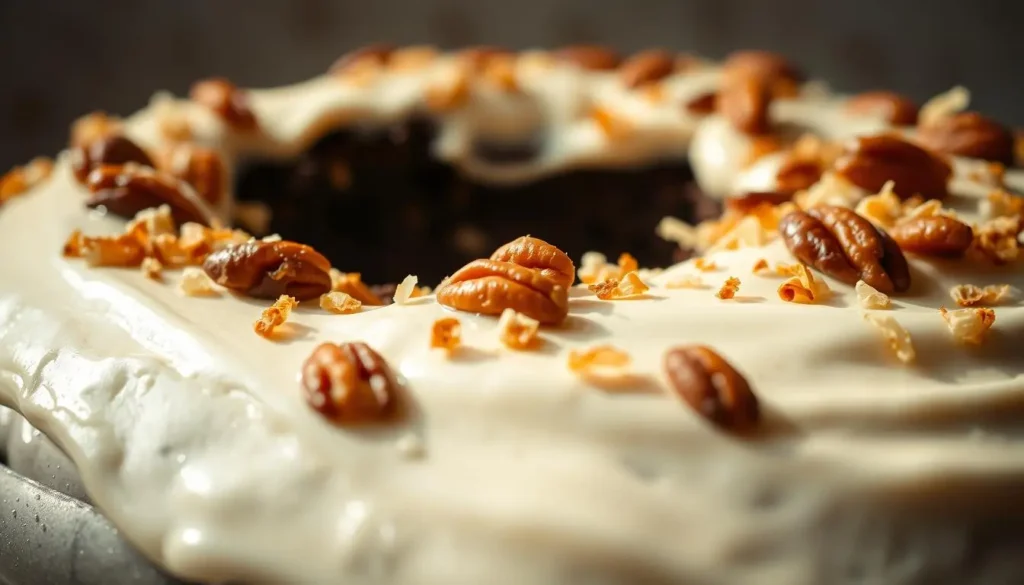
The heart of an authentic German chocolate cake is its legendary coconut-pecan frosting. This rich, decadent topping turns an ordinary cake into a traditional German chocolate cake recipe. It will impress even the most discerning dessert lovers.

Creating the perfect frosting requires attention to detail and quality ingredients. Let’s dive into the essential components that make this frosting truly special.

Essential Ingredients for Coconut-Pecan Frosting

  • 1 cup evaporated milk
  • 1 cup granulated sugar
  • 3 egg yolks
  • 1/2 cup unsalted butter
  • 1 teaspoon vanilla extract
  • 1 1/3 cups shredded coconut
  • 1 cup chopped pecans

Cooking and Mixing Techniques

The key to an exceptional coconut-pecan frosting is careful preparation. Start by combining milk, sugar, egg yolks, and butter in a medium saucepan. Cook the mixture over medium heat, stirring constantly to prevent burning.

Continue cooking until the mixture thickens and turns a golden caramel color, typically about 12-15 minutes. Remove from heat and stir in vanilla extract, shredded coconut, and chopped pecans. Allow the frosting to cool and thicken before spreading on your authentic German chocolate cake.

Pro tip: Let the frosting cool completely for the best spreading consistency!

Your homemade coconut-pecan frosting will elevate your traditional German chocolate cake recipe from good to absolutely unforgettable.

Assembling Your German Chocolate Cake

Making a stunning homemade German chocolate cake needs precision and careful assembly. The cake’s look depends on how well you layer and frost each part. The right techniques can turn a simple dessert into a show-stopper that pleases both the eyes and taste buds.

To assemble your easy German chocolate cake, follow these key steps for a professional look:

  • Let cake layers cool completely before putting them together
  • Put the first layer on a strong cake stand
  • Use a rotating cake turntable for smooth frosting
  • Apply a thin crumb coat to keep in loose cake particles

Precision Layering Techniques

Start by trimming cake layers to make them even. Precision is key when stacking your homemade German chocolate cake. Use a long serrated knife to level each layer, making sure they’re stable and look clean.

Frosting for a Flawless Finish

The coconut-pecan frosting should be spreadable but not too runny. Spread lots between layers for a rich and indulgent cake that looks as good as it tastes. Use an offset spatula for smooth, even coverage.

  • Start with a generous center layer of frosting
  • Gently press next cake layer on top
  • Spread frosting from center to edges
  • Create decorative swirls on top for visual appeal

With these techniques, you’ll make a German chocolate cake that will wow family and friends.

Decorating Your Cake

Creating a stunning german chocolate cake from scratch is more than just baking. The final decoration turns your cake into a masterpiece that pleases both the eyes and taste buds.

Decorating your cake lets you show off your creativity and make it look amazing. Whether you’re new to baking or have lots of experience, these decoration tips will make your dessert stand out.

Simple Decorating Ideas

Here are some easy ways to decorate your cake:

  • Sprinkle toasted coconut flakes around the cake’s edges
  • Arrange pecan halves in decorative patterns
  • Create chocolate shavings for elegant garnishing
  • Use a piping bag to add elegant frosting borders

Using Edible Decorations

Edible decorations not only make your cake look better but also add to its flavor.

Decoration TypeTechniqueVisual Impact
Chocolate CurlsUse a vegetable peeler on chocolate barSophisticated and elegant
Toasted CoconutLightly toast in skillet before sprinklingAdds texture and golden color
Pecan PiecesChop and scatter on cake topRustic and delicious appearance

The goal is to make a german chocolate cake that looks and tastes incredible. Feel free to try new things and show off your style!

Serving Suggestions

Your authentic German chocolate cake deserves a perfect presentation. This will highlight its rich flavors and delightful texture. Whether it’s for a dinner party or a quiet dessert at home, these tips will help you present your cake with style and sophistication.

Perfect Drink Pairings

Choosing the right drink can make your cake experience even better. Here are some tasty drink options:

  • Rich, dark coffee to complement the chocolate
  • Smooth vanilla-infused cold milk
  • Sweet dessert wines like Port or Moscato
  • Warm chai tea with subtle spices

Elegant Presentation Ideas

Turn your German chocolate cake into a visual masterpiece with these presentation tips:

  1. Use a decorative cake stand for height and drama
  2. Garnish with fresh berries or mint leaves
  3. Dust with powdered sugar for an elegant touch
  4. Create artistic plate designs using chocolate drizzles
OccasionPresentation StyleRecommended Garnish
Dinner PartyElegant platingChocolate shavings
BirthdayDecorative cake standCandles
Casual GatheringRustic servingFresh berries

“A great dessert is not just about taste, but about creating a memorable experience.” – Pastry Chef Legacy

With these serving suggestions, your German chocolate cake will be the star of any occasion. It will delight guests with its exquisite flavor and stunning presentation.

Healthier Alternatives and Modifications

Making a healthier version of a traditional german chocolate cake is easy. You can swap ingredients to make it more nutritious. This way, you can enjoy a sweet treat without feeling guilty.

For those who care about their health, there are smart ways to make their favorite cake better. You can do this without losing the delicious taste.

Whole Wheat Flour Substitution

Switching to whole wheat flour makes your cake healthier. Here are some tips:

  • Try mixing 50% whole wheat flour with 50% all-purpose flour
  • Use white whole wheat flour for a lighter texture
  • Expect a denser cake with more fiber

Sugar and Oil Alternatives

Changing sugar and oil can make your cake healthier:

IngredientHealthy SubstitutionBenefit
Granulated SugarCoconut SugarLower glycemic index
Vegetable OilUnsweetened ApplesauceReduced calorie content
Brown SugarStevia or Monk Fruit SweetenerZero-calorie options

Remember, small changes can make a big difference in your cake’s health benefits. You can still enjoy its delicious taste.

Troubleshooting Common Issues

Baking an easy German chocolate cake from scratch can sometimes present unexpected challenges. Even experienced bakers encounter occasional hiccups that can impact the texture and taste of their delicious dessert. Understanding how to address these common problems will help you create a perfect German chocolate cake every time.

When making a German chocolate cake from scratch, you might encounter two primary issues that can frustrate even seasoned bakers:

Solving Dry Cake Dilemmas

A dry cake can ruin the entire baking experience. Here are expert solutions to keep your cake moist and delectable:

  • Measure ingredients precisely using kitchen scales
  • Avoid overbaking by checking cake doneness early
  • Use room temperature ingredients for better integration
  • Consider adding sour cream or buttermilk to increase moisture

Fixing Frosting Consistency Problems

The signature coconut-pecan frosting can be tricky. When your frosting refuses to thicken, try these professional techniques:

  • Cook the frosting on low heat, stirring constantly
  • Ensure egg yolks are tempered correctly
  • Let the frosting cool completely before spreading
  • Use fresh ingredients at proper temperatures

With these troubleshooting tips, your easy German chocolate cake will turn out perfect every single time!

Final Thoughts on German Chocolate Cake

Making the best German chocolate cake is more than just following a recipe. It’s about creating a dessert that people will remember. Your journey shows how simple ingredients can turn into a rich, decadent treat that everyone loves.

This German chocolate cake recipe is a mix of tradition and creativity. Every step, from choosing the best chocolate to layering the frosting, helps you grow as a baker. With practice, even small changes can make your cake amazing.

Why This Recipe is a Must-Try

This German chocolate cake is special because of its mix of textures and flavors. The moist chocolate and the caramel-like frosting make it a treat for the senses. Mastering this recipe will impress your friends and family, and connect you with a beloved tradition.

Encouragement for Baking Enthusiasts

Whether you’re new to baking or have been doing it for years, this recipe is for you. Don’t be scared of the steps—embrace them, learn, and enjoy the tasty outcome. Your baking journey is about passion, creativity, and sharing sweet moments with those you love.

FAQ

Is German chocolate cake actually from Germany?

No, German chocolate cake isn’t from Germany. It was named after Samuel German, an American baker. He created a dark baking chocolate for Baker’s Chocolate Company in the mid-1800s. The cake recipe was first published in a Dallas newspaper in 1957 and became popular across the United States.

What makes German chocolate cake different from other chocolate cakes?

Its unique coconut-pecan frosting is cooked and has a caramel-like texture. Unlike other chocolate cakes, German chocolate cake uses a lighter, sweeter chocolate. It also has a rich, gooey frosting that’s spread between layers and on top of the cake.

Can I make German chocolate cake if I’m not an experienced baker?

Absolutely! The recipe might seem complex, but it’s achievable for bakers of all skill levels. By following step-by-step instructions and preparing your ingredients in advance, you can make a delicious German chocolate cake at home.

How long does German chocolate cake stay fresh?

When stored properly in an airtight container at room temperature, your cake will stay fresh for 3-4 days. If refrigerated, it can last up to a week. Just be sure to bring it to room temperature before serving to restore its optimal texture and flavor.

Can I make this cake gluten-free?

Yes, you can adapt the recipe by using gluten-free all-purpose flour blend in place of regular flour. Make sure to check that all other ingredients, including baking powder and chocolate, are also gluten-free to ensure a safe alternative for those with gluten sensitivities.

What type of chocolate works best for German chocolate cake?

Use sweet baking chocolate or German’s Sweet Chocolate (if available). If you can’t find it, you can substitute with a combination of semi-sweet chocolate and a bit of sugar. High-quality chocolate will significantly improve your cake’s flavor.

How can I prevent my cake from becoming dry?

To keep your cake moist, avoid overmixing the batter, don’t overbake, and consider adding ingredients like buttermilk or sour cream. Check your cake a few minutes before the recommended baking time and use the toothpick test to ensure it doesn’t dry out.

Can I freeze German chocolate cake?

Yes, you can freeze German chocolate cake. Wrap the cake layers or fully assembled cake tightly in plastic wrap and then in aluminum foil. It can be frozen for up to 2-3 months. Thaw overnight in the refrigerator before serving, and let it come to room temperature for the best taste and texture.

0 comments
1 FacebookTwitterPinterestEmail
Healthy Asian Recipes

Healthy Asian Recipes to Tantalize Your Taste

Serves: 4 Prep Time: Cooking Time:
Nutrition facts: 350 calories 10 grams fat
Rating: 5.0/5
( 1 voted )

Ingredients

  • 2 tablespoons olive oil
  • 1 pound chicken breast, sliced
  • 2 cups broccoli florets
  • 1/2 cup sliced bell peppers
  • 1/2 cup carrots, julienned
  • 1 tablespoon soy sauce
  • 1 tablespoon hoisin sauce
  • 1 teaspoon ginger, minced
  • 1 teaspoon garlic, minced
  • 1 tablespoon sesame oil
  • 1 teaspoon chili paste (optional)
  • Salt and pepper to taste

Instructions

Heat olive oil in a large skillet or wok over medium-high heat. Add chicken breast slices and cook until browned and cooked through, about 5-7 minutes. Remove the chicken from the skillet and set aside. In the same skillet, add broccoli, bell peppers, and carrots. Stir-fry for about 3-4 minutes until vegetables are slightly tender. Add soy sauce, hoisin sauce, ginger, garlic, sesame oil, and chili paste (if using). Stir to coat the vegetables evenly. Return the cooked chicken to the skillet, toss everything together, and cook for an additional 2 minutes. Season with salt and pepper to taste before serving. Serve over brown rice or noodles for a complete meal.

Notes

You can substitute tofu for chicken for a vegetarian version of this dish. Adjust the chili paste amount to your preferred spice level.

Are you ready to turn your kitchen into a vibrant place? Healthy Asian recipes offer a journey of flavor and nutrition. They take you beyond traditional Western cooking.

Delicious Asian cuisine is more than just taste. It’s about eating fresh, balanced, and using old cooking techniques. From Bangkok’s markets to Tokyo’s kitchens, these recipes are full of wisdom.

This guide will show you how to make tasty, healthy meals. Whether you’re an experienced cook or just starting, you’ll learn to make dishes that are good for you.

Key Takeaways

  • Discover authentic Asian cooking techniques
  • Learn about nutritious ingredients
  • Explore flavor-packed healthy recipes
  • Understand the health benefits of Asian cuisine
  • Master simple cooking methods

Introduction to Healthy Asian Cuisine

Asian cuisine offers a unique way to make your meals healthier. Countries like Japan, China, and Thailand have dishes that are tasty and good for you.

Looking into popular Asian ingredients shows a wealth of health benefits. These cuisines focus on fresh, whole foods. They add a lot of flavor and health benefits to your meals.

Benefits of Eating Asian Foods

Asian foods have many health benefits:

  • Low in saturated fats
  • Rich in plant-based proteins
  • High in essential nutrients
  • Promotes balanced eating

Traditional cooking methods like steaming and quick stir-frying keep nutrients in your food. These methods use less oil but keep lots of flavor and nutrients.

Key Ingredients in Healthy Asian Dishes

Knowing the main ingredients of Asian cooking can change your eating habits. Key ingredients include:

  1. Tofu – a versatile protein source
  2. Seaweed – packed with minerals
  3. Ginger – supports digestion
  4. Brown rice – complex carbohydrates

Adding these ingredients to your meals opens up a world of tasty, healthy dishes. They nourish your body and soul.

Flavorful Appetizers to Start Your Meal

Start your meal with tasty Asian appetizers that are easy and quick. These starters will make your taste buds dance and prepare you for a great meal. They are full of flavor and good for you, showing that healthy food can be super tasty.

Appetizers are key when making quick meals. They set the mood for your meal. Here are some simple, healthy options to start your meal.

Vegetable Spring Rolls

These spring rolls are a healthier version, packed with veggies. To make them, use:

  • Rice paper wrappers for a crunchy texture
  • Fresh carrots, cucumber, and bell peppers
  • Fresh herbs like mint and cilantro
  • A light dipping sauce

Edamame with Sea Salt

Edamame is a protein-rich snack from Asia. Just steam or boil the pods and sprinkle with sea salt. It’s a quick, healthy snack.

Nutrition FactsPer 1/2 Cup Serving
Protein8 grams
Calories120
Fiber5 grams

Spicy Korean Cucumber Salad

This salad adds a spicy kick to your meal. Thinly sliced cucumbers in a spicy dressing make a refreshing starter. It’s light and full of flavor.

  • Slice cucumbers into thin rounds
  • Mix with gochugaru (Korean red pepper flakes)
  • Add rice vinegar and sesame oil
  • Garnish with green onions

These appetizers show how easy it is to make healthy, tasty dishes. With little prep, you can impress everyone with your starters.

Wholesome Rice and Grain Dishes

Make your meals healthier with grain dishes that add authentic Asian flavors. Rice and grains are key in many Asian dishes. They offer tasty and nutritious options that can change how you eat.
Trying whole grain versions of Asian recipes is exciting. These dishes are not only delicious but also good for you. They help you stay healthy while enjoying tasty meals.

Quinoa Fried Rice: A Protein-Packed Twist

Make fried rice healthier with quinoa. This gluten-free grain adds protein to your meal. It keeps the taste and texture of traditional fried rice.

  • Use white quinoa for a lighter texture
  • Add colorful vegetables for extra nutrition
  • Season with low-sodium soy sauce

Coconut Brown Rice: Creamy and Nutritious

Add coconut milk to your rice for a creamy side dish. Brown rice is full of complex carbs and nutrients. It’s great for those who care about their health.

“Cooking is about passion, and that passion shines through in every grain of rice.” – Unknown Chef

Sushi Brown Rice Bowl: Deconstructed Dining

Make a sushi bowl with brown rice as the base. It lets you pick your favorite ingredients. Add fresh fish, avocado, and veggies for a full meal.

Pro tip: Try different proteins to keep your meals interesting and healthy.

Nutritious Soups for Every Season

Explore traditional Asian recipes that warm your heart and nourish your body. Nutritious Asian cooking offers a wide range of soups for any season. These dishes mix amazing flavors with health benefits, making them key to a balanced diet.

Asian soups are more than food – they’re healing. Each recipe uses ingredients that boost wellness. From light broths to hearty soups, they offer vital nutrients and comfort.

Miso Soup with Tofu and Seaweed

Miso soup is a classic in nutritious Asian cooking. It offers great health benefits. This traditional recipe includes:

  • Fermented miso paste rich in probiotics
  • Soft tofu for protein
  • Nutrient-packed seaweed
  • Low-calorie, high-flavor profile

Hot and Sour Soup

This soup is packed with ingredients that boost your immune system. It has a perfect mix of heat and tanginess. Mushrooms, bamboo shoots, and lean proteins make it a powerful wellness-promoting dish.

Thai Coconut Chicken Soup

This Thai-inspired soup is your ultimate comfort food. It’s creamy, with lean chicken, lemongrass, and ginger. It warms your soul and supports your health with every spoonful.

Satisfying Stir-Fry Recipes

Stir-fry cooking is a quick and nutritious way to make meals. It turns simple ingredients into tasty, healthy dishes. These recipes are perfect for a busy weeknight dinner.

Stir-frying is an art that cooks food fast with high heat. This method keeps nutrients in and makes food delicious. The secret to a great stir-fry is in how you prepare and cook it.

Beef and Broccoli Stir-Fry

This classic dish is a mix of lean beef and green broccoli. Slice the beef thinly and marinate it for extra flavor. Here are the main ingredients:

  • Lean beef strips
  • Fresh broccoli florets
  • Garlic and ginger
  • Low-sodium soy sauce

Tofu and Vegetable Stir-Fry

This dish is a tasty, plant-based option. Extra-firm tofu adds protein, while colorful veggies add nutrition and look great.

IngredientProtein (g)Calories
Extra-firm Tofu1094
Mixed Bell Peppers130
Zucchini220

Kung Pao Chicken with Cashews

This stir-fry is a healthier version of a favorite dish. It combines spicy chicken and crunchy cashews. The mix of protein, veggies, and zesty sauce is sure to excite your taste buds.

Tip for home cooks: Keep your wok or skillet very hot. Move ingredients fast to get that perfect stir-fry sear without losing nutrients.

Delicious Healthy Noodle Dishes

Noodle lovers rejoice! Healthy Asian recipes don’t mean you have to give up flavor or satisfaction. Easy Asian dishes can turn traditional noodle meals into nutritious adventures that excite your taste buds and support your health goals.

Exploring different noodle options opens a world of tasty and healthy possibilities. These dishes show that eating healthy can be both fun and delicious.

Zoodles with Peanut Sauce

Zucchini noodles are a low-carb option full of nutrients. Turn your favorite pasta dish into a light, fresh experience by spiralizing zucchini. Then, top it with a rich, creamy peanut sauce.

  • Quick and easy to prepare
  • Gluten-free option
  • High in vitamins and minerals

Whole Wheat Chicken Chow Mein

Make the classic chow mein healthier by using whole wheat noodles and lean protein. This version of healthy Asian recipes adds extra fiber and energy. It keeps the flavors you love.

“Nutrition meets tradition in every delicious bite!” – Chef Anna Lee

Soba Noodles with Sesame Dressing

Buckwheat soba noodles add a nutty flavor and impressive nutrition to your dishes. Dressed with a light sesame vinaigrette, they offer protein, antioxidants, and a great texture.

  • Rich in protein
  • Supports heart health
  • Quick cooking time

Flavorful Asian-Inspired Salads

Explore the world of delicious Asian cuisine with vibrant salads. These dishes turn your meal into a nutritious adventure. They mix crisp textures, bold flavors, and health benefits, changing how you eat.

Asian-inspired salads are a perfect mix of nutrition and taste. Each recipe uses unique ingredients for flavor and nutrition. Let’s look at three standout salads that will make your meals better.

Thai Beef Salad with Lime Dressing

This salad is packed with protein and zingy flavor. It has tender beef and a bright lime dressing. The key ingredients are:

  • Grilled lean beef strips
  • Fresh herbs like mint and cilantro
  • Crisp mixed greens
  • Tangy lime juice

Vietnamese Noodle Salad

This salad is perfect for hot days. It’s light yet satisfying, with rice noodles and fresh veggies. It’s cool and refreshing, great for summer.

  • Rice vermicelli noodles
  • Julienned vegetables
  • Aromatic herbs
  • Nuoc cham dressing

Asian Cabbage Salad

This salad is crunchy and nutritious. It celebrates fermented ingredients and bold flavors. The cabbage adds texture and health benefits.
IngredientNutritional Benefit
Napa CabbageHigh in Vitamin K
KimchiProbiotic Support
Sesame SeedsHealthy Fats

These salads show the amazing variety of Asian cuisine. They prove healthy eating can be incredibly delicious. This happens when you use fresh ingredients and bold flavors.
Low-Calorie Meat and Seafood Options

Healthy Asian recipes don’t have to be boring. Lean proteins with authentic Asian flavors can make your meals exciting. These options show that eating well can also be tasty.

When cooking proteins, choose methods that boost flavor without adding calories. Grilling, steaming, and quick stir-frying are great. They help keep your food nutritious and delicious.

Teriyaki Salmon with Asparagus

Salmon is a great choice for a heart-healthy protein, full of omega-3s. This dish combines teriyaki sauce with grilled salmon and asparagus. Here are some tips:

  • Use low-sodium teriyaki sauce
  • Grill salmon at high heat for crispy edges
  • Pair with steamed asparagus for added nutrition

Ginger Garlic Shrimp

Ginger garlic shrimp is quick, flavorful, and light. It’s a perfect example of authentic Asian flavors. It’s great for a fast dinner on a busy night.

Lemon Herb Grilled Chicken

Grilled chicken is a great base for Asian-inspired flavors. Marinate it in lemon, herbs, and light soy sauce. This makes it a great match for many side dishes.

Pro tip: Always let meats rest after cooking to retain moisture and enhance flavor.

Health-Conscious Side Dishes

Side dishes are key to making your Asian-inspired meals complete. They add balance and nutrition to your meals. These dishes use popular Asian ingredients to make veggies taste amazing.

Vegetables are full of nutrients that boost your meal’s health. With a little creativity, you can make ordinary veggies into tasty side dishes. These dishes will enhance your main course.

Asian Roasted Brussels Sprouts

Brussels sprouts get a tasty makeover with an Asian twist. Roasting them brings out their sweetness and adds a crispy texture. A mix of sesame oil, soy sauce, and garlic turns them into a favorite dish.

  • Crisp and caramelized texture
  • Rich in vitamins and minerals
  • Quick and easy preparation

Sautéed Bok Choy

Bok choy is a top Asian ingredient that adds nutrition and flavor. It cooks fast in a hot wok, keeping its crisp texture. A sauté with garlic and ginger makes it a simple yet elegant side.

Sesame Garlic Green Beans

Green beans get a special touch with an Asian cooking method. Stir-frying them and adding a toasted sesame and garlic sauce makes them crunchy and flavorful. They pair well with any main dish.

Side DishPreparation TimeKey Nutrients
Roasted Brussels Sprouts20 minutesVitamin K, Fiber
Sautéed Bok Choy10 minutesVitamin C, Calcium
Sesame Garlic Green Beans15 minutesVitamin A, Iron

These side dishes show that healthy eating can be easy and tasty. By using creative cooking and bold flavors, you can make veggies into exciting dishes. These dishes support your health goals.

Delectable Sauces and Condiments

Take your homemade Asian dishes to the next level with homemade sauces and condiments. Making your own allows you to pick the ingredients, cut down on salt, and discover amazing flavors. This turns simple meals into unforgettable dishes.

When you make sauces from scratch, you control what goes into them. These condiments can make your cooking much better. They add depth and excitement to all sorts of dishes.

Homemade Soy Sauce Alternatives

Regular soy sauce has a lot of sodium. But, you can make healthier versions that still taste great:

  • Coconut aminos: A lower-sodium option with a slightly sweet taste
  • Liquid amino acids: Protein-rich alternative with reduced salt content
  • Mushroom-based sauce: Creates deep, savory flavor profiles

Spicy Szechuan Sauce

This sauce is hot and full of complex flavors. It’s perfect for adding excitement to your meals. The main ingredients are:

  1. Dried chilies
  2. Garlic
  3. Ginger
  4. Sichuan peppercorns
  5. Rice vinegar

Ginger Scallion Sauce

This sauce is fresh and aromatic. It’s great for adding flavor to meats, veggies, and noodles. Blend fresh ginger, scallions, oil, and salt for an instant flavor boost that captures authentic Asian tastes in minutes.

Pro tip: Experiment with ingredient ratios to create your perfect sauce blend!

Desserts Inspired by Asia

Exploring traditional Asian recipes doesn’t mean you have to skip dessert. Delicious Asian cuisine offers healthier dessert options that are tasty and nutritious. These treats turn classic desserts into wholesome indulgences that are both satisfying and good for you.

Asian desserts are famous for their unique flavors and innovative ingredients. They often use natural sweeteners and nutrient-rich components, making them a guilt-free pleasure.

Mango Sticky Rice: A Fruity Delight

This classic Thai dessert has a health-conscious twist. It uses brown rice instead of white, adding more fiber. Fresh mangoes add natural sweetness and essential vitamins.

  • Low-glycemic brown rice base
  • Fresh mango for natural sweetness
  • Minimal added sugar

Matcha Green Tea Ice Cream: Antioxidant Frozen Treat

Matcha ice cream is a modern twist on traditional desserts. It’s packed with antioxidants, offering a refreshing and beneficial treat.

IngredientNutritional Benefit
Matcha PowderHigh in Antioxidants
Low-fat MilkCalcium and Protein
Natural SweetenerReduced Sugar Content

Coconut Tapioca Pudding: Creamy and Dairy-Free

This dairy-free dessert shows the versatility of Asian recipes. Coconut milk makes it creamy, while tapioca pearls add a fun chewiness. It’s a great choice for a lighter, nutritious dessert.

By trying these Asian desserts, you’ll find a world of flavors that are healthy. Each recipe offers a unique way to satisfy your sweet tooth while giving you important nutrients.

Meal Prep Tips for Healthy Asian Cooking

Preparing quick Asian meals doesn’t have to be hard or take a lot of time. With the right tips, you can make your kitchen a place for fast, healthy, and tasty dishes.

Learning to prepare meals well is crucial for a healthy diet, even when you’re busy. Here are some tips to make cooking easier and enjoy tasty Asian meals without much effort every day.

Batch Cooking Essentials

Batch cooking is a great way to make quick Asian meals. Here are some tips to make meal planning easier:

  • Prepare big batches of rice and grains at the start of the week
  • Chop veggies ahead of time and keep them in sealed containers
  • Make versatile sauces that can be used in many dishes

Effective Ingredient Storage

Storing ingredients right keeps your dishes fresh and ready to go:

  • Get airtight containers for pantry items like rice and noodles
  • Keep fresh herbs in water to make them last longer
  • Use vacuum-sealed bags for marinated meats

Quick-Prep Techniques for Busy Weeknights

Make your weeknight cooking faster with these tips:

  • Use a rice cooker or instant pot for easy grain cooking
  • Keep pre-cut proteins and veggies in the freezer
  • Have a list of 30-minute meal recipes

With these strategies, you can enjoy healthy, tasty Asian food without spending hours cooking.

Conclusion: Embracing a Healthy Asian Lifestyle

Exploring healthy Asian recipes is a culinary adventure. It’s more than just cooking—it’s a journey into diverse cooking techniques. These techniques can change your diet and improve your health.

Nutritious Asian cooking lets you see food in a new light. You can make tasty meals with fresh veggies, lean proteins, and whole grains. The recipes in this guide are flexible, so you can make them your own.

Encouragement to Experiment with Recipes

Begin with one or two recipes that catch your eye. Feel free to change ingredients based on what you have. Cooking is all about trying new things, and Asian cuisine is a great place to start.

Resources for Learning More About Asian Cuisine

Keep learning by checking out cookbooks by chefs like Martin Yan or Andrea Nguyen. Websites like The Wok and Serious Eats have lots of tutorials and recipes. They can help you explore Asian cooking even more.

FAQ

Are Asian recipes really healthy?

Yes, many Asian recipes are healthy. They use lean proteins, lots of vegetables, and cooking methods that keep nutrients in. Traditional Asian foods often use whole foods, fermented items, and little processed stuff. This makes them great for healthy meals.

What are the key ingredients in healthy Asian cooking?

Important ingredients include tofu, brown rice, seaweed, and fresh veggies. Lean proteins like chicken and fish, and herbs like ginger and garlic are also key. These items are full of nutrients, low in calories, and offer many health benefits.

Can I make Asian recipes if I’m not an experienced cook?

Absolutely! Many Asian recipes are easy and quick to make. With basic cooking skills and a bit of practice, you can make tasty and healthy Asian dishes. Start with simple stir-fries, salads, and one-pot meals to get better.

How can I reduce sodium in Asian recipes?

To cut down on sodium, use low-sodium soy sauce, fresh herbs, homemade sauces, and less pre-packaged mixes. Using fresh ingredients and controlling your seasoning helps keep sodium low while keeping the flavors true to Asian cuisine.

Are Asian recipes suitable for special diets?

Yes, most Asian recipes can be made for different diets. You can find vegetarian, vegan, gluten-free, and low-carb options in Asian cooking. Just swap out ingredients to fit your dietary needs.

What cooking techniques are common in healthy Asian cooking?

Healthy Asian cooking often uses steaming, stir-frying, poaching, and grilling. These methods use little oil, keep nutrients in, and let ingredients’ natural flavors and textures shine.

How can I stock a pantry for Asian cooking?

You’ll need rice, soy sauce, sesame oil, rice vinegar, ginger, garlic, dried seaweed, tofu, and spices. Having these basics ready makes cooking Asian meals fast and easy.

Can Asian recipes help with weight management?

Yes, many Asian recipes are low in calories but high in nutrients. They often have balanced portions, lots of veggies, lean proteins, and complex carbs. This can help with weight management and give you lasting energy.

0 comments
0 FacebookTwitterPinterestEmail
Chicken Tacos

Easy Chicken Tacos: A Flavorful Meal

by IDYA
Chicken Tacos

Easy Chicken Tacos: A Flavorful Meal

Serves: 4 Prep Time: Cooking Time:
Nutrition facts: 250 calories 12 grams fat
Rating: 5.0/5
( 1 voted )

Ingredients

  • 1 lb boneless, skinless chicken breasts
  • 1 tablespoon olive oil
  • 1 teaspoon ground cumin
  • 1 teaspoon chili powder
  • 1/2 teaspoon garlic powder
  • 1/2 teaspoon onion powder
  • Salt and pepper, to taste
  • 8 small corn or flour tortillas
  • 1/2 cup diced onion
  • 1/2 cup chopped cilantro
  • 1 lime, cut into wedges
  • 1/2 cup salsa
  • 1/2 cup shredded cheese (optional)
  • 1/4 cup sour cream (optional)

Instructions

Heat olive oil in a skillet over medium heat. Season chicken breasts with cumin, chili powder, garlic powder, onion powder, salt, and pepper. Add chicken to the skillet and cook for 6-7 minutes per side, or until the chicken is cooked through and has an internal temperature of 165°F. Remove from skillet and let rest for a few minutes. While the chicken is resting, warm tortillas in a dry skillet or microwave for 20-30 seconds. Shred the cooked chicken using two forks, then divide evenly between the warm tortillas. Top each taco with diced onion, chopped cilantro, salsa, shredded cheese, and sour cream, if desired. Serve the tacos with lime wedges on the side for squeezing.

Notes

Feel free to customize these tacos with your favorite toppings such as avocado, jalapeños, or hot sauce. You can also use ground chicken or turkey as a substitute for the chicken breasts.

Ever thought of turning a simple dinner into a flavor fiesta? Chicken tacos are your answer. This easy recipe is a game-changer for anyone looking for tasty, quick meals.

Chicken tacos are more than food; they’re a blank canvas for your creativity. They’re great for family dinners or casual get-togethers. This recipe is perfect for both busy people and cooking enthusiasts, offering a mix of simplicity and flavor.

Imagine whipping up a delicious meal in under 30 minutes, like a pro. This easy chicken taco recipe makes it possible. It brings authentic Mexican flavors to your table with little effort.

Key Takeaways

  • Chicken tacos are quick and easy to prepare
  • Perfect for family dinners and casual gatherings
  • Versatile recipe that allows for personal customization
  • Requires minimal cooking skills
  • Provides a delicious and satisfying meal

Introduction to Chicken Tacos

Chicken tacos are a fun and tasty meal that can spice up your dinner. They mix great flavors, health benefits, and ease, perfect for a quick, fulfilling meal. They’re a hit with families and food lovers who want a balanced, delicious dinner.

Choosing chicken as your main protein is smart. It’s lean and great for making healthy, customizable tacos.

Why Chicken Tacos Are a Great Choice

Chicken tacos are a top pick for many reasons:

  • They’re quick to make
  • They can be flavored in many ways
  • They fit various diets
  • They’re easy on the wallet

Nutritional Benefits of Chicken Tacos

Healthy chicken tacos are a nutritious choice. They combine protein-rich chicken, fresh veggies, and whole grain tortillas. This mix offers a balanced meal full of important nutrients.

The key nutritional points of chicken tacos are:

  • High protein content for muscle health
  • Room for lots of veggies
  • Chance to add fiber-rich foods
  • They can be low-calorie if made carefully

Understanding chicken tacos’ versatility and health benefits lets you make them a nutritious, satisfying meal.

Essential Ingredients for Chicken Tacos

Making tasty chicken tacos begins with picking the right stuff. Knowing what’s key helps you make a meal that’s a hit. From the chicken to the seasoning, each part is important.

Chicken: Types to Choose

For chicken taco ingredients, you have many tasty choices:

  • Chicken Breast: Lean and versatile
  • Chicken Thighs: More flavorful and tender
  • Rotisserie Chicken: Quick and convenient option
  • Grilled Chicken: Adds smoky flavor

Essential Spices and Seasonings

Your chicken taco seasoning makes a big difference. A great mix usually has:

  • Chili powder
  • Cumin
  • Paprika
  • Garlic powder
  • Oregano
  • Salt and pepper

Toppings to Enhance Flavor

Chicken taco toppings make the meal unforgettable. Here are some classic and creative choices:

  • Fresh cilantro
  • Diced onions
  • Shredded cheese
  • Lime wedges
  • Sour cream
  • Avocado slices
  • Salsa or pico de gallo

By mixing and matching these, you can make your tacos just how you like them. It’s a way to make your meal special and tailored to your taste.

Preparing the Chicken

Creating delicious chicken tacos begins with the right chicken. The perfect chicken taco marinade can turn a simple meal into a memorable experience. Your choice of preparation and cooking method greatly affects the flavor and texture of your tacos.

Before cooking, it’s important to understand marinating. A great marinade adds depth and excitement to your dish. It infuses the meat with vibrant flavors that will delight your taste buds.

Mastering the Chicken Taco Marinade

A top-notch chicken taco marinade includes:

  • Citrus juice (lime or orange)
  • Olive oil
  • Garlic
  • Chili powder
  • Cumin
  • Paprika

Marinate your chicken for at least 30 minutes, but no more than 2 hours. Overmarinating can make the meat tough and break down its texture.

Cooking Methods: Grilling vs. Baking Chicken Tacos

For baked chicken tacos, you have two main cooking methods:

Cooking MethodProsCons
GrillingSmoky flavor, crispy exteriorRequires outdoor grill, weather-dependent
BakingConsistent cooking, easy cleanupLess charred flavor

Baked chicken tacos are a great option when grilling isn’t possible. Preheat your oven to 375°F. Bake marinated chicken for 20-25 minutes until it’s fully cooked.

Pro tip: Always use a meat thermometer to ensure your chicken reaches an internal temperature of 165°F for safe consumption.

Making the Taco Shells

Chicken taco shells are key to a tasty meal. The right shell can greatly improve your chicken tacos’ taste and texture.

Trying out different chicken taco shells can open up new flavors. Your taco’s whole character can change with the right shell.

Exploring Shell Varieties

There are many exciting chicken taco shells to choose from:

  • Corn tortillas (traditional Mexican-style)
  • Flour tortillas (softer and more flexible)
  • Hard corn shells (crispy texture)
  • Lettuce wraps (low-carb alternative)

Crafting Homemade Taco Shells

Making your own chicken taco shells is simple. A few basic steps can make your tacos better at home.

Shell TypePreparation MethodDifficulty Level
Corn TortillasWarm on skillet, fold while softEasy
Flour TortillasGrill or toast quicklyEasy
Crispy Hard ShellsDrape over oven rack, bake until crispModerate

Pro tip for perfect chicken taco shells: Always warm your tortillas before filling. This makes them more flexible and flavorful. For corn tortillas, a quick 30-second warm-up on a hot skillet is crucial.

The secret to great chicken taco shells is in the preparation and love you put into each step.

Assembling Your Chicken Tacos

Making the perfect chicken taco is an art. It’s more than just mixing ingredients. The right way to put them together can make a big difference. Learning how to layer your toppings will make your tacos unforgettable.

Your toppings should mix flavors and textures well. Start with a warm tortilla. Then, layer your ingredients to get the most taste in each bite.

Layering for Maximum Flavor

The secret to amazing chicken tacos is in how you layer them. Here’s the best order:

  • Warm tortilla base
  • Seasoned chicken
  • Moisture-rich ingredients (salsa, guacamole)
  • Crunchy toppings
  • Fresh herbs or greens
  • Cheese

Creative Combinations of Toppings

Try new toppings to make your tacos unique. Here are some ideas:

  • Citrus-Inspired: Pickled red onions, orange segments, fresh cilantro
  • Smoky Southwest: Roasted corn, chipotle crema, crushed tortilla chips
  • Fresh Mediterranean: Cucumber, feta cheese, mint leaves

“The right toppings can turn a simple chicken taco into a culinary masterpiece.” – Professional Chef

Remember, the secret to great toppings is balance. Don’t be shy to try new things and make it your own!

Exploring different chicken tacos recipe variations can make your meal special. Each variation adds unique flavors and exciting twists to the classic chicken taco. This lets you customize your dining experience.

Chicken tacos are very versatile, making them great for creative cooking. Your taste buds will love these delicious variations that add fun to your kitchen.

Spicy Chicken Tacos

Spicy chicken tacos are perfect for those who like a little heat. Start with a strong chicken tacos recipe. Then, add these ingredients to increase the spice:

  • Chipotle peppers in adobo sauce
  • Cayenne pepper
  • Habanero hot sauce
  • Jalapeño peppers

BBQ Chicken Tacos

BBQ chicken tacos mix smoky, sweet flavors with taco basics. Choose a top-notch BBQ sauce and marinate the chicken for the best taste. Pro tip: Grill the chicken to enhance the smoky flavor profile.

Chicken Fajita Tacos

Chicken fajita tacos bring a restaurant vibe to your kitchen. The secret is perfectly seasoned chicken and charred veggies. Slice the chicken thin and cook with bell peppers and onions for a real taste.

Experiment with different chicken tacos recipe variations to discover your family’s favorite!

Sides to Serve with Chicken Tacos

Creating the perfect healthy chicken tacos experience goes beyond the main dish. The right side dishes can elevate your meal from good to extraordinary. They provide balanced nutrition and exciting flavors that complement your tacos perfectly.

When planning your healthy chicken tacos menu, consider sides that add nutritional value and taste. Traditional Mexican accompaniments offer both authenticity and deliciousness.

Traditional Mexican Sides

  • Mexican Rice: A classic side with tomato and garlic flavors
  • Black Beans: Protein-rich and perfectly seasoned
  • Elote (Mexican Street Corn): Grilled corn with chili and lime

Healthy Side Options

For those focused on maintaining a nutritious meal alongside healthy chicken tacos, these lighter alternatives provide excellent nutrition:

  1. Roasted Vegetable Medley
    • Includes bell peppers, zucchini, and onions
    • Low-calorie and nutrient-dense
  2. Quinoa Salad
    • Packed with protein
    • Light and refreshing
  3. Citrus Slaw
    • Adds crunch and brightness
    • Low in calories

Your healthy chicken tacos will shine with these thoughtfully selected side dishes. They balance flavor, nutrition, and cultural authenticity.

Tips for the Perfect Chicken Tacos

Making an easy chicken taco recipe is more than just mixing ingredients. It’s about mastering a few key techniques. These tips will help you make your tacos stand out.

Keeping Your Chicken Moist and Flavorful

For amazing chicken tacos, keeping the meat moist is key. Here are some expert tips:

  • Marinate chicken for at least 30 minutes before cooking
  • Use chicken thighs instead of breast meat for extra juiciness
  • Cook chicken to the perfect internal temperature of 165°F
  • Let chicken rest for 5-10 minutes after cooking to retain moisture

Balancing Flavors and Textures

Creating the perfect chicken taco is about balance. Think about this flavor matrix for your recipe:

Flavor ProfileTexture ComponentRecommended Ingredient
SpicyCrunchyJalapeño and crispy tortilla chips
CreamySmoothAvocado or sour cream
TangyFreshLime juice and cilantro

By choosing ingredients that work well together, you’ll make restaurant-quality chicken tacos. The best recipe is one that you enjoy making and eating.

Storing Leftover Chicken Tacos

Keeping your shredded chicken tacos fresh is easy. Just store them right to keep the taste and avoid waste. With a few easy steps, you can enjoy them as much as the first time.

Storing your tacos needs a smart plan. Each part of the taco should be stored separately to stay fresh and tasty.

Best Practices for Storage

  • Separate shells from filling to prevent sogginess
  • Store shredded chicken in an airtight container
  • Keep toppings in sealed containers
  • Refrigerate within two hours of cooking

Your tacos can stay fresh in the fridge for 3-4 days if stored right. Use glass containers with tight lids to keep them fresh longer.

How to Reheat Leftover Tacos

Reheating MethodBest ForTechnique
OvenCrispy shellsPreheat to 350°F, wrap in foil, heat 10 minutes
MicrowaveQuick warmingUse paper towel, heat 30-45 seconds
SkilletRestoring textureMedium heat, 2-3 minutes per side

Pro tip: Avoid reheating tacos multiple times to maintain the best quality and taste of your shredded chicken tacos.

“Fresh is best, but smart storage makes leftovers just as delightful!” – Kitchen Wisdom

Hosting a Chicken Taco Night

Turn your dinner into a fun adventure with a chicken taco night. It will wow your friends and family. The secret is in the preparation and creativity, especially with chicken taco toppings for everyone to enjoy.

For a perfect chicken taco night, plan well and engage your guests. Aim for an interactive meal that sparks fun and tasty discoveries.

Creating a Taco Bar

Set up a stunning taco bar with a wide range of chicken taco toppings. Make sure to include:

  • Protein options: Grilled, shredded, and seasoned chicken
  • Tortillas: Soft corn and flour varieties
  • Fresh chicken taco toppings:
    • Diced tomatoes
    • Chopped cilantro
    • Sliced jalapeños
    • Diced onions
  • Sauces and salsas
  • Cheese selections

Fun Taco-Themed Activities

Add fun activities to make your chicken taco night unforgettable:

  1. Taco Topping Challenge: See who can make the most unique mix
  2. Salsa-Making Contest: Let guests show off their salsa skills
  3. Taco Trivia: Test their Mexican food knowledge

Pro tip: Get most ingredients ready before the night. Presentation and variety are key to a successful taco bar!

Healthier Alternatives to Traditional Chicken Tacos

Healthy chicken tacos don’t have to lose flavor or fun. Smart choices in ingredients can make this classic dish nutritious and support your health goals.

Start making your healthy chicken tacos better by choosing the right base. The tortilla is key to the meal’s nutrition.

Whole Wheat and Corn Tortilla Options

Your tortilla choice greatly affects your tacos’ health. Here are some good options:

  • Whole wheat tortillas are full of fiber
  • Corn tortillas are packed with nutrients
  • Low-carb cauliflower tortillas are a great choice

Protein Substitution Strategies

Try different proteins to make your tacos more balanced. Here are some ideas:

Protein SourceNutritional Benefit
Ground TurkeyLess fat than chicken
TofuPlant-based, high in protein
Black BeansFiber-rich, vegetarian option

“Healthy eating is about making smart ingredient swaps without compromising taste.” – Nutrition Expert

For healthy chicken tacos, use lean proteins, whole grain tortillas, and fresh veggies. These changes can turn your favorite dish into a nutritional winner.

Adding the right sauce can turn a simple chicken taco into a feast for the taste buds. Sauces and salsas add that special kick that makes your tacos unforgettable.

Knowing how to match sauces with your chicken tacos is key. Each sauce has its own flavor that complements the seasoning in unique ways.

Easy Homemade Salsa Recipes

Making your own salsa is easy and fun. Here are some quick and tasty recipes:

  • Classic Pico de Gallo: Fresh tomatoes, onions, cilantro, lime juice
  • Roasted Tomato Salsa: Charred tomatoes with garlic and jalapeños
  • Mango Salsa: Sweet and spicy for a tropical twist

Sauce Pairing Guide

Finding the perfect sauce for your chicken tacos can enhance your meal. Different seasonings pair well with specific sauces.

Taco StyleRecommended SauceFlavor Profile
Spicy Chicken TacosCooling Lime CremaBalances heat with tangy freshness
BBQ Chicken TacosSmoky Chipotle SauceIntensifies barbecue notes
Grilled Chicken TacosAvocado Salsa VerdeAdds creamy, herbaceous touch

Pro tip: Always taste your seasoning and adjust your sauce. The goal is to create a flavor mix that’s both harmonious and memorable.

FAQs About Chicken Tacos

Getting the perfect chicken tacos recipe can be tough, especially for beginners. This guide answers common questions and offers expert tips. It helps you make delicious tacos with confidence.

To make amazing chicken tacos, you need to know some cooking secrets. Let’s look at the top questions home cooks have when making this popular dish.

Top Questions for Chicken Taco Enthusiasts

  • How long should I marinate chicken for tacos?
  • What are the best chicken cuts for tacos?
  • Can I make chicken tacos ahead of time?
  • How do I keep my taco shells from getting soggy?

Expert Tips for First-Time Taco Makers

For those new to chicken tacos, here are some key tips:

  1. Choose boneless, skinless chicken breasts for easy preparation
  2. Use a meat thermometer to ensure chicken reaches 165°F
  3. Prep ingredients before cooking for smoother execution
  4. Experiment with different seasonings
Taco Making TipRecommendation
Marinating Time30 minutes to 2 hours
Ideal Chicken CutChicken breast or thighs
Recommended Cooking MethodGrilling or skillet cooking

With these tips, you’ll be ready to make delicious chicken tacos. They’ll impress your family and friends. Remember, the more you practice, the better you’ll get at making chicken tacos!

Conclusion: Enjoying Your Chicken Tacos

Making the perfect easy chicken taco recipe is fun. It brings joy to your kitchen and excitement to your table. You’ve learned how to turn simple ingredients into a tasty meal. You can make it your own, every time.

Your chicken taco journey is just starting. You can try new flavors and seasonings. An easy chicken taco recipe is a chance to be creative and show off your cooking style. You can make them spicy, mild, or anything you like.

Experimenting with Flavor Profiles

Don’t be scared to try new things in your cooking. Your chicken tacos can show off your taste and cultural background. Share your recipes with others or post them online. The best part of cooking is making it your own.

Building Culinary Confidence

Getting good at making chicken tacos takes time. But with each try, you’ll get better. Enjoy learning, have fun cooking, and love the tasty results of your creativity.

FAQ

How long can I store leftover chicken for tacos?

Cooked chicken can stay in the fridge for 3-4 days. Cool it down first. Keep it away from taco shells and toppings for the best taste.

Can I make chicken tacos ahead of time?

Yes, you can! Prep the chicken and seasonings early. Store the chicken separately from the shells and toppings. Reheat the chicken and make fresh tacos for the best flavor.

What are the best chicken cuts for tacos?

Chicken breasts and thighs are great for tacos. Breasts are leaner, while thighs are juicier. A rotisserie chicken is also a quick and tasty choice.

How can I make my chicken tacos spicier?

Add jalapeños, cayenne pepper, or chipotle to your seasoning. Use spicy salsa or hot sauce as toppings. This way, you can adjust the heat to your liking.

Are chicken tacos a healthy meal option?

Chicken tacos can be healthy if done right. Choose lean chicken and whole wheat or corn tortillas. Add lots of veggies and watch your portion sizes to keep it nutritious.

Can I make chicken tacos gluten-free?

Yes! Use corn tortillas and gluten-free seasonings and sauces. Just check the labels to make sure. This way, you can enjoy delicious gluten-free chicken tacos.

What’s the best way to keep taco shells from getting soggy?

Start with cheese on the shell, then add hot chicken. This keeps the shell dry. Serve salsa and sour cream on the side for extra flavor.

How long should I marinate chicken for tacos?

Marinate for 30 minutes to 2 hours for great flavor. Don’t marinate more than 24 hours to avoid tough meat. Even 15-20 minutes can make a big difference.

What are some unique chicken taco variations?

Try BBQ, buffalo, Caribbean, or Asian-style chicken tacos. These add a twist to your usual tacos and make them exciting.

Can I make chicken tacos in advance for a party?

Yes! Prepare the chicken and toppings early. Set up a taco bar for guests to make their own. It’s easy to host and lets everyone customize their tacos.

0 comments
0 FacebookTwitterPinterestEmail
Canes Sauce
How to Make Cane's Sauce: The Perfect Recipe

Ever wondered how to make Cane’s sauce at home? This favorite sauce has won many hearts across the U.S. Now, you can learn to make a homemade version that’s just as good.

Making great Cane’s sauce is more than just mixing ingredients. It’s about finding the right mix of flavors. This guide will help you make a homemade Cane’s sauce that will wow your taste buds.

Key Takeaways

  • Learn the exact technique for creating an authentic Cane’s sauce recipe
  • Discover insider tips for achieving the perfect sauce consistency
  • Understand the key ingredients that make Cane’s sauce unique
  • Save money by making your own sauce at home
  • Impress friends and family with your culinary skills

Introduction to Cane’s Sauce and Its Popularity

Explore the world of Cane’s sauce, a favorite among food lovers in the U.S. It started at Raising Cane’s Chicken Fingers and quickly became a fast-food icon.

The story of Cane’s sauce is one of culinary creativity. Todd Graves, Raising Cane’s founder, created it to stand out. What began as a simple recipe has turned into a cultural hit.

The Unexpected Origins

Graves made the sauce early on at Raising Cane’s. He aimed to make a flavor that would make the restaurant unique. The result was a creamy, tangy sauce that’s now famous:

  • Developed in Louisiana
  • Inspired by classic dipping sauces
  • Perfected through multiple recipe iterations

Why People Can’t Get Enough

Its unique taste is why people love Cane’s sauce. It’s creamy, zesty, and a bit spicy. It’s also versatile, making it a favorite for many.

What’s special about this sauce is how it makes simple dishes better. It’s great for dipping chicken or as a burger spread. Cane’s sauce turns everyday meals into something special.

“It’s not just a sauce, it’s a culinary experience!” – Food Enthusiast

From its start to its national fame, Cane’s sauce shows that simple recipes can leave a lasting mark.

Essential Ingredients for Cane’s Sauce

To make the perfect copycat Cane’s sauce, you need to pick the right ingredients. These ingredients should mix well to create that famous tangy taste. Knowing what goes into Cane’s sauce is key to getting that authentic flavor everyone loves.

This sauce is simple to make. You probably have most of the ingredients in your kitchen. This makes it easy to make whenever you want.

Common Household Ingredients

  • Mayonnaise (the creamy base)
  • Ketchup (for tanginess)
  • Worcestershire sauce
  • Garlic powder
  • Black pepper

Specialty Ingredients You Might Need

While most ingredients are common, a few special touches can make your sauce even better.

IngredientPurposeAvailability
PaprikaAdds depth of flavorMost grocery stores
Hot sauceOptional spicy kickWidely available
Buttermilk powderEnhanced tanginessSpecialty baking sections

Pro tip: For the best taste, use fresh ingredients and measure them carefully. Getting the right mix is crucial to making that signature Cane’s sauce flavor everyone adores.

Step-by-Step Guide to Making Cane’s Sauce

Making Cane’s sauce at home is simpler than you think. This guide will show you how to make it with easy ingredients. You’ll follow simple steps that anyone can do.

How to Make Cane's Sauce: The Perfect Recipe

To make your own Cane’s sauce, pay close attention to detail. We’ll break it down into easy steps. This will help you make a tasty copycat sauce.

Gathering Your Ingredients

First, gather all the ingredients you need. Here’s what you’ll require:

  • Mayonnaise
  • Ketchup
  • Worcestershire sauce
  • Black pepper
  • Garlic powder

Precise Mixing Technique

The secret to great Cane’s sauce is in how you mix it. Follow these steps carefully:

  1. Measure ingredients precisely
  2. Combine in a clean mixing bowl
  3. Whisk thoroughly to ensure smooth consistency
  4. Let the sauce sit for 15-20 minutes

Flavor Customization

Every great chef starts with a recipe but then makes it their own. Taste and adjust your sauce to your liking. Want more kick? Add hot sauce. Want it tangier? Add more Worcestershire sauce.

IngredientStandard AmountFlavor Adjustment
Mayonnaise1/2 cup±2 tablespoons
Ketchup1/4 cup±1 tablespoon
Worcestershire Sauce1 teaspoon±1/2 teaspoon

Mastering Cane’s sauce is about trying and finding your perfect mix. Don’t be shy to make it your own!

Tips for Perfecting Cane’s Sauce

Making the perfect Cane’s sauce needs focus and detail. Whether you cook at home or love sauces, these tips will make your recipe better. They’ll help you reach restaurant-quality levels.

Creating great Cane’s sauce is an art. It’s about choosing the right ingredients and using the right techniques. Knowing the small details makes a big difference in flavor.

Getting the right mix is key for Cane’s sauce. Here are some exact measurements to follow:

  • Use exact ingredient proportions
  • Measure liquids at eye level
  • Invest in quality measuring tools

Fresh Ingredients Make the Difference

The secret to perfect Cane’s sauce is in the ingredients. Fresh ingredients are a must for an authentic taste.

IngredientFreshness ImpactRecommended Storage
MayonnaiseCriticalRefrigerated, sealed
KetchupImportantCool, dark place
SpicesEssentialAirtight container

Marination Magic

Marinating your Cane’s sauce is a big plus. Refrigerate it for at least 30 minutes before serving. This lets the flavors blend and intensify.

Pro tip: The longer your sauce sits, the more developed its flavor becomes!

By following these tips, you can make a Cane’s sauce as good as the restaurant’s. Try different things, taste, and adjust until it’s just right for you.

How to Store Cane’s Sauce Properly

Storing Cane’s sauce right is key to keeping its taste great and food safe. The right storage methods help keep your homemade sauce fresh longer.

Choosing the right container is vital for storing Cane’s sauce. Glass or top-notch plastic containers with tight lids are best. They keep the sauce’s flavor rich and stop contamination.

Best Storage Containers

  • Airtight glass mason jars
  • BPA-free plastic containers with secure lids
  • Sealed food-grade containers

The shelf life of Cane’s sauce depends on ingredients and how it’s stored. When kept in the fridge, homemade Cane’s sauce stays good for 5-7 days.

Shelf Life of Cane’s Sauce

Storage MethodShelf LifeQuality Preservation
Refrigerated (Sealed Container)5-7 daysExcellent
Room Temperature2-4 hoursNot Recommended

To keep your Cane’s sauce fresh, store it in the fridge’s coldest spot. Always use clean tools when getting sauce to avoid bacteria. Look for spoilage signs like bad smell, color changes, or mold before eating.

By following these storage tips, you can enjoy your homemade Cane’s sauce for longer, keeping it fresh, safe, and tasty.

Serving Suggestions for Cane’s Sauce

Cane’s sauce is more than just a dipping sauce. It’s a versatile ingredient that can make many dishes taste better. By trying different cane’s sauce pairings, you can make your meals more exciting.

  • Sandwich and Burger Spread: Swap out regular condiments for cane’s sauce for a flavor boost
  • Salad Dressing: Add a tangy twist by drizzling it over fresh greens
  • Vegetable Dip: Enjoy it with raw or roasted veggies
  • Seafood Accompaniment: It pairs well with grilled shrimp or fish
  • Potato Topping: Use it as a zesty sauce for baked or roasted potatoes

Protein Pairings for Cane’s Sauce

While chicken is a classic choice, cane’s sauce also goes well with other proteins. Try it with crispy tofu, grilled steak strips, or as a marinade for barbecue chicken. Its creamy texture and balanced flavor make it very versatile.

Creative Culinary Applications

Be creative with your homemade cane’s sauce. Use it as a base for cold pasta salads, a topping for baked potatoes, or even as a unique pizza drizzle. The only limit is your imagination.

Frequently Asked Questions about Cane’s Sauce

Exploring homemade Cane’s sauce can raise many questions. Our detailed cane’s sauce FAQ is here to help you become a pro at making this favorite condiment.

Home cooks and sauce lovers often ask about tweaking their Cane’s sauce recipe. Let’s look at some common questions when making this tasty dipping sauce.

Vegan-Friendly Sauce Options

It’s easy to make a vegan version of Cane’s sauce with a few swaps. Here are some key vegan alternatives:

  • Swap mayonnaise for vegan mayonnaise
  • Choose egg-free Worcestershire sauce
  • Go for dairy-free milk options

Ingredient Substitution Strategies

Missing certain ingredients for Cane’s sauce alternatives? No worries! Here are some handy solutions:

  1. Ketchup can stand in for tomato paste
  2. White vinegar can replace apple cider vinegar
  3. Dijon mustard can be swapped with yellow mustard

Pro tip: The secret to amazing Cane’s sauce is getting the flavors right. Taste and adjust your mix to your liking.

Storage and Freshness Concerns

Your homemade Cane’s sauce will keep for 7-10 days in the fridge, stored in an airtight container. Always check for any spoilage before using it.

Remember, experimenting is part of the fun in creating the perfect sauce!

Common Mistakes to Avoid When Making Cane’s Sauce

Making perfect Cane’s sauce needs focus and skill. Many try to make this favorite condiment at home but face challenges. Knowing common mistakes helps you avoid them and get great results.

Learning to fix cane’s sauce starts with spotting common errors. These mistakes can affect your sauce’s taste and quality.

Mixing Techniques Matter

Making Cane’s sauce is all about the right mixing. Too much mixing can ruin the sauce’s balance. Not mixing enough means it won’t taste right.

  • Overmixing breaks down ingredient structure
  • Undermixing creates uneven flavor distribution
  • Gentle folding preserves sauce texture

Temperature and Resting Time

Not chilling the sauce long enough is a big mistake. This step is key for flavor and texture.

Mixing ErrorConsequenceSolution
OvermixingWatery, separated sauceMix gently, stop when ingredients combine
UndermixingUneven flavorFold ingredients until uniformly blended
Skipping ChillingWeak flavor profileRefrigerate for at least 30 minutes

By knowing these common mistakes, you can make a tasty sauce. It will be just as good as the original Cane’s.

Variations of Cane’s Sauce Recipe

Exploring cane’s sauce variations can make your dipping experience amazing. By trying different flavors, you can make the classic sauce your own. This way, you can discover new and exciting tastes.

How to Make Cane's Sauce: The Perfect Recipe

Spicy food fans will love these unique Cane’s sauce twists. Making small changes can take your sauce to the next level. You’ll impress everyone with your creative flavors.

Spicy Cane’s Sauce Variation

Making spicy Cane’s sauce is simple. Here are some ingredients to add heat:

  • Cayenne pepper
  • Hot sauce
  • Red pepper flakes
  • Sriracha

The secret to great spicy Cane’s sauce is adding heat slowly. Start with a little spice and adjust until it’s just right for you.

Honey Mustard Twist Recipe

If you prefer something sweeter, try the honey mustard version. Mix your classic Cane’s sauce with:

  • Dijon mustard
  • Honey
  • Mild paprika
Variation TypeKey IngredientsFlavor Profile
Spicy Cane’s SauceCayenne, Hot SauceIntense, Fiery
Honey Mustard TwistHoney, Dijon MustardSweet, Tangy

Remember, the fun of cane’s sauce variations is in your creativity. Feel free to experiment and find your favorite sauce mix!

Nutritional Information for Cane’s Sauce

Understanding cane’s sauce nutrition helps you make better food choices. Knowing the calories and nutrients lets you enjoy it without upsetting your diet.

Let’s explore the nutritional profile of this tasty sauce that makes chicken tenders so appealing.

Caloric Content and Serving Considerations

When looking at cane’s sauce calories, think about how much you eat. A usual 2 tablespoons has:

  • 120-140 calories
  • 10-12 grams of total fat
  • 2-3 grams of carbohydrates

Key Nutrients in the Sauce

Cane’s sauce has important nutrients that give it its flavor and texture:

NutrientAmount per Serving
Total Fat12g
Saturated Fat2g
Sodium180mg
Protein1g

Pro tip: Enjoy Cane’s sauce in moderation for a balanced diet.

“Knowing what you’re eating is the first step to making healthier food choices” – Nutrition Expert

While the sauce tastes great, it’s high in calories and fat. If you’re watching your diet, use it sparingly. Or try lighter options that still taste good.

Pairing Drinks with Cane’s Sauce

Enhancing your Cane’s sauce experience is more than just the perfect dip. It’s about making a meal memorable with the right drinks. Cane’s sauce drink pairings can turn a simple meal into a flavorful adventure.

When looking for drinks to pair with Cane’s sauce, consider these options:

  • Refreshing Soft Drinks
    • Crisp cola
    • Citrus-based sodas
    • Root beer
  • Craft Beer Selections
    • Light lagers
    • Wheat beers
    • Pale ales

For those who prefer not to drink alcohol, choose drinks that match Cane’s sauce’s tangy and creamy taste. Iced tea, lemonade, and sparkling water are great choices. They offer a refreshing contrast to the rich sauce.

Wine and Beer Pairings

For wines or craft beers, pick lighter options that won’t mask the sauce’s unique flavor. Crisp white wines like Sauvignon Blanc or light-bodied pilsners pair well with Cane’s sauce-based dishes.

“The right drink can elevate your Cane’s sauce experience from good to unforgettable.”

Pro tip: Try different drinks to find your ideal Cane’s sauce pairing. Your taste buds will appreciate the perfect match!

Conclusion

Making homemade Cane’s sauce is more than a fun cooking project. It turns your kitchen into a place where you can play with flavors. You save money and get to enjoy a fresh taste that’s just right for you.

When you try making Cane’s sauce, you open up a world of tasty options. You can control what goes into it, how it tastes, and what’s good for you.

Key Benefits of Homemade Cane’s Sauce

  • Cost-effective alternative to store-bought versions
  • Full control over ingredient quality
  • Ability to customize flavor profiles
  • Fresh taste without preservatives

Embracing Culinary Creativity

With Cane’s sauce, you can make it your own. Feel free to mix things up and add your own special spices. It’s a chance to show off your taste.

Experimentation LevelPotential Flavor Outcome
BeginnerClassic Cane’s Sauce
IntermediateSpicy Cane’s Sauce Variation
AdvancedPersonalized Gourmet Blend

Cooking is all about exploration and personal expression. Your homemade Cane’s sauce is a blank canvas. It’s waiting for your special touch.

User Feedback and Adjustments

Your journey with Cane’s sauce is just starting. We encourage you to try new things and share your thoughts. Your input is key to making this sauce even better.

By sharing your ideas, you help everyone in the cooking world. Maybe you found a new ingredient or a way to make the sauce better. Your suggestions can inspire others to try new things.

Culinary Community Connection

Keep track of how you make your sauce. Note down what you use and how you mix it. Your detailed notes could help others make their sauce just right.

Share your sauce-making journey on social media or cooking forums. These places are where food lovers share their knowledge and ideas.

Recipe Evolution

Recipes get better with every new idea. Your feedback turns simple steps into a shared adventure. Feel free to try new things and share what you find.

By doing this, you help others learn and improve their Cane’s sauce. Your creativity can inspire a whole community of cooks.

FAQ

Can I Make Cane’s Sauce Vegan?

Yes, you can make vegan Cane’s sauce. Use vegan mayonnaise instead of regular mayonnaise. Follow Your Heart or Just Mayo are great options. They keep the sauce creamy and tangy.

What Are Good Substitutes for Missing Ingredients?

For missing ingredients, try these: – Use soy sauce or tamari instead of Worcestershire sauce – Mix tomato paste with vinegar for ketchup – Greek yogurt or sour cream can replace mayonnaise – Tabasco can be swapped with Sriracha or Frank’s RedHot

How Long Can I Store Homemade Cane’s Sauce?

Homemade Cane’s sauce lasts 5-7 days in the fridge. Check for spoilage before using. Keep it chilled for quality and safety.

Is Cane’s Sauce Gluten-Free?

Yes, you can make gluten-free Cane’s sauce. Choose gluten-free Worcestershire sauce and mayonnaise. Make sure all condiments are gluten-free.

Can I Freeze Cane’s Sauce?

Freezing Cane’s sauce isn’t recommended. It may separate and lose texture when thawed. For best taste, make it fresh and refrigerate for up to a week.

How Spicy Is Traditional Cane’s Sauce?

Traditional Cane’s sauce is mild and tangy. It’s not spicy. You can add more Tabasco or black pepper for more heat.

What Can I Use Cane’s Sauce On Besides Chicken?

Cane’s sauce is versatile. Use it as: – Dipping sauce for french fries – Spread on sandwiches – Salad dressing – Topping for burgers – Dip for vegetables – Sauce for fish or seafood

0 comments
0 FacebookTwitterPinterestEmail
Yum Yum Sauce Recipe 1

Easy Homemade Yum Yum Sauce Recipe

by IDYA
Yum Yum Sauce Recipe 1

Easy Homemade Yum Yum Sauce Recipe

Serves: 1 coup Prep Time: Cooking Time:
Nutrition facts: 90 calories 8 fat
Rating: 5.0/5
( 1 voted )

Ingredients

  • 1/2 cup mayonnaise
  • 2 tablespoons ketchup
  • 1 tablespoon rice vinegar
  • 1 tablespoon sugar
  • 1 teaspoon garlic powder
  • 1 teaspoon smoked paprika
  • 1/2 teaspoon cayenne pepper (optional for spice)
  • 1 tablespoon water (to thin, if necessary)

Instructions

In a medium-sized bowl, combine mayonnaise, ketchup, rice vinegar, sugar, garlic powder, smoked paprika, and cayenne pepper. Whisk the ingredients together until smooth and well combined. If the sauce is too thick, add 1 tablespoon of water at a time until the desired consistency is reached. Taste and adjust seasonings as needed. You can add more cayenne pepper for extra heat or more sugar for sweetness. Serve immediately or store in the refrigerator in an airtight container for up to 1 week.

Notes

Yum Yum Sauce is a great dipping sauce for shrimp, chicken, vegetables, and even sushi. If you prefer a spicier version, increase the amount of cayenne pepper.

Ever wondered how to make that creamy sauce from your favorite Japanese steakhouse at home? Making the perfect yum yum sauce is actually quite simple.

Imagine wowing your friends and family with a sauce that tastes like it’s from a restaurant. It only takes 10 minutes to make. This sauce will make any meal special.

Ready to make the tastiest homemade yum yum sauce? It’s perfect for grilled meats and veggies. You don’t need special skills. Just a few ingredients and a bit of creativity.

Key Takeaways

  • Discover an incredibly simple yum yum sauce recipe
  • Learn to make restaurant-quality sauce at home
  • Requires only 10 minutes of preparation time
  • Uses common kitchen ingredients
  • Versatile sauce for multiple dishes

What is Yum Yum Sauce?

Yum Yum Sauce is a favorite among food lovers in the United States. It’s a creamy, tangy sauce that started in Japanese-American steakhouses. Now, it’s a must-have in many restaurants and homes.

This sauce has a special taste that combines many flavors. Its creamy texture and deep flavor make it great for many dishes.

Sauce Origins and Characteristics

Yum Yum Sauce comes from Japanese-inspired dishes in American restaurants. It’s made with:

  • Mayonnaise
  • Tomato paste
  • Paprika
  • Garlic powder
  • Sugar

This delicious condiment goes well with many foods. It’s loved by many for its versatility.

Food CategoryRecommended Pairings
ProteinsGrilled chicken, shrimp, steak
VegetablesGrilled zucchini, roasted peppers
Fried FoodsTempura, onion rings

Looking to make a meal better or create a fancy dish? Yum Yum Sauce adds a wonderful flavor. It turns simple dishes into something special.

Ingredients You Need for Yum Yum Sauce

Making the perfect spicy mayo sauce is all about choosing the right ingredients. These ingredients should work together to create a burst of flavor. Whether you’re cooking at home or love to experiment in the kitchen, knowing what goes into Yum Yum Sauce is key. It helps you make a tasty condiment that can take any dish to the next level.

To start making a real creamy sriracha sauce, you need to gather the right stuff. We’ll look at the essential ingredients you’ll need. These are divided into two groups: the must-haves and the nice-to-haves.

Core Ingredients for Classic Yum Yum Sauce

The heart of any good Yum Yum Sauce is its core ingredients. Here’s what you should have ready:

  • Mayonnaise (full-fat recommended)
  • Tomato paste
  • Paprika
  • Garlic powder
  • Sugar
  • Butter (melted)

Optional Ingredients to Customize Your Sauce

Want to make your basic spicy mayo sauce even better? Try adding these optional ingredients. They can give your sauce more depth and personality:

  • Sriracha sauce (for extra heat)
  • Smoked paprika
  • Cayenne pepper
  • White vinegar
  • Worcestershire sauce

Playing with these ingredients can help you make a creamy sriracha sauce that’s just right for you. The great thing about Yum Yum Sauce is how versatile it is. Feel free to experiment and make it your own!

Tools Needed for Making Yum Yum Sauce

Making the perfect hibachi grill sauce needs the right tools. Whether you’re cooking at home or love making sauces, the right tools matter. They can change how your yum yum sauce turns out.

Having the right tools makes making hibachi grill sauce easier. Let’s look at the key tools you need to make a tasty homemade sauce.

Essential Kitchen Equipment

  • Measuring cups and spoons
  • Medium mixing bowl
  • Airtight storage container
  • Sharp whisk
  • Rubber spatula

Mixing Tools Comparison

ToolEffectivenessRecommended Use
WhiskHighSmooth, well-blended sauce
BlenderMediumUltra-smooth consistency
ForkLowQuick mixing, less smooth

Professional tip: A quality whisk is your best friend for making hibachi grill sauce. It mixes ingredients well and makes a smooth sauce like the ones in restaurants.

You don’t need fancy kitchen tools to make great sauce. Simple tools and a bit of skill can help you make a tasty hibachi grill sauce at home.

Step-by-Step Guide to Prepare Yum Yum Sauce

Making yum yum sauce is simple. Just a few steps and you’ll have this tasty condiment ready in no time. Follow these steps for the best flavor.

Your homemade yum yum sauce will change your kitchen. Follow these easy steps for a creamy, tangy sauce that makes any dish better.

Gather Your Ingredients

Getting ready is crucial for a great yum yum sauce. First, gather all your ingredients:

  • 1/2 cup mayonnaise
  • 2 tablespoons tomato paste
  • 1 teaspoon garlic powder
  • 1 teaspoon paprika
  • 1/4 teaspoon cayenne pepper
  • 1 tablespoon sugar
  • 1 tablespoon water

Combine Ingredients Perfectly

The key to a fantastic yum yum sauce is in the mixing. Start by mixing everything in a bowl. Pro tip: Use a clean, dry measuring cup for accurate measurements.

IngredientMixing Tip
MayonnaiseUse as base for creamy texture
Tomato PasteAdds rich color and depth
SeasoningsBlend thoroughly for even flavor

Whisk and Taste

Whisk everything until smooth. Then, taste and adjust the seasonings. Your sauce should be sweet, tangy, and a bit spicy.

For the best taste, chill it for at least 30 minutes before serving. This lets the flavors mix and intensify.

Tips for Perfecting Your Yum Yum Sauce

Making the perfect Yum Yum sauce is all about finding the right mix of flavors. With a few tips, your homemade sauce can go from good to amazing.

To make an outstanding sauce, pay attention to small details. These tips will help you get your Yum Yum sauce just right.

Balancing Sweetness and Heat

Getting the flavor just right is key. Here’s how to do it:

  • Start with small amounts of sweet and spicy ingredients
  • Taste and adjust a little at a time
  • Use paprika for a gentle heat
  • Add sriracha for a bold kick
  • Balance the heat with a bit of sugar or mayo

Adjusting Consistency

The sauce’s texture is crucial. Here’s how to get it right:

  • Add mayonnaise to thicken
  • Use milk or water to thin it out
  • Whisk well for a smooth texture
  • Chill the sauce to set its consistency

Try these methods to make a Yum Yum sauce that’s just how you like it.

Variations of Yum Yum Sauce

Exploring different variations of Yum Yum sauce can turn it into a culinary adventure. By making small changes, you can create unique flavors that match your taste. This can make your dishes even better.

The beauty of Yum Yum sauce is how adaptable it is. Whether you want to add heat or make it more aromatic, these variations will help. You can customize your spicy mayo sauce just right.

Spicing Up Your Sauce

For those who enjoy a spicy kick, making your Yum Yum sauce spicy is easy. Here are some tips to add heat:

  • Add 1-2 teaspoons of sriracha for a classic spicy kick
  • Mix in diced jalapeños for fresh heat
  • Incorporate cayenne pepper for intense warmth

Garlic-Infused Delight

Garlic fans can enhance their Yum Yum sauce with garlic. Here are some ways to do it:

  • Roast garlic for a deep, mellow flavor
  • Mince fresh garlic for a sharp, bright taste
  • Use garlic powder for consistent seasoning

Each variation adds something special to this versatile sauce. You can experiment and find your ideal mix.

Variation TypeKey IngredientsFlavor Profile
Spicy VersionSriracha, Hot SauceIntense, Fiery
Garlic VersionRoasted Garlic, Fresh GarlicRich, Aromatic

Common Mistakes to Avoid

Making the perfect condiment needs careful attention. Even skilled cooks can make mistakes when making Yum Yum Sauce. Knowing these common errors will help you make a smooth, tasty sauce every time.

Overmixing the Sauce: A Texture Trap

Mixing your condiment might seem easy, but overmixing can mess up the texture. Too much stirring can make the sauce too thin and watery.

  • Mix ingredients gently until just combined
  • Use slow, deliberate whisking motions
  • Stop mixing when ingredients are evenly distributed

Refrigeration Challenges: Keeping Your Sauce Fresh

Storing your Yum Yum Sauce right is key to keeping it fresh and safe. Wrong storage can harm the flavor and pose health risks.

Refrigeration TipBest Practice
Storage ContainerAirtight glass or plastic container
Temperature40°F or below
Maximum Storage Time5-7 days

Avoiding these mistakes will help your homemade Yum Yum sauce impress everyone.

Storing Yum Yum Sauce

Keeping your Yum Yum sauce fresh is important. It helps keep the flavor bright and the sauce safe to eat.

Homemade Yum Yum sauce needs good care to stay tasty. Glass containers with tight lids are best. They protect the sauce’s special taste.

Best Storage Practices

  • Always use a clean, airtight container
  • Store in the refrigerator immediately after preparation
  • Keep the container away from direct light and heat
  • Use a container with a narrow opening to prevent contamination

Understanding Sauce Shelf Life

The life of your sauce depends on how you handle it. Homemade Yum Yum sauce usually lasts 5-7 days in the fridge.

“Fresh ingredients and proper storage are key to maintaining the sauce’s delicious flavor!” – Culinary Experts

Look out for signs of spoilage. These include bad smells, color changes, or mold. If you’re unsure, it’s best to throw it away and make a new batch.

Pairing Ideas with Yum Yum Sauce

Discover the magic of Yum Yum sauce. It turns simple meals into amazing dishes. This creamy, tangy sauce is more than just for dipping. It opens up new flavors for everyone to enjoy.

Yum Yum sauce can make many dishes better. As a shrimp sauce, it adds a zesty kick to seafood and grilled foods.

Classic Pairing Recommendations

  • Grilled seafood, especially jumbo shrimp
  • Hibachi-style chicken and vegetables
  • Crispy french fries and onion rings
  • Fried appetizers like calamari

Creative Culinary Uses

Try new things with Yum Yum sauce. Use it as a sandwich spread, salad dressing, or marinade for grilled meats.

  • Sandwich spread replacement
  • Salad dressing alternative
  • Burger and wrap enhancement
  • Vegetable dip

Yum Yum sauce makes simple meals taste like they’re from a restaurant. It’s that versatile.

Nutritional Information

Knowing the nutritional facts of homemade Japanese Steakhouse Sauce is key. Yum Yum Sauce is a tasty mix of flavors. It also gives us a peek into its calorie and nutrient content.

Caloric Breakdown

A serving of Yum Yum sauce, about 2 tablespoons, has 70-90 calories. The main sources of these calories are:

  • Mayonnaise: 65-75 calories
  • Tomato paste: 5-10 calories
  • Seasonings: Minimal caloric impact

Dietary Considerations

When making your Japanese Steakhouse Sauce, think about different diets. Here are some important points:

  1. Gluten-Free Options: Most ingredients are naturally gluten-free, but check individual component labels
  2. Low-Fat Alternatives: Use Greek yogurt or light mayonnaise to reduce fat content
  3. Vegan Modifications: Substitute mayonnaise with vegan alternatives

Always check the labels of each ingredient to make sure they fit your dietary needs. Yum Yum sauce is very flexible, making it easy to adjust for different diets.

Vegan Yum Yum Sauce Alternative

Plant-based eating doesn’t mean giving up tasty sauces. Making a vegan version of Yum Yum Sauce is simple. It lets everyone enjoy this tasty condiment.

Changing traditional Yum Yum Sauce into a vegan version is easy. You just need to swap out ingredients. Look for plant-based options that keep the sauce creamy and flavorful.

Ingredient Substitutions

To make vegan Yum Yum Sauce, replace old ingredients with new ones:

  • Mayonnaise: Use vegan mayo made from aquafaba or soy
  • Replace dairy with coconut or almond-based options
  • Choose egg-free condiments

Flavor and Texture Comparison

“A great vegan sauce should be indistinguishable from the original!” – Vegan Cooking Expert

Your vegan sauce can match the original by focusing on:

  • Keeping it creamy
  • Getting the sweet and tangy balance right
  • Keeping the smooth texture

With the right ingredients, your vegan Yum Yum Sauce will be a hit. Everyone will love it.

Frequently Asked Questions

Many people wonder about making the perfect hibachi grill sauce at home. This section answers common questions about Yum Yum Sauce.

Can I Prepare Yum Yum Sauce in Advance?

Yes, you can make Yum Yum sauce ahead of time. It’s great to prepare up to 5-7 days before you need it. Keep it in an airtight container in the fridge to keep it fresh.

The sauce gets even better as it sits. It becomes more flavorful and creamy.

  • Refrigerate immediately after preparation
  • Use within a week for optimal taste
  • Stir well before serving

How to Adjust the Flavor Profile?

It’s easy and fun to customize your Yum Yum sauce. Start with the basic recipe. Then, try these tweaks:

  1. For more heat: Add extra cayenne pepper or hot sauce
  2. For sweetness: Increase paprika or add a touch of honey
  3. For tanginess: Adjust the amount of vinegar or lemon juice

Remember, small changes can make a big difference. Taste as you go and follow your taste buds to create the perfect sauce.

Pro tip: Always taste and adjust seasonings gradually to avoid overwhelming the sauce’s delicate balance.

Conclusion: Enjoy Your Homemade Yum Yum Sauce

Making your own Yum Yum sauce opens up a world of creativity in the kitchen. It’s perfect for adding flavor to simple meals or impressing guests with a homemade condiment. This versatile sauce brings incredible taste to any dish.

By trying out different recipes, you can create a sauce that’s all your own. You can adjust the heat and mix in unique ingredients. This makes your kitchen a place of endless possibilities.

Final Thoughts on Sauce Making

Your homemade Yum Yum sauce is more than just a condiment. It’s a way to explore new flavors in cooking. Start with a basic recipe and then add your own twist. A creamy sriracha sauce blend could become your go-to for amazing meals.

Encouragement to Experiment

Don’t be shy to try new things with your Yum Yum sauce. Each batch you make helps you get better at making this tasty condiment. Share your creations with others and see your cooking skills grow with each new dish.

FAQ

Can I make Yum Yum Sauce ahead of time?

Absolutely! You can make Yum Yum Sauce up to 5-7 days in advance. Store it in an airtight container in the fridge. This will help the flavors blend and get richer. Just stir it well before serving, and it’s ready to enjoy.

How long does homemade Yum Yum Sauce last?

Homemade Yum Yum Sauce lasts 5-7 days in the fridge. Always use a clean utensil when scooping. Keep it sealed in an airtight container to stay fresh and prevent bacteria.

Is Yum Yum Sauce gluten-free?

Most Yum Yum Sauce recipes can be gluten-free. Just check your ingredients. Use gluten-free mayonnaise and make sure any tomato paste is gluten-free for a gluten-free version.

Can I make a spicy version of Yum Yum Sauce?

Definitely! For a spicy version, add sriracha, hot sauce, or red pepper flakes. Start with a little and adjust to your liking. This way, you can make the sauce as spicy as you want.

What are the best foods to serve with Yum Yum Sauce?

Yum Yum Sauce is very versatile! It’s great with grilled shrimp, chicken, fried seafood, veggies, french fries, egg rolls, and hibachi meats. It’s perfect for dipping and also as a sandwich spread or salad dressing.

How can I adjust the sauce’s consistency?

To thin the sauce, add a bit of milk or water. For a thicker sauce, add more mayonnaise or refrigerate it. Always adjust a little at a time and taste as you go to keep the flavor balanced.

Are there vegan alternatives for Yum Yum Sauce?

Yes! For a vegan version, use plant-based mayonnaise. Choose soy, aquafaba, or cashew-based mayonnaise. Replace regular mayonnaise with these, and keep the other ingredients the same for a similar taste.

0 comments
0 FacebookTwitterPinterestEmail
Tuscan Chicken Recipe

Tuscan Chicken: Easy and Flavor Recipe

by IDYA
Tuscan Chicken Recipe

Tuscan Chicken: Easy and Flavor Recipe

Serves: 4 Prep Time: Cooking Time:
Nutrition facts: 350 per serving calories 18 grams fat
Rating: 5.0/5
( 1 voted )

Ingredients

  • 4 boneless skinless chicken breasts
  • 1 tablespoon olive oil
  • 1 cup heavy cream
  • 1/2 cup chicken broth
  • 1/2 cup sun-dried tomatoes, chopped
  • 2 cups fresh spinach
  • 3 cloves garlic, minced
  • 1/4 teaspoon red pepper flakes
  • Salt and pepper to taste
  • "1/4 cup grated Parmesan cheese

Instructions

Heat olive oil in a large skillet over medium heat. Season chicken breasts with salt and pepper and cook for 6-7 minutes per side until golden and cooked through. Remove from skillet and set aside.  In the same skillet, add garlic and red pepper flakes. Sauté for 1 minute until fragrant. Add sun-dried tomatoes and chicken broth to the skillet. Stir to combine and bring to a simmer. Pour in heavy cream, and bring to a simmer again. Stir in spinach and Parmesan cheese until the sauce thickens and spinach wilts. Return the cooked chicken to the skillet and coat with the creamy sauce. Simmer for an additional 3-5 minutes, allowing the flavors to combine. Serve immediately and enjoy your Tuscan chicken!

Notes

You can serve this dish with a side of pasta or rice to complete the meal. Adjust the level of spice by adding more or less red pepper flakes.

Ever wondered why Italian chicken dishes are so tasty? The Tuscan chicken recipe will change how you cook with its rich, vibrant flavors. It feels like a trip to Tuscany with every bite.

This Italian chicken dish uses traditional ingredients and simple cooking methods. It brings out amazing flavors. Each bite is a story of rustic Italian cooking that will excite your taste buds.

The Tuscan chicken recipe is more than a meal. It’s a journey of authentic Italian flavors to your kitchen. Whether you’re an experienced cook or new to the kitchen, this recipe will improve your skills and wow your guests.

Key Takeaways

  • Discover the authentic flavors of Tuscan cuisine
  • Learn a simple yet delicious Italian chicken dish
  • Explore traditional Tuscan cooking techniques
  • Create restaurant-quality meals at home
  • Impress friends and family with your culinary skills

Introduction to Tuscan Chicken

Explore the world of Tuscan cuisine, where every bite is a story of rich flavors and tradition. This creamy chicken recipe is more than a meal. It’s a comfort food that takes you to Tuscany’s rolling hills with its vibrant ingredients and authentic cooking.

What Makes Tuscan Chicken Unique?

Tuscan chicken is different from other Italian dishes. It has unique flavors that make it special:

  • Creamy garlic-based sauce that coats tender chicken
  • Sun-dried tomatoes providing intense, concentrated flavor
  • Fresh spinach adding nutritional value and vibrant color
  • Herbs like basil and oregano that capture regional essence

“In Tuscany, food is not just sustenance—it’s a celebration of life and tradition.” – Italian Culinary Expert

The Origins of Tuscan Cuisine

Tuscan cooking comes from a rich agricultural heritage. Farmers and home cooks made recipes with local ingredients. They turned simple things into amazing meals. This recipe shows generations of cooking wisdom, focusing on fresh, quality ingredients.

The region’s cooking philosophy is cucina povera—”poor kitchen.” It celebrates being resourceful and making delicious dishes from humble ingredients. Tuscan chicken is a perfect example, making simple chicken into a memorable dish.

Key Ingredients for Tuscan Chicken

To make a real Tuscan chicken dish, you need the right ingredients. They add vibrant flavors and a true Italian taste to your cooking. Start by knowing the main parts that make a simple meal special.

Chicken Cuts: Best Options for Flavor

Choosing the right chicken cuts is key for Tuscan chicken. Boneless, skinless chicken breasts are great for quick cooking and soaking up flavors. For even more taste, try:

  • Chicken thighs for extra moisture
  • Organic, free-range chicken for better taste
  • Tender chicken cutlets for quicker prep

Fresh Herbs: Essential for Authenticity

Herbs are the heart of Tuscan cooking. Your sun-dried tomato chicken will shine with these fresh herbs:

  1. Fresh basil
  2. Rosemary sprigs
  3. Thyme leaves
  4. Italian parsley

“The secret to Tuscan cooking is simple: fresh ingredients and passionate preparation.” – Italian Culinary Experts

Pantry Staples You Will Need

Make sure your pantry has these key items for a top-notch Tuscan chicken dish:

  • Sun-dried tomatoes for deep flavor
  • High-quality extra virgin olive oil
  • Garlic (fresh or roasted)
  • Kosher salt and black pepper
  • White wine for deglazing

With top-notch ingredients and knowing their importance, you’ll make a garlic chicken dish that feels like a trip to Tuscany.

Preparation: Getting Started

Creating a tasty spinach chicken dish for a quick weeknight dinner needs some planning. The secret to a delicious meal is in the steps you take before cooking. With the right steps, you can turn simple ingredients into a feast fit for a restaurant.

Your journey starts with picking the right ingredients and techniques. A well-prepared dish can make your cooking stand out.

Marinating the Chicken: Tips and Tricks

Marinating is key for adding amazing flavor to your spinach chicken. Here are some important tips:

  • Choose boneless, skinless chicken breasts for even marination
  • Use fresh herbs like rosemary and thyme
  • Marinate for at least 30 minutes, but no longer than 2 hours
  • Always marinate in the refrigerator to prevent bacterial growth

Preparing the Vegetables: A Step-by-Step Guide

For a quick weeknight dinner, fast vegetable prep is essential. Fresh spinach can make your chicken dish go from good to great.

  1. Wash spinach thoroughly under cold water
  2. Pat dry with clean paper towels
  3. Remove tough stems
  4. Chop or tear leaves into bite-sized pieces

Pro tip: Keep your spinach crisp by storing it in a sealed container with a paper towel to absorb excess moisture.

Cooking Methods for Tuscan Chicken

There are many ways to cook a delicious Tuscan chicken dish. You can choose a method that fits your lifestyle and kitchen. Each way brings out different flavors and textures, letting you make the dish your own.

Sautéing: Quick and Flavorful

Sautéing makes your Tuscan chicken golden brown on the outside and juicy inside. It’s perfect for a fast meal that tastes rich and full of flavor.

  • Use a heavy-bottomed skillet for even heat distribution
  • Cook chicken over medium-high heat
  • Ensure internal temperature reaches 165°F

Slow Cooker: Hands-Off Convenience

If you’re always on the go, the slow cooker is your friend. Just mix the ingredients and let it cook. You’ll get tender, flavorful chicken without lifting a finger.

  1. Layer ingredients in the slow cooker
  2. Cook on low for 6-8 hours
  3. Check chicken reaches safe internal temperature

Every cooking method has its own benefits for Tuscan chicken. You can pick the one that works best for you, based on your schedule and taste.

Flavor Enhancements

To make an ordinary italian chicken dish special, add thoughtful flavors. The right ingredients can make a simple meal into a creamy chicken recipe that’s amazing. It will feel like you’re in Tuscany.

Choosing the perfect wine and cheese can really enhance your Tuscan chicken. Each ingredient is key to a memorable meal.

Adding a Touch of Wine: Red or White?

Wine choice is crucial for your italian chicken dish. Here’s what to consider:

  • White wines like Pinot Grigio add a light, crisp taste
  • Red wines, such as Chianti, bring a rich, earthy flavor
  • Dry wines are best for a balanced taste

“The right wine transforms a simple chicken dish into a culinary journey through Tuscany.” – Italian Culinary Expert

Incorporating Cheese: What Works Best?

Cheese is key to a rich, creamy chicken recipe. The best cheese melts well and fits the dish’s flavors.

  • Parmigiano-Reggiano has a sharp, nutty taste
  • Pecorino Romano adds a tangy, salty touch
  • Fresh mozzarella makes it creamy and luxurious

By picking the right wine and cheese, your Tuscan chicken becomes an extraordinary culinary experience.

Serving Suggestions for Tuscan Chicken

Make your Tuscan chicken recipe a memorable meal with the right presentation. The right sides can turn a simple dinner into a journey through Tuscany.

  • Creamy polenta with fresh herbs
  • Roasted garlic rosemary potatoes
  • Rustic crusty bread for soaking up sauce
  • Crisp arugula salad with lemon vinaigrette
  • Grilled seasonal vegetables

Creating an Authentic Tuscan Dining Experience

To bring Tuscan dining to your table, create a warm atmosphere. Your tuscan chicken recipe needs a presentation that delights all senses.

  • Table Setting: Use earthenware plates and rustic linens
  • Wine Pairing: Choose a medium-bodied Chianti or Sangiovese
  • Lighting: Soft candlelight adds warmth and ambiance

A great comfort food recipe is about more than taste. It’s about making moments of joy and connection at dinner.

Health Benefits of Tuscan Ingredients

Discovering the nutritional power of your favorite garlic chicken recipe changes how you view meals. Tuscan chicken is more than a taste delight—it’s a smart way to eat healthy and feel good.

Your spinach chicken dish is a nutritional powerhouse. It offers health benefits beyond just taste. Let’s dive into the amazing health perks of this classic dish.

Nutritional Value of Chicken

Chicken is a top-notch source of lean protein. It’s key for muscle upkeep and body function. A serving gives you:

  • High-quality protein (about 31 grams per 100 grams)
  • Essential amino acids for muscle repair
  • Low saturated fat content
  • Vital minerals like selenium and phosphorus

The Health Perks of Fresh Veggies and Herbs

The veggies in your garlic chicken are nutritional heroes. Spinach, in particular, offers incredible health benefits:

  • Rich in iron for energy production
  • Contains antioxidants that combat inflammation
  • Supports eye health with lutein and zeaxanthin
  • Provides vitamin K for bone strength

“Let food be thy medicine and medicine be thy food” – Hippocrates

Choosing a spinach chicken recipe is more than cooking a meal. It’s a long-term health investment. The mix of lean protein and nutrient-rich veggies offers a balanced, healthy meal that boosts your body’s health.

Storing Leftovers

Your delicious one-pot meal doesn’t have to end after the first serving. Tuscan chicken can be a versatile and convenient easy weeknight dinner option that extends well beyond the initial preparation.

Proper storage is key to maintaining the flavor and safety of your Tuscan chicken. Follow these essential guidelines to keep your meal fresh and delicious.

Best Practices for Chilling and Reheating

Storing your Tuscan chicken correctly helps preserve its taste and texture. Here are some expert tips:

  • Cool the chicken completely before storing
  • Use airtight containers to prevent moisture loss
  • Refrigerate within two hours of cooking
  • Store in the refrigerator for up to 3-4 days

When reheating, use these methods to maintain the chicken’s moisture:

  1. Microwave with a damp paper towel covering the dish
  2. Reheat in the oven at 350°F, covered with foil
  3. Add a splash of chicken broth to prevent drying out

Creative Ways to Use Leftover Tuscan Chicken

Transform your leftovers into exciting new meals that keep your easy weeknight dinner interesting and delicious.

Leftover DishPreparation Method
Chicken SaladChop and mix with mayo, herbs, and greens
Tuscan Chicken PastaShred and toss with pasta and extra sauce
Stuffed PeppersDice and use as filling with cheese

Pro tip: Leftover Tuscan chicken can be a lifesaver for quick and tasty meals throughout the week. Get creative and enjoy your one-pot meal in multiple delicious ways!

Variations of Tuscan Chicken

Exploring the versatility of an Italian chicken dish opens up a world of culinary creativity. Your Tuscan chicken recipe can transform into multiple exciting variations. These cater to different dietary needs and taste preferences.

The beauty of sun-dried tomato chicken lies in its adaptability. Whether you’re looking to modify the recipe for specific dietary requirements or want to experiment with unique flavor combinations, this dish offers countless possibilities.

Adapting the Recipe for Different Diets

  • Gluten-Free Version: Replace wheat flour with almond or coconut flour for coating
  • Dairy-Free Option: Substitute cream with coconut milk or cashew cream
  • Low-Carb Alternative: Use cauliflower rice instead of traditional pasta
  • Vegetarian Twist: Replace chicken with firm tofu or portobello mushrooms

Adding Your Creative Twist: Unique Additions

Elevate your Italian chicken dish by experimenting with unexpected ingredients. Consider these creative enhancements to make your Tuscan chicken truly unique:

IngredientFlavor ProfileRecommended Pairing
Artichoke HeartsTangy and EarthyLemon-infused olive oil
Roasted Red PeppersSweet and SmokyGoat cheese crumbles
Kalamata OlivesRich and BrinyFresh basil leaves

Embrace your culinary imagination and transform the classic sun-dried tomato chicken into a personalized masterpiece. Make it reflect your unique taste and cooking style.

Frequently Asked Questions

Many people wonder about making a tasty tuscan chicken recipe. This dish is loved for its flavor and ease of making. It’s a go-to for those who want a delicious meal at home.

Making Your Tuscan Chicken Gluten-Free

It’s simple to make this recipe gluten-free. Just follow these easy steps:

  • Swap regular flour for almond flour or gluten-free all-purpose flour
  • Use gluten-free breadcrumbs for coating
  • Always check labels for gluten

Wine Pairing Recommendations

Finding the right wine can make your tuscan chicken even better. Here are some top picks:

Chicken PreparationRecommended WineFlavor Profile
Creamy Tuscan ChickenChardonnayButtery, smooth complement
Herb-Infused ChickenPinot GrigioLight, crisp undertones
Spicy Tuscan ChickenSauvignon BlancBright, acidic balance

“The right wine transforms a simple meal into a culinary experience.” – Culinary Experts

Pro tip: Pick a wine that matches the chicken’s flavors. Your taste buds will love it!

Conclusion: Enjoying Your Tuscan Chicken

Cooking Tuscan chicken is more than just making a meal. It’s about creating a special experience. Your dish becomes a way to explore Tuscany’s rich culinary traditions, turning your kitchen into a Mediterranean haven.

By making this recipe your own, you add a personal touch. You can change spices, swap ingredients, or try new cooking methods. This makes your Tuscan chicken dish truly unique, showing off your taste and creativity.

Your Tuscan chicken journey is just beginning. It invites you to dive deeper into cultural connections, enjoy fresh ingredients, and find joy in cooking at home. Learning this recipe connects you to Italian culinary traditions passed down through generations.

Remember, cooking is an adventure. Every time you make Tuscan chicken, you’ll find new flavors and techniques. Enjoy the process, the smells, and every delicious bite of your creation.

FAQ

How can I make Tuscan chicken gluten-free?

To make Tuscan chicken gluten-free, use cornstarch or gluten-free flour instead of regular flour. Make sure chicken broth and seasonings are gluten-free. Use gluten-free breadcrumbs for breading.

Always check labels to avoid gluten. This ensures your dish is safe for those with gluten allergies.

What wines pair well with Tuscan chicken?

White wines like Pinot Grigio or Chardonnay pair well with Tuscan chicken. They complement the creamy sauce and garlic. A light-bodied Sangiovese red wine is also a good choice.

The goal is to find a wine that enhances the dish’s flavors without overpowering them.

Can I make this recipe dairy-free?

Yes, you can make Tuscan chicken dairy-free. Replace heavy cream with coconut milk or dairy-free cream. Use nutritional yeast or dairy-free cheese for creaminess.

Choose olive oil instead of butter and dairy-free chicken broth. This keeps the dish free from dairy.

How long can I store Tuscan chicken leftovers?

Store Tuscan chicken in an airtight container in the fridge for 3-4 days. Keep the chicken and sauce separate for better quality. Reheat with a splash of chicken broth to prevent drying.

Always heat the chicken to 165°F (74°C) to ensure food safety.

What are the best chicken cuts for this recipe?

Boneless, skinless chicken breasts are the top choice for Tuscan chicken. They cook evenly and soak up flavors well. Chicken thighs offer a tender and juicy option.

Chicken tenders are quick to cook and keep the dish’s flavors intact.

Can I freeze Tuscan chicken?

Freeze Tuscan chicken for 2-3 months. Use a freezer-safe container and remove air to prevent freezer burn. Thaw in the fridge overnight before reheating.

Freezing might change the texture of spinach and cream. Best consumed within a month for the best taste.

0 comments
0 FacebookTwitterPinterestEmail
Newer Posts